
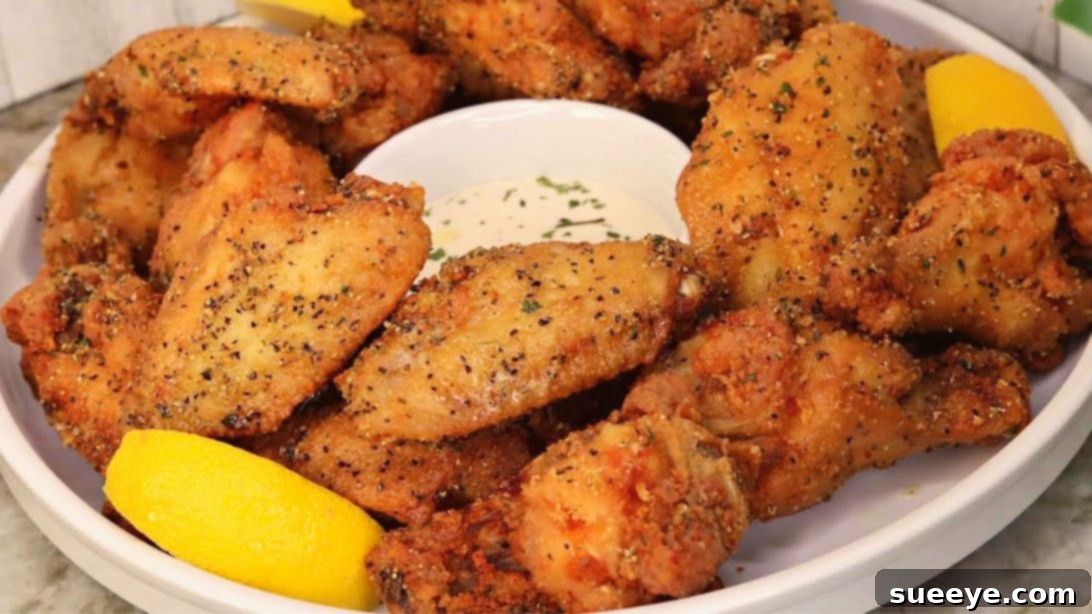
Unleash Flavor: The Ultimate Crispy Lemon Pepper Chicken Wings Recipe
There’s an undeniable magic to perfectly cooked chicken wings – that satisfying crunch, juicy interior, and a burst of flavor that leaves you reaching for more. Among the myriad of wing flavors, lemon pepper stands out as a timeless classic, offering an exquisite balance of tangy citrus and savory spices. It’s a flavor profile that’s simply irresistible, making it a staple for game nights, parties, or just a delicious treat. If you’ve been searching for a recipe that delivers on all fronts – incredible crispiness, vibrant flavor, and straightforward execution – then look no further.
Inspired by the fantastic tutorial from Island Vibe Cooking on YouTube, this guide will walk you through creating the most delectable crispy lemon pepper chicken wings you’ve ever tasted. This recipe isn’t just simple and quick; it incorporates a genius technique that elevates the wings to an extraordinary level of deliciousness. Get ready to impress your friends and family with these restaurant-quality homemade wings.
Essential Ingredients for Perfect Lemon Pepper Wings
Crafting these mouthwatering wings begins with selecting high-quality ingredients. Here’s everything you’ll need to bring this zesty creation to life:
- 1 pound fresh chicken wings (party wings, separated flats and drumettes are ideal)
- 1 tbsp onion powder
- 1 tbsp garlic powder
- 1 tbsp adobo seasoning (ensure it contains salt, or adjust accordingly)
- 2 tbsp olive oil
- 1 cup all-purpose flour
- 2 tbsp unsalted butter, melted
- 2 tbsp high-quality lemon pepper seasoning (or more, to taste)
- Fresh lime and white vinegar (for cleaning)
- Optional: Fresh lemon wedges and chopped parsley for garnish
Step-by-Step Directions to Crispy Perfection
Follow these detailed instructions to achieve irresistibly crispy and flavorful lemon pepper chicken wings:
Step 1: Prepare and Season the Chicken Wings
Proper preparation is the first crucial step to achieving that coveted crispy skin and tender meat. Begin by thoroughly preparing your chicken wings.
- Clean the Wings: Place the chicken wings in a large bowl. For an extra clean and fresh taste, rinse them with a mix of fresh lime juice and a splash of white vinegar. This traditional cleaning method helps to remove any impurities and lingering odors, leaving your chicken perfectly prepped.
- Pat Dry Thoroughly: This step cannot be stressed enough for maximum crispiness! After rinsing, transfer the wings to a clean surface lined with paper towels. Pat each wing piece absolutely dry. Moisture is the enemy of crispy skin, so take your time with this. You can even let them air dry in the refrigerator for 30 minutes to an hour for even better results.
- Oil and Season: Once dry, transfer the chicken to a large mixing bowl. Drizzle with olive oil, ensuring each wing is lightly and evenly coated. The oil acts as a binder, helping the seasonings adhere better.
- Flavor Infusion: Generously season the wings with onion powder, garlic powder, and adobo seasoning. Toss vigorously to ensure every single piece is thoroughly and evenly coated with the spice blend. Don’t be shy; good seasoning is key to deeply flavorful wings.
Step 2: Coat and Cook to Golden Perfection
Now that your wings are seasoned, it’s time to give them their crispy coating and cook them until golden and succulent.
- Flour Dredge: In a separate shallow bowl, add the all-purpose flour. Take each seasoned chicken wing and dredge it thoroughly in the flour, ensuring it’s completely coated. Gently shake off any excess flour – a thin, even layer is what you’re aiming for, not a thick, clumpy one. This flour coating contributes significantly to the exterior crispiness.
- Choose Your Cooking Method: Once all wings are dredged, you have a couple of excellent options for cooking:
- Air Frying Method: For a healthier and equally crispy result, arrange the floured wings in a single layer in your air fryer basket, being careful not to overcrowd it. Cook at 375°F (190°C) for 20-25 minutes, flipping them halfway through, until they are golden brown and cooked through. Depending on your air fryer model, you might need to adjust the time. Cooking in batches ensures even crispiness.
- Deep Frying Method: For traditional indulgence, heat about 3-4 inches of oil (vegetable, canola, or peanut oil works best) in a large, heavy-bottomed pot or Dutch oven to 350°F (175°C). Carefully add the floured wings in batches, ensuring not to overcrowd the pot, which can lower the oil temperature and lead to soggy wings. Fry for 8-12 minutes, or until the wings are deep golden brown and reach an internal temperature of 165°F (74°C). Use a slotted spoon or spider to transfer the cooked wings to a wire rack set over paper towels to drain excess oil.
- Baking Method (Alternative): Preheat your oven to 400°F (200°C). Place the floured wings on a baking rack set over a baking sheet (this allows air circulation for crispiness). Bake for 45-50 minutes, flipping them halfway through, until they are golden, crispy, and cooked through.
- Achieving Doneness: Regardless of the method, the wings should be beautifully golden brown and crispy on the outside, with an internal temperature of 165°F (74°C) at their thickest part.
Step 3: Sauce and Serve Immediately
The final touch brings all the incredible flavors together.
- Butter and Lemon Pepper Toss: Once the wings are crispy and cooked, immediately transfer them to a large mixing bowl. Pour the melted unsalted butter over the hot wings, then generously sprinkle with lemon pepper seasoning.
- Toss to Coat: Toss the wings vigorously until they are thoroughly and evenly coated with the buttery lemon pepper mixture. The heat from the wings will help the butter and seasoning adhere beautifully, creating that signature glossy finish and intense flavor.
- Serve and Enjoy: Serve your crispy lemon pepper chicken wings piping hot! They are fantastic on their own, but also pair wonderfully with your favorite dipping sauces like ranch, blue cheese, or a zesty garlic aioli. Garnish with fresh lemon wedges and a sprinkle of chopped parsley for a pop of color and extra freshness.
Pro Tips for the Crispiest Wings Ever
Achieving truly crispy wings is an art. Here are some extra tips to ensure your lemon pepper wings are always a crunchy success:
- Don’t Overcrowd: Whether air frying, deep frying, or baking, ensure the wings are cooked in a single layer or in small batches. Overcrowding lowers the temperature and steams the wings instead of frying them, resulting in a less crispy texture.
- Dry Brine (Optional): For next-level crispiness, lightly salt your wings and place them uncovered on a wire rack in the refrigerator for at least 4 hours, or overnight. This draws out moisture, leading to an incredibly crispy skin.
- Baking Powder Trick: Before seasoning, you can toss the dried wings with 1 teaspoon of baking powder (aluminum-free). Baking powder raises the pH level of the chicken skin, helping it to brown and crisp up more effectively.
- Hot Oil is Key (Deep Frying): Always use a thermometer to ensure your oil is at the correct temperature (350°F/175°C). Too cool, and the wings become greasy; too hot, and they burn before cooking through.
- Sauce at the Last Minute: Toss the wings with the butter and lemon pepper seasoning immediately after they come out of the heat and right before serving. This ensures the seasoning adheres perfectly and the wings remain crispy.
Serving Suggestions and Variations
These crispy lemon pepper wings are incredibly versatile. Here are some ideas to make them part of a larger meal or to try new flavor twists:
Perfect Pairings:
- Classic Sides: Serve with crunchy celery sticks, carrot sticks, and a creamy ranch or blue cheese dip.
- Hearty Sides: Pair with crispy french fries, sweet potato fries, or a side of macaroni and cheese.
- Fresh Salads: A light, crisp green salad or a vibrant coleslaw can cut through the richness of the wings beautifully.
Flavor Variations:
- Spicy Lemon Pepper: Add a pinch of cayenne pepper or a dash of your favorite hot sauce to the melted butter mixture for a fiery kick.
- Garlic Parmesan Lemon Pepper: Incorporate some grated Parmesan cheese and extra garlic powder into the final toss for a rich, umami twist.
- Herby Lemon Pepper: Add finely chopped fresh herbs like rosemary or thyme to the seasoning blend or the melted butter for an aromatic touch.
Storage and Reheating
While best enjoyed fresh, if you have any leftover crispy lemon pepper wings, here’s how to store and reheat them:
- Storage: Allow the wings to cool completely, then transfer them to an airtight container. Store in the refrigerator for up to 3-4 days.
- Reheating for Crispiness: To revive their crispiness, avoid the microwave. Reheat them in an air fryer at 350°F (175°C) for 5-7 minutes, or in an oven preheated to 375°F (190°C) for 10-15 minutes, until heated through and crispy again.
Why This Recipe Shines
This lemon pepper chicken wing recipe truly stands out for several reasons. The initial rinse with lime and vinegar not only cleans but also adds a subtle brightness. The dry patting and initial oil coating ensure the seasonings adhere perfectly and pave the way for an incredibly crispy exterior. The dual cooking options (air fryer or deep fry) cater to different preferences without compromising on crunch. Finally, the hot toss in melted butter and lemon pepper seasoning guarantees that every wing is saturated with that irresistible salty-sour flavor right at the moment of serving.
Whether you’re a seasoned chef or a home cook looking to master a crowd-pleasing dish, this recipe for crispy lemon pepper chicken wings is a guaranteed win. It’s simple, efficient, and delivers a flavor explosion that will have everyone asking for your secret. Give it a try, and prepare to elevate your chicken wing game!
*A special thank you to Island Vibe Cooking via YouTube for inspiring this fantastic recipe and for all the images used here. If you enjoyed this recipe, be sure to visit her channel for more delicious and easy-to-follow video tutorials!