
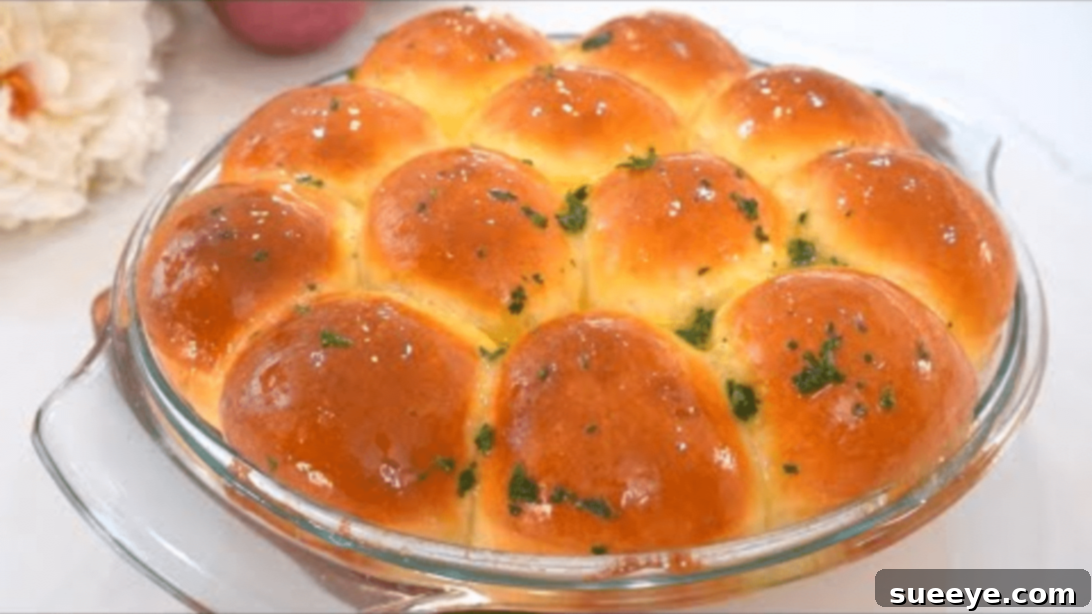
Delicious & Easy: The 1-Hour Classic Dinner Rolls Recipe You Need!
There’s nothing quite like the aroma of freshly baked bread wafting through your home. And when it comes to comforting, versatile baked goods, homemade dinner rolls are a true classic. While many recipes for these beloved bread rolls can seem daunting or time-consuming, requiring extensive kneading and proofing, we’ve discovered a truly remarkable solution. This incredible recipe from Savor Easy on YouTube simplifies the process dramatically, allowing you to create soft, fluffy, and utterly irresistible dinner rolls in just about one hour! Perfect for busy weeknights, last-minute gatherings, or simply satisfying that sudden craving for warm, homemade bread, this method is a game-changer for bakers of all skill levels.
Forget store-bought rolls that often lack the distinct flavor and tenderness of a freshly baked batch. This recipe not only delivers on taste but also makes the baking experience genuinely enjoyable. Whether you’re a seasoned baker looking for a quick and reliable recipe, or a complete beginner eager to dive into the world of bread making, these classic dinner rolls are designed for success. The steps are incredibly straightforward, guiding you smoothly from mixing the ingredients to pulling golden-brown rolls out of the oven. Prepare to impress your family and friends with this surprisingly simple yet profoundly delicious creation. Once you try these, they’re sure to become a staple in your kitchen!
Why Homemade Dinner Rolls Are Always the Best Choice
Opting for homemade dinner rolls offers a multitude of benefits that elevate any meal. Firstly, the taste and texture are simply unmatched. Freshly baked rolls boast a tenderness and a delicate crumb that store-bought alternatives often can’t replicate. The subtle sweetness and rich flavor profile of these classic rolls complement a wide array of dishes, from hearty stews and roast dinners to light salads and vibrant soups. Secondly, baking your own rolls allows you to control the ingredients, ensuring you’re serving wholesome goodness without any unwanted additives or preservatives. There’s also an undeniable sense of accomplishment and warmth that comes from presenting a basket of rolls you’ve made from scratch. It’s a small gesture that speaks volumes, turning an ordinary meal into a special occasion. Plus, the enticing aroma that fills your kitchen while these rolls bake is an experience in itself, setting a welcoming and comforting atmosphere for everyone to enjoy.
RELATED: For another fantastic bread recipe, explore this Crockpot Garlic Dinner Rolls Recipe.
Understanding Your Ingredients for Perfect Rolls
Crafting perfect dinner rolls begins with understanding the role each ingredient plays. This recipe uses a harmonious blend to ensure tenderness, flavor, and a beautiful rise. Here’s a detailed look at what you’ll need and why each component is crucial:
Ingredients for Classic Dinner Rolls:
- ⅔ cups of milk, slightly warm: Milk adds richness and helps create a tender crumb. Warming it slightly (to around 105-115°F or 40-46°C) is crucial as it activates the instant yeast, allowing it to work efficiently without being too hot and killing the yeast.
- 1 large egg: Eggs contribute to the roll’s structure, richness, and golden hue. They also help bind the ingredients and add moisture, resulting in a softer texture.
- ¼ cup of sweetened condensed milk: This ingredient is a secret weapon for incredibly soft and flavorful rolls. It adds a delicate sweetness and significant moisture, ensuring your rolls stay tender and moist for longer. It also contributes to a beautiful brown crust.
- ¼ cup of unsalted butter, melted: Butter is essential for a rich, buttery flavor and a wonderfully tender texture. Using unsalted butter allows you to control the overall salt content in the recipe.
- 1½ tsp of instant yeast: Instant yeast is a baker’s best friend, as it doesn’t require proofing beforehand. It works quickly to leaven the dough, producing light and airy rolls. Ensure your yeast is fresh for the best rise.
- 2½ cups of bread or all-purpose flour: While all-purpose flour works well, bread flour, with its higher protein content, yields a slightly chewier and more structured roll. Both options are suitable for this recipe, offering flexibility depending on what you have on hand.
- ¾ tsp of salt: Salt balances the sweetness, enhances the overall flavor of the rolls, and helps regulate yeast activity. Don’t skip it, as it’s vital for a well-rounded taste.
For Brushing (optional, but highly recommended for extra flavor and shine)
- 3 tbsp of salted butter: A brush of melted salted butter adds a beautiful sheen and an extra layer of savory richness to the hot rolls.
- 1 tsp of grated garlic: Freshly grated garlic infused into the butter provides an aromatic, savory kick, transforming plain rolls into garlic bread rolls.
- 1 tbsp of parsley, finely chopped: Fresh parsley adds a pop of color and a herbaceous note that complements the garlic and butter perfectly.
- Eggwash (1 egg + 1 tbsp of milk): This mixture brushed on before baking creates a gorgeous, glossy, golden-brown crust. The egg provides color and shine, while the milk helps thin it for even application.
Step-by-Step Guide: Crafting Your Classic Dinner Rolls
Follow these easy steps to bake a batch of warm, fluffy, and perfectly golden dinner rolls in just about an hour. The detailed instructions ensure a smooth process, even for beginners.
Step 1: Mixing and Kneading the Dough to Perfection
Begin by combining your wet ingredients and yeast in a large mixing bowl. Add the slightly warm milk, egg, sweetened condensed milk, and melted unsalted butter. Whisk these together thoroughly until they are well combined and smooth. This ensures an even distribution of flavors and moisture. Next, add the instant yeast and give it a quick whisk to disperse. Now, gradually incorporate the flour and salt into the wet mixture. Use a sturdy spoon or a dough whisk to fold the ingredients together until a shaggy dough starts to form. At this point, turn the dough out onto a lightly floured surface. Knead the dough vigorously for about 5 minutes until it becomes smooth, elastic, and no longer sticky. A fantastic technique for developing gluten quickly is the “slap and fold” method: lift the dough, slap it onto the counter, and fold it over itself. Repeat this action for about 5 minutes. This intensive kneading helps create the characteristic soft and chewy texture of the rolls. Once kneaded, press the dough down gently to flatten it slightly.
Step 2: Shaping and Proofing for Fluffy Rolls
Once your dough is kneaded, it’s time to portion it out. Divide the dough into 12 equal parts. For consistent roll sizes, you can use a kitchen scale to weigh each portion (approximately 50-60 grams per roll). Allow these divided dough portions to rest for about 10 minutes. This short rest period, often called a “bench rest,” helps the gluten relax, making the dough easier to handle and shape without resistance. After resting, take each portion and roll it into a smooth, tight ball. The goal is to create a seamless surface on each roll. Prepare a 10-inch baking dish by greasing it generously with butter. This prevents sticking and adds a little extra flavor. Arrange the shaped dough balls evenly in the greased dish, ensuring they have a little space to expand but are still close enough to touch as they rise. Cover the dish loosely with plastic wrap or a clean kitchen towel and set it aside in a warm place for about 25 to 30 minutes. During this proofing stage, the yeast works its magic, causing the rolls to double in size and become wonderfully light and airy.
Step 3: Baking to Golden Perfection and Finishing Touches
Preheat your oven to 180°C (350°F) while the rolls are proofing. This ensures the oven is at the correct temperature for even baking. Once the rolls have proofed and visibly increased in size, it’s time for the egg wash. In a small bowl, whisk together one egg with one tablespoon of milk. Gently brush this egg wash generously over the top of each roll. The egg wash will give your rolls a beautiful golden-brown color and a lovely glossy finish. Carefully place the baking dish into the preheated oven and bake for approximately 18 to 20 minutes, or until the rolls are puffed up, deeply golden brown on top, and cooked through. While the rolls are baking, prepare the optional garlic butter topping. In a small bowl, melt three tablespoons of salted butter, then stir in one teaspoon of freshly grated garlic and one tablespoon of finely chopped parsley. As soon as the rolls come out of the oven, while they are still hot, generously brush the garlic-parsley butter mixture over the tops. The heat from the rolls will help the butter melt and absorb, infusing them with an irresistible savory aroma. Serve immediately and enjoy the warm, soft, and delicious classic dinner rolls!
Expert Tips for Baking Success
Achieving consistently perfect dinner rolls is easier than you think with these expert tips:
- Accurate Measuring: Especially with flour, precise measurements are key. Too much flour can lead to dry, dense rolls, while too little might make the dough too sticky to handle. Use a kitchen scale for the most accurate results, or the ‘spoon and level’ method for flour (spoon flour into a measuring cup and level off with a straight edge).
- Proper Milk Temperature: Ensure your milk is truly “slightly warm” – between 105-115°F (40-46°C). If it’s too cold, the yeast won’t activate; if it’s too hot, it will kill the yeast, preventing your rolls from rising. A quick check with a thermometer is ideal.
- Don’t Rush the Proof: While this is a quick recipe, the proofing stage is vital. Give the dough the full 25-30 minutes, or until it has visibly doubled in size. A warm, draft-free spot is best. You can create a warm environment by placing the covered dish in an oven that’s turned off with the light on.
- Kneading is Key: Don’t skip or shorten the kneading time. This process develops the gluten, which gives the rolls their structure and tender, chewy texture. A well-kneaded dough will be smooth and elastic.
- Even Roll Size: Dividing the dough into equal portions ensures that all your rolls bake uniformly. Using a scale for this step is highly recommended for consistent results.
- Preheat Your Oven: Always preheat your oven fully. Placing dough into a cold or partially heated oven can negatively impact the rise and texture of your rolls.
- Don’t Overbake: Keep a close eye on your rolls during the last few minutes of baking. Overbaking can lead to dry, tough rolls. They should be beautifully golden brown on top.
Serving Suggestions & Delicious Variations
These classic dinner rolls are incredibly versatile and can be enjoyed in countless ways. They are perfect as a side for almost any meal, from a comforting Sunday roast to a light weeknight soup. Serve them warm with a knob of butter, a drizzle of honey, or your favorite jam for breakfast or brunch. They also make excellent mini sandwiches or sliders for gatherings. Consider stuffing them with pulled pork or chicken salad for a delightful snack.
Looking to switch things up? Here are a few delightful variations to try:
- Herb Rolls: Mix 1-2 tablespoons of finely chopped fresh herbs like rosemary, thyme, or chives into the dough during the mixing stage for an aromatic twist.
- Cheesy Rolls: Fold in ½ cup of shredded cheddar or Parmesan cheese when adding the flour for a savory, cheesy treat.
- Garlic & Herb Knots: Instead of rolling into balls, shape the dough into knots and then proceed with the recipe. Brush with the garlic-parsley butter as suggested for an extra flavorful finish.
- Sweet Cinnamon Rolls: After shaping, brush the rolls with melted butter, then sprinkle with a mixture of cinnamon and sugar before the final proofing and baking. A light glaze can be added after baking.
- Sesame Seed Topping: Before baking, after applying the egg wash, sprinkle a generous amount of sesame seeds over the top for added texture and a nutty flavor.
No matter how you choose to enjoy them, these homemade classic dinner rolls are sure to be a crowd-pleaser. Their simplicity and deliciousness make them a fantastic addition to any meal or occasion.
Enjoy Your Homemade Masterpiece!
Baking homemade dinner rolls doesn’t have to be an all-day affair. With this incredible 1-hour classic dinner rolls recipe, you can enjoy the unparalleled taste and aroma of fresh, warm bread with minimal effort. The satisfaction of pulling a pan of golden, fluffy rolls from your oven is truly a joy, and the smiles it brings to your dining table are priceless. Whether you’re serving them with a hearty dinner, using them for sliders, or simply enjoying one as a comforting snack, these rolls are sure to become a cherished recipe in your culinary repertoire. We extend our sincere gratitude to Savor Easy via YouTube for sharing this fantastic, beginner-friendly recipe. Be sure to visit her channel and subscribe for more amazing and easy-to-follow cooking guides!
*All images in this article are credited to Savor Easy via YouTube.