
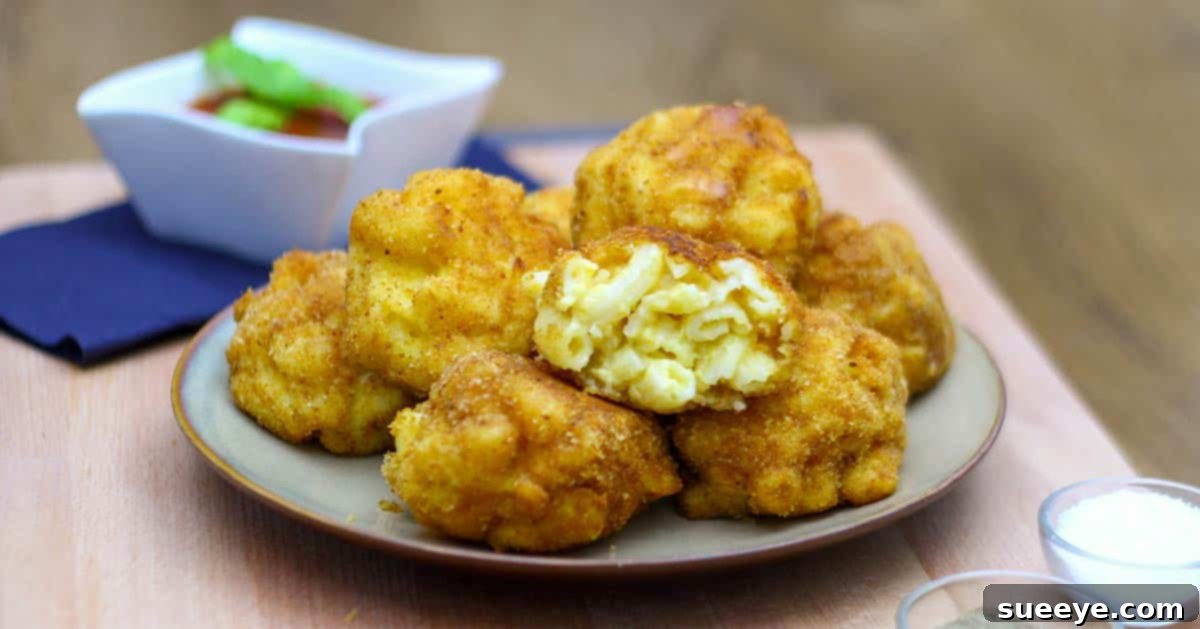
Unlock the Magic: How to Make Irresistible Bite-Sized Mac and Cheese Balls
Prepare to have your perception of mac and cheese revolutionized! Gone are the days of plain, ordinary mac and cheese. Imagine instead, golden-brown, crispy spheres, each bursting with creamy, cheesy goodness, perfectly portioned for a delightful bite. These incredible bite-sized mac and cheese balls are not just a snack; they are a culinary revelation, a party appetizer that promises to steal the show and leave your guests craving more. Once you experience the magic of transforming your favorite comfort food into these individual wonders, you’ll wonder how you ever lived without them.
This innovative twist takes the beloved classic and elevates it to an art form. It’s an incredibly simple concept with spectacular results: craft your favorite macaroni and cheese, shape it into small, manageable balls, freeze them to perfection, coat them in a seasoned breading, and then fry them until they achieve a delightful crispness. The exterior offers a satisfying crunch, giving way to a warm, gooey, and unbelievably flavorful interior. Whether you serve them with a classic dipping sauce like ketchup or marinara, or elevate them with a sophisticated ranch or a luxurious cheese sauce, these bites are guaranteed to be a hit. For the true connoisseur of cheese, a double dip in a rich, velvety cheese sauce is an absolute must-try experience.
Why Bite-Sized Mac and Cheese Balls are a Game Changer
The appeal of mac and cheese is universal, but transforming it into a bite-sized format unlocks a whole new level of enjoyment and versatility. Here’s why these little wonders are destined to become your go-to recipe for any occasion:
- Perfect Portion Control: No need for forks or large servings. Each ball is a self-contained, perfect bite, making them ideal for mingling and casual snacking.
- Unmatched Texture Contrast: The magic lies in the crispy, golden exterior beautifully contrasting with the soft, molten cheese interior. It’s a textural symphony in every bite.
- Party-Friendly Powerhouse: As a party appetizer, they are unparalleled. Easy to pick up, mess-free, and universally loved by both adults and children, they disappear from serving platters almost as quickly as you can make them.
- Make-Ahead Marvel: One of their greatest advantages is the ability to prepare them in advance. You can make the mac and cheese, form the balls, bread them, and freeze them weeks ahead of time, then simply fry or bake them fresh right before your event.
- Customization Opportunities: From the type of cheese to creative mix-ins and various dipping sauces, these bites offer endless possibilities for personalization to suit any palate or dietary preference.
- Kid-Friendly Delight: Even the pickiest eaters can’t resist these fun and flavorful cheesy bites. They’re a fantastic way to make mealtime exciting for children.
The Ultimate Recipe: Crafting Your Perfect Mac and Cheese Balls
While you can technically use boxed mac and cheese in a pinch, starting with a homemade base will yield far superior results in terms of flavor and texture. Our recipe focuses on creating a rich, creamy mac and cheese that holds its shape beautifully once chilled.
Ingredients:
- For the Mac and Cheese:
- 1 pound elbow macaroni or small pasta shells
- 4 tablespoons unsalted butter
- 1/4 cup all-purpose flour
- 3 cups whole milk, warmed
- 1 teaspoon dry mustard powder (enhances cheese flavor)
- 1/2 teaspoon garlic powder
- 1/2 teaspoon smoked paprika (optional, for depth)
- Salt and freshly ground black pepper to taste
- 4 cups shredded cheese blend (we recommend 2 cups sharp cheddar, 1 cup Gruyère, 1 cup Monterey Jack or mozzarella for optimal melt and flavor)
- 1/4 cup grated Parmesan cheese
- For the Breading and Frying:
- 1 cup all-purpose flour (for dredging)
- 3 large eggs, beaten with 1 tablespoon water or milk (for egg wash)
- 2 cups Panko breadcrumbs (for superior crispiness)
- 1 teaspoon salt
- 1/2 teaspoon black pepper
- 1/2 teaspoon garlic powder
- Vegetable oil, canola oil, or peanut oil for deep frying (enough to fill your pot about 3-4 inches deep)
Step-by-Step Instructions:
- Prepare the Macaroni: Cook the elbow macaroni according to package directions until al dente. Drain thoroughly and rinse with cold water to stop the cooking process and prevent sticking. Set aside.
- Make the Cheese Sauce: In a large, heavy-bottomed saucepan or Dutch oven, melt the butter over medium heat. Whisk in the flour and cook for 1-2 minutes, stirring constantly, to create a roux.
- Add Milk and Seasonings: Gradually whisk in the warm milk, ensuring no lumps form. Continue whisking until the sauce begins to thicken, about 5-7 minutes. Stir in the dry mustard, garlic powder, smoked paprika (if using), salt, and pepper.
- Incorporate Cheese: Reduce heat to low. Add the shredded cheese blend and Parmesan cheese, stirring continuously until the cheese is completely melted and the sauce is smooth and creamy.
- Combine and Chill: Add the drained macaroni to the cheese sauce, stirring until thoroughly coated. Transfer the mac and cheese to a baking dish or shallow pan, spreading it evenly. Cover tightly with plastic wrap and refrigerate for at least 4 hours, or preferably overnight. Chilling is crucial as it allows the mac and cheese to firm up, making it easier to roll into balls.
- Form the Balls: Once chilled and firm, use a small ice cream scoop or your hands to roll the mac and cheese into 1 to 1.5-inch balls. Place them on a parchment-lined baking sheet.
- Freeze the Balls: Transfer the baking sheet with the mac and cheese balls to the freezer for at least 2-3 hours, or until completely frozen solid. This step is vital to prevent them from falling apart during frying.
- Prepare Breading Station: Set up a breading station with three shallow dishes: one with all-purpose flour, one with the beaten eggs (mixed with water/milk), and one with Panko breadcrumbs seasoned with salt, pepper, and garlic powder.
- Bread the Balls: Working in batches, dredge each frozen mac and cheese ball first in flour (shaking off excess), then dip it into the egg wash, and finally roll it thoroughly in the seasoned Panko breadcrumbs, pressing gently to ensure a good coating. For an extra crispy crust, you can double bread them (egg wash, breadcrumbs, egg wash, breadcrumbs again). Return the breaded balls to the freezer for at least 30 minutes to firm up the coating.
- Preheat Oil: In a large, heavy-bottomed pot or Dutch oven, heat about 3-4 inches of oil over medium-high heat until it reaches 350-375°F (175-190°C). Use a candy thermometer to monitor the temperature for best results.
- Fry the Balls: Carefully lower 4-6 breaded mac and cheese balls into the hot oil, being careful not to overcrowd the pot. Fry for 3-5 minutes, turning occasionally, until they are golden brown and crispy on all sides.
- Drain and Serve: Remove the fried balls with a slotted spoon and transfer them to a plate lined with paper towels to drain any excess oil. Serve immediately with your favorite dipping sauces.
Expert Tips for Perfect Mac and Cheese Bites Every Time
Achieving restaurant-quality mac and cheese balls is easier than you think with these expert tips:
- Use Quality Cheese: A blend of good melting cheeses like sharp cheddar, Gruyère, and Monterey Jack will give you the best flavor and creamy texture. Avoid pre-shredded cheese as it contains anti-caking agents that can make your sauce gritty.
- Don’t Overcook Pasta: Cook your macaroni to al dente, as it will continue to cook slightly when combined with the hot cheese sauce and again during frying.
- Thorough Chilling is Key: Do not skip the chilling and freezing steps! This is the most critical part for ensuring your balls hold their shape and don’t disintegrate in the hot oil.
- Season Your Breading: Plain breadcrumbs are boring. Adding salt, pepper, garlic powder, and perhaps a pinch of paprika or cayenne to your Panko breadcrumbs significantly boosts flavor.
- Maintain Oil Temperature: Use a thermometer to keep your oil between 350-375°F (175-190°C). Oil that’s too cool will result in greasy balls, while oil that’s too hot will burn the exterior before the inside is heated through.
- Don’t Overcrowd the Pot: Frying in small batches helps maintain oil temperature and ensures even cooking and crisping.
- Baking Alternative: For a slightly healthier option, you can bake your mac and cheese balls. Preheat your oven to 400°F (200°C). Lightly spray the breaded balls with cooking spray and bake for 15-20 minutes, flipping halfway through, until golden brown and heated through. An air fryer also works wonderfully!
Creative Variations and Customizations
While the classic mac and cheese ball is delicious, don’t hesitate to get creative and customize them to your liking:
- Cheese Blends: Experiment with different cheeses! Try smoked gouda, pepper jack for a kick, fontina, or even a blue cheese crumble for a sophisticated twist.
- Savory Mix-ins: Fold in cooked, crumbled bacon, finely chopped jalapeños, caramelized onions, roasted garlic, finely diced ham, or even a spoonful of pesto into your mac and cheese mixture before chilling.
- Spicy Kick: Add a pinch of cayenne pepper to your cheese sauce or breadcrumbs, or serve with a sriracha mayo dipping sauce.
- Buffalo Chicken Mac and Cheese Balls: Mix in shredded cooked chicken tossed in buffalo sauce into your mac and cheese for a gameday favorite.
- Herbs: Fresh chives, parsley, or thyme can add a fragrant element to your mac and cheese base.
- Different Coatings: While Panko is king for crispiness, you can experiment with crushed crackers (like Ritz for a buttery flavor), crushed cornflakes, or even pretzel crumbs for a unique texture.
Serving Suggestions and Occasions
These bite-sized mac and cheese balls are incredibly versatile and perfect for a wide array of occasions:
- Party Appetizer: The quintessential party food! They’re easy to eat while mingling and always a crowd-pleaser for birthdays, holiday gatherings, or any celebration.
- Game Day Snack: Pair them with an array of dipping sauces for the ultimate Super Bowl spread or tailgate party.
- Kid-Friendly Treat: A guaranteed hit with children, especially when served with classic ketchup or a mild marinara sauce.
- Potlucks and Picnics: As a make-ahead dish, they’re perfect for bringing to potlucks or as a special addition to a picnic spread (serve them warm or at room temperature).
- Comfort Food Indulgence: Sometimes you just need a delicious, comforting snack. These fit the bill perfectly for a cozy night in.
- Brunch Item: Serve them as a savory bite alongside other brunch favorites like quiches and fruit.
For dipping, the possibilities are endless: classic ketchup, zesty marinara, creamy ranch, tangy BBQ sauce, spicy sriracha mayo, sweet chili sauce, or even a homemade cheese sauce for an extra layer of decadence.
A Brief Nod to the History of Mac and Cheese
While bite-sized mac and cheese balls might seem like a modern invention, the concept of macaroni and cheese itself has a rich history, dating back centuries. Early recipes for pasta and cheese dishes can be found in medieval cookbooks. However, the dish we recognize today as macaroni and cheese gained popularity in America in the 18th century, famously introduced by Thomas Jefferson after encountering it in France. Since then, it has evolved from a gourmet dish to a beloved staple, particularly in American households. This transformation into a crispy, dippable bite is a testament to its enduring appeal and adaptability, continuously finding new ways to delight palates across generations.
Why This Recipe Will Be Your New Favorite Go-To
This isn’t just a recipe; it’s an invitation to elevate your culinary game and impress everyone you know. The ease of preparation, the ability to make them ahead, and the sheer delight they bring to any table make these bite-sized mac and cheese balls an invaluable addition to your recipe repertoire. They offer that perfect blend of nostalgic comfort and exciting novelty. Whether you’re hosting a grand celebration or simply looking for an exceptional snack for your family, these crispy, gooey bites are guaranteed to be the most popular dish. So, roll up your sleeves, embrace the cheesy goodness, and get ready to experience mac and cheese like never before!
Frequently Asked Questions About Mac and Cheese Balls
- Can I use store-bought or boxed mac and cheese?
- While a homemade mac and cheese base is recommended for superior flavor and texture, you can use boxed mac and cheese. Just ensure it’s made thicker than usual (use slightly less milk) and allow it to cool completely and firm up in the refrigerator before rolling.
- How long can I freeze the mac and cheese balls?
- Unfried, breaded mac and cheese balls can be stored in an airtight container in the freezer for up to 1-2 months. When ready to cook, fry them directly from frozen, adding a couple of extra minutes to the cooking time.
- What’s the best way to reheat leftovers?
- To maintain crispiness, reheat fried mac and cheese balls in an oven preheated to 350°F (175°C) for 10-15 minutes, or in an air fryer at 350°F (175°C) for 5-8 minutes, until heated through and crispy again. Microwaving is not recommended as it will make them soggy.
- How do I prevent the balls from falling apart while frying?
- The key is proper chilling and freezing. Ensure your mac and cheese mixture is very firm before rolling, and that the balls are frozen solid before breading and frying. Also, ensure your oil is at the correct temperature (350-375°F / 175-190°C) and avoid overcrowding the fryer.
- Can I make these gluten-free?
- Absolutely! Simply use gluten-free elbow macaroni and gluten-free all-purpose flour for the roux and dredging. Ensure your breadcrumbs are also gluten-free (Panko-style gluten-free breadcrumbs are widely available).
Conclusion
From a simple side dish to the star appetizer, these bite-sized mac and cheese balls represent the ultimate evolution of a beloved comfort food. They are simple to prepare, incredibly versatile, and universally adored, making them the perfect addition to any gathering, big or small. The combination of crispy exterior and molten cheesy interior is truly addictive, and the joy of sharing these homemade treats is immeasurable. So, go ahead and embark on this delicious journey. Your taste buds, and your guests, will thank you!