
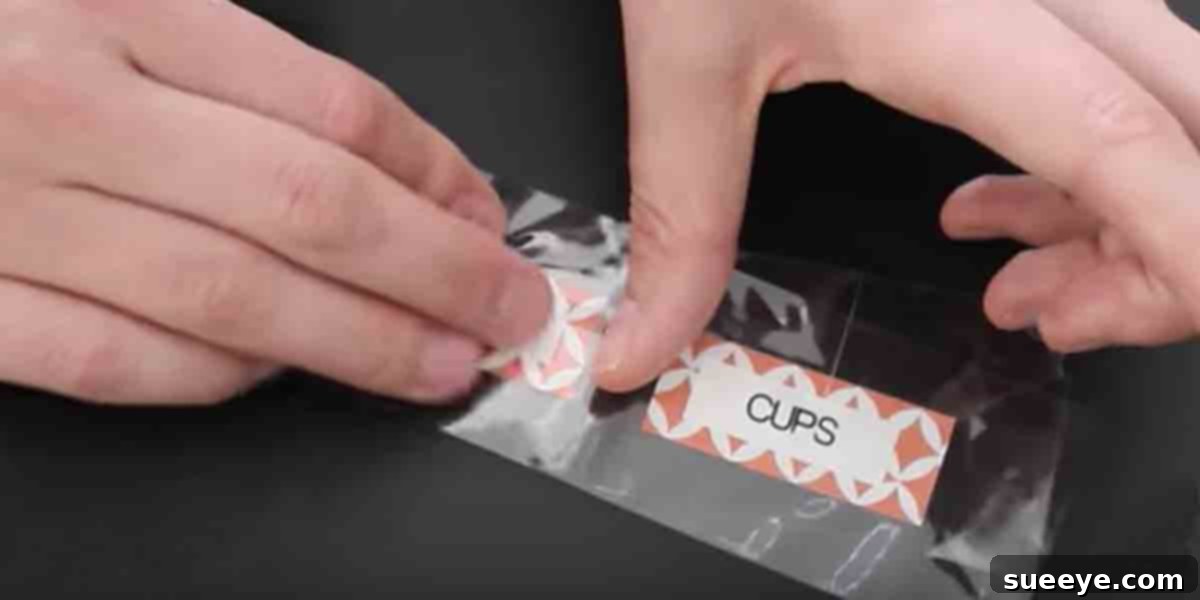
DIY Laminating: Clever Alternatives to Protect Your Documents Without a Machine
We’ve all experienced that moment of urgent need: a crucial document, a cherished recipe card, or a newly printed label that absolutely needs to be protected from wear, tear, and moisture. The ideal solution often seems to be a laminator. However, what happens when you don’t own one, or worse, the one you’ve borrowed breaks down at the most inconvenient time, much like my recent experience? This very dilemma led me on a fascinating quest to discover viable laminating alternatives. What I found were not just emergency fixes, but truly ingenious methods that, in many ways, surpass the traditional approach, offering versatility and convenience I never expected.
The real charm of these DIY laminating techniques lies in their simplicity, accessibility, and impressive effectiveness. They serve as a fantastic “Plan B,” ensuring your valuable papers remain pristine and durable, even when a bulky, often expensive laminator isn’t within reach. Bid farewell to the frustration of torn instruction manuals, coffee-stained recipe cards, or smudged labels. With these straightforward hacks, you can give your important documents a new lease on life, safeguarding them with common household items you likely already have or can easily acquire.
Why Document Preservation Through Lamination is Crucial
Before delving into the “how-to” of these ingenious alternatives, it’s worth understanding the profound benefits that lamination offers for document preservation. Lamination acts as a robust protective barrier, encasing your paper items in a resilient, often waterproof, layer. This vital process delivers several key advantages:
- Enhanced Durability: Laminated items become highly resistant to tearing, creasing, folding, and general daily wear. This significantly extends their functional lifespan, making them ideal for frequently handled materials.
- Superior Water Resistance: A properly laminated item is largely impervious to spills, humidity, and even light rain. This feature is invaluable for items used in moisture-prone environments such as kitchens, workshops, or outdoor settings.
- Preserved Appearance: Lamination effectively prevents fading caused by UV light exposure and protects against dirt, grime, and smudges. It often enhances the vibrancy of colors and print, keeping your documents looking crisp and professional over time.
- Effortless Cleaning: Laminated surfaces are remarkably easy to wipe clean. This makes them perfect for items like children’s educational materials, placemats, or instructions that might frequently come into contact with food or dirt.
- Professional Finish: For presentations, display signs, homemade ID cards, or labels, lamination provides a polished, high-quality look that conveys attention to detail and professionalism.
While dedicated laminating machines offer a consistently smooth and uniform finish, they do require specific equipment and specialized supplies. The DIY alternatives we’re about to explore provide many of these same protective benefits using materials that are far more accessible and budget-friendly, making robust document protection achievable for everyone.
My Discovery Journey: From Broken Laminator to Brilliant Hacks
My own recent dilemma perfectly encapsulates the common challenge faced by many. I had a significant batch of cherished recipe cards I was determined to protect from the inevitable kitchen mishaps. Simultaneously, I was embarking on an ambitious organizing project, requiring durable, clear labels for various baskets and containers. My vision was clear: crisp, professional-looking labels that wouldn’t peel, smudge, or deteriorate over time. My initial solution was to borrow my daughter’s laminator, but fate had other plans. The machine, once a beacon of hope, abruptly failed, leaving my projects in limbo and my frustration levels rising.
Refusing to be deterred, I turned to the vast resources of the internet, brainstorming alternative methods to achieve that coveted laminated effect. It was there that I unearthed a treasure trove of tutorials showcasing how to create protective finishes using everyday household items. What truly astonished me was not just the efficacy of these methods, but their remarkable versatility. Several of these DIY techniques offered unique advantages that even traditional laminators couldn’t match, proving to be more flexible for my specific needs.
These simple hacks worked like an absolute charm for both my recipe cards and my new organizing labels. They provided a durable, wipeable, and aesthetically pleasing finish that has admirably stood the test of time. This accidental discovery completely revolutionized my approach to document preservation, demonstrating that truly innovative and practical solutions often emerge from repurposing the mundane materials around us.
Top DIY Laminating Alternatives You Can Easily Use Today
You absolutely don’t need a bulky, expensive machine to achieve a professional, protective, and laminated finish for your important papers. Here are some of the most effective and widely adopted DIY methods, each offering unique advantages:
1. Self-Adhesive Laminating Sheets/Pouches
These are arguably the closest and most convenient alternative to machine-based lamination, designed specifically for cold lamination processes.
- What they are: Clear plastic sheets or pre-folded pouches with a strong adhesive backing, protected by a peel-off liner. The pouches allow you to sandwich your document seamlessly.
- Best for: Items where a smooth, consistently uniform finish is paramount, closely mimicking the look and feel of machine lamination. They are excellent for photos, certificates, medium-sized documents, flashcards, and bookmarks.
- Pros: Highly durable, offer exceptional clarity, require no heat, and are relatively quick to apply.
- Cons: Can be slightly more expensive than other DIY methods. Requires meticulous application to prevent air bubbles and achieve a perfectly smooth finish.
2. Clear Packing Tape (Heavy-Duty Shipping Tape)
For smaller items, heavy-duty clear packing tape is an incredibly cost-effective, readily available, and surprisingly robust laminating solution. Think of it as an instant, on-demand laminate roll!
- What it is: A strong, transparent adhesive tape primarily designed for sealing shipping boxes, known for its durability and firm grip.
- Best for: Smaller items that require localized protection, such as individual index cards, custom labels, small pictures, temporary ID cards, flashcards, or business cards.
- Pros: Extremely inexpensive, universally available, and creates a very strong, waterproof, and durable seal.
- Cons: Primarily suited for smaller items. Laminating larger surfaces requires multiple overlapping strips, which can result in visible seams and a less uniform appearance compared to sheets.
3. Clear Contact Paper (Self-Adhesive Shelf Liner)
Often found in the home organization or kitchen supplies aisle, clear contact paper is essentially a large, thin roll of self-adhesive plastic. It’s an excellent choice for bigger projects where broader coverage is needed.
- What it is: A roll of transparent, adhesive-backed vinyl or plastic film, commonly used to line shelves, drawers, or cover surfaces for protection.
- Best for: Larger documents, posters, custom placemats, educational charts, children’s artwork, and frequently handled educational materials where a seamless and expansive protective surface is desired.
- Pros: Highly cost-effective for covering large areas, easily cut to any desired size, and provides substantial protection against moisture and wear.
- Cons: Applying it smoothly without bubbles or wrinkles can be challenging, especially on very large items. It may not offer the same rigidity or perfectly sleek finish as specialized laminating sheets.
4. Mod Podge or Other Clear Sealants
While not “lamination” in the traditional sense of encasing an item in plastic film, applying a clear sealant like Mod Podge creates a highly protective, durable, and often waterproof coating over paper items. It’s an outstanding choice for various craft projects and decorative preservation.
- What it is: A versatile craft product that functions as an adhesive, sealer, and finish, available in different sheens (gloss, matte, satin). Similar clear acrylic spray or brush-on sealants can also be used.
- Best for: Craft projects, original artwork, decorative labels, collages, scrapbooking elements, or any item that benefits from a painted-on protective layer rather than a smooth plastic film. It’s particularly good for textured papers or items.
- Pros: Extremely versatile, offers a variety of finishes, provides excellent protection against moisture and general wear, and can be applied to uneven or textured surfaces.
- Cons: Requires significant drying time between coats, can slightly alter the texture and feel of the paper, and may not achieve the same rigid or perfectly smooth surface as adhesive films.
Step-by-Step Guides for Effective DIY Document Protection
Now, let’s get practical! Here’s a detailed guide on how to effectively use each of these fantastic alternatives to protect your important items, ensuring the best possible results.
How to Use Self-Adhesive Laminating Sheets for a Professional Finish
This method delivers results that most closely resemble traditional machine lamination.
Materials Needed:
- Self-adhesive laminating sheets or pre-folded pouches
- The specific document(s) you wish to laminate
- Sharp scissors or a precision craft knife
- A ruler or other straight edge for precise trimming
- A soft cloth, squeegee, or a credit card (essential for smoothing out bubbles)
- A clean, impeccably flat work surface
Instructions:
- Document Preparation: Begin by ensuring your document is entirely clean, perfectly flat, and free of any dust, lint, or debris. Trim it precisely to your desired final size.
- Work Surface Hygiene: Thoroughly clean your work surface. Even the smallest particle can become permanently trapped under the laminate, creating an unsightly bubble or imperfection.
- Document Positioning (for Pouches): If using a self-adhesive pouch, gently open it. Carefully align your document centrally within the pouch, aiming for equal margins on all sides.
- Applying the First Sheet (for Single Sheets): For single self-adhesive sheets, peel back a small section of the backing liner from one short edge of the sheet. Align this exposed sticky edge perfectly with one edge of your document, ensuring it’s straight.
- Smooth Application: Slowly and incrementally peel back the rest of the liner. As you do this, simultaneously press the laminating sheet onto your document. Utilize a soft cloth, a squeegee, or a credit card to systematically smooth out any air bubbles, working meticulously from the center outwards towards the edges. This slow and steady step is absolutely critical for achieving a flawless, bubble-free finish.
- Applying the Second Layer (for Pouches or Double-Sided): If using a pouch, carefully fold the second adhesive side over the document, aligning it perfectly with the first layer. For double-sided protection using two single sheets, flip your document over, peel the liner from a second sheet, and apply it in the exact same careful manner, ensuring all edges align perfectly.
- Final Trimming: Once the adhesive is fully secured and smoothed, use your sharp scissors or a craft knife with a ruler to trim around the laminated document. It is crucial to leave a small, consistent border (approximately 1/8 to 1/4 inch) of clear laminate around all edges. This protective border creates a vital seal, preventing moisture from entering and extending the document’s longevity.
How to Laminate Small Items with Packing Tape
This method is quick, incredibly cost-effective, and perfect for smaller items requiring robust protection.
Materials Needed:
- Good quality, clear heavy-duty packing tape (thicker tape provides better results)
- The small item(s) you intend to laminate
- Sharp scissors
- A clean, flat, and stable work surface
Instructions:
- Item Preparation: Ensure your item is completely clean, dry, and precisely trimmed to its final size.
- Apply First Layer of Tape: Lay a strip of packing tape onto your clean work surface, sticky side facing upwards, making sure the strip is slightly longer than your item. Carefully place your item onto the center of the tape.
- Add Overlapping Strips (as needed): If your item is wider than a single strip of tape, meticulously apply additional strips of tape. Overlap each subsequent strip slightly (about 1/8 inch) to guarantee a complete and secure seal across the entire surface. Press down firmly with your fingers or a credit card to eliminate any trapped air bubbles.
- Apply Second Layer of Tape: Once the first side is fully covered and smoothed, carefully flip the item over. Apply tape to the second side in the same overlapping manner, ensuring that the new strips extend slightly beyond the edges of the first layer to create a comprehensive seal. If only single-sided protection is required, simply trim the excess tape from around the edges of the first layer.
- Smooth and Seal Thoroughly: Using your fingers, a credit card, or a squeegee, firmly press down over the entire laminated surface. This action helps to eliminate any remaining air bubbles and ensures a strong, lasting bond.
- Trim to Finish: Use sharp scissors to carefully trim any excess tape, always leaving a small, consistent border of clear tape around the edge of your item. This border is essential for maintaining a strong, waterproof seal.
How to Use Clear Contact Paper for Larger Laminating Projects
This method is ideal for projects that require broad, seamless coverage for bigger documents or custom items.
Materials Needed:
- A roll of clear contact paper
- The larger document(s) you wish to laminate
- Sharp scissors or a precision craft knife
- A long ruler or straight edge for accurate cuts and smoothing
- A squeegee or credit card (absolutely vital for smoothing out air bubbles)
- A very large, clean, and perfectly flat work surface
Instructions:
- Document Preparation: Verify that your document is completely flat, clean, and accurately trimmed.
- Measure and Cut Contact Paper: Unroll the contact paper. Measure and cut two identical pieces that are at least 1-2 inches larger than your document on all sides. This extra margin is crucial for easier application and a strong seal.
- Position First Sheet: Carefully peel back only a small section of the backing from one short edge of the first piece of contact paper. Gently position this exposed sticky edge onto your clean work surface, ensuring it’s straight.
- Align Document: Meticulously align your document onto the exposed sticky area of the contact paper, making sure to leave an adequate and even margin around all sides.
- Smooth Application: This step requires patience. Slowly and gradually peel back the remaining backing paper from the contact paper while simultaneously smoothing the contact paper over your document. Use a squeegee or credit card, working diligently from the center outwards, to push out all air bubbles. Take your time, as rushing here will lead to trapped bubbles and wrinkles.
- Repeat for Second Side (for Double-Sided): If you are laminating both sides, carefully flip the document over. Take your second piece of pre-cut contact paper, peel back a small section of its backing, and align it perfectly over the first layer and the document. Slowly and smoothly apply it down as you did with the first side, ensuring precise alignment.
- Trim Excess: Once both sides are applied and smoothed, use a craft knife with a ruler or sharp scissors to trim the excess contact paper. Remember to leave a small, consistent border of contact paper around the document. This border is essential for creating a durable and moisture-resistant seal.
Sealing with Mod Podge or Other Clear Sealants for Crafts and Art
This method is best suited for artistic projects, craft items, or textured surfaces where a rigid plastic film isn’t the primary objective, but robust surface protection is.
Materials Needed:
- Mod Podge (available in gloss, matte, or satin finish) or another suitable clear acrylic sealer (spray or brush-on)
- A foam brush or a soft-bristle paintbrush for smooth application
- The item you wish to seal (ensure it’s completely dry if it involves ink or paint)
- A clean work surface, ideally protected by newspaper or wax paper to catch drips
Instructions:
- Item Preparation: Ensure your item is completely dry, clean, and flat. If it involves inkjet prints, ensure the ink is fully cured to prevent smudging.
- Apply First Thin Coat: Using your foam brush, apply a very thin, even coat of Mod Podge over the entire surface of your item. Work swiftly and smoothly to minimize visible brush marks.
- Allow to Dry Completely: Let the first coat dry fully. This typically takes 15-20 minutes, but drying time can vary significantly based on ambient humidity and temperature.
- Apply Additional Coats (Optional but Recommended): For significantly increased durability, water resistance, and a richer finish, apply 1-2 additional thin coats of Mod Podge. It is crucial to allow each subsequent coat to dry completely before applying the next.
- Curing Time: While Mod Podge often feels dry to the touch relatively quickly, it requires a full 24 hours to cure completely. For maximum hardness and water resistance, it can take up to 4 weeks. Handle the item gently during this curing period.
Common and Creative Uses for Your DIY Laminated Items
The practical applications for these DIY laminating methods are incredibly diverse and remarkably useful in everyday life. My personal experience with recipe cards and organizing labels merely scratches the surface of what’s possible:
- Kitchen Recipe Cards: Shield your beloved recipes from inevitable kitchen spills, splatters, and stains.
- Organizational Labels: Craft durable, wipeable labels for storage baskets, bins, file folders, or pantry shelves, ensuring they withstand frequent handling.
- Instruction Manuals & Quick Guides: Safeguard frequently referenced instructions for appliances, tools, craft projects, or children’s toys, making them resistant to damage.
- Educational Flashcards & Materials: Make learning tools significantly more durable for children, students, or personal study, allowing for repeated use without wear.
- Custom Bookmarks: Create personalized, long-lasting bookmarks that resist tearing, bending, and liquid damage.
- Children’s Artwork & School Projects: Preserve precious creations from sticky fingers, tears, and general deterioration, turning them into lasting keepsakes.
- Reusable Checklists & To-Do Lists: Laminate a checklist or calendar and use a dry-erase marker, making it indefinitely reusable and environmentally friendly.
- Temporary Signs or Notices: Protect signs for outdoor events, garage sales, or temporary displays from weather elements.
- Homemade ID Cards or Membership Cards: Reinforce homemade or temporary identification cards, ensuring they last longer.
- Personalized Placemats: Design custom, easy-to-clean placemats from artwork, photos, or themed designs.
- Game Pieces & Board Game Enhancements: Protect frequently handled game pieces or create durable overlays for board games.
Key Benefits of Embracing DIY Laminating Techniques
Beyond simply providing an immediate solution to a lack of a laminator, these alternative methods offer several compelling and practical advantages:
- Exceptional Cost-Effectiveness: Materials like packing tape or contact paper are significantly more affordable than purchasing specialized laminating pouches or a dedicated laminator machine. This makes document protection accessible on any budget.
- Unparalleled Accessibility: You likely have at least one of these essential materials (tape, contact paper, or Mod Podge) readily available in your home. This means you can begin protecting your documents instantly, without needing a special trip to the store.
- Remarkable Versatility: Different DIY methods are best suited for different item sizes, shapes, and desired finishes. This flexibility allows you to choose the perfect technique for each unique project.
- Instant Gratification: There’s no waiting for a laminating machine to heat up, nor for new supplies to arrive. You can laminate on demand, whenever the need arises.
- Space-Saving Solution: Eliminate the need to store a bulky laminator machine and its accessories, freeing up valuable counter or storage space.
Essential Tips for Achieving Flawless DIY Laminating Results
To ensure your DIY laminating projects turn out perfectly, looking professional and lasting long, keep these expert tips in mind:
- Maintain a Pristine Work Surface: Always work on an absolutely clean and dust-free surface. Any dust, lint, pet hair, or crumbs will inevitably get trapped under the adhesive and become impossible to remove once sealed.
- Adopt a Slow and Steady Pace: When applying any adhesive films (self-adhesive sheets, packing tape, or contact paper), peel the backing slowly and systematically smooth the film as you go. Rushing this step is the primary cause of unsightly air bubbles and wrinkles.
- Utilize the Right Smoothing Tools: A credit card, a ruler, or a dedicated squeegee is an invaluable tool for effectively pushing out air bubbles and ensuring a smooth, flat application.
- Ensure Consistent Overlap (for Tape): If you’re using packing tape, make certain to create consistent, slight overlaps between strips. This is crucial for forming a strong, nearly seamless, and comprehensive seal.
- Always Leave a Protective Border: When trimming your laminated document, consistently leave a small, clear border (e.g., 1/8 to 1/4 inch) of the laminate around the edges of the paper. This border provides a critical seal that prevents moisture from seeping into the paper and compromising your protection.
- Embrace Practice Runs: If you’re new to these DIY methods, it’s highly recommended to perform a test run on a scrap piece of paper or an unimportant item before working on your valuable document. This allows you to perfect your technique.
- Invest in Quality Materials: While these are DIY methods, choosing good quality, clear packing tape, and contact paper will yield significantly better results. Cheaper alternatives might be too thin, prone to yellowing over time, or have weaker adhesive.
- Be Patient with Sealants: If using Mod Podge or other liquid sealants, remember that adequate drying and curing time is essential for maximum durability and water resistance. Don’t rush the process.
Conclusion: Empowering Your Document Preservation Journey
What began as the sheer frustration of a broken laminator unexpectedly led me down an incredibly rewarding path of discovery. I uncovered a vibrant world of practical, budget-friendly, and highly effective DIY laminating solutions that have fundamentally changed how I approach document preservation. Whether your goal is to protect cherished family recipes, create incredibly durable and wipeable labels for an impeccably organized home, or simply safeguard essential instructions from daily wear and tear, these ingenious methods offer an empowering and accessible alternative to traditional lamination.
No longer do you need to fret over the inevitable fate of torn papers, smudged prints, or coffee-stained documents. With just a simple roll of clear packing tape, a versatile sheet of contact paper, or some self-adhesive laminating pouches, you possess the power to safeguard your most important items with surprising ease and unwavering confidence. Embrace these clever tricks, and you’ll soon find yourself wondering why you ever felt exclusively reliant on a dedicated laminating machine!
Happy and creative laminating!