
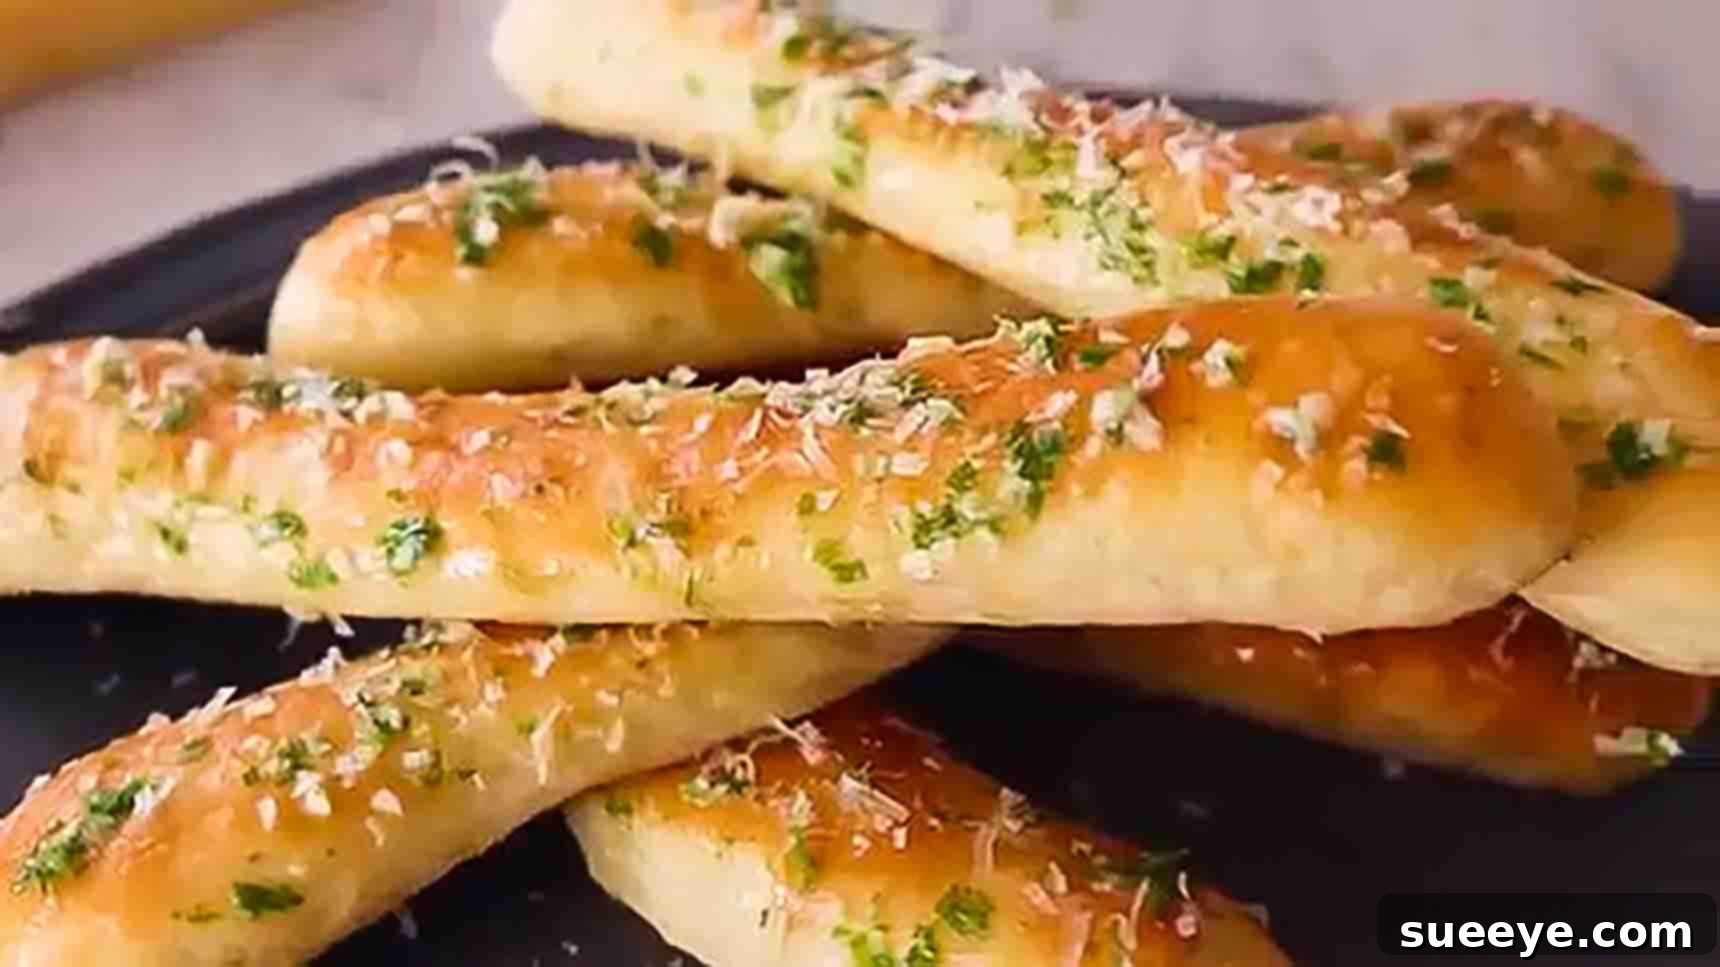
The Easiest & Most Delicious Homemade Garlic Butter Breadsticks Recipe
Are you yearning for that irresistible aroma of freshly baked breadsticks, warm from the oven, glistening with aromatic garlic butter? Look no further! This comprehensive guide will walk you through creating the most phenomenal homemade breadsticks you’ve ever tasted. Inspired by a fantastic and widely loved recipe from Preppy Kitchen on YouTube, these breadsticks defy their simple preparation with an astonishing depth of flavor and a perfect soft, chewy texture. They are truly one of the best breadsticks I’ve ever had, proving that sometimes the simplest recipes yield the most spectacular results.
Whether you’re serving them alongside a rich Italian pasta dish, dunking them into a hearty soup, complementing a fresh crisp salad, or simply enjoying them as a delightful standalone snack, these breadsticks are guaranteed to be a crowd-pleaser. Forget bland, store-bought versions; once you experience the ease of preparation and the superior taste of these homemade marvels, there will be no turning back. Prepare to elevate your culinary game and delight your taste buds with this incredibly easy, flavorful, and utterly satisfying recipe!
Making breadsticks from scratch might sound like a task for seasoned bakers, but this recipe is specifically designed for maximum simplicity without compromising on taste or texture. It skillfully utilizes common kitchen staples and straightforward techniques, making it incredibly accessible for bakers of all skill levels, from complete beginners to experienced home cooks looking for a quick win. The true magic lies in the perfectly balanced, tender dough and the exquisitely aromatic garlic butter topping, which together combine to create an unforgettable treat. So, gather your ingredients, clear your counter, and get ready to transform humble components into something truly extraordinary. Let’s dive into the world of warm, buttery, garlicky perfection and discover your new go-to breadstick recipe!
Why These Homemade Breadsticks Are an Absolute Must-Try
There are countless reasons why this specific breadstick recipe stands out from the rest and deserves a permanent spot in your recipe collection:
- Effortlessly Easy: With clear, concise instructions and minimal fuss, even novice bakers can achieve spectacular results.
- Phenomenal Flavor Profile: A delicate balance of savory, slightly sweet dough perfectly complemented by a rich, pungent garlic butter topping.
- Irresistible Texture: Expect a delightfully soft and fluffy interior with a satisfyingly tender, golden-brown exterior. They are perfectly chewy without being dense.
- Remarkably Versatile: These breadsticks are an ideal accompaniment for an extensive range of meals, from classic Italian dinners to casual lunches and impressive appetizers.
- Cost-Effective and Fresh: Making them at home is significantly cheaper and undoubtedly fresher than any store-bought alternative, allowing you to control the quality of ingredients.
- Highly Customizable: The base recipe is robust enough to allow for easy adaptation of toppings and seasonings to perfectly suit your personal preferences or dietary needs.
Essential Equipment for a Seamless Breadstick Baking Experience
Having the right tools at hand can significantly enhance your breadstick baking journey, making it smoother, more efficient, and ultimately more enjoyable. While most items are common kitchen staples, a few can notably streamline the dough preparation and baking process:
- Stand Mixer with Dough Hook Attachment: This is arguably the biggest game-changer for kneading dough, saving you considerable time and effort. The dough hook mimics hand-kneading, efficiently developing gluten for a perfectly elastic dough. If you don’t own one, you can absolutely knead by hand, but be prepared for a good 10-12 minutes of active kneading!
- Large Mixing Bowls: You’ll need at least two: one for proofing the yeast initially and another, larger one, for the dough’s first rise, ensuring it has ample space to double comfortably.
- Accurate Measuring Cups and Spoons: Baking is a science, and precision in measurements for both dry and liquid ingredients is paramount for consistent, successful results.
- Baking Sheets: At least one large baking sheet (or two medium ones) is essential to bake all your breadsticks without overcrowding, which ensures even cooking and browning.
- Parchment Paper: Lining your baking sheets with parchment paper is a simple yet effective trick. It prevents sticking, promotes even baking, and makes cleanup incredibly easy.
- Pastry Brush: An indispensable tool for evenly applying that mouth-watering garlic butter topping over your warm breadsticks, ensuring every inch is coated in flavor.
- Bench Scraper (Optional but Highly Recommended): This handy tool is excellent for neatly dividing the dough into equal portions and for scraping any residual dough off your work surface.
- Rolling Pin (Optional): While hand-rolling the dough into ropes works perfectly fine, a rolling pin can help you achieve more uniform and consistent breadstick shapes and thicknesses.
Ingredients for Your Irresistible Homemade Breadsticks
The true beauty of this recipe lies in its elegant simplicity, utilizing readily available, everyday ingredients that, when combined with care, create truly extraordinary results. For the best possible outcome, always ensure your ingredients are fresh and measured accurately.
Dough:
- 1 cup Warm Water (ideally 105-115°F / 40-46°C): The exact temperature of the water is absolutely crucial for successfully activating the active dry yeast without inadvertently killing it. It should feel comfortably warm to the touch, like a baby’s bathwater, not hot.
- 1 Packet (2 1/4 teaspoons) Active Dry Yeast: This is the magical leavening agent responsible for giving our breadsticks their wonderfully light, airy, and fluffy texture. Always double-check that your yeast is active and well within its expiration date for optimal rising power.
- 2 tablespoons Granulated Sugar: Beyond simply adding a touch of sweetness, sugar primarily acts as immediate food for the yeast, helping it to activate quickly. It also contributes to the dough’s eventual tender crumb and a beautiful golden-brown crust.
- 2 1/2 cups All-Purpose Flour, Divided: All-purpose flour provides the primary structure for our breadsticks. Dividing the flour into two additions allows for better hydration during the initial mix and makes the dough easier to handle as gluten develops.
- 3 tablespoons Oil (or Melted Unsalted Butter): This fat source adds significant richness, crucial moisture, and delightful tenderness to the dough. High-quality vegetable oil, canola oil, or even melted unsalted butter are excellent choices.
- 1 teaspoon Fine Sea Salt: Salt is much more than just a seasoning; it plays a vital role in enhancing the overall flavor of the bread, strengthening the gluten structure, and importantly, regulating the activity of the yeast. Never omit it!
Topping:
- 2 tablespoons Unsalted Butter, Melted: This forms the rich, luscious base of our irresistible garlic butter topping. Using unsalted butter gives you precise control over the total salt content in your finished breadsticks.
- 1/2 teaspoon Fine Sea Salt: A dash of salt in the topping is essential for seasoning and brilliantly brings out the savory flavors of the garlic and butter.
- 1/2 teaspoon Garlic Powder: This provides that iconic, deeply savory garlic flavor that defines classic breadsticks. Granulated garlic can also be used as an effective substitute.
- A Handful of Fresh Parsley, Finely Chopped: Fresh parsley adds a vibrant, fresh herbaceous note and a beautiful visual pop of color to the breadsticks. Fresh herbs truly make a difference here!
- 1 tablespoon Grated Parmesan Cheese: A final, generous flourish of savory, salty, umami-rich goodness that truly elevates the breadsticks to a gourmet level. Always use freshly grated Parmesan for superior flavor and texture.
Step-by-Step Instructions to Bake Your Own Phenomenal Breadsticks
Follow these detailed steps closely and precisely, and you’ll be enjoying warm, incredibly flavorful homemade breadsticks in surprisingly little time. Remember, precision and a little patience are your best allies in baking!
Step 1: Preparing the Dough and Its First Rise
Begin by activating your yeast. In the bowl of your stand mixer (if you’re using one; otherwise, a large mixing bowl will suffice for hand-kneading), combine 1 cup of warm water, 2 tablespoons of granulated sugar, and the entire packet (2 1/4 teaspoons) of active dry yeast. Give these ingredients a quick, gentle stir to ensure they are well combined. Now, the crucial part: set the bowl aside and let it sit undisturbed for approximately five to ten minutes. During this vital period, the yeast will “bloom” – you should observe a visible, foamy layer forming on the surface. This foamy layer is a positive sign, indicating that your yeast is alive, active, and ready to work its magic, ensuring your breadsticks will rise beautifully and achieve that desired light texture.
Once your yeast mixture is wonderfully foamy and fragrant, add 2 cups of the all-purpose flour and 3 tablespoons of either melted butter or oil to the bowl. If you are utilizing a stand mixer, attach the dough hook and begin mixing on a low speed (usually speed 2) until the ingredients are just combined and a shaggy, somewhat sticky dough begins to form. This initial mixing stage helps to hydrate the flour evenly. After about one minute of mixing, stop the mixer, scrape down any flour or dough clinging to the sides of the bowl, and then add the remaining 1/2 cup of all-purpose flour along with 1 teaspoon of fine sea salt. Increase the mixer speed to medium-low (speed 3-4) and continue to mix and knead the dough for a full six minutes. During this kneading process, you will witness the dough gradually transforming from sticky and rough to smooth, elastic, and eventually pulling away cleanly from the sides of the bowl. This dedicated kneading time is essential for developing the gluten, which is critical for the breadsticks’ structure, chewiness, and overall appeal.
After the six minutes of kneading, carefully remove the dough from the mixer. Lightly grease a clean, large mixing bowl with a small amount of butter or oil. Transfer the kneaded dough into this greased bowl, making sure to turn it over once to coat its entire surface lightly with the grease. This prevents the dough from sticking as it rises. Cover the bowl tightly with plastic wrap or a clean, damp kitchen towel to create a warm, humid environment. Place the covered bowl in a warm, draft-free spot in your kitchen – a slightly warmed, turned-off oven with the light on works perfectly – and let the dough rise for approximately 45 minutes, or until it has visibly doubled in size. The exact rising time can fluctuate slightly depending on the ambient temperature of your kitchen, so always rely on visual cues rather than strict timing. This first significant rise is crucial for developing deep flavors and creating numerous air pockets, which contribute to the breadsticks’ wonderfully light and airy texture.
Step 2: Shaping, Baking, and Topping the Irresistible Breadsticks
While your dough is diligently completing its first rise, take a moment to prepare your baking station. Preheat your oven to a precise 400 degrees Fahrenheit (200 degrees Celsius). Line a large baking sheet with a sheet of parchment paper; this simple step will prevent your breadsticks from sticking and ensure they bake evenly and release easily. Once the dough has successfully doubled in size, gently punch it down to release the accumulated air. Transfer the deflated dough onto a lightly floured clean surface. Resist the urge to add too much flour here, just enough to prevent sticking.
Now, it’s time to shape your breadsticks. Divide the dough into 12 equal pieces. For the most uniform results, you can weigh the entire dough and then divide that weight by 12 to get precise portions for each breadstick. Take one piece of dough at a time and, using the palms of your hands, gently roll it into a rope approximately 9 inches long and about 1/2 to 3/4 inch thick. Strive for consistency in thickness across all breadsticks, as this ensures they bake evenly; thinner parts might overcook, while thicker sections could remain slightly doughy. Arrange these perfectly shaped dough ropes on your prepared baking sheet, ensuring you leave a little space between each one to allow for further expansion during the second rise and, crucially, during baking. Once all the breadsticks are shaped and neatly arranged on the baking sheet, loosely cover them again with plastic wrap or a clean kitchen towel and let them rise for another 30 minutes. This second, shorter rise is known as proofing and is vital for achieving that wonderfully light and airy interior texture.
After the second rise, carefully transfer the baking sheet into your preheated oven. Bake the breadsticks for approximately 12 to 17 minutes, or until they achieve a beautiful golden-brown color and are cooked through. Baking times can vary considerably between ovens, so it’s always wise to keep a close eye on them, especially towards the end of the baking cycle. A good indicator of doneness is when they sound hollow if gently tapped on the bottom.
While your breadsticks are baking to perfection, prepare your delectable topping. In a small bowl, combine 2 tablespoons of melted unsalted butter, 1/2 teaspoon of fragrant garlic powder, 1/2 teaspoon of fine sea salt, and a generous handful of finely chopped fresh parsley. Whisk these ingredients together until they are thoroughly combined and fragrant. The aroma alone will be incredibly enticing, a preview of the deliciousness to come!
As soon as the breadsticks emerge from the oven, piping hot and wonderfully fragrant, do not delay! Immediately brush the garlic butter mixture generously and evenly over each and every breadstick using your pastry brush. The residual heat from the freshly baked breadsticks will help the butter melt beautifully, allowing it to soak in and infuse every bite with an incredible garlicky goodness. For the final, exquisite touch, sprinkle a tablespoon of freshly grated Parmesan cheese over the warm, buttered breadsticks. The cheese will melt ever so slightly, creating a delicate, savory crust that adheres perfectly. Serve your homemade garlic butter breadsticks immediately and savor every single delicious bite! They are undeniably at their absolute best when enjoyed fresh out of the oven.
Expert Tips for Perfectly Delicious Homemade Breadsticks Every Time
Achieving consistently perfect breadsticks is easy with a few insider tips and tricks:
- Avoid Excessive Flour: While a lightly floured surface is necessary to prevent sticking when shaping, adding too much flour to your dough or workspace can lead to dry, tough breadsticks. Use just enough to manage the dough.
- Optimal Warmth for Rising: Yeast thrives in warmth! A slightly warm kitchen environment (around 70-75°F / 21-24°C) or a clever trick like a turned-off oven with just the light on can create the ideal conditions for faster and more robust dough rising.
- Consistent Rolling is Key: Strive to roll all your breadsticks to a uniform length and thickness. This seemingly small detail is critical for ensuring they bake evenly, preventing some from being undercooked while others become over-crispy.
- Minimize Disturbance During Rise: Resist the temptation to constantly lift the cover off the rising dough. Each time you do, cold air can enter, potentially hindering the yeast’s activity and slowing down the rising process.
- Brush Immediately After Baking: This is a non-negotiable step! Applying the garlic butter as soon as the breadsticks emerge from the hot oven ensures it melts beautifully, thoroughly soaks into the warm bread, and maximizes flavor infusion.
- Prioritize Fresh Ingredients: The quality of your ingredients, especially the freshness of your active dry yeast and vibrant parsley, makes a noticeable and significant difference in the final taste and texture of your breadsticks.
- Taste Test Your Topping: Before brushing it onto your precious breadsticks, take a tiny taste of your garlic butter mixture. This allows you to adjust the salt, garlic powder, or any other seasonings to perfectly suit your personal preference.
- Don’t Overbake: Overbaked breadsticks can become dry and hard. Keep an eye on the color – a beautiful golden brown is your cue that they are done.
Versatile Serving Suggestions and Storage Guidelines
These homemade breadsticks are incredibly versatile and pair wonderfully with a wide array of dishes, making them a fantastic addition to almost any meal. Here are some inspired ideas:
- The Ultimate Pasta Companion: They are a classic and essential accompaniment to any Italian pasta dish, perfect for artfully soaking up rich marinara, creamy Alfredo, or savory pesto sauces.
- Elevate Soups and Salads: Add a delightful textural crunch and a burst of savory garlic flavor to your favorite hearty soups (like minestrone, tomato bisque, or lentil soup) and fresh, crisp salads.
- Fantastic with Dips: Transform them into a sensational appetizer by serving them alongside a warm bowl of marinara sauce, a velvety cheese sauce, a robust hummus, or even a zesty arrabbiata dip.
- A Simply Delicious Snack: They are utterly delicious and satisfying on their own, making for a perfect pick-me-up snack any time of the day.
Storage Guidelines: While these breadsticks are unequivocally at their best when enjoyed fresh and warm from the oven, any delicious leftovers can be stored. Place them in an airtight container at room temperature, where they will remain fresh for 1 to 2 days. To reheat and bring back some of their initial warmth and delightful crispness, simply pop them back into a preheated oven (around 350°F / 175°C) for 5-7 minutes, or until they are warmed through and slightly revived. You can also freeze baked breadsticks for extended storage, up to 1 month. To enjoy them after freezing, thaw them at room temperature for an hour or two, then reheat as directed above.
Creative Variations and Customizations for Your Homemade Breadsticks
Once you’ve mastered the foundational recipe, don’t hesitate to unleash your culinary creativity! The base dough is incredibly versatile, allowing for a myriad of delicious variations and personalized additions:
- Extra Cheesy Breadsticks: For an indulgent treat, incorporate 1/4 cup of shredded mozzarella, cheddar, or a blend of Italian cheeses into the dough during the last minute of kneading. Alternatively, sprinkle extra cheese on top of the breadsticks a few minutes before they finish baking.
- Herb-Infused Dough: For an aromatic twist, mix 1 teaspoon of dried Italian seasoning, or a combination of dried oregano, basil, and thyme, directly into the flour before adding the liquids.
- Spicy Garlic Kick: If you enjoy a bit of heat, add a pinch or two of red pepper flakes to the garlic butter topping. The warmth of the breadsticks will gently bloom the spice.
- Nutty Sesame Seed Breadsticks: For a delightful texture and nutty flavor, lightly brush the shaped dough ropes with a little egg wash (an egg whisked with a tablespoon of water) before the second rise, then generously sprinkle with sesame seeds.
- “Everything Bagel” Breadsticks: Skip the traditional garlic butter and Parmesan! Instead, after baking, brush the warm breadsticks with melted butter and sprinkle them generously with your favorite everything bagel seasoning blend for a trendy and flavorful twist.
- Sweet Cinnamon Sugar Breadsticks: For a delightful dessert-style breadstick, omit the savory topping altogether. Instead, melt butter, mix it with cinnamon and sugar to taste, and brush this sweet mixture over the warm breadsticks. A drizzle of glaze (powdered sugar and milk) can be added for extra decadence.
- Roasted Garlic Breadsticks: For an even deeper garlic flavor, substitute some of the garlic powder in the topping with finely mashed roasted garlic.
Conclusion: Your New Favorite Homemade Treat Awaits!
There you have it – a remarkably simple yet profoundly satisfying recipe for homemade garlic butter breadsticks. This recipe, inspired by the culinary wisdom and accessible approach of Preppy Kitchen, serves as undeniable proof that restaurant-quality flavor and texture are entirely achievable and effortlessly replicated right in the comfort of your own kitchen. From the exciting moment you activate the yeast to the final, fragrant sprinkle of Parmesan cheese, each step of this baking journey is straightforward, enjoyable, and incredibly rewarding.
The resulting breadsticks are far more than just a mere side dish; they are a delightful culinary experience in themselves, offering a perfect harmony of irresistible softness, satisfying chewiness, and an explosion of garlicky, buttery goodness with every single bite. They truly stand out as a highlight on any table, inviting smiles and contented sighs from everyone who tries them.
So, why delay any longer? Embrace the pure joy of baking and treat yourself, your cherished family, and your appreciative friends to these truly incredible homemade breadsticks. They are impeccably perfect for any conceivable occasion, incredibly easy to whip up, and absolutely guaranteed to earn you rave reviews and requests for the recipe time and time again. Happy baking, and may you savor every single flavorful bite of your delicious, homemade creation!