
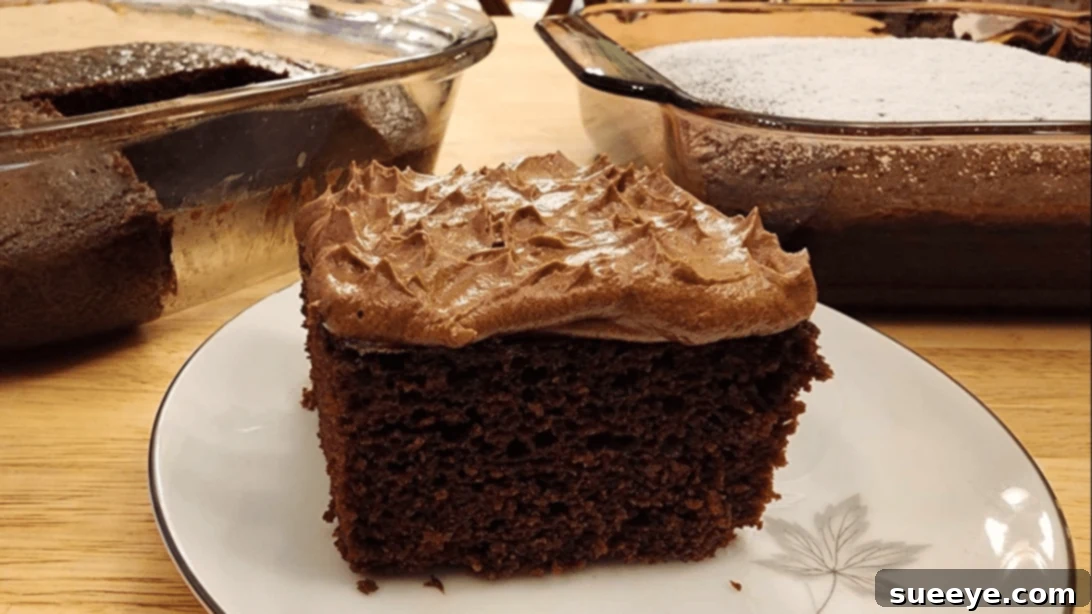
Classic Chocolate Depression Cake: A Delicious & Budget-Friendly Blast from the Past
Step back in time to an era of resilience and culinary ingenuity with the classic Depression Cake. This humble yet incredibly delicious dessert, also affectionately known as “Wacky Cake” or “War Cake,” rose to prominence during the trying times of the Great Depression. Born out of necessity when eggs, butter, and milk were scarce or simply too expensive, this cake offers a delightful paradox: a rich, moist, and satisfying treat crafted from the most basic pantry staples. What makes it truly remarkable is its inherent nature as an eggless, dairy-free (and often vegan, depending on your sugar choice) marvel, making it a fantastic option for those with dietary restrictions or simply seeking a more budget-conscious baking adventure.
Beyond its historical significance, the Chocolate Depression Cake remains a beloved recipe today for its sheer simplicity, incredibly moist crumb, and deep chocolate flavor. It proves that you don’t need a pantry full of gourmet ingredients to create something truly special. The ingredients you’ll need are likely already waiting in your kitchen, making this an accessible and effortless way to bake a cake anytime the craving strikes.
Many might wonder if a cake made without traditional binders and fats could truly deliver on taste. Rest assured, this Chocolate Depression Cake recipe is a testament to flavor and texture, consistently turning out wonderfully rich and satisfying. We invite you to learn how to recreate this timeless treat by following this comprehensive guide and watching the helpful video tutorial by The Hillbilly Kitchen – Down Home Country Cooking on YouTube. Prepare to be amazed by its simplicity and delectable results – we’re confident you’ll enjoy making and sharing this cake as much as we do!
RELATED: Easy 3-Ingredient Chocolate Cake Recipe
The Enduring Legacy: Why Depression Cake Still Matters Today
The story of Depression Cake is more than just a recipe; it’s a narrative of resilience, innovation, and resourcefulness. During the Great Depression of the 1930s, families faced immense economic hardship. Traditional baking ingredients like eggs, milk, and butter became luxury items, forcing home bakers to get creative. This period saw the rise of “mock” recipes and dishes that substituted expensive ingredients with more affordable alternatives. Depression Cake emerged as a shining example of this culinary adaptation, proving that even in times of scarcity, joy and comfort could still be found in a simple slice of cake.
Today, this cake continues to resonate for several compelling reasons. Firstly, its inherent cost-effectiveness is still highly relevant. In an age where grocery bills are steadily rising, a recipe that relies on inexpensive pantry staples like flour, sugar, cocoa, oil, and vinegar is a welcome relief for any household budget. Secondly, the increasing awareness of dietary needs and preferences makes this naturally egg-free and dairy-free cake a fantastic choice for individuals with allergies or those following vegan diets. It’s an accidental hero for inclusive baking!
Furthermore, there’s a certain nostalgia and charm associated with historical recipes. Baking a Depression Cake connects us to a significant period in history, offering a tangible link to the resourcefulness of previous generations. It’s a humble reminder that delicious food doesn’t always require elaborate preparations or exotic ingredients. This cake celebrates the beauty of simplicity and the power of a good, honest dessert.
Ingredients for a Perfectly Moist Chocolate Depression Cake
- 1½ cups All-Purpose Flour: The foundational dry ingredient providing structure to our cake. Ensure it’s measured accurately for the best texture.
- 1 cup Granulated Sugar: Sweetens the cake and contributes to its moistness. Brown sugar can also be used for a slightly deeper, more caramel-like flavor.
- ¼ cup Unsweetened Cocoa Powder: The star ingredient for that rich chocolate flavor. Use a good quality cocoa powder for superior taste.
- 1 teaspoon Baking Soda: This acts as the primary leavening agent, creating the cake’s light and airy texture when it reacts with the vinegar.
- ½ teaspoon Salt: A crucial ingredient that balances the sweetness and enhances all the other flavors, especially the chocolate.
- 1 cup Brewed Coffee or Water: Coffee significantly deepens and enriches the chocolate flavor without making the cake taste like coffee. Water works just as well if preferred.
- ⅓ cup Vegetable Oil: Replaces butter, providing essential moisture and tenderness to the cake. Any neutral-flavored oil like canola, sunflower, or grapeseed oil will work.
- 1 tablespoon White Vinegar: The magic ingredient! It reacts with the baking soda to create carbon dioxide bubbles, giving the cake its rise and tender crumb. Don’t worry, you won’t taste it in the final product.
- 1 teaspoon Real Vanilla Extract: A touch of vanilla enhances the overall flavor profile, complementing the chocolate beautifully.
How to Make This Easy & Delicious Chocolate Depression Cake
Creating this historical gem is surprisingly simple, requiring just one bowl and a few basic steps. Follow along to bake a perfectly moist and flavorful Chocolate Depression Cake that will impress everyone.
Step 1: Prepare Your Dry Ingredients
In a large mixing bowl, combine the 1½ cups of all-purpose flour, 1 cup of granulated sugar, ¼ cup of unsweetened cocoa powder, 1 teaspoon of baking soda, and ½ teaspoon of salt. Use a whisk to thoroughly combine these dry ingredients. This step is crucial for ensuring that the leavening agent (baking soda) and cocoa powder are evenly distributed throughout the flour, preventing pockets of unmixed ingredients and promoting an even rise and consistent flavor in your finished cake.
Step 2: Incorporate the Wet Ingredients
Next, create a “well” or a small depression in the center of your dry mixture. Into this well, pour the 1 cup of brewed coffee (or water), ⅓ cup of vegetable oil, 1 teaspoon of real vanilla extract, and finally, the 1 tablespoon of white vinegar. The vinegar’s reaction with the baking soda will start almost immediately, so you might notice a slight fizzing or bubbling – this is exactly what you want!
Step 3: Mix Until Just Combined
Using your whisk or a rubber spatula, gently stir the wet and dry ingredients together. Mix until they are just combined and no streaks of dry flour remain. Be careful not to overmix the batter; overmixing can develop the gluten in the flour too much, leading to a tough or dense cake. A few small lumps are perfectly fine and will bake out.
Step 4: Prepare for Baking
Once your batter is ready, pour it evenly into your chosen baking dish. A standard 8×8-inch or 9×9-inch square pan, or a 9-inch round cake pan, works beautifully for this recipe. For easy removal and cleanup, you can lightly grease and flour your pan or line it with parchment paper. Ensure your oven is preheated to 350°F (175°C) before placing the cake inside. Proper preheating is key to an even bake and good rise.
Step 5: Bake to Perfection
Carefully place the baking dish into your preheated oven. Allow the cake to bake for approximately 25 to 30 minutes. Baking times can vary slightly depending on your oven and the size of your pan, so it’s always best to check for doneness. Insert a toothpick into the center of the cake; if it comes out clean or with a few moist crumbs attached, your cake is ready. Avoid overbaking, as this can lead to a dry cake.
Step 6: Cool and Serve
Once baked, remove the cake from the oven and place it on a wire rack to cool completely in its pan. Allowing the cake to cool fully is essential, not only for easier handling but also for the texture to set properly. Cutting into a warm cake can sometimes result in a crumbly mess. Once cooled, you can frost it with your favorite dairy-free chocolate frosting, dust it simply with powdered sugar, or enjoy it as is. This cake is delightful in its pure, unadorned form!
Tips for a Flawless Chocolate Depression Cake Experience
While this recipe is incredibly forgiving, a few expert tips can elevate your Depression Cake from good to absolutely unforgettable:
- Measure Accurately: Baking is a science, and precise measurements are key, especially for flour and leavening agents. Use the spoon-and-level method for flour (spoon flour into measuring cup, then level off with a straight edge).
- Don’t Skip the Vinegar: The vinegar is not for flavor; it’s vital for activating the baking soda, which gives the cake its lift. Any white vinegar will work, and you won’t taste it in the final product.
- Coffee for Deep Flavor: While water is perfectly acceptable, using brewed coffee instead of water significantly enhances the chocolate flavor, making it richer and more profound without imparting a coffee taste.
- Avoid Overmixing: Mix the batter until just combined. Overmixing develops gluten, which can lead to a tough, chewy cake rather than a tender, moist one.
- Test for Doneness: Ovens vary, so rely on the toothpick test. If it comes out clean, the cake is done. A few moist crumbs are okay, but wet batter means it needs more time.
- Cool Completely: Patience is a virtue here. Allowing the cake to cool entirely on a wire rack prevents it from becoming gummy and makes it easier to handle and frost.
Serving Suggestions and Creative Variations
The beauty of the Chocolate Depression Cake lies in its versatility. It’s delicious on its own, but also provides a fantastic canvas for various toppings and modifications:
- Simple Dusting: A light sprinkle of powdered sugar is classic and elegant, perfect for highlighting the cake’s rustic charm.
- Dairy-Free Chocolate Frosting: Elevate your cake with a rich and creamy dairy-free chocolate frosting. Many recipes use cocoa powder, powdered sugar, plant-based milk, and vegan butter or oil.
- Quick Chocolate Glaze: Whisk together powdered sugar, a bit of cocoa powder, and a splash of plant-based milk or coffee until you reach a pourable consistency. Drizzle over the cooled cake.
- Fresh Berries: The tartness of raspberries, strawberries, or cherries pairs beautifully with the sweet chocolate.
- Coconut Whipped Cream: For a light and airy topping, especially fitting for a dairy-free dessert, chill a can of full-fat coconut milk overnight, then whip the solidified cream with a little powdered sugar and vanilla.
- A La Mode: Serve a slice warm with a scoop of your favorite dairy-free vanilla ice cream or sorbet.
- Add-ins: Fold in a handful of vegan chocolate chips, chopped nuts (like walnuts or pecans), or even shredded coconut into the batter before baking for added texture and flavor.
- Spices: A pinch of cinnamon or a tiny dash of cayenne pepper (for a Mexican hot chocolate twist) can be added to the dry ingredients to subtly enhance the chocolate flavor.
Concluding Thoughts on This Historical Sweet Treat
The Chocolate Depression Cake is more than just a recipe; it’s a piece of history baked into a delightful dessert. Its humble origins during a challenging era speak volumes about human ingenuity and the enduring power of comfort food. This cake proves that simplicity can indeed be profoundly satisfying, offering a moist, rich, and truly delicious chocolate experience without the need for eggs, butter, or milk.
Whether you’re looking for a budget-friendly treat, a naturally dairy-free or eggless option, or simply a taste of history, this recipe is a must-try. We encourage you to gather your simple ingredients, follow these straightforward steps, and create your own batch of this timeless classic. Share it with friends and family, and let its story inspire conversation around the table. Enjoy every delicious, guilt-free bite!
*All these amazing images and the video tutorial are thanks to The Hillbilly Kitchen – Down Home Country Cooking via YouTube. We highly recommend visiting her channel for more wonderful recipes and home cooking inspiration!