
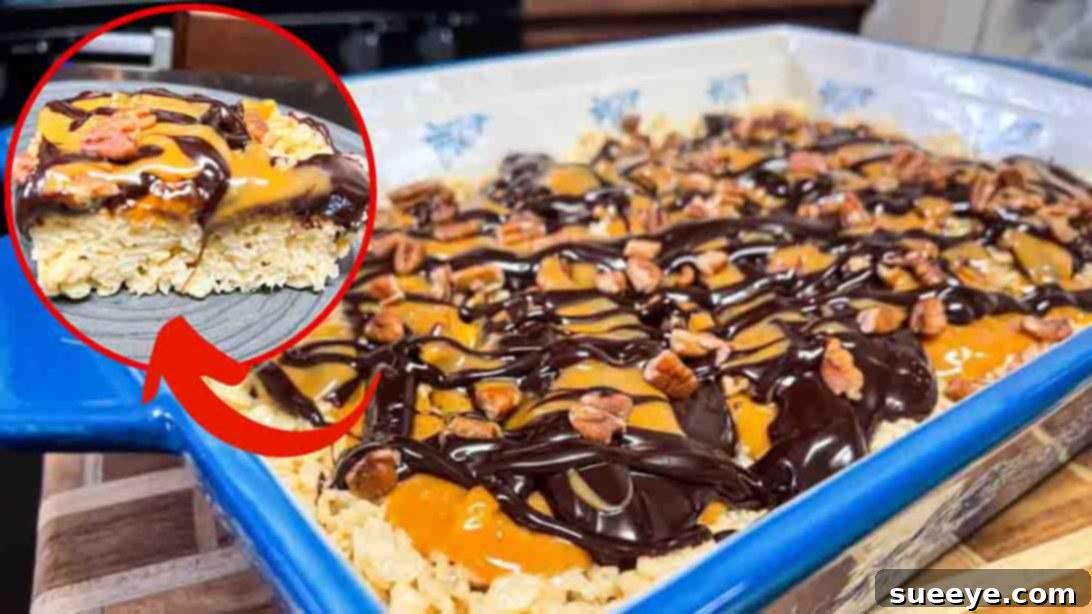
Prepare to delight your taste buds and impress your family with an extraordinary twist on a classic favorite: **Turtle Rice Krispie Treats!** This incredible no-bake dessert, inspired by the creative culinary talents showcased on Catherine’s Plates on YouTube, transforms simple ingredients into a gourmet experience. Forget the oven and the stress of complex baking; this recipe is designed for ease, speed, and maximum enjoyment. It’s an ideal project for a fun afternoon in the kitchen with your kids, yielding treats that are not only irresistibly delicious but also incredibly satisfying to make.
These aren’t just any Rice Krispie treats; they are a decadent fusion of gooey marshmallows, crisp cereal, buttery caramel, rich semi-sweet chocolate, and crunchy pecans—a harmonious blend of textures and flavors reminiscent of the beloved turtle candies. Whether you’re a seasoned baker or a kitchen novice, this recipe guarantees success and a chorus of happy sighs from everyone who takes a bite. It has become a frequent request in my home, always disappearing faster than I can make them! Don’t miss out on creating these sensational snacks. Follow our comprehensive guide below and prepare to make some magic!
Why You’ll Adore These No-Bake Turtle Rice Krispie Treats
In today’s fast-paced world, finding a dessert recipe that is both simple to execute and profoundly satisfying can feel like a rare gem. Our Turtle Rice Krispie Treats fit this bill perfectly, offering a multitude of reasons why they should be your next go-to sweet treat:
- Effortlessly Delicious: The beauty of this recipe lies in its simplicity. With no baking required, you can create a sophisticated dessert with minimal fuss, making it perfect for last-minute cravings or spontaneous gatherings.
- Family-Friendly Fun: Involving kids in the kitchen has never been easier or more enjoyable. From melting marshmallows to pressing the mixture into the pan, each step is engaging and safe, fostering cherished memories and budding culinary skills.
- A Unique Flavor Profile: Elevate the classic Rice Krispie treat with the addition of creamy caramel, rich chocolate, and toasted pecans. This “turtle” combination delivers a sophisticated sweetness balanced with a delightful crunch that stands out from ordinary treats.
- Perfect for Any Occasion: Whether you’re hosting a birthday party, bringing a dish to a potluck, preparing a holiday dessert, or simply craving a comforting snack, these treats are versatile crowd-pleasers. They travel well and are always a hit!
- Customizable: While the turtle combination is divine, the base recipe is incredibly adaptable. Explore different nuts, chocolate varieties, or even add a sprinkle of sea salt to truly make them your own.
Unveiling the “Turtle” Twist: A Symphony of Flavors
The term “Turtle” in confectionery refers to a delightful combination of pecans, caramel, and chocolate, often arranged to resemble a turtle shell. This recipe masterfully incorporates these classic elements into the beloved Rice Krispie treat format, transforming it into something truly special. The crisp, chewy base of cereal and marshmallow provides the perfect foundation for layers of buttery, rich caramel and smooth, indulgent semi-sweet chocolate. Each bite is then crowned with the earthy, satisfying crunch of crushed pecans, creating a multi-faceted sensory experience that is both familiar and excitingly new. It’s this ingenious blend that takes an everyday snack and elevates it to a gourmet dessert, all without ever needing to turn on your oven.
Gather Your Ingredients for Sweet Success
Before diving into the fun of creation, ensure you have all your ingredients measured and ready. Using high-quality components will undoubtedly enhance the flavor and texture of your finished Turtle Rice Krispie Treats. Here’s what you’ll need for this truly delightful dessert:
- 1/4 cup of unsalted butter: Essential for melting down the marshmallows and adding a rich, creamy flavor to the base.
- 6 cups of mini marshmallows: The star binder that creates that signature gooey, chewy texture. Mini marshmallows melt more quickly and evenly.
- 7 cups of rice krispies cereal: The crispy foundation of our treats. Ensure they are fresh for maximum crunch.
- 1 cup of crushed pecans: These provide the distinctive “turtle” crunch and nutty flavor. You can lightly toast them beforehand for an even deeper taste.
- 1 bag (11 oz) of caramel bits: These convenient bits melt beautifully to form the luscious caramel layer.
- 1 bag (10 oz) semi-sweet chocolate chips: For the decadent chocolate drizzle that completes the turtle profile.
- 1/4 cup + 2 tbsp heavy whipping cream, divided: This is crucial for creating smooth, pourable caramel and chocolate glazes.
Having everything prepped makes the assembly process smooth and enjoyable, ensuring you can quickly move from ingredients to a finished masterpiece!
Step-by-Step Instructions: Crafting Your Turtle Rice Krispie Masterpiece
Step 1: Preparing the Crispy Marshmallow Base
The foundation of these magnificent treats starts with a perfectly prepared Rice Krispie base. Begin by melting 1/4 cup of unsalted butter in a large, heavy-bottomed pot set over medium heat. Once the butter is completely melted and shimmering, add 6 cups of mini marshmallows to the pot. Stir the marshmallows continuously with a sturdy spoon or spatula. This constant stirring is key to ensure they melt down evenly and smoothly without burning. Keep stirring until the marshmallows have transformed into a gloriously gooey, liquid consistency.
As soon as the marshmallows are fully melted, immediately remove the pot from the heat. Now, swiftly incorporate 7 cups of rice krispies cereal into the melted marshmallow mixture. Fold and mix vigorously until every single rice krispie is thoroughly coated with the sticky marshmallow. Working quickly here is important, as the mixture will become less pliable as it cools.
Next, prepare your baking dish. Generously grease a 9×13-inch baking dish with butter or a non-stick cooking spray. This crucial step prevents the sticky mixture from adhering to the pan. Transfer the warm rice krispie mixture into the greased dish. To achieve a perfectly even and compact base, gently press the mixture down firmly and evenly across the bottom of the baking dish. You can use buttered hands or a piece of wax paper to prevent sticking, or the back of a buttered spatula. Ensure it’s packed tightly for sturdy treats. Set this aside to cool slightly while you prepare the decadent toppings.
Step 2: Crafting the Luxurious Caramel and Chocolate Layers
With your rice krispie base cooling, it’s time to create the signature “turtle” layers. Take your 1 bag (11 oz) of caramel bits and place them into a microwave-safe bowl. Add 2 tablespoons of heavy whipping cream to the caramel bits. Place the bowl in the microwave and heat for 30-second intervals, stirring thoroughly after each interval. Continue this process until the caramel bits are completely melted and you achieve a wonderfully smooth, pourable consistency. The heavy cream helps create a luscious, spreadable caramel sauce.
In a separate microwave-safe bowl, repeat the process for the chocolate layer. Combine your 1 bag (10 oz) of semi-sweet chocolate chips with the remaining 2 tablespoons of heavy whipping cream. Microwave in 30-second bursts, stirring well between each, until the chocolate is fully melted and beautifully smooth and glossy. You’ve now created two essential components of your turtle topping!
Step 3: Assembling and Finishing Your Turtle Treats
Now for the exciting part – bringing all the layers together! Evenly drizzle about half of the prepared smooth caramel over the cooled rice krispie base. Use a spoon or spatula to spread it gently if needed, ensuring good coverage. Next, follow with a drizzle of about half of the melted semi-sweet chocolate over the caramel layer. Don’t worry about perfection; a rustic drizzle adds to the charm.
Generously sprinkle 1 cup of crushed pecans evenly over the chocolate and caramel layers. These provide the characteristic crunch and nutty flavor that defines the “turtle” profile. Finally, finish off your masterpiece by drizzling the remaining caramel and chocolate glaze over the pecans. This final layer of drizzle not only adds more flavor but also acts as a binder for the pecans and creates a visually appealing finish.
Allow the treats to set for at least 30 minutes at room temperature, or for faster setting, place them in the refrigerator for about 15-20 minutes until the caramel and chocolate are firm. Once set, use a sharp, buttered knife to cut the large slab into individual bite-sized squares. Serve these glorious Turtle Rice Krispie Treats immediately and watch them disappear!
Pro Tips for Crafting Perfect Turtle Rice Krispie Treats
While the recipe is wonderfully straightforward, a few expert tips can elevate your Turtle Rice Krispie Treats from great to absolutely unforgettable:
- Freshness is Key: Always use fresh marshmallows and Rice Krispies cereal. Stale ingredients can result in a hard or less chewy texture.
- Don’t Overcook Marshmallows: Once melted and smooth, remove them from the heat immediately. Overcooking can lead to stiff, difficult-to-chew treats.
- Grease Everything: When pressing the mixture into the pan, lightly butter your hands or the back of a spatula. This prevents sticking and makes the process much easier and cleaner.
- Even Pressure: Press the Rice Krispie mixture firmly and evenly into the pan to ensure uniform thickness and consistent texture in every square.
- Chilling for Clean Cuts: Allow the treats to chill in the refrigerator for at least 15-20 minutes after adding the toppings. This solidifies the caramel and chocolate, making for cleaner, sharper cuts.
- Warm Knife for Cutting: For the cleanest possible cuts, run your knife under hot water, dry it quickly, and then slice. Repeat as needed between cuts.
- Storage Savvy: Store your finished Turtle Rice Krispie Treats in an airtight container at room temperature for up to 3 days, or in the refrigerator for up to a week. If refrigerated, allow them to come to room temperature for optimal chewiness.
Endless Possibilities: Flavor Variations and Customizations
The beauty of this Turtle Rice Krispie Treat recipe lies in its adaptability. While the classic combination is divine, feel free to unleash your creativity and experiment with these exciting variations:
- Nutty Alternatives: Not a fan of pecans, or simply want to try something different? Walnuts, almonds, or even chopped peanuts can make excellent substitutions, each offering a unique flavor profile and crunch. Lightly toast them before adding for enhanced flavor.
- Chocolate Choices: Experiment with different types of chocolate chips. Milk chocolate will add a sweeter, creamier touch, while dark chocolate can provide a more intense, sophisticated bitterness. White chocolate chips could also create a visually stunning contrast.
- A Hint of Salt: For those who love the sweet and salty combination, a generous sprinkle of flaky sea salt over the finished chocolate and caramel layers takes these treats to another level. It beautifully balances the sweetness and enhances all the flavors.
- Extra Indulgence: Consider adding a handful of mini chocolate chips or a drizzle of white chocolate to the marshmallow mixture along with the Rice Krispies for an extra layer of chocolatey goodness throughout the base.
- Spice It Up: A pinch of cinnamon or nutmeg added to the melted marshmallows can introduce a warm, comforting note, especially perfect for fall or holiday seasons.
- Miniature Masterpieces: Instead of a large pan, you can press the mixture into mini muffin tins or use cookie cutters to create fun shapes for individual servings.
These variations allow you to tailor the treats to your personal preferences or to suit any occasion, ensuring they remain a fresh and exciting dessert option time and time again.
Frequently Asked Questions About Turtle Rice Krispie Treats
We understand you might have a few questions when trying a new recipe, even one as simple as this. Here are some common queries and their answers to help ensure your Turtle Rice Krispie Treats turn out perfectly every time:
- Q: Can I make these treats ahead of time?
A: Absolutely! These no-bake treats are perfect for making in advance. Prepare them a day or two before your event and store them in an airtight container at room temperature. They hold up beautifully and are often even better after the flavors have had a chance to meld. - Q: How long do Turtle Rice Krispie Treats stay fresh?
A: When stored properly in an airtight container, they will remain fresh and delicious for about 3-4 days at room temperature. If stored in the refrigerator, they can last up to a week, though the texture might be a bit firmer initially. - Q: Can I use different types of cereal?
A: While Rice Krispies provide the classic light and airy crispness, you can certainly experiment with other cereals like Cheerios, Chex, or even corn flakes. Be aware that the texture and overall flavor profile will change, so adjust your expectations accordingly. - Q: Are these treats gluten-free?
A: The base ingredients for Rice Krispie treats can often be gluten-free, but it’s crucial to check the labels of all your ingredients, especially the Rice Krispies cereal and marshmallows, as formulations can vary by brand. Some cereals contain malt flavoring which is not gluten-free. - Q: My treats are too hard/too sticky. What went wrong?
A: If your treats are too hard, you might have overcooked the marshmallows. Ensure you remove them from the heat as soon as they are fully melted. If they are too sticky, you might not have used enough butter or cooking spray when pressing them into the pan, or they simply need more time to cool and set.
There you have it – a truly irresistible, no-bake masterpiece that combines the nostalgic comfort of Rice Krispie treats with the gourmet indulgence of turtle candies. These **Turtle Rice Krispie Treats** are more than just a dessert; they’re an experience, promising smiles, satisfied cravings, and delightful memories. From their simple preparation to their complex, delicious flavor profile, they are a testament to how easy it can be to create something truly special in your own kitchen. Whether you’re a seasoned chef or a beginner baker, this recipe offers a foolproof path to sweet success. So, gather your ingredients, follow these easy steps, and prepare to discover your new favorite treat. Dive in and taste the magic today!