
The Ultimate No-Bake Oreo Cheesecake: Your Easiest Path to Dessert Heaven
Are you a devoted fan of the classic Oreo cookie? And does the rich, creamy allure of cheesecake make your heart skip a beat? If you answered a resounding “yes” to both, then prepare to embark on a delightful culinary journey with this incredibly simple yet utterly decadent no-bake Oreo cheesecake dessert. Inspired by the genius creators at TheCooknShare, this recipe promises to be your new go-to for a show-stopping treat that requires absolutely no oven time.
For years, I indulged in slices of luxurious Oreo cheesecake from high-end bakeries and cozy cafes, always assuming such a masterpiece was beyond the reach of a home cook. Imagine my surprise and delight upon discovering just how effortlessly this exquisite dessert comes together! The beauty of a no-bake recipe is its universal appeal – whether you’re a seasoned baker or a complete novice in the kitchen, you can achieve professional-quality results with minimal effort and without the stress of traditional baking. This recipe is a game-changer for anyone craving a truly impressive dessert without the fuss.
RELATED: Looking for more delicious no-bake treats? Don’t miss this refreshing No-Bake Oreo Lemon Dessert!
Why You’ll Love This Easy No-Bake Oreo Cheesecake
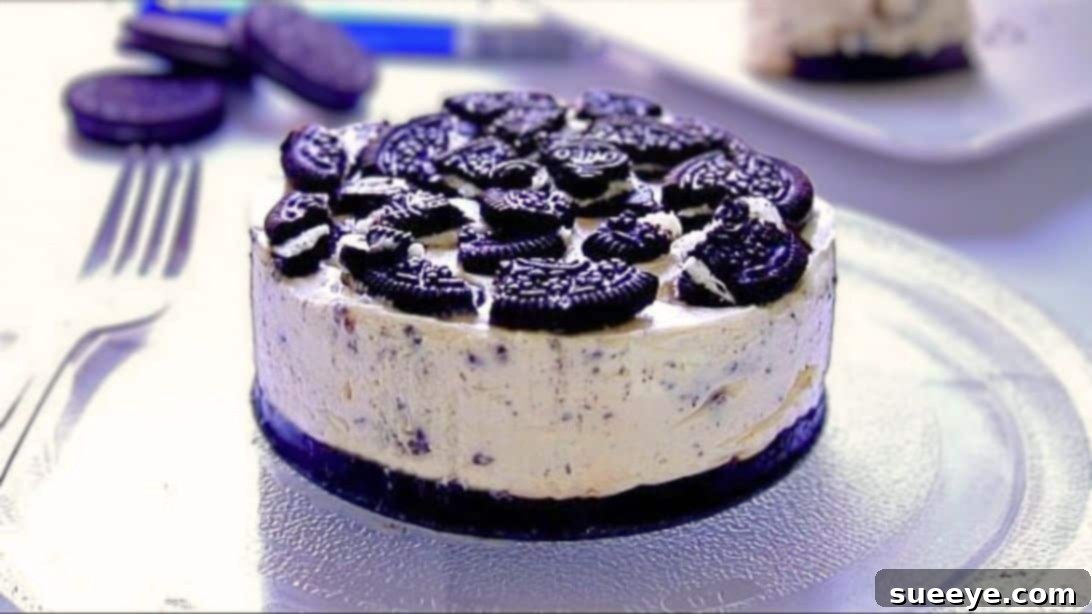
This isn’t just another dessert recipe; it’s an invitation to create joy. The no-bake Oreo cheesecake is a perfect harmony of textures and flavors. It features a robust, crunchy Oreo cookie crust that provides a delightful contrast to the silky-smooth, rich cream cheese filling, generously studded with chunks of everyone’s favorite cookie. Every bite offers that iconic chocolatey goodness combined with a tangy, sweet cheesecake creaminess that’s simply irresistible. It’s truly the ultimate dessert for Oreo enthusiasts and a guaranteed crowd-pleaser for any occasion – from casual family gatherings to elegant dinner parties.
One of the most appealing aspects of this dessert is its versatility. Serve it chilled, fresh from the refrigerator, alongside a warm cup of coffee or a comforting mug of tea for an indulgent afternoon treat. It’s also a fantastic make-ahead option, as it needs time to set, allowing you to prepare it hours or even a day in advance. The simple preparation method means less cleanup and more time to enjoy your creation. Forget complicated techniques; with just a few basic ingredients and straightforward steps, you’ll be dishing out slices of pure bliss in no time.
EXPLORE MORE: Craving another simple Oreo delight? Try this Easy 4-Ingredient Oreo Ice Cream Recipe!
Gathering Your Simple Ingredients for Decadent Oreo Cheesecake
The magic of this easy Oreo cheesecake lies in its minimal ingredient list. You only need six readily available items to create this masterpiece. Quality ingredients make a difference, so choose your favorites to ensure the best flavor. Here’s what you’ll need:
- Oreo Cookies with Filling: The star of our show! You’ll need these for both the crunchy base and the delightful chunks mixed into and topping the cheesecake filling. Don’t remove the cream; it adds moisture and flavor to the crust and richness to the overall dessert.
- Unsalted Butter (Melted): Essential for binding the cookie crumbs together to form a sturdy, flavorful crust. Unsalted butter allows you to control the overall saltiness of your dessert.
- Chilled Whipping Cream (Heavy Cream): This forms the light and airy base of our cheesecake filling, giving it that luxurious, melt-in-your-mouth texture without the need for eggs or baking. Ensure it’s very cold for optimal whipping.
- Room Temperature Cream Cheese: The heart of any cheesecake! Using full-fat cream cheese is recommended for the richest flavor and creamiest texture. Crucially, it must be at room temperature to ensure it blends smoothly without lumps.
- Confectioner’s Sugar (Powdered Sugar): This fine sugar dissolves easily, ensuring a silky-smooth cheesecake filling without any grainy texture. It also adds the perfect touch of sweetness.
- Vanilla Extract: A splash of good quality vanilla extract enhances all the other flavors, adding warmth and depth to the creamy filling.
Essential Equipment for Your No-Bake Journey
While the process is incredibly simple, having a few key tools on hand will make your cheesecake creation even smoother:
- Food Processor: Ideal for quickly crushing Oreos into fine crumbs or larger chunks. If you don’t have one, a sturdy Ziploc bag and a rolling pin work just as well!
- Hand Mixer or Stand Mixer: Perfect for whipping cream and blending the cream cheese mixture until perfectly smooth and creamy.
- 5-inch Springform Pan: This type of pan is a dream for cheesecakes, allowing for easy removal without damaging the delicate structure of your dessert.
- Mixing Bowls and Spatulas: For combining your ingredients with ease.
Step-by-Step Guide: How to Make No-Bake Oreo Cheesecake
Follow these simple instructions to create your own irresistible no-bake Oreo cheesecake. Each step is designed to be straightforward, ensuring a perfect result every time.
Step 1: Prepare the Irresistible Oreo Crust
Begin by making the foundation of your cheesecake. Take approximately 8 Oreo cookies (including their cream filling) and place them into a food processor. Pulse until they transform into fine, even crumbs. If a food processor isn’t available, simply place the cookies in a sturdy plastic ziplock bag, seal it, and use a rolling pin or the bottom of a heavy glass to crush them until finely crumbed. Once crushed, transfer these chocolatey crumbs into a medium-sized mixing bowl, getting ready for the next crucial step.
Step 2: Form the Perfect Crust
To the bowl of Oreo crumbles, add 2 tablespoons of melted unsalted butter. Mix thoroughly with a spoon or spatula until all the cookie crumbs are evenly moistened and resemble wet sand. This butter acts as the binder, ensuring your crust holds together beautifully. Once combined, transfer the mixture into a 5-inch springform pan. Use the back of a spoon or your fingertips to press the mixture down firmly and evenly across the bottom of the pan. Ensure it’s compacted well to create a sturdy base for your cheesecake. Place the pan in the refrigerator while you prepare the filling to allow the crust to firm up.
Step 3: Whip the Cream to Fluffy Perfection
In a separate, clean, and ideally chilled mixing bowl, pour 1 cup and 1 tablespoon of very cold whipping cream (heavy cream). Using a hand mixer or a stand mixer fitted with a whisk attachment, beat the cream on medium-high speed. Continue beating until the cream becomes light, fluffy, and forms stiff peaks. Be careful not to overbeat, as it can turn into butter. Once it reaches the desired consistency, set it aside in the refrigerator to keep it chilled and stable.
Step 4: Craft the Creamy Cheesecake Base
In another clean mixing bowl, combine 1/4 cup and 3 tablespoons of room temperature cream cheese (ensure it’s soft for lump-free blending), 3 tablespoons of confectioner’s sugar, and 1/4 teaspoon of vanilla extract. Using a hand mixer on low to medium speed, beat the ingredients together until the mixture is completely smooth, creamy, and free of any lumps. Scrape down the sides of the bowl as needed to ensure everything is incorporated perfectly. This step creates the rich, tangy foundation for your cheesecake filling.
Step 5: Incorporate More Oreo Goodness
Now it’s time to add more of that iconic Oreo flavor and texture! Take a few more Oreo cookies and break them into smaller, irregular pieces. You can do this quickly in a food processor with a few short pulses, or manually by placing them in a ziplock bag and gently tapping them with a rolling pin. The goal here is to have distinct cookie chunks, not fine crumbs, to provide delightful bites of Oreo throughout the cheesecake. Gently fold these larger Oreo crumbs into the prepared cream cheese mixture using a spatula. This ensures they are evenly distributed without being over-processed.
Step 6: Assemble Your No-Bake Masterpiece
Retrieve the chilled Oreo crust from the refrigerator. Carefully spoon the cream cheese and Oreo mixture evenly over the compacted crust in the springform pan. Use a spatula or the back of a spoon to gently spread the filling from edge to edge, ensuring a smooth and level surface. Take your time to create a beautiful top layer, as this will be the visible surface of your delectable cheesecake.
Step 7: Chill, Garnish, and Enjoy!
For a final touch of Oreo magic, break a few more Oreo cookies into larger chunks and artfully scatter them over the top of the cheesecake filling. This not only adds visual appeal but also provides another layer of satisfying crunch. Once garnished, place the springform pan into the refrigerator or freezer. Allow the cheesecake to chill for at least 4-6 hours in the refrigerator, or about 2-3 hours in the freezer, until it is completely set and firm. Once firm, carefully release the sides of the springform pan, slice, and savor every rich, creamy, and delightful bite. Enjoy your homemade no-bake Oreo cheesecake!
Tips for the Perfect No-Bake Oreo Cheesecake
To ensure your no-bake Oreo cheesecake turns out perfectly every time, keep these helpful tips in mind:
- Room Temperature Cream Cheese: This is crucial! Cold cream cheese will result in a lumpy filling. Take it out of the refrigerator at least an hour before you plan to mix.
- Chilled Whipping Cream and Bowl: For the best results, make sure your heavy whipping cream is very cold. You can even chill your mixing bowl and whisk attachment in the freezer for 10-15 minutes before whipping to help the cream reach stiff peaks faster.
- Don’t Overmix: While you want a smooth cream cheese mixture, avoid overmixing the whipped cream. Overmixing can cause it to become grainy or separate.
- Compacting the Crust: Press the Oreo crust firmly into the pan. This prevents it from crumbling when sliced.
- Patience is Key for Setting: Don’t rush the chilling process. A minimum of 4-6 hours (or overnight) in the refrigerator ensures the cheesecake is fully set and has the perfect firm-yet-creamy texture. If you’re in a hurry, 2-3 hours in the freezer will work, but be sure to let it soften slightly in the fridge before serving for optimal creaminess.
- Easy Release: To ensure your cheesecake comes out clean, you can lightly grease the sides of the springform pan or line them with parchment paper before adding the filling.
Variations and Customizations for Your Oreo Cheesecake
While this classic no-bake Oreo cheesecake recipe is divine on its own, feel free to get creative and customize it to your liking:
- Mint Oreo Cheesecake: Use mint-flavored Oreos for the crust and filling, or add a few drops of peppermint extract to the cream cheese mixture.
- Peanut Butter Swirl: Swirl in some melted peanut butter into the cream cheese filling before chilling for a rich peanut butter and chocolate flavor.
- Chocolate Drizzle: Once the cheesecake is set, drizzle melted chocolate (dark, milk, or white) over the top for an extra layer of decadence.
- Fruit Topping: While Oreos are the star, a fresh berry compote or sliced strawberries can add a lovely contrasting freshness, especially during warmer months.
- Different Cookies: Experiment with other cookie varieties for the crust and mix-ins, such as chocolate chip cookies, graham crackers, or even Nilla Wafers.
Your Go-To No-Bake Dessert Awaits!
This ultimate no-bake Oreo cheesecake recipe proves that creating an incredibly delicious and visually stunning dessert doesn’t have to be complicated. With just a handful of simple ingredients and straightforward steps, you can whip up a rich, creamy, and satisfying treat that will impress everyone. So, gather your Oreos, embrace the simplicity of no-bake, and get ready to enjoy a slice of pure dessert heaven. Happy no-baking!