
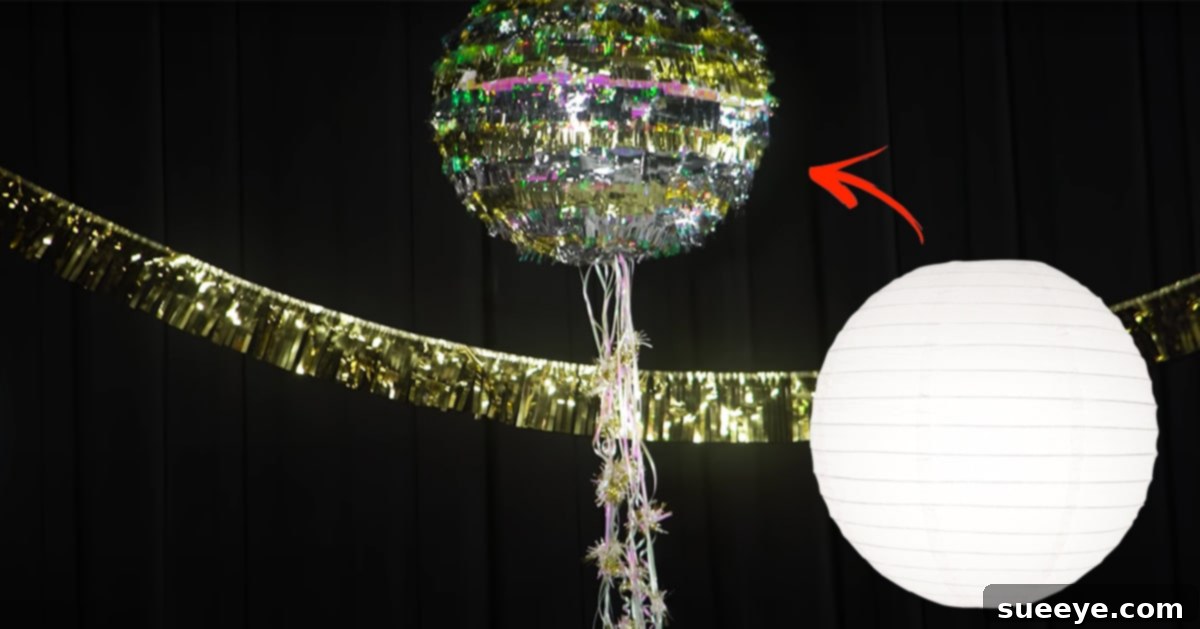
DIY Disco Ball Confetti Piñata: Sparkle Up Your New Year’s Eve (or Any Party!)
Elevate your next celebration with a spectacular DIY disco ball confetti piñata! Perfect for a dazzling New Year’s Eve bash, a retro-themed birthday, or any event calling for a touch of sparkle, this handmade masterpiece is more than just a decoration – it’s an interactive experience. Inspired by the brilliant creators at HGTV Handmade, this project offers a fantastic way to infuse personality and playful excitement into your party. Imagine the thrill as guests pull ribbons, unleashing a cascade of confetti, treats, and perhaps even tiny champagne bottles or personalized fortunes! While the process calls for a bit of patience and creativity, the rewarding outcome of a unique, shimmering piñata makes every moment spent worthwhile.
Creating your own piñata allows for unparalleled customization, from the vibrant metallic colors to the delightful treasures hidden within. Forget generic store-bought decorations; a DIY disco ball piñata becomes a conversation starter and a focal point, adding a truly personal and unforgettable element to your festivities. Whether you’re aiming for a sophisticated adult gathering or a fun-filled family affair, this craft can be tailored to suit any age group and theme. Let’s dive into transforming a simple paper lantern into an extraordinary, glimmering showstopper!
Why Choose a DIY Disco Ball Piñata for Your Celebration?
In a world of mass-produced party supplies, a DIY disco ball piñata stands out as a beacon of creativity and thoughtful effort. There are numerous compelling reasons to embark on this crafting adventure:
- Unmatched Personalization: Tailor every aspect of your piñata, from its size and color scheme to the exact mix of goodies it holds. Want a specific shade of metallic? Or a mix of kid-friendly candies and adult-only mini treats? You have complete control.
- Budget-Friendly Fun: Crafting your own piñata often proves more economical than purchasing a custom-made one. Many of the supplies are readily available and affordable, allowing you to allocate more of your party budget to other exciting elements.
- Engaging Party Activity: The anticipation leading up to the piñata reveal is an event in itself. Whether it’s a traditional smash piñata or a modern pull-string version, it adds a structured, interactive game that breaks the ice and gets everyone involved.
- Stunning Visual Impact: A shimmering disco ball piñata isn’t just a game; it’s a magnificent piece of decor. Hung strategically, it catches the light beautifully, creating a festive ambiance that complements any party theme, especially one celebrating new beginnings or joyous milestones.
- A Sense of Accomplishment: There’s immense satisfaction in seeing your handmade creation bring joy and excitement to your guests. It’s a tangible representation of your effort and care for the celebration.
For New Year’s Eve, the disco ball theme is particularly fitting, symbolizing glamor, sparkle, and the joyous transition into a new year. The reflective surfaces of the metallic fringe evoke the celebratory lights and fireworks associated with the holiday, making your piñata a perfectly thematic centerpiece.
Essential Supplies for Your Shimmering Piñata Project
Gathering your materials is the first exciting step in bringing your disco ball piñata to life. Most of these items are easily found at craft stores, party supply shops, or even online. Here’s a detailed list:
- Paper Lantern: This forms the base of your piñata. Choose a sturdy, spherical lantern. Sizes typically range from 8 inches to 20 inches or more. A 12-16 inch lantern is a great starting point for a noticeable but manageable piñata. The color of the lantern itself isn’t critical since it will be covered, but a lighter color might prevent any show-through.
- Sturdy Ribbon (for hanging): Select a strong ribbon or cord, approximately 1-2 yards long, that can securely hold the weight of your filled piñata. Satin, grosgrain, or even decorative rope can work well.
- Ruler: Essential for precise measurements of your fringe strips, ensuring a consistent and neat appearance.
- Hole Puncher: A standard single-hole punch will be needed for creating the pull-string mechanism at the bottom of the piñata.
- Metallic Tissue Paper: This is the star of the show! Opt for silver, gold, iridescent, or a mix of metallic colors to achieve that iconic disco ball sparkle. You will need a significant amount – for a 12-inch lantern, plan for at least 15-20 sheets (20×26 inches each), possibly more for larger lanterns or denser fringe.
- Fringe Scissors (or Regular Scissors): Fringe scissors have multiple blades, making quick work of cutting several fringes at once. If you don’t have them, regular sharp scissors will work perfectly fine, though the process will be more time-consuming.
- Double-Sided Tape: Your primary adhesive for attaching the metallic fringe. Choose a strong, wide tape (1-inch width works well) for secure attachment. Craft glue or hot glue (used carefully) can be alternatives, but tape offers cleaner application and less drying time.
- Piñata Stuffers: This is where the fun truly begins! Consider a diverse mix of goodies:
- Candies: Individually wrapped chocolates, lollipops, chewy candies.
- Confetti: Biodegradable paper confetti, metallic confetti, or a mix for an extra burst of sparkle.
- Small Toys: Mini puzzles, bouncy balls, temporary tattoos, stickers, glow sticks (especially great for NYE!).
- Personalized Fortunes: Small slips of paper with positive affirmations, predictions for the new year, or fun dares.
- Adult-Friendly Additions (for 21+ parties): Mini liquor bottles (ensure they are plastic and durable), lottery tickets, or small, novelty items.
Ensure your stuffers are not too heavy, too fragile, or have sharp edges that could damage the piñata or injure guests.
Detailed Directions: Crafting Your Dazzling Disco Ball Piñata
Transforming a simple paper lantern into a show-stopping disco ball piñata is a gratifying process. Follow these comprehensive steps to ensure a beautiful and functional creation:
Step 1: Preparing Your Paper Lantern & Pull-String Mechanism
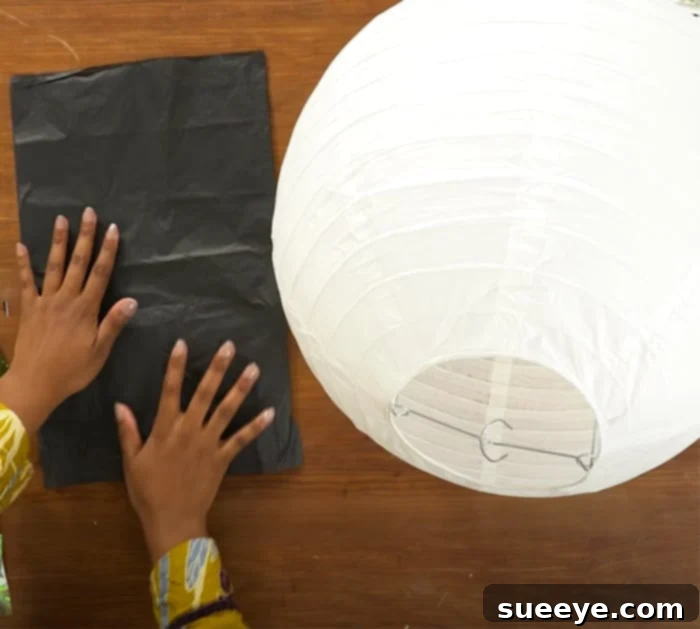
Begin by carefully expanding your paper lantern according to its manufacturer’s instructions, ensuring it forms a perfect sphere. Most lanterns come with a metal expander that fits inside. For a pull-string piñata, we need to create a release mechanism at the bottom.
- Identify the Bottom Opening: Paper lanterns typically have an opening at the bottom where the metal expander is inserted. This is where your piñata fillers will eventually exit.
- Create the Release Flap: Cut a circular piece of sturdy tissue paper or thin cardstock that is slightly larger than the bottom opening of your lantern. This will serve as your “trapdoor.”
- Form a Hinge: Using a small, easily breakable piece of tape (like masking tape or a very thin line of craft glue), attach one edge of this paper circle to the corresponding rim of the lantern’s bottom opening. This creates a hinge, allowing the door to swing open.
- Prepare Ribbons for Pulling: Cut approximately 10-15 pieces of decorative ribbon, each about 18-24 inches long. These will be your pull strings.
- Punch Holes: With your hole puncher, carefully create small holes around the unhinged perimeter of your paper trapdoor and corresponding holes around the lantern’s bottom rim.
- Attach Dummy Ribbons: Thread most of your ribbons through these holes, tying them securely to the paper trapdoor *only*. These are the “dummy” strings that won’t open the piñata, adding to the suspense.
- Attach the “Winning” Ribbon: For the one ribbon that will actually open the piñata, attach it in such a way that when pulled, it tears the tape of the hinge or pulls the entire trapdoor away from the lantern. A good method is to reinforce this specific ribbon’s attachment point to the trapdoor and ensure the hinge tape is just strong enough to hold the contents but weak enough to break with a firm tug. Alternatively, you can attach the winning ribbon to a small, reinforced tab on the *inside* of the trapdoor, designed to rip the hinge tape when pulled.
- Important Note on Internal Wires: The original instructions mentioned removing the wire. This typically refers to ensuring that the *internal metal expander* (the frame giving the lantern its shape) does not obstruct the pull-string mechanism or the free fall of the piñata contents. If the expander has wires that run across the bottom opening, gently bend or secure them out of the way, or ensure your trapdoor works around them. The main hanging wire at the top should remain.
Step 2: Preparing Your Metallic Fringe
This step is where your piñata starts to take on its signature disco ball texture. Patience here will pay off with a full and luxurious fringe.
- Cut Tissue Paper Strips: Start by cutting your metallic tissue paper into strips. A good working size is approximately 3 inches in length by 2 inches in width. Don’t worry about perfect squares; slight variations add to the handmade charm. Remember, you’ll need many of these – estimate around 150-300 pieces for a standard 12-16 inch lantern, depending on how dense you want the fringe.
- Create the Fringe: Take each 3×2 inch strip and, using your fringe scissors (or regular scissors), cut fringes about halfway up the 3-inch length. Ensure you don’t cut all the way through, leaving a solid 1.5-inch band at the top. If using regular scissors, make repeated, close cuts along one edge.
- Repeat: Continue this process until you have a substantial pile of fringed metallic strips. This is the most time-consuming part, so consider putting on some music or a podcast!
Step 3: Decorating the Lantern with Metallic Fringe
Now it’s time to bring the sparkle! This process involves layering the fringe to create a full, textured disco ball effect.
- Start from the Bottom: Begin attaching your fringe strips from the very bottom of the lantern, just above your pull-string mechanism. This ensures that subsequent layers overlap neatly.
- Apply Double-Sided Tape: Apply a horizontal strip of double-sided tape around the circumference of the lantern. Work in manageable sections (e.g., a quarter of the lantern at a time) to prevent the tape from losing its stickiness.
- Attach Fringe Strips: Carefully press the unfringed edge of your metallic strips onto the tape, ensuring the fringes hang downwards. Overlap each strip slightly as you work your way around the lantern, creating a continuous row.
- Layer Upwards: Once the first row is complete, apply another strip of double-sided tape directly above it, slightly overlapping the top of the first row’s fringe. Continue attaching fringe strips, working your way up the entire surface of the lantern in concentric circles. The goal is to cover the entire lantern evenly, leaving no gaps.
- Cover the Top: Don’t forget to cover the very top of the lantern, where the hanging loop is located. You can create a small “cap” of fringe or carefully apply strips in a circular pattern around the hanging point.
Step 4: Filling Your Piñata with Delights
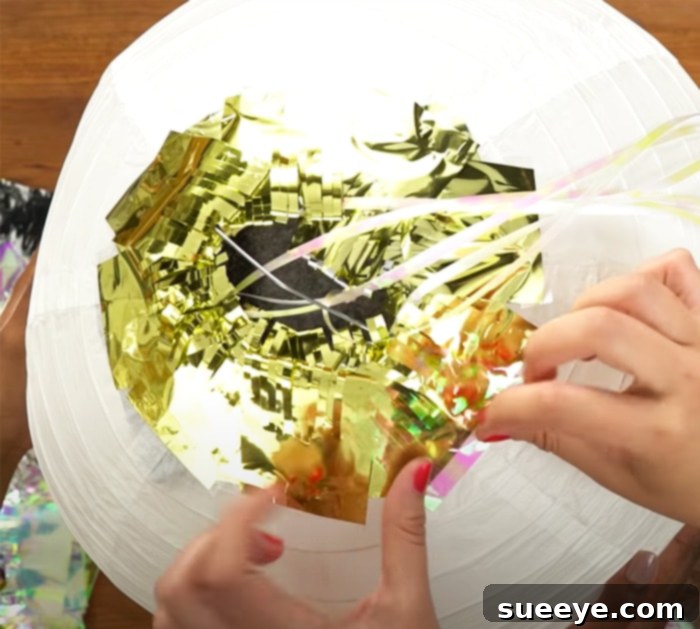
Once your disco ball is fully fringed and looking fabulous, it’s time to stuff it with all the wonderful goodies! This is best done through the top opening of the paper lantern, which usually has a larger access point.
- Open the Top: Gently open the top of the lantern (if it was sealed or if the hanging mechanism allows access).
- Fill Carefully: Begin filling your piñata with your chosen stuffers. Distribute the weight evenly to prevent the piñata from becoming lopsided. For a New Year’s Eve party, a mix of confetti and small items works beautifully. If including mini alcohol bottles, ensure they are plastic and durable.
- Don’t Overfill: While it’s tempting to cram in as much as possible, avoid overfilling. Too much weight can strain the piñata’s structure and the hanging ribbon, potentially causing it to break prematurely. Also, leave enough space for the items to fall out easily.
Step 5: Final Touches and Hanging Your Masterpiece
With your piñata stuffed and shimmering, it’s time for the grand finale – preparing it for display and the exciting reveal.
- Secure the Top: Once filled, ensure the top opening of your lantern is securely closed. You can use a small piece of tape or string to keep it shut, if necessary.
- Attach Hanging Ribbon: Thread your sturdy hanging ribbon through the loop at the very top of the paper lantern. Tie it securely with a strong knot, ensuring it can support the full weight of the piñata.
- Hang with Care: Choose a suitable location for hanging your piñata – somewhere with enough space for guests to gather safely, away from fragile objects. Use a strong hook or beam that can support the weight. Ensure the piñata hangs at an appropriate height for guests to reach the pull strings comfortably.
- Arrange Pull Strings: Fan out all the pull strings at the bottom of the piñata so they are easily accessible to guests.
Creative Customization Ideas for Any Occasion
While a disco ball piñata is perfect for New Year’s Eve, its versatility means it can be adapted for a multitude of other celebrations:
- Birthday Bashes: Customize the metallic tissue paper colors to match the birthday theme – gold for a milestone birthday, pink and silver for a princess party, or bright multi-colored metallics for a festive kid’s party.
- Anniversaries: Fill it with sentimental notes, small tokens representing shared memories, or even gift cards for a couple’s special day.
- Graduation Celebrations: Use school colors for the fringe and fill with small gifts relevant to their next chapter, like mini notebooks, pens, or good luck charms.
- Baby Showers or Gender Reveals: Use pink and blue metallics, or a mix of both if it’s a reveal. Fill with baby-themed treats or small pacifiers and rattles.
- Retro Theme Parties: A disco ball is inherently retro! Embrace the 70s or 80s vibe with fluorescent metallic tissue paper and era-specific small trinkets.
- Holiday Decor: Beyond New Year’s, consider a red and green metallic piñata for Christmas, or pastel metallics for Easter.
The beauty of this DIY project lies in its adaptability. Don’t be afraid to experiment with different patterns of fringe application, adding glitter glue, or incorporating other embellishments like stick-on rhinestones for extra bling. The only limit is your imagination!
Safety First: Tips for a Fun and Secure Piñata Experience
To ensure everyone has a fantastic and safe time, keep these points in mind:
- Hanging Location: Hang the piñata from a sturdy support that can bear its weight, and ensure there’s ample clear space around it for guests to stand and move without bumping into anything or anyone.
- Filler Selection: Avoid heavy, hard, or sharp objects, especially if children will be participating. Prioritize individually wrapped candies and soft, small toys. For adult parties with mini alcohol bottles, ensure they are lightweight plastic and clearly communicate the contents to guests.
- Supervision: For children’s parties, always have adult supervision during the piñata activity to ensure fair play and safety.
- Pull-String Safety: If you opt for a pull-string piñata, ensure all ribbons are easily accessible and that the release mechanism is safe and won’t cause the entire piñata to drop unexpectedly.
Conclusion: A Dazzling Celebration Awaits!
Crafting your own DIY disco ball confetti piñata is more than just a craft project; it’s an investment in creating memorable moments and adding a unique sparkle to your celebrations. From the initial cuts of metallic tissue paper to the final flourish of filling it with exciting treasures, each step builds anticipation for the grand reveal. This project, while requiring a touch of dedication, is ultimately straightforward and incredibly rewarding. Whether it’s the centerpiece of your New Year’s Eve countdown, a highlight of a birthday party, or a creative addition to any festive gathering, your handmade disco ball piñata is sure to dazzle, delight, and leave a lasting impression on all your guests.
So, gather your supplies, put on some festive music, and embark on this glittering journey. The joy of creating something beautiful with your own hands, and then watching it bring so much happiness to others, is truly unparalleled. Get ready to party in style with your very own, magnificent disco ball piñata!