
Walls are often the silent canvases of our homes, bearing witness to daily life. While they might not accumulate dust like shelves or furniture, they inevitably gather an array of fingerprints, scuff marks, and general grime over time. These subtle blemishes, if left unattended, can dull the vibrancy of your living spaces and detract from your home’s overall cleanliness. Regular wall and baseboard cleaning isn’t just about aesthetics; it contributes to a healthier environment by removing allergens and pollutants that settle on surfaces.
How to Effectively Clean Walls and Baseboards: Your Ultimate Guide to a Brighter Home
Many homeowners shy away from cleaning walls, fearing damage to paint or simply not knowing the most effective techniques. However, achieving sparkling clean walls and baseboards is far simpler than you might imagine, provided you use the right approach and gentle cleaning solutions. This comprehensive guide will walk you through a proven method, inspired by expert cleaning tutorials, to restore the freshness of your walls without harming their finish. Say goodbye to smudges and scuffs, and welcome a brighter, more inviting home environment.
The Importance of Regularly Cleaning Walls and Baseboards
Beyond the obvious aesthetic improvements, keeping your walls and baseboards clean offers several significant benefits:
- Enhanced Air Quality: Walls and baseboards collect dust, pet dander, and other airborne particles. Cleaning them reduces the amount of these allergens circulating in your home, leading to better indoor air quality, especially beneficial for those with allergies or respiratory issues.
- Preservation of Paint and Finishes: Grime and residues, if left too long, can degrade paint finishes over time, making them appear dull or even causing discoloration. Regular, gentle cleaning helps to preserve the life and luster of your paintwork.
- Brighter Living Spaces: Clean walls reflect light better, instantly making rooms feel larger, brighter, and more welcoming. Removing accumulated dirt can make a surprising difference in the overall ambiance of your home.
- Prevents Stain Buildup: Addressing minor marks and smudges promptly prevents them from becoming deeply ingrained stains that are much harder to remove later.
- Maintains Home Value: A well-maintained home, right down to clean walls and baseboards, presents better and can contribute positively to its perceived value and appeal.
Essential Preparations Before You Begin Your Wall Cleaning Journey
Before you dive into scrubbing, a few crucial preliminary steps will ensure a smooth and damage-free cleaning process. Preparation is key to protecting your paint and achieving optimal results.
Performing a Paint Patch Test: A Non-Negotiable Step
Not all paints are created equal, and some finishes are more delicate than others. Cleaning solutions, even mild ones, can sometimes react adversely with certain types of paint, leading to discoloration, streaking, or even paint removal. To avoid an unfortunate mishap, always perform a patch test:
- Choose an inconspicuous area: Select a small spot behind a large piece of furniture, a curtain, or in a hidden corner of the room.
- Apply your cleaning solution: Dip a clean, soft cloth or sponge in your prepared cleaning solution (hot water and dish soap), wring it out well, and gently dab the test area.
- Observe the reaction: Let the area dry completely. Check for any signs of adverse reaction such as paint lifting, color fading, streaking, or stickiness. If the paint shows any negative changes, discontinue use of that solution and consider using only plain water or consulting a professional. If it passes the test, you can proceed with confidence.
Dusting Your Walls Thoroughly: The First Layer of Defense
Before any wet cleaning begins, it’s paramount to remove loose dust, cobwebs, and light debris from your walls and baseboards. Skipping this step can turn dust into muddy streaks when wet, making your job harder. This process is surprisingly simple yet highly effective:
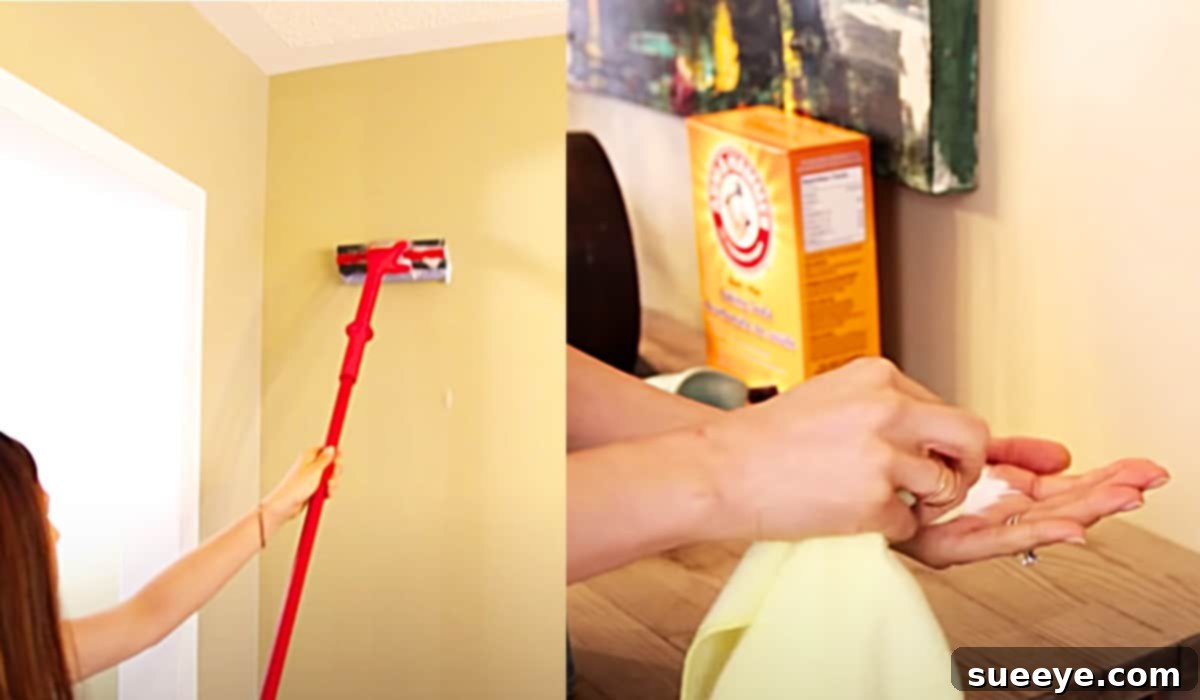
- Gather Your Tools: A dry microfiber mop, a duster with an extendable handle, or a vacuum cleaner with a soft brush attachment are excellent choices.
- Work from Top to Bottom: Start at the ceiling and work your way down the walls. This ensures that any dislodged dust falls to areas you haven’t cleaned yet.
- Gentle Strokes: Use long, gentle strokes to sweep dust away. For textured walls, pay extra attention to crevices where dust loves to hide.
- Don’t Forget Baseboards and Trim: Use a handheld duster or vacuum attachment to meticulously clean the top and front surfaces of your baseboards and any door or window trim.
Gathering Your Wall Cleaning Arsenal: Essential Materials Needed
With your preparations complete, it’s time to assemble the simple yet effective tools and solutions required for a sparkling clean home. You’ll be surprised how few items you truly need.
- 1-2 Buckets: Essential for holding your cleaning solution and, ideally, a separate one for rinsing your mop or cloths.
- Hot Water: Helps to dissolve grease and grime more effectively than cold water.
- 1 Teaspoon of Mild Dish Soap: Opt for a gentle, all-purpose dish soap that is free of harsh chemicals, dyes, or strong fragrances to protect your paint. Dawn, Palmolive, or similar brands often work well.
- 1 Teaspoon of Baking Soda: An excellent natural abrasive and deodorizer, perfect for tackling stubborn spot stains.
- Sponge Mop or Flat-Head Mop: A crucial tool for reaching high areas and efficiently covering large wall surfaces. A flat-head mop with a washable microfiber pad is particularly effective.
- Microfiber Rags/Cloths (multiple): Highly absorbent and gentle, microfiber is ideal for drying walls and for spot cleaning without leaving lint or streaks.
- Regular Nap Rag or Soft Towel: Useful for general wiping or as an additional drying cloth.
- Gloves: Protect your hands from the cleaning solution and prolonged exposure to water.
- Safety Goggles (Optional but Recommended): Especially when cleaning high areas, to prevent drips from getting into your eyes.
Step-by-Step Guide to Sparkling Clean Walls and Baseboards
Now that you’re prepared and equipped, let’s get down to the actual cleaning process. Following these steps will ensure a thorough and damage-free clean, leaving your walls looking fresh and rejuvenated.
Step 1: Prepare Your Gentle Wall Cleaning Solution
The foundation of our cleaning method lies in a simple yet effective solution. Fill your first bucket with hot water. The warmth of the water helps to break down oils, grease, and dirt more efficiently. Add just one teaspoon of your chosen mild dish soap. This small amount is sufficient to create a gentle lather that cleans effectively without leaving excessive residue or requiring extensive rinsing. Stir the mixture gently to combine.
Step 2: Initiate the Wall Washing Process
Submerge your sponge mop (or a flat-head mop with a microfiber pad) into the prepared cleaning solution. It’s crucial to wring out the mop thoroughly until it’s just damp, not dripping wet. Excess water can lead to streaks, drip marks, and potential water damage to walls or floors. Begin mopping your walls from the top down, working in small sections. Use gentle, overlapping strokes to ensure even coverage. For extremely dirty sections, you might need to re-dip and wring your mop more frequently. Remember to change your cleaning solution regularly when it becomes visibly dirty to avoid spreading grime.
Step 3: Promptly Dry the Cleaned Wall Sections
Once you’ve washed a section of the wall, immediately follow up by drying it. Attach a clean, dry microfiber cloth to your flat-head mop or use a separate, clean microfiber rag for this task. Drying is critical to prevent water spots, streaks, and to ensure no moisture is left lingering on the paint, which could cause damage over time. Wipe the wall gently but firmly, ensuring all moisture is absorbed. This step is as important as washing for achieving a flawless finish.
Step 4: Tackle Stubborn Stains with Targeted Spot Cleaning
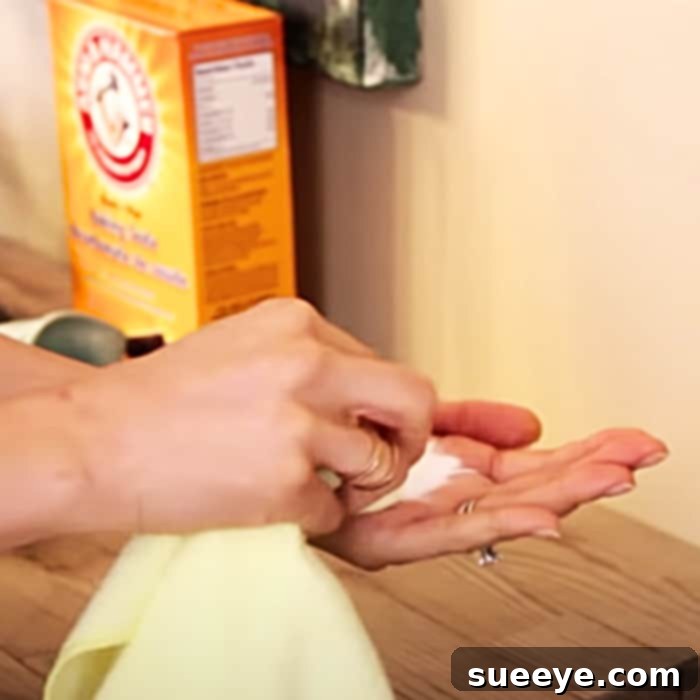
After the general wash, you might notice some more stubborn marks that persist. This is where baking soda comes in handy. Create a gentle paste by mixing a teaspoon of baking soda with just a few drops of water until it forms a thick consistency. Dip a damp microfiber cloth into this paste. Gently rub the affected area using a circular motion. Baking soda acts as a mild abrasive that can lift scuffs, crayon marks, and some grease stains without harsh chemicals. After scrubbing, wipe the area clean with a fresh, damp cloth to remove any baking soda residue, then dry it thoroughly. For particularly tough marks like permanent marker, exercise extreme caution and test a small area first, as stronger solutions may be required or professional help.
Focusing on Baseboards: A Detailed Approach for Neglected Areas
Baseboards are often overlooked, yet they accumulate an incredible amount of dust, dirt, and scuff marks, especially from shoes and vacuum cleaners. Their proximity to the floor makes them a magnet for grime. Here’s how to give them the attention they deserve:
- Initial Dusting: Just like walls, start with a thorough dry dusting. Use a vacuum cleaner with a brush attachment or a dry microfiber cloth to remove all loose dust and debris. Pay attention to the top edge and any intricate carvings.
- Targeted Cleaning Solution: You can use the same mild dish soap and hot water solution. For baseboards, a handheld sponge or a regular microfiber rag is often more maneuverable than a mop.
- Scrubbing Scuff Marks: For stubborn scuff marks, the baking soda paste method is highly effective. Alternatively, a melamine foam eraser (like a “Magic Eraser”) can be incredibly useful, but always use it with caution and test in an inconspicuous area first, as it can sometimes remove paint or alter the finish if used too aggressively.
- Don’t Forget Corners and Edges: Use an old toothbrush or a cotton swab to get into tight corners and along the caulk lines where dirt tends to accumulate.
- Dry Thoroughly: Always dry baseboards immediately after cleaning to prevent water damage to the wood or paint and to avoid attracting new dust to damp surfaces.
Advanced Tips and Tricks for Wall Cleaning Success
To further enhance your wall cleaning routine and tackle specific challenges, consider these expert tips:
- Address Different Stain Types:
- Grease Marks: For kitchen walls, a slightly stronger solution of dish soap can be used, or a degreasing cleaner specifically designed for walls (always patch test).
- Crayon/Pencil Marks: Baking soda paste is often effective. For stubborn crayon, a small amount of toothpaste (non-gel, white) can work wonders. Apply with a cloth, rub gently, then wipe clean.
- Ink Stains: These are tricky. Rubbing alcohol or hairspray can sometimes lift fresh ink stains, but test carefully as they can also damage paint.
- Fingerprints: The mild dish soap solution is usually sufficient for common fingerprints.
- Cleaning Textured Walls: Textured walls require a bit more care. Use softer brushes or sponges, and be extra gentle to avoid damaging the texture. A damp microfiber cloth wrapped around a stiff brush can help get into crevices. Avoid overly wet cleaning, as water can get trapped in the texture.
- Work in Sections: Always clean and dry walls in manageable sections to prevent water from drying on its own and leaving streaks.
- Protect Your Floors: Lay down old towels or drop cloths along the base of the walls to catch any drips and protect your flooring.
- Consider Your Paint Finish:
- Flat/Matte Finish: These are the most delicate and prone to showing water marks or rubbing off. Be extra gentle and use minimal moisture.
- Eggshell/Satin Finish: More durable than flat, these can generally withstand gentle cleaning.
- Semi-Gloss/Gloss Finish: The most durable and easiest to clean, often found in kitchens and bathrooms.
Maintaining Your Walls Between Deep Cleans
Preventative maintenance can significantly reduce the frequency and intensity of deep cleaning sessions:
- Regular Dusting: A quick dry dusting of walls and baseboards every month or two can prevent heavy dust buildup.
- Immediate Spot Treatment: Address new smudges or marks as soon as they appear with a damp cloth or a tiny bit of your mild cleaning solution.
- Strategic Furniture Placement: Avoid placing furniture directly against walls where possible to minimize scuff marks.
- Hand Washing Awareness: Encourage family members to wash hands regularly, especially after activities that might lead to dirty hands (e.g., gardening, cooking), to reduce transferred grime to walls.
Conclusion: Enjoy Your Fresher, Brighter Home
Cleaning walls and baseboards might seem like a daunting task, but with the right tools, a gentle approach, and this step-by-step guide, it becomes an achievable and rewarding home maintenance activity. The method outlined above, drawing inspiration from expert tutorials by Clean My Space on YouTube, is designed to be effective and safe for most paint finishes. By investing a little time and effort, you’ll not only remove visible dirt and grime but also enhance the air quality and overall ambiance of your living spaces. Revel in the satisfaction of impeccably clean walls and baseboards that contribute to a truly welcoming and vibrant home environment.