

How to Wash Your Car Properly: An Expert’s Guide to Preserving Your Investment
Embarking on the journey of car maintenance can seem daunting, but few steps are as crucial, or as rewarding, as a proper car wash. It’s more than just about aesthetics; it’s about protecting a significant investment. When I first encountered the invaluable insights shared by Pan The Organizer on YouTube, I was genuinely thrilled. His twenty years of car detailing experience shine through, offering practical, veteran-approved tips that transform a simple wash into a meticulous detailing session. A clean car undeniably looks better, but a correctly washed car also safeguards its paintwork, prevents premature wear, and helps maintain its resale value. Neglecting proper cleaning and maintenance can quickly lead to irreversible damage, making it paramount to adopt the right techniques before it’s too late. This comprehensive guide, inspired by expert advice, will walk you through every step to achieve a showroom-quality finish right in your driveway.
Why Proper Car Washing Matters: Beyond Just a Clean Look
Many car owners view washing their vehicle as a chore, a superficial task to remove dirt. However, understanding the deeper implications reveals that it’s a critical aspect of vehicle longevity and preservation. Every day, your car is exposed to environmental hazards: road grime, industrial fallout, bird droppings, tree sap, UV rays, and acid rain. These elements, if left on the paint surface, can etch, stain, and degrade the clear coat over time, leading to dullness, fading, and even rust. A proper wash doesn’t just remove these contaminants; it prepares the surface for subsequent protection like waxing or sealing, creating a barrier against future damage. Investing a little time in learning and applying professional washing techniques means you’re not just cleaning your car; you’re actively contributing to its health, appearance, and value for years to come.
Essential Materials for a Professional Car Wash at Home
The secret to a scratch-free, effective car wash begins with the right tools. Skimping on materials can lead to swirl marks, dull paint, and an overall unsatisfying result. Here’s a detailed look at what you’ll need to wash your car properly, ensuring every item serves a specific, protective purpose:
- High-Quality Microfiber Washing Mitts (Minimum 2 recommended): Not all wash mitts are created equal. Opt for plush, deep-pile microfiber mitts that can lift and trap dirt particles away from the paint surface, significantly reducing the risk of scratching. The “two mitts” rule is non-negotiable: one mitt should be exclusively for the car’s painted surfaces (roof, hood, doors, trunk), and a separate, distinctively colored mitt should be reserved solely for the grittier, dirtier areas like wheels and lower rocker panels. This separation prevents transferring abrasive grit from the wheels to your pristine paintwork.
- Proper pH-Neutral Car Shampoo: This is perhaps the most critical item. Never use household dish soap! Dish soaps are formulated to cut through grease and oils, which means they will strip away any protective waxes or sealants on your car’s paint, leaving it vulnerable to the elements and prone to drying out rubber and plastic components. A dedicated car shampoo is pH-neutral, meaning it’s gentle on your car’s finish and existing protection, yet highly effective at lifting dirt. It also produces rich suds that provide lubrication, allowing your wash mitt to glide smoothly across the surface.
- Two Buckets (with Grit Guards): This is the cornerstone of the “two-bucket method,” a technique widely advocated by detailing professionals to prevent swirl marks. One bucket is for your soapy wash solution, and the other is for clean rinse water. Each bucket should ideally be equipped with a grit guard – a grate placed at the bottom that traps dirt and debris, preventing your wash mitt from picking up contaminants that could scratch your paint. When you rinse your mitt, rub it against the grit guard to dislodge embedded dirt before dipping it back into the clean soap solution.
- Dedicated Wheel & Tire Cleaning Tools: Wheels and tires accumulate significantly more brake dust, road grime, and stubborn dirt than the rest of the car. Using a separate set of tools for these areas is crucial. This includes a sturdy wheel brush (designed to reach into spokes and barrels), a dedicated tire brush for scrubbing sidewalls, and a specific wheel cleaner. Ensure your wheel cleaner is safe for your specific wheel type (e.g., acid-free for clear-coated or painted wheels).
- Premium Microfiber Drying Towels (Waffle Weave or Twisted Pile): The drying process is often where new scratches and swirl marks are introduced. Avoid using old bath towels or cotton cloths, as they are too abrasive. High-quality microfiber drying towels, particularly those with a waffle weave or twisted pile construction, are incredibly absorbent and designed to wick away water without scratching the paint. They are soft, lint-free, and reduce the need for excessive wiping.
- Hose with a Quality Nozzle: A good hose nozzle allows you to control the water flow, from a gentle rinse to a stronger jet for dislodging stubborn dirt. A gentle, fan-like spray is ideal for rinsing off soap without pushing dirt deeper into crevices.
- Optional but Recommended:
- Tire Dressing Applicator: For applying tire shine evenly without making a mess.
- Quick Detailer or Drying Aid: Can be misted onto the paint during drying to lubricate the surface further and enhance shine, reducing the chance of water spots and leaving a streak-free finish.
- Leaf Blower or Car Dryer: For forced-air drying, especially useful for blowing water out of crevices, emblems, and mirrors, minimizing drips and contact drying.
Setting the Stage: Ideal Conditions for Car Washing
Even with the best materials, washing your car in the wrong conditions can undermine your efforts. The environment plays a significant role in achieving a perfect, streak-free finish. Here’s how to create the optimal setting for your car wash:
- Time of Day: Late Afternoon or Early Evening: Avoid washing your car in the scorching midday sun. Direct sunlight and high temperatures cause water and soap to dry too quickly on the paint surface, leading to unsightly water spots, streaks, and even etching, especially if your water supply has a high mineral content. Washing your car when temperatures are cooler and the sun is less intense (e.g., late afternoon or early evening) allows the soap to work its magic and gives you ample time to rinse thoroughly before anything dries.
- Location: Shady Spot is Key: Complementing the ideal time of day, washing your car in a shaded area is crucial. Whether it’s under a tree (be mindful of sap and falling debris!), in a garage, or beside a building, shade prevents premature drying of soap and water. This gives you more working time and ensures a more uniform, spot-free result.
- Weather Conditions: Avoid Wind and Rain: While a light breeze might seem pleasant, strong winds can kick up dust, pollen, and other airborne contaminants that can settle on your wet, soapy car, negating your efforts and potentially scratching the paint during drying. Naturally, avoid washing during rain, but also be aware of the forecast for the immediate future to ensure your freshly cleaned car isn’t immediately soiled.
The Step-by-Step Guide to Washing Your Car Like a Pro
Now that you have your materials ready and the conditions are perfect, it’s time to dive into the washing process. Following these steps ensures maximum effectiveness and protection for your vehicle.
Step 1: The Pre-Rinse – Removing Loose Debris
Begin by thoroughly rinsing your entire car with a strong, but not overly aggressive, stream of water from your hose. Start from the top and work your way downwards. The goal here is to dislodge and wash away any loose dirt, dust, pollen, and major contaminants before you even touch the paint with a wash mitt. This pre-rinse minimizes the amount of abrasive grit that your mitt will encounter, significantly reducing the risk of scratching. Pay extra attention to wheel wells and rocker panels, where much of the heavier grime accumulates.
Step 2: Preparing Your Wash Solution
Set up your two buckets: one for your wash solution and one for clean rinse water, both equipped with grit guards. Following the instructions on your chosen car shampoo, dilute the soap concentrate with water in your “wash” bucket. Fill the “rinse” bucket with clean water. Having both buckets ready before you start washing ensures a smooth and efficient process.
Step 3: Washing the Main Body – The Top-Down Approach
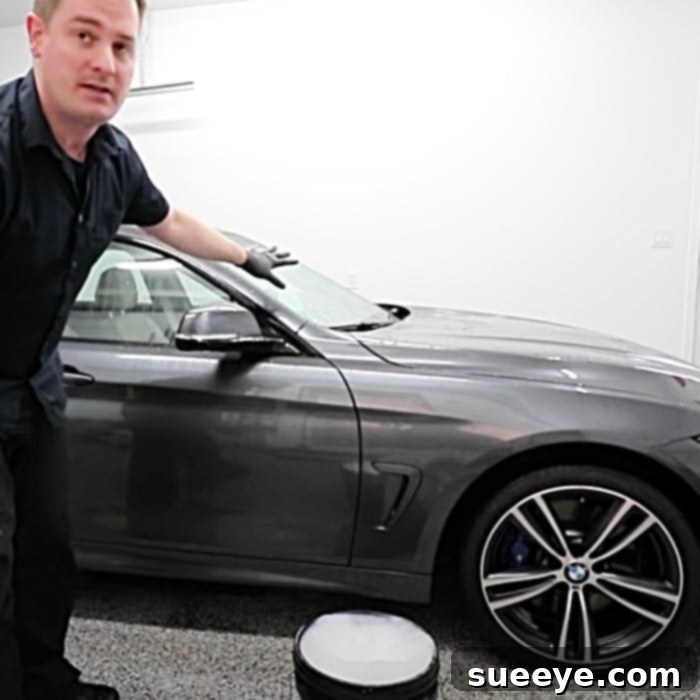
This is where the expert technique truly comes into play. You will begin by dipping your designated paint-only wash mitt into the soapy solution. The cardinal rule is to always start at the cleanest part of the car and work your way down to the dirtiest sections. Most of the grit and grime collects near the bottom of the vehicle, as well as on the wheels and tires. If you start at the bottom, you’ll be picking up the heaviest dirt and spreading it onto the overall car’s surface as you work upwards. Therefore, start at the mid-portion of the roof, then move to the windows, upper panels, hood, trunk, and finally the lower body panels. Work in small sections, washing one panel or half-panel at a time. After washing each section, rinse your mitt thoroughly in the clean water bucket (agitating it against the grit guard) before re-dipping it into the soapy solution. This constant rinsing keeps your wash mitt free of abrasive particles.
Step 4: Thorough Rinsing – Washing Away the Suds
Once you’ve washed a section or the entire car (depending on how quickly you work and how hot it is), it’s crucial to rinse all the soap off thoroughly before it dries. Starting from the top again, use a gentle, continuous flow of water to sheet the soap off the panels. Allow the water to cascade over the car’s surface, carrying the soap and remaining contaminants with it. Ensure no suds or soap residue are left behind, as they can dry and leave streaks or spots. If you’re working on a larger vehicle or in warmer conditions, it’s often best to wash and rinse one or two panels at a time to prevent soap from drying prematurely.
Step 5: Dedicated Wheel and Tire Cleaning
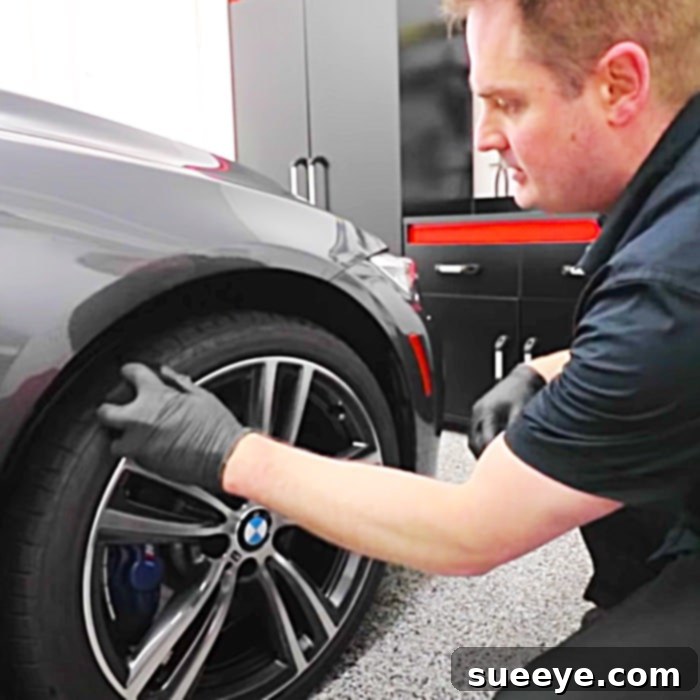
This step should always be performed after the main body wash, and critically, with dedicated tools. Using the separate, designated wash mitt and brushes for your wheels and tires, apply your wheel cleaner according to its instructions. Allow it to dwell for the recommended time to loosen brake dust and grime. Then, use your wheel brush to agitate the cleaner on the wheel faces, spokes, and barrels. Use your tire brush to scrub the tire sidewalls, removing old tire dressing and road film. Rinse each wheel and tire thoroughly, ensuring all cleaner and grime are washed away. Pan The Organizer provides excellent additional tips in his video tutorial on tackling these often-stubborn areas, making sure they gleam.
Step 6: The Critical Drying Process – Preventing Water Spots
Drying is just as important as washing. Leaving water to air dry, especially if you have hard water, will inevitably lead to unsightly water spots. Immediately after the final rinse, start drying your car. Grab your premium microfiber drying towels. The most effective method is often a “blotting” or “sheeting” technique: lay the large towel flat on a wet panel and gently pat or drag it without applying excessive pressure. For best results, use a leaf blower or car dryer first to blow off as much standing water as possible, especially from crevices, door jams, and mirror housings, before finishing with towels. This reduces the amount of contact drying needed and minimizes the chances of leaving streaks or introducing new scratches. If you’re using a quick detailer or drying aid, mist it onto the wet surface before wiping with the drying towel for added lubrication and shine.
Beyond the Wash: Enhancing and Maintaining Your Car’s Finish
A proper wash provides a clean slate. To truly protect and enhance your car’s appearance, consider these additional steps:
Applying Tire Dressing for a Pristine Look
Once your tires are clean and dry, apply a high-quality tire dressing using a dedicated applicator. This step not only gives your tires a rich, dark, and conditioned look but also helps protect them from UV rays and environmental elements that can cause cracking and fading. Choose between a matte, satin, or high-gloss finish based on your preference. Ensure even application and wipe off any excess to prevent “tire sling” onto your paint.
Quick Detailers and Sealants for Added Protection
For an extra layer of gloss and protection, after drying, you can apply a spray wax, sealant, or ceramic boost product. These are quick to apply and buff off, providing additional UV protection, enhancing the paint’s depth, and making future washes easier. They create a sacrificial layer that protects your clear coat from minor contaminants and aids in water beading.
Cleaning Windows for Crystal-Clear Visibility
Don’t forget the windows! A clean car with streaky windows diminishes the overall effect. Use a dedicated automotive glass cleaner and two clean, specific microfiber towels (one for application, one for buffing) to achieve streak-free clarity on all glass surfaces, inside and out. Roll down your windows slightly to clean the top edge, which often gets missed.
Common Car Washing Mistakes to Avoid
Even with the best intentions, some common mistakes can compromise your car washing efforts. Being aware of these pitfalls can save you time, money, and potential damage to your vehicle:
- Using Dish Soap or Household Cleaners: As previously mentioned, this is a cardinal sin in car care. These products are too harsh and will strip waxes, dry out plastics, and dull your paint. Always use a pH-neutral car shampoo.
- Washing in Direct Sunlight or High Heat: This leads to rapid drying of soap and water, resulting in stubborn water spots and streaks. Always wash in the shade and during cooler parts of the day.
- Not Using a Grit Guard: Washing without a grit guard allows dirt and grit from your mitt to resuspend in your wash water, turning your wash bucket into a potent source of swirl marks.
- Using Dirty or Old Towels/Mitts: Reusing dirty wash mitts or old, abrasive towels is a sure way to scratch your paint. Always use clean, dedicated microfiber tools for washing and drying.
- Letting Soap Dry on the Car: If soap dries on the paint before rinsing, it can leave behind residue and streaking that are difficult to remove without re-washing the affected area.
- Washing Bottom-Up: Starting from the dirtiest parts (like the lower body panels) and moving upwards only spreads the heaviest grit across cleaner surfaces, increasing the risk of scratches. Always wash top-down.
- Using Excessive Pressure: While you need to remove dirt, scrubbing too hard, especially with a dry or poorly lubricated mitt, can abrade the clear coat. Let the soap and mitt do the work with gentle passes.
Conclusion: Protecting Your Investment, One Wash at a Time
The journey to a perfectly clean and protected car is an ongoing one, but with the right techniques and tools, it becomes a satisfying and rewarding endeavor. Following these expert tips, championed by detailing veterans like Pan The Organizer, ensures that each wash isn’t just about making your car look good, but about actively preserving its finish, integrity, and long-term value. These tips are truly valuable to help keep your car in pristine shape. By investing a little extra time and care into the process, you’re not just cleaning a vehicle; you’re safeguarding an asset and enjoying the pride that comes with owning a beautifully maintained automobile. Make these practices a regular part of your car care routine, and you’ll reap the benefits of a vehicle that looks better, lasts longer, and holds its value more effectively.