
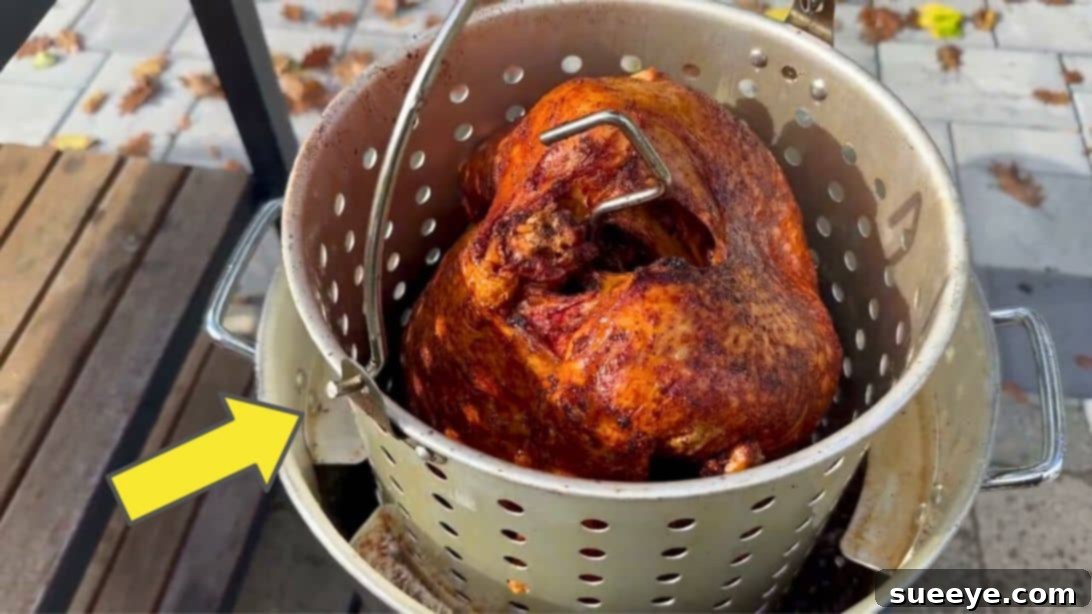
Tired of the same old oven-roasted turkey? If you’re seeking an exciting and incredibly delicious new way to prepare your holiday bird, it’s time to explore the world of deep-frying. Imagine a turkey with unbelievably crispy, golden-brown skin that practically shatters with every bite, encasing incredibly moist, tender meat bursting with flavor. This isn’t just a meal; it’s an experience. Deep-fried turkey is a game-changer, especially for those who adore crispy textures and crave a truly succulent bird. For your upcoming Thanksgiving or any festive gathering, mastering the art of deep-frying a turkey is far easier and less complicated than you might anticipate, and the results are absolutely worth it.
RELATED: How to Quickly Defrost a Turkey
To achieve the pinnacle of moistness and tenderness, we highly recommend brining your turkey before deep-frying. While not strictly mandatory, this simple step makes a dramatic difference, infusing the meat with flavor and ensuring it stays juicy even under the intense heat of the fryer. Trust us, it’s a secret to culinary success that you won’t regret. If you’re eager to see the process in action, you can learn how to deep fry a whole turkey with MartinsPotatoRolls’ comprehensive video tutorial.
Here’s another recipe you might want to try: Easy Stovetop Turkey Chili Recipe
Why Deep-Fry Your Thanksgiving Turkey?
Deep-frying offers distinct advantages over traditional oven roasting. The rapid cooking process creates a unique crust while locking in moisture, preventing the meat from drying out. The intense heat cooks the turkey quickly and evenly, resulting in a significantly shorter cooking time than oven roasting, freeing up your oven for other side dishes. Moreover, the characteristic flavor imparted by the hot oil, especially peanut oil, is truly something special that will impress your guests and elevate your holiday feast.
Essential Preparations for a Safe and Delicious Deep-Fried Turkey
Safety First: Deep-Frying Guidelines
Deep-frying a turkey involves working with a large volume of hot oil and a propane burner, which requires careful attention to safety. Never attempt this indoors or in a garage. Always keep a Class B or K fire extinguisher nearby and ensure you have a clear understanding of how to use it. Proper safety precautions are paramount to prevent accidents and ensure a smooth cooking experience.
Equipment You’ll Need:
- Turkey Fryer Kit: Includes a large pot (typically 30-40 quart), a propane burner stand, and a lifting hook with a turkey basket.
- Propane Tank: A standard 20-pound tank for your burner.
- Long-Stem Thermometer: Essential for monitoring oil temperature (clip-on recommended) and meat internal temperature.
- High-Heat Resistant Gloves and Long Apron: For personal protection against hot oil splatters.
- Paper Towels: For thoroughly drying the turkey and equipment.
- Stick or Ruler: For accurately determining oil fill level.
- Wire Rack and Baking Sheet: For draining the cooked turkey.
- Class B or K Fire Extinguisher: Absolutely critical for oil fires.
- Peanut Oil: Or another high-smoke-point oil (e.g., canola, grapeseed).
Choosing and Preparing Your Turkey:
Select a turkey that weighs between 10-14 pounds. Larger turkeys can be difficult to manage in most fryers and may cook unevenly. It is absolutely crucial that your turkey is completely thawed before deep-frying. A frozen or partially frozen turkey submerged in hot oil can cause a dangerous oil overflow and explosion. For thawing instructions, refer to our related guide: How to Quickly Defrost a Turkey. As mentioned, brining the turkey for several hours or overnight is highly recommended to ensure maximum moisture and flavor. A simple brine of water, salt, sugar, and aromatics will make a significant difference in the final product.
The Ultimate Guide to Deep-Frying a Whole Turkey
Step 1: Select Your Safe Frying Location
Safety is non-negotiable when deep-frying. Choose a level, outdoor spot far away from any combustible structures, such as your house, garage, deck, or wooden fences. A concrete driveway or a stone patio is ideal. Ensure the area is clear of debris and has good ventilation. Avoid windy areas, which can affect burner performance and increase the risk of oil splatter.
Step 2: Determine the Correct Oil Level – The Water Displacement Test
This step is critical for safety, preventing dangerous oil overflows. Place your thawed, unbrined turkey into the fryer basket and carefully lower it into the empty fry pot. Fill the pot with water just until the top of the turkey is covered by about 1-2 inches. Remove the turkey and basket, allowing the excess water to drain. Use a stick or ruler to mark the water level inside the pot. This mark indicates the exact amount of oil you’ll need. Discard all the water and thoroughly dry the pot.
Step 3: Thoroughly Dry Your Turkey and Equipment
Water and hot oil do not mix, and even a small amount of moisture can cause explosive splattering. After determining the oil level, completely dry the inside and outside of your turkey using plenty of paper towels. Pay extra attention to the cavity and any crevices. Ensure the fryer pot and basket are also completely dry before proceeding. This step is vital for preventing dangerous situations.
Step 4: Set Up the Fryer and Heat the Oil
Position your fryer stand and pot at your chosen safe outdoor location. Fill the turkey fryer pot with peanut oil (or your preferred high-smoke-point oil) up to the mark you made in Step 2. Attach the propane tank to the burner and carefully light it according to the manufacturer’s instructions. Slowly heat the oil to 350°F (175°C), continuously monitoring the temperature with your long-stem thermometer. Do not leave heating oil unattended.
Step 5: Marinate and Season Your Turkey
While the oil heats, prepare your turkey for flavor. You can inject it with a marinade (e.g., Cajun butter, herb-garlic butter) or apply a dry rub to the skin. Remember that some of the dry rub might wash off slightly when submerged in the oil, but a good amount of flavor will penetrate. For best results, use a combination of injection and a light rub. Ensure your seasoning choices complement the intense flavor of fried turkey.
Step 6: Prepare the Turkey for Immersion
Carefully place your seasoned turkey into the fryer basket. Ensure it fits snugly and is positioned for even cooking. This step is easier to do while the turkey is still on a stable surface, rather than trying to load it while handling hot oil.
Step 7: Don Your Personal Safety Gear
Before proceeding, put on heavy-duty, heat-resistant rubber gloves that cover your forearms, and a long, thick apron. Eye protection is also highly recommended. These items will shield you from any potential splatters of extremely hot oil, which can cause severe burns.
Step 8: Safely Lower the Turkey and Begin Cooking
Crucial Safety Step: Turn off the propane burner completely before lowering the turkey. This prevents immediate flare-ups from oil displacement. Using the lifting hook, very slowly and carefully lower the turkey in its basket into the hot oil. This process must be done gradually to minimize splashing and allow the oil to adjust. Once the turkey is fully submerged, you can safely turn the flame back on. Place the lid loosely on the pot to help maintain temperature, but be aware of steam buildup. Monitor the oil temperature constantly, aiming to keep it around 325-350°F (163-175°C). The turkey will cook for approximately 3 to 4 minutes per pound. For example, a 10-pound turkey will typically take about 30 to 40 minutes.
Step 9: Check for Doneness and Rest Your Turkey
When the estimated cooking time is up, turn off the gas burner again. Slowly and carefully raise the turkey out of the boiling oil. Allow excess oil to drip back into the pot. Place the basket on a wire rack set over a baking sheet to catch any remaining drips. Using a meat thermometer, check the internal temperature: the breast meat should reach 165°F (74°C) and the thigh meat 175°F (79°C). Be extremely careful, as the turkey and oil will be scalding hot. Once the desired temperatures are reached, remove the turkey from the basket and let it rest for at least 20-30 minutes before carving. Resting allows the juices to redistribute, ensuring an incredibly moist and flavorful bird.
Tips for the Perfect Deep-Fried Turkey
- Brining is Key: Don’t skip the brining step! It’s the best way to ensure a moist, flavorful turkey.
- Inject for Extra Flavor: Use a specialized injector to infuse marinades directly into the turkey meat for an extra punch of flavor.
- Monitor Oil Temperature Closely: Fluctuations in oil temperature can lead to unevenly cooked or greasy turkey. Keep a close eye on your thermometer.
- Never Overfill the Pot: Always use the water displacement method to find the correct oil level to prevent dangerous overflows.
- Rest Your Turkey: Just like with roasting, resting your deep-fried turkey is crucial for retaining juices and tenderness.
- Use the Right Oil: Peanut oil is highly recommended due to its high smoke point and neutral flavor, which allows the turkey’s taste to shine through. Canola or grapeseed oil are also good alternatives.
- Plan for Oil Disposal: Once the oil has cooled completely, it can be strained and reused for a few more cooks, or disposed of properly in sealed containers (check local regulations).
Frequently Asked Questions About Deep-Frying Turkey
What size turkey is best for deep-frying?
Most turkey fryers are designed for turkeys between 10-14 pounds. This size cooks more evenly and is safer to handle in the hot oil. Larger birds become unwieldy and pose a greater risk of overflow.
How long does it take to deep-fry a turkey?
Generally, it takes 3 to 4 minutes per pound at an oil temperature of 325-350°F (163-175°C). So, a 12-pound turkey would cook in approximately 36-48 minutes.
Can I deep-fry a frozen turkey?
Absolutely NOT. This is extremely dangerous. A frozen or partially frozen turkey will cause the oil to boil over violently and can lead to a severe fire or explosion. Ensure your turkey is completely thawed and thoroughly dried before it comes anywhere near the hot oil.
What type of oil should I use?
Peanut oil is the gold standard for deep-frying turkey due to its high smoke point (around 450°F/232°C) and neutral flavor profile. Canola oil, grapeseed oil, or sunflower oil are also suitable alternatives with similar properties.
How do I safely dispose of the used oil?
Allow the oil to cool completely, which can take several hours or even overnight. Once cool, you can strain it to remove food particles and store it in a clean container for reuse (usually 2-3 more times). If disposing, pour it into non-recyclable containers (like milk jugs or plastic bottles) and seal them tightly, then discard them with your regular trash. Never pour oil down the drain.
Is deep-frying turkey safe?
Yes, if proper safety precautions are followed diligently. The key is to always fry outdoors, use a completely thawed and dry turkey, monitor oil temperatures, and have a fire extinguisher on hand. Neglecting these precautions can make it very dangerous.
Conclusion: Embrace the Crispy Revolution!
Deep-frying a turkey offers an unparalleled culinary experience, transforming a traditional holiday staple into something truly extraordinary. With its impossibly crispy skin and incredibly juicy, flavorful meat, a deep-fried turkey is sure to become the star of your next festive meal. By following this comprehensive guide, prioritizing safety, and paying attention to detail, you’ll discover that achieving this delicious masterpiece is not only attainable but also immensely rewarding. So, step outside your comfort zone this holiday season, embrace the fryer, and prepare to delight your family and friends with the best turkey they’ve ever tasted!