
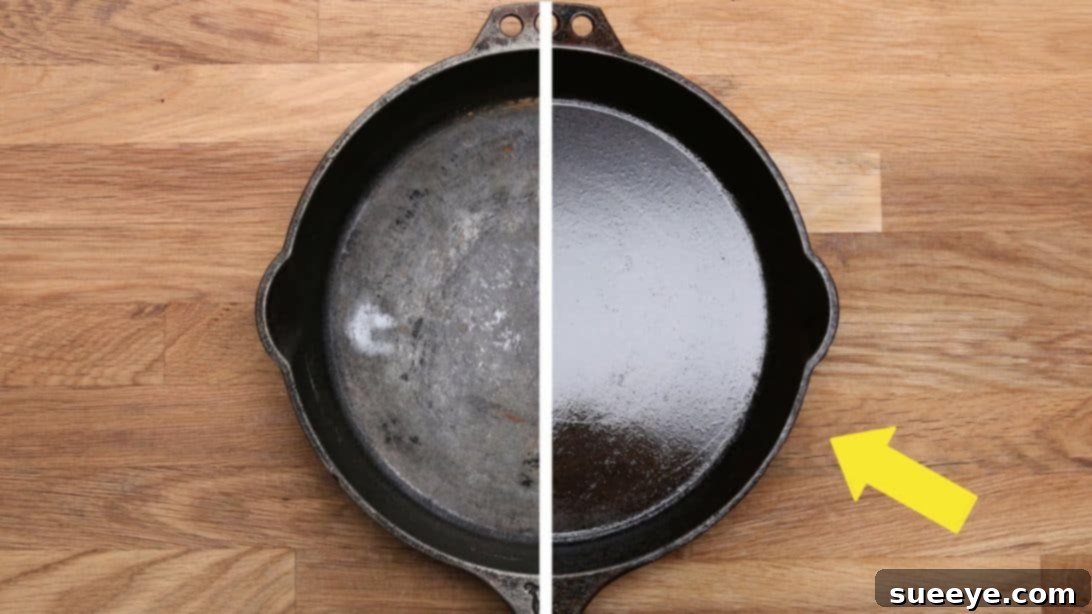
Cast iron skillets have earned their revered place in kitchens worldwide, standing as a testament to timeless culinary craftsmanship. Far more than just a piece of cookware, these remarkable pans offer a unique blend of qualities that set them apart from their modern counterparts. Their unparalleled durability ensures they can last for generations, making them a true heirloom. Beyond longevity, cast iron boasts superior heat retention and distribution, cooking food evenly and efficiently. With proper care, they develop a naturally non-stick surface, reducing the need for excessive oils. Furthermore, their versatility allows for a myriad of cooking methods, from stovetop searing to oven baking. While the initial investment may seem higher than other options, a well-maintained cast iron skillet offers an exceptional return, delivering outstanding results and a distinctive flavor profile that only cast iron can achieve. For anyone passionate about cooking, investing in a high-quality cast iron skillet is a decision that pays dividends in delicious meals for decades to come.
RELATED: How to Cook the Perfect Steak Every Time
Unlocking the Full Potential of Your Cast Iron Skillet
If you’re new to the rewarding world of cast iron or simply looking to refine your technique, understanding the fundamental processes of seasoning, cooking, and cleaning is paramount. These steps are not merely about maintenance; they are about cultivating a relationship with your pan that ensures optimal performance, longevity, and exceptional culinary results. A well-cared-for cast iron skillet is a joy to use, providing a naturally non-stick surface and an even cook every time. To gain a comprehensive visual understanding of how to properly prepare, use, and care for your skillet, we highly recommend this informative tutorial from Tasty.
Ready to put your expertly seasoned skillet to the test and savor the unique flavor it imparts? Here’s a delicious and satisfying recipe to kickstart your cast iron cooking journey: Cheesiest Cast-Iron Skillet Pizza Recipe
The Essential Guide to Seasoning Your Cast Iron Skillet
Seasoning is the cornerstone of cast iron care, transforming a bare iron pan into a naturally non-stick, rust-resistant, and aesthetically pleasing cooking surface. It’s a process that involves baking thin layers of oil onto the iron, causing it to polymerize and bond with the metal. This creates a hard, smooth, and durable finish that improves incrementally with every use. A properly seasoned skillet provides effortless food release, contributes to superior flavor, and makes cleanup remarkably straightforward. Whether you’ve just acquired a brand-new pan or are meticulously restoring a cherished antique, mastering the seasoning process is the critical first step towards a lifetime of unparalleled cooking experiences. This initial seasoning sets the foundation for years of delicious, non-stick performance.
Step 1: Thoroughly Clean and Remove Any Rust
Before initiating the seasoning process, especially for a new skillet or one exhibiting signs of rust, a meticulous cleaning is absolutely essential. Gather a durable steel wool pad or a robust abrasive scouring pad (the rough, green side of a kitchen sponge is also effective) and scrub the skillet vigorously and comprehensively. Use a small amount of mild dish soap and hot water to eliminate any factory coatings, accumulated dirt, grime, or existing rust. Do not hesitate to use soap during this initial cleaning phase; the objective is to achieve an impeccably clean surface before applying any oil. Dedicate extra attention to the cooking surface, the exterior walls, the handle, and even the underside of the pan. Rinse the skillet thoroughly under hot running water, ensuring no soap residue remains. If rust persists, repeat the scrubbing and rinsing until all traces are eradicated and the pan presents a uniformly clean appearance.
Step 2: Ensure Complete Dryness
Immediately after rinsing your cast iron skillet, meticulously dry it with a clean, absorbent towel. Cast iron is highly susceptible to rust formation, making any residual moisture its primary adversary. To guarantee that every last droplet of water has evaporated, place the towel-dried skillet directly onto a burner on your stovetop over low to medium heat. Allow it to sit for several minutes, observing as any remaining moisture visibly steams off the surface. The pan should become entirely bone dry, with no visible dampness. Once you are absolutely certain that it is devoid of all moisture, carefully remove it from the heat using kitchen mittens or oven mitts, as the skillet will be very hot to the touch.
Step 3: Apply an Incredibly Thin Layer of Oil
The application of oil is a pivotal step in developing that protective, naturally non-stick seasoning layer. While various oils can be utilized, flaxseed oil is frequently acclaimed as the optimal choice for initial seasoning due to its exceptionally high smoke point and superior polymerization characteristics, which result in an exceptionally hard and durable finish. However, if flaxseed oil is not readily accessible or if budgetary considerations are a factor, excellent alternatives with high smoke points include canola oil, grapeseed oil, or even solid vegetable shortening. Drizzle a very small quantity of your chosen oil onto the skillet. Using a clean paper towel, vigorously rub the oil into every single surface of the pan—the interior cooking surface, the exterior, and the handle—ensuring complete and even coverage. The objective is to achieve an almost imperceptible, incredibly thin layer of oil, not a thick, glistening coat.
Step 4: Meticulously Wipe Away All Excess Oil
This stage is arguably the most critical for achieving a successful and resilient seasoning. Following the oil application, procure a fresh, clean paper towel and with considerable force, wipe off as much of the applied oil as humanly possible. The skillet should appear as though there is virtually no oil remaining on its surface; however, a microscopic, even layer will still adhere. Any discernible excess oil left on the surface will inevitably become sticky and gummy during the high-temperature baking process, leading to an uneven, unattractive, and ultimately ineffective seasoning that will flake off. Continue wiping until the pan feels dry to the touch and no visible streaks, puddles, or shiny patches of oil are present.
Step 5: Bake for Optimal Polymerization
Preheat your oven to its highest possible temperature, typically ranging between 450 to 500 degrees Fahrenheit (230-260°C). Once the oven has reached the desired temperature, carefully place your cast iron skillet upside down on the middle rack. Positioning it upside down is crucial as it prevents any potential pooling or dripping of oil, ensuring the formation of a uniformly thin and smooth seasoning layer. Allow the skillet to bake for a minimum of one hour at this intense heat. This high temperature is vital because it causes the applied oil to surpass its smoke point, initiating a chemical process known as polymerization. During this reaction, the oil molecules break down and chemically bond with the iron, creating a hard, plastic-like layer that constitutes your durable, non-stick seasoning. If, upon removing your skillet after an hour, it feels tacky or appears brownish rather than exhibiting a smooth, dark, and hard finish, it often indicates that your oven was not hot enough or too much oil was inadvertently left on the pan. For the most superior results and to establish a truly robust and resilient seasoning, it is highly recommended to repeat Steps 3 through 5 at least 3-4 times, allowing the skillet to cool completely to room temperature between each successive layer. This builds up multiple thin, incredibly durable layers of seasoning that will improve with every subsequent use.
Mastering the Art of Cooking with Cast Iron Skillets
With your cast iron skillet meticulously seasoned and ready for action, you are now poised to unlock an entirely new dimension of cooking excellence. The inherent secret to cast iron’s superior culinary performance lies in its extraordinary capacity to retain and distribute heat with remarkable evenness and consistency. However, harnessing this formidable power requires a slightly nuanced approach compared to conventional non-stick or stainless steel pans. By adhering to these essential tips, you will ensure culinary success and consistently achieve perfectly cooked dishes every time.
Preheating is Absolutely Paramount
Always, without exception, preheat your cast iron skillet thoroughly before introducing any food. Place it on your stovetop over a low to medium heat setting for a minimum duration of 5 to 10 minutes. This gradual and deliberate preheating process is critical; it ensures that the pan heats uniformly across its entire surface, effectively preventing localized hot spots and guaranteeing a consistently stable cooking temperature. To ascertain if the skillet has reached its optimal temperature, carefully hover your hand approximately an inch above the surface – you should distinctly feel significant heat radiating upwards. Under no circumstances should you directly touch the cooking surface. A prevalent mistake that almost invariably leads to food sticking is placing cold ingredients into a cold or insufficiently heated cast iron pan. The pan absolutely requires ample time to reach its ideal temperature to facilitate that coveted perfect sear and ensure effortless food release.
Searing for Culinary Perfection
When you are searing meats such as succulent steaks, tender chicken breasts, or flavorful pork chops, it is imperative to resist the natural impulse to constantly move or disturb your food. Carefully place the seasoned meat into the preheated, lightly oiled skillet and allow it to cook undisturbed for several minutes. This crucial period permits the Maillard reaction to occur unimpeded, which is responsible for creating that intensely desirable crispy, caramelized crust and rich, complex flavor. The food will, by its own accord, naturally release from the pan once a proper, well-formed crust has developed. Flipping or moving the food too prematurely will inevitably disrupt the formation of this exquisite crust and almost certainly lead to frustrating sticking.
Embrace its Versatility: Seamless Stove-to-Oven Cooking
One of cast iron’s most celebrated and distinguishing features is its unparalleled ability to transition seamlessly and safely from the stovetop directly into the oven. This inherent versatility makes it the ultimate cooking vessel for a wide array of dishes that necessitate an initial sear, sauté, or fry, followed by a finishing bake in the oven. Envision perfectly seared steaks that are then expertly finished to your desired doneness in the oven, fluffy frittatas, moist cornbread, or delectable deep-dish pizzas. It is vital to consistently remember that the cast iron handle will become extremely hot after oven use; therefore, always utilize robust oven mitts or a protective handle cover.
Understanding What to Cook (and What to Potentially Avoid)
Cast iron excels with extraordinary prowess at searing, frying, baking, roasting, and even slow-simmering dishes. It is unequivocally fantastic for achieving crispy, golden-brown fried chicken, perfectly baked, moist cornbread, beautifully pan-seared vegetables bursting with flavor, and decadent skillet cookies. However, it is generally prudent to exercise caution and, if possible, avoid cooking highly acidic foods in a newly seasoned or lightly seasoned cast iron skillet. Ingredients such as concentrated tomato sauce, red wine, vinegar, or citrus juices possess the capacity to strip away the hard-earned seasoning layer, potentially imparting an undesirable metallic taste to your meticulously prepared food, and necessitating a complete re-seasoning of your pan. While exceptionally well-seasoned, older pans may tolerate brief acidic cooks without significant degradation, it remains a sound general rule of thumb to exercise considerable caution, especially with prolonged simmering of acidic components.
Effortless Cleaning and Maintenance for Your Cast Iron Skillet
Proper cleaning and consistent maintenance are absolutely vital for preserving your cast iron skillet’s precious non-stick properties and ensuring its exceptional longevity. Contrary to a pervasive and long-standing popular myth, using a modest amount of soap will not, in fact, “ruin” your hard-earned seasoning, particularly with modern dish soaps which are significantly less harsh than the lye-based soaps of bygone eras. The fundamental key to successful cast iron cleaning is to clean it gently but thoroughly, and perhaps most importantly, to dry it completely and immediately after each use.
Immediate Post-Cook Cleaning
Strive to clean your cast iron skillet relatively soon after use, ideally while it is still warm but not dangerously scorching hot. This timing significantly facilitates the removal of any lingering food residue. Run the skillet under hot water and, for any particularly stubborn or stuck-on food bits, utilize a non-metal scouring pad, a stiff bristled brush designed for cookware, or simply the rough, abrasive side of your kitchen sponge. Many seasoned cast iron enthusiasts enthusiastically advocate for coarse salt as an exceptional natural abrasive: simply sprinkle a tablespoon or two of coarse salt into the pan, add a very small amount of hot water, and then scrub vigorously with a paper towel or sponge. The abrasive nature of the salt effectively helps to scour away food particles without causing any damage to the meticulously built-up seasoning layer. Rinse the skillet thoroughly with hot water to remove all salt and food debris.
Thorough Drying is Absolutely Non-Negotiable
Once your skillet has been thoroughly cleaned, immediately dry it with a clean, absorbent towel. Following this, and this step is crucial, place the towel-dried skillet back onto your stovetop over a low heat setting for several minutes. This critical drying step ensures the complete evaporation of any remaining moisture, which is the primary culprit behind rust formation. You will often observe a delicate wisp of steam rising from the pan as the very last bits of water dissipate, confirming it is utterly dry.
The Protective Oil Layer: Re-Seasoning After Each Wash
After your pan is unequivocally bone dry and still comfortably warm from the stovetop drying process, apply an incredibly thin, almost imperceptible layer of a suitable cooking oil (such as canola oil, vegetable oil, or grapeseed oil) to the entire surface of the pan—both the inside cooking surface and the exterior, including the handle—using a clean paper towel. Buff the oil thoroughly into the iron until the pan looks almost dry to the touch, precisely as you did during the initial seasoning process. Subsequently, place the lightly oiled pan back onto the stovetop over medium heat for a few minutes, until you observe a faint wisp of smoke emanating from the surface. This subtle smoke indicates that the applied oil is beginning to polymerize and bond with the iron, effectively reinforcing and rejuvenating your existing seasoning. Turn off the heat and allow the skillet to cool completely on the stove before carefully storing it away.
Optimal Storage Practices for Your Cast Iron Skillet
Always store your clean, thoroughly dry, and lightly oiled cast iron skillet in a dry environment, ideally away from areas prone to excessive humidity. If you intend to stack other pans on top of your cast iron, it is a wise practice to place a paper towel or a thin cloth in between each item. This protective barrier serves to safeguard the cooking surface from scratches and, crucially, helps to absorb any minuscule residual moisture, further preventing potential rust development. With consistent and proper care, your cast iron skillet will not merely be a cooking implement, but a cherished culinary tool that will provide unparalleled cooking experiences and last for many decades, becoming a valuable family heirloom.