
The Ultimate Guide to Deep Cleaning Your Gas Stovetop Like a Pro
A pristine kitchen is a joy to behold, and at its heart often lies a gas stovetop – a workhorse that can quickly accumulate grease, food spills, and grime. While countless methods promise a sparkling finish, many fall short when tackling stubborn, baked-on messes. Inspired by the truly effective techniques shared by Clean My Space on YouTube, this comprehensive guide will equip you with the knowledge and steps to deep clean your gas stovetop like a professional. Say goodbye to unsightly residue and hello to a stovetop that gleams, right down to the smallest crevices. Whether you’re a seasoned chef or a casual cook, maintaining a clean cooking surface is crucial for hygiene, efficiency, and the longevity of your appliance. Prepare to transform your stovetop and rediscover the pleasure of cooking in a truly spotless environment.
Why a Spotless Gas Stovetop Matters
Beyond aesthetic appeal, a clean gas stovetop offers numerous benefits. Regularly removing grease and food particles prevents bacterial growth, ensuring a more hygienic cooking surface for your family’s meals. Accumulated grime can also impede burner performance, leading to uneven heating and less efficient cooking. Furthermore, heavy grease buildup poses a potential fire hazard. By following a thorough cleaning routine, you not only extend the life of your appliance but also create a safer, more pleasant cooking experience. This method specifically targets tough stains and allows you to reach areas often overlooked, guaranteeing a comprehensive clean that makes a tangible difference.
Essential Materials You’ll Need
Gathering the right tools before you begin will streamline the cleaning process and ensure optimal results. You likely have most of these items already in your home:
- Microfiber Cloths: Several clean cloths are ideal for wiping, drying, and polishing without leaving lint or streaks. Their soft texture is perfect for delicate surfaces.
- Rubber Gloves: Essential for protecting your hands from cleaning solutions and stubborn grime.
- Scrub Squares/Pads: Non-abrasive but effective scrubbers are crucial for loosening baked-on food and grease without scratching your stovetop’s finish.
- Cleaning Toothbrush: An old toothbrush is invaluable for reaching into tight corners, burner crevices, and ignition ports.
- All-Purpose Cleaner: A good quality all-purpose cleaner will help cut through lighter grease and general surface grime.
- Heavy-Duty Dish Soap: Opt for a concentrated dish soap known for its grease-cutting power. This is your primary weapon against tough oily residues.
- Spray Bottle: Handy for diluting cleaners or creating custom solutions, allowing for even application.
- Baking Soda: A natural abrasive and deodorizer, baking soda is fantastic for creating a powerful paste or boosting cleaning solutions.
- Warm Water: Crucial for mixing solutions, rinsing, and generally enhancing the cleaning power of other agents.
Step-by-Step Guide to a Sparkling Gas Stovetop
This detailed guide walks you through each phase of deep cleaning your gas stovetop, ensuring every component receives the attention it needs for a truly professional finish.
Step 1: Preparation and Initial Soaking for Maximum Impact
The secret to effortless cleaning lies in proper preparation and allowing your cleaning agents time to work their magic. Begin by ensuring your stovetop is completely cool before you start. Safety first! Don your rubber gloves to protect your hands from harsh chemicals and grime. The first crucial step is to meticulously disassemble your stovetop. Carefully remove all burner grates, burner caps, and burner heads. These components are often the most heavily soiled and require dedicated treatment. Set them aside in an organized manner to avoid mixing up pieces. As you remove them, take a moment to inspect their condition and identify areas that will need extra scrubbing.
Next, prepare a powerful pre-soak solution for your removable burner components. In a large basin or your kitchen sink, combine a generous amount of heavy-duty dish soap, a few tablespoons of baking soda, and enough warm water to fully submerge your burner pieces and grates. The warm water helps to activate the soap and baking soda, creating a potent degreasing bath. Submerge all removed grates, burner caps, and burner heads into this mixture. Allow them to soak for at least 15-20 minutes, or even longer if the grime is particularly stubborn. This crucial soaking period gives the solution time to penetrate and break down baked-on food and grease, making subsequent scrubbing significantly easier.
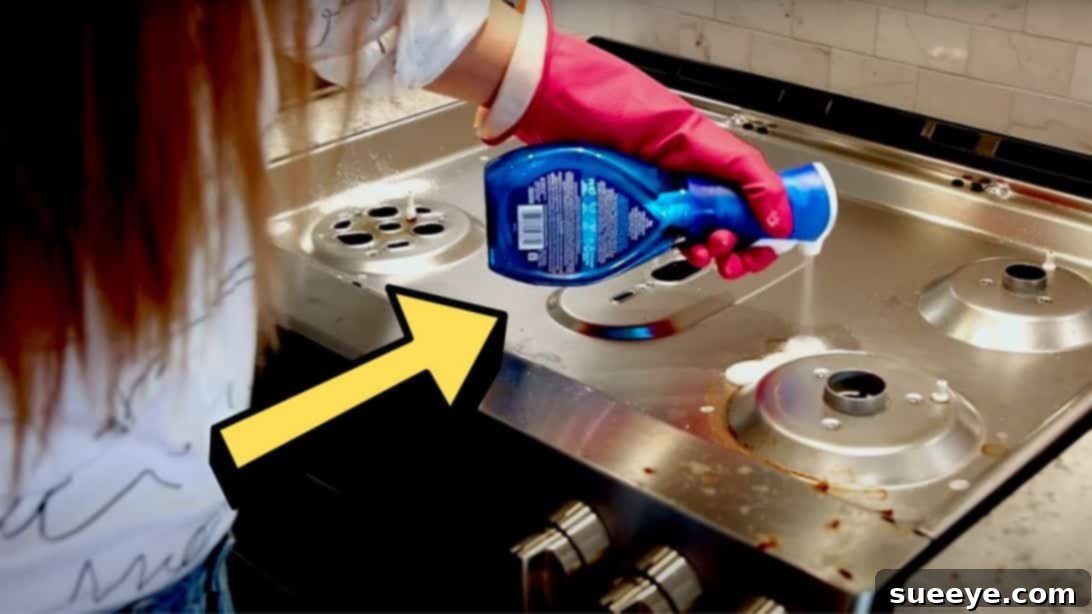
While your burner components are soaking, turn your attention to the main stovetop surface. Identify any areas with dried spills, burnt-on food, or thick grease spots. Liberally spray these gunky or greasy areas with your heavy-duty dish soap directly from the bottle, or use a mixture of concentrated dish soap and a little warm water in a spray bottle. For the rest of the stovetop surface, mist it thoroughly with an all-purpose cleaner or a solution of soapy water (using your heavy-duty dish soap). Allow these cleaning agents to sit and penetrate the dirt for several minutes – ideally, the duration your burner pieces are soaking. This “dwell time” is vital, as it softens and lifts grime, preventing the need for excessive scrubbing later on. Resist the urge to scrub prematurely; patience at this stage will save you considerable effort.
Step 2: Deep Cleaning, Rinsing, and Polishing for a Flawless Finish
After the initial soaking period, it’s time for the scrubbing and detailing. Retrieve your burner pieces from the soak solution. Instead of immediately rinsing them, grab a scrub square or pad and begin scrubbing each piece thoroughly while it’s still coated in the soapy mixture. The prolonged contact with the soap and baking soda will have significantly weakened the grease and grime, making it much easier to remove. Pay close attention to any burnt-on residue or discolored areas. Continue scrubbing until you’re satisfied that all visible grime has been lifted. Once scrubbed, do not rinse them immediately. Instead, lay them back in the soapy water or a clean basin with fresh soapy water and let them sit for a few more minutes. This extra soak allows the cleaning agents to continue dissolving any remaining stubborn particles.
Now, turn your attention back to the stovetop surface. Using a clean scrub square, meticulously scrub the entire surface where the cleaners have been sitting. Work in small sections, applying gentle pressure to lift away loosened grime. For areas with intricate designs or small, hard-to-reach crevices, such as around the burner ports, deploy your cleaning toothbrush. The fine bristles of the toothbrush are perfect for dislodging trapped food particles and grease from these tight spots. Once you’ve thoroughly scrubbed the stovetop surface, it’s time to rinse. Take a clean microfiber cloth, dampen it with clean, warm water, and begin wiping away the soapy residue from the stovetop. Rinse and wring out your cloth frequently to avoid spreading dirty water. Continue wiping until the entire stovetop surface is free of suds and appears clean. For an extra shine, you can follow with a second wipe using a cloth dampened with just plain water.
Next, return to your burner components. Thoroughly rinse each burner cap, head, and grate under warm running water until all soap residue is gone. Inspect each piece carefully to ensure no grime remains. If you spot any stubborn areas, a quick re-scrub might be necessary. Once rinsed, lay all the cleaned burner pieces and grates flat on a clean, dry microfiber cloth or a drying rack. Allow them to air dry completely. Ensuring they are fully dry before reassembly is crucial, as any residual moisture can lead to rust or affect burner performance. For the small burner outlets on the stovetop itself, use your toothbrush again to clean any potential blockages, then wipe dry. Once all components are sparkling clean and completely dry, carefully reassemble your gas stovetop. Place the burner heads, caps, and grates back into their correct positions. Stand back and admire your brilliantly clean, professional-looking gas stovetop!
Expert Tips for Maintaining a Clean Stovetop
While a deep clean is incredibly satisfying, regular maintenance is key to keeping your gas stovetop in pristine condition and reducing the frequency of extensive cleaning sessions. After each use, try to wipe down your stovetop with a damp cloth and a little dish soap. Addressing spills immediately prevents them from drying and hardening, which makes them much harder to remove later. For daily maintenance, a quick spray of all-purpose cleaner and a wipe-down is usually sufficient. Consider using burner covers or drip pans to catch spills and food particles, making cleanup a breeze. Periodically check your burner ports for any blockages, which can affect flame efficiency. A toothpick or a small needle can gently clear these, but always ensure the gas is off and the stovetop is cool. By incorporating these small habits into your routine, you can significantly prolong the sparkling results of your deep clean.
Troubleshooting Common Stovetop Issues
Even with the best cleaning routine, some issues might pop up. For extremely burnt-on food, creating a thick paste of baking soda and a small amount of water, applying it directly to the stain, and letting it sit for several hours (or even overnight) can work wonders. Cover it with plastic wrap to keep it moist. Then, gently scrape it off with a plastic scraper before cleaning as usual. If you notice rust spots, especially on cast iron grates, a mixture of equal parts salt and lemon juice can be applied, left for a few minutes, then scrubbed away. Rinse and dry thoroughly to prevent further rust. For stubborn discoloration, repeated applications and longer dwell times with your heavy-duty dish soap and baking soda mixture are often the answer. Remember, patience and proper soaking are your best allies.
Safety First: Important Precautions
When cleaning a gas stovetop, safety should always be your top priority. Always ensure the stovetop is completely cool before disassembling or applying any cleaning agents. If you’re using strong chemical cleaners, ensure good ventilation by opening windows or turning on your kitchen fan. Never spray water directly into burner ports or ignition areas when the stovetop is on or still warm. Avoid harsh abrasive scrubbers or steel wool, which can scratch and damage the stovetop’s finish, making it more prone to future grime accumulation. If you’re unsure about a particular cleaner, test it on an inconspicuous area first. Always handle gas components with care and ensure they are dry and properly reassembled before turning on the gas.
Frequently Asked Questions (FAQs)
Q: How often should I deep clean my gas stovetop?
A: The frequency depends on your cooking habits. For heavy daily use, a deep clean every 1-2 months is recommended. For lighter use, every 3-4 months might suffice. Regular daily wiping down will extend the time between deep cleans.
Q: Can I use a dishwasher to clean the burner grates?
A: It depends on the material. Cast iron grates are generally not recommended for dishwashers as the harsh detergents can strip their seasoning and lead to rust. Enamel-coated or lighter metal grates might be dishwasher safe, but always check your appliance manual first. Handwashing is often safer and more effective for removing baked-on grime.
Q: What if my burner flames look uneven after cleaning?
A: Uneven flames usually indicate a partially blocked burner port or an improperly seated burner cap/head. Ensure all parts are completely dry and correctly reassembled. Use a small, thin wire or toothpick to gently clear any debris from the tiny holes on the burner head. If the problem persists, consult your appliance manual or a professional.
Conclusion
Achieving a professionally clean gas stovetop is entirely within your reach with the right approach and a little dedication. By following this detailed guide, inspired by the expertise of Clean My Space, you’ll not only remove unsightly grease and grime but also enhance the functionality and longevity of your appliance. Remember, the key lies in methodical preparation, allowing cleaning agents sufficient dwell time, and meticulous scrubbing. Incorporate these tips into your kitchen routine, and you’ll consistently enjoy a gleaming, hygienic cooking space. A clean stovetop is more than just appealing; it’s a foundation for safer, more efficient, and more enjoyable cooking experiences. Try it today and witness the remarkable transformation!
*All image credit belongs to Clean My Space via YouTube. Follow and subscribe to her channel for more excellent cleaning tutorials!