
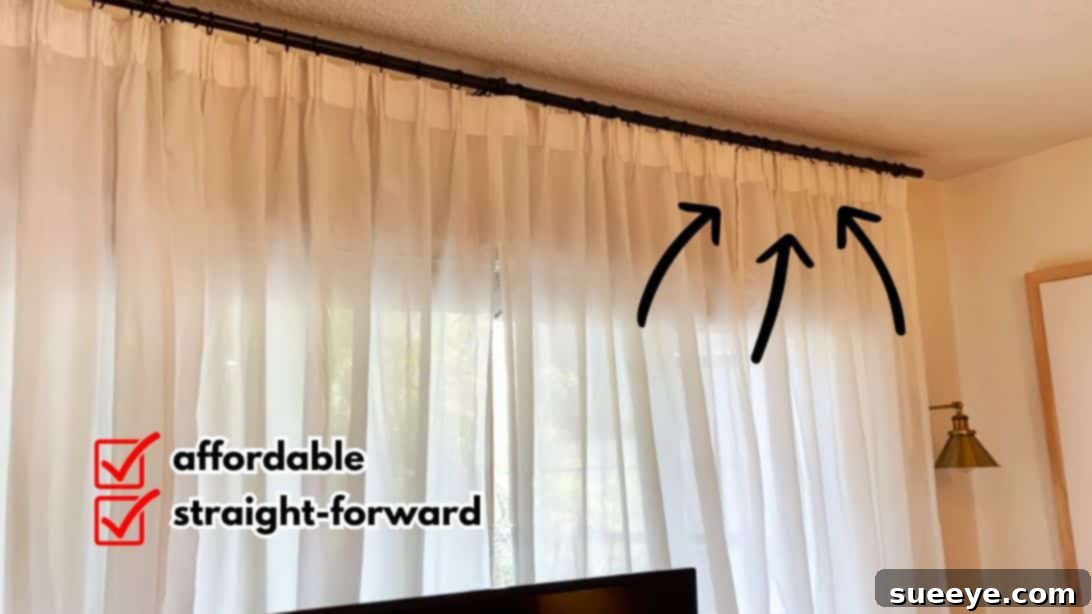
Dreaming of a home adorned with luxurious, tailored curtains that exude sophistication? Pinch pleat curtains are renowned for their elegant, structured appearance, offering a custom look that elevates any room. Traditionally, achieving this refined style often involves complex sewing techniques or significant expense from professional custom curtain makers. But what if we told you that the opulent aesthetic of pinch pleats is now within your reach, without needing a sewing machine or breaking the bank? Get ready to transform your living space with this ingenious DIY pinch pleat curtains idea by Steph Youngren – an incredibly simple and affordable IKEA hack that delivers truly stunning results.
Pinch pleats are characterized by their neatly stitched-in folds at the top, creating a permanent, structured drape that falls beautifully. While the term “stitched-in” might sound daunting, this particular method bypasses sewing entirely, making it accessible for even the most novice DIY enthusiast. This innovative approach utilizes readily available IKEA curtains and a clever hardware solution to replicate the high-end appearance effortlessly. Prepare to be amazed at how easily you can achieve the sophisticated window treatments you’ve always desired, turning a simple IKEA curtain into a focal point of elegant design.
RELATED: How to Make A Rod Pocket Curtain
This brilliant hack offers an incredibly straightforward path to upgrading your existing curtains, instantly making them appear fuller, more structured, and undeniably luxurious. There’s no longer any need to invest heavily in expensive custom drapery to achieve the pleated curtains of your dreams. The transformation that pinch pleats bring to a room is remarkable; they add visual height, depth, and a polished finish that can dramatically enhance the overall ambiance of your home. If you already have IKEA curtains at home, this is the perfect opportunity to give them a significant glow-up. Even if you don’t, the affordability of IKEA’s curtain range makes this project a budget-friendly way to achieve a high-end look.
Pinch pleats are not just about aesthetics; they also offer practical benefits. The structured pleats ensure that your curtains stack back neatly when open, maximizing natural light and providing a clean, uncluttered look. When closed, they provide excellent coverage and insulation, contributing to both privacy and energy efficiency. This DIY project is not just about making curtains; it’s about making a statement in your home, reflecting your personal style, and enjoying the satisfaction of a beautifully executed project that adds lasting value.
For more curtain tips and tricks to elevate your window treatments, explore these helpful resources: 5 Rules for Hanging Curtains, How to Shorten Curtains Without Taking Them Down, DIY Tab Top Curtains Tutorial.
Essential Materials for Your No-Sew Pinch Pleat Curtains
Gathering your materials is the first step towards creating your stunning pinch pleat curtains. This project requires only a few key items, making it incredibly accessible and cost-effective. Here’s what you’ll need:
- Pleater Hooks: These specialized hooks, typically with four prongs, are the secret to creating those perfect, uniform pleats without any stitching. Ensure you have enough for your desired curtain width, usually one hook per pleat section and one for each end.
- IKEA Curtains: The foundation of this hack. IKEA curtains are ideal due to their consistent quality, wide range of colors and fabrics, and often their reinforced top edges that facilitate this no-sew method. Choose a fabric and length that complements your room’s aesthetic.
- Curtain Rings: These rings attach to your pleater hooks and allow your curtains to glide smoothly along the curtain rod. Opt for rings with eyelets or small clips designed to hook into pleater hooks.
- Curtain Rods: Select a curtain rod that is robust enough to support the weight of your curtains and extends sufficiently beyond the window frame to allow the curtains to stack back gracefully. Consider the finish and style to match your room’s decor.
Step-by-Step Guide: How to Craft Your No-Sew Pinch Pleat Curtains
Follow these simple instructions to effortlessly transform your flat-panel IKEA curtains into elegant pinch pleats. Precision and consistency are key to achieving a professional-looking finish.
Step 1: Preparing the First and Last Sections with Pleater Hooks
Begin by taking a pleater hook, which should typically feature four distinct prongs. You will be using one pleater hook for each designated pleat section across the top of your curtain, as well as one hook specifically for each of the curtain’s outer ends to ensure a neat finish. To start, locate the outermost edge of your curtain’s top hem, specifically the reinforced pleater section if your IKEA curtains come with one (often a reinforced band or pre-punched holes). Carefully insert the first prong of your pleater hook into the fabric at the very edge. Work your way inwards, inserting each subsequent prong into the next available slot or section of the fabric, one row at a time. The goal is to insert all four prongs smoothly and simultaneously if possible. The very end rows can sometimes be a bit snug or tricky; if you encounter resistance, a handy trick is to use a toothpick to gently help guide the fabric threads or open the loops, making it easier for the pleater hook prongs to slide through. Ensure the hook is securely seated and flush with the top edge of the curtain, as this will set the foundation for a perfectly tailored look.
Step 2: Implementing the 4-3-3-3 Pleat Pattern for Uniformity
This step is crucial for creating the distinctive “pinch” effect that defines this style of curtain. You will be following a specific “4-3-3-3” pattern, which dictates the spacing of your pleater hooks to form consistent pleats. Begin by counting four sections (or holes, depending on your curtain’s design) from the end of the first pleater hook you just inserted in Step 1. On the fourth section, insert the *first* prong of your next pleater hook. This initiates the spacing for your first actual pinch pleat. Next, count three more sections from where the first prong was inserted, and on the third section, insert the *second* prong of the same pleater hook. Repeat this precise counting and insertion for the two remaining prongs of that same hook: count three sections, insert the third prong; then count another three sections, and insert the fourth prong. Once all four prongs are inserted for this hook, gently push them all the way up, ensuring the hook is firmly seated and flush against the top edge of the curtain. This action gathers the fabric between the prongs, creating the characteristic pinched fold. The consistency of this 4-3-3-3 pattern is what gives pinch pleat curtains their elegant, uniform appearance.
Step 3: Repeating the Pleating Process Across the Curtain
Continue repeating the “4-3-3-3” pleating pattern described in Step 2 across the entire width of your curtain. Work systematically, moving from one pleat section to the next, maintaining the precise counting and insertion for each subsequent pleater hook. As you progress, take a moment to occasionally step back and visually inspect your work, ensuring that the pleats are forming uniformly and that the spacing remains consistent. This attention to detail will guarantee a polished and professional finish. Once you have reached the very last section of your curtain, you will repeat the initial process from Step 1. Insert a pleater hook at the outer edge of this final section, ensuring it is securely placed to provide a clean and finished end to your pleat arrangement. This mirroring of the first step ensures that both ends of your curtain are neatly secured and present a symmetrical appearance.
Step 4: Hanging Your Newly Pleated Curtains with Rings and Rods
With all your pleater hooks securely in place and your beautiful pleats formed, it’s time to hang your curtains and enjoy your handiwork. First, attach the curtain rings to the pleater hooks. Most pleater hooks have a small eyelet or loop at the top where the curtain ring can be easily slipped on. Ensure that each pleater hook is connected to a ring, evenly distributing the weight. Once all the rings are attached, carefully thread them onto your curtain rod. If your rod is already mounted, you may need to remove it temporarily to slide the rings on. After the curtains are on the rod, re-mount the rod if necessary, and adjust the curtains to hang evenly. Stand back and admire the luxurious, custom look you’ve achieved with this simple, no-sew hack. For an even more professional presentation, consider lightly steaming or ironing your curtains before hanging to remove any lingering creases and allow the fabric to drape perfectly.
No-Sew DIY Pinch Pleat Curtains: A Luxurious Look Made Effortless
This ingenious no-sew method for creating pinch pleat curtains from IKEA panels is truly a game-changer for home decorators. It demystifies what often seems like a complicated and expensive design choice, bringing a touch of custom luxury into any home without the typical fuss or cost. By leveraging readily available materials and following a few clear steps, you can achieve a sophisticated window treatment that looks professionally tailored.
The beauty of this IKEA hack lies in its simplicity and accessibility. You don’t need advanced crafting skills, a sewing machine, or a hefty budget to elevate your home’s aesthetic. The transformation is immediate and impactful, adding structure, fullness, and an undeniable elegance that significantly upgrades the look and feel of any room. Whether you’re refreshing a living room, adding charm to a bedroom, or creating a refined dining space, these DIY pinch pleat curtains are a perfect solution. They offer the satisfaction of a do-it-yourself project combined with the enduring appeal of classic design.
So, why wait? Gather your materials, follow Steph Youngren’s brilliant guide, and prepare to be delighted by the luxurious transformation of your windows. Embrace the ease of this no-sew technique and create a home that reflects your style, comfort, and a keen eye for sophisticated design. Your dream of custom curtains is no longer just a dream – it’s an achievable, enjoyable DIY project waiting to happen!