
How to Effortlessly Untangle Knotted Necklaces: Your Ultimate Guide to Jewelry Restoration and Care
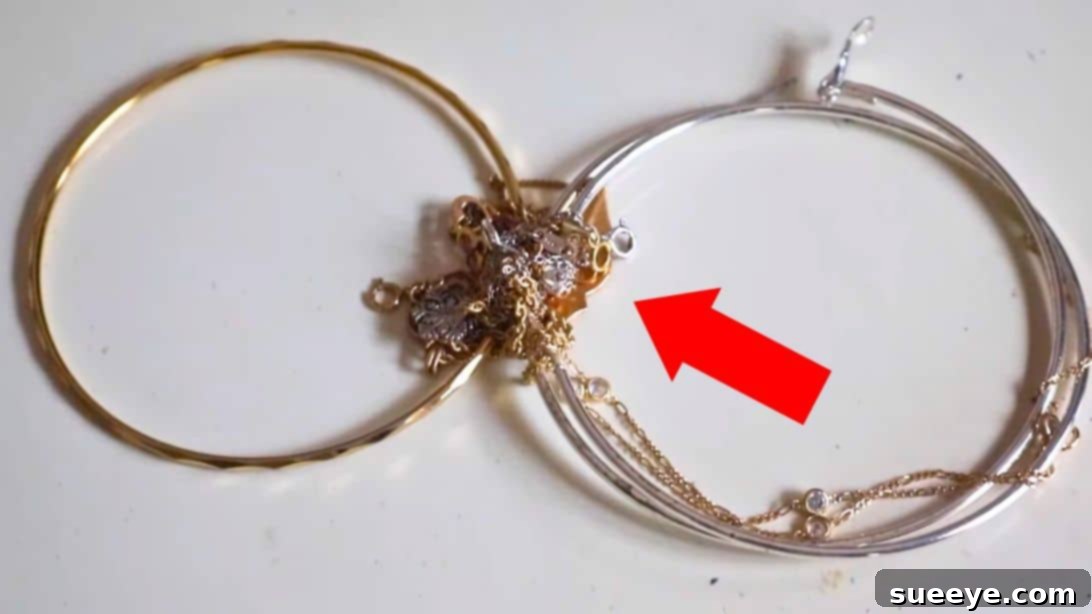
There’s hardly anything more frustrating for a jewelry lover than reaching for a beloved necklace, only to find it in a hopeless knot. A tangled necklace, especially one with a delicate, thin chain, can seem like an insurmountable challenge. Many of us have experienced that moment of regret, perhaps after tossing our favorite pieces into a bag in a hurry, only to discover a tangled mess later. This common predicament has led countless individuals to stash away their treasured necklaces, deeming them too difficult to restore. But what if we told you that untangling even the most stubborn knots is not only possible but can be surprisingly simple with the right approach and a dash of patience?
Whether it’s a sentimental piece inherited from a loved one or a stylish accessory you wear daily, keeping your necklaces knot-free is essential for their longevity and your peace of mind. This comprehensive guide will walk you through proven techniques to untangle knotted necklaces, offer specific advice for delicate chains, and most importantly, provide actionable tips on how to prevent these frustrating tangles from happening in the first place. Say goodbye to jewelry box headaches and reclaim your beautiful collection!
Why Do Necklaces Get Tangled So Easily?
Understanding the root cause of tangles can help you better prevent them. Several factors contribute to necklaces becoming knotted:
- Thin Chains: Delicate chains, especially those with small links, are particularly prone to tangling. Their flexibility allows them to intertwine easily with themselves and other pieces.
- Improper Storage: The most common culprit is simply tossing necklaces together in a drawer or jewelry box without individual separation. When pieces move around, they inevitably latch onto each other.
- Multiple Necklaces: Wearing or storing multiple necklaces together significantly increases the chances of them intertwining. The friction and movement cause the chains to wrap around each other.
- Chain Material and Design: Certain chain designs, like snake chains or very fine curb chains, have a natural tendency to knot if not handled with care.
- Gravity and Movement: Even the slightest movement, whether in a travel bag or a poorly organized drawer, can cause chains to shift and form knots.
Your Essential Untangling Toolkit
Before you begin the untangling process, gather a few simple tools that will make the job much easier. Having these items on hand can turn a frustrating chore into a manageable task.
- Paperclip, Toothpick, or Sewing Needle: These are your primary tools. Their fine, pointed tips are crucial for working with tiny knots. A straightened paperclip offers good grip and a slightly blunter point, while a sewing needle or toothpick provides precision for the tightest knots.
- A Flat, Well-Lit Surface: Good lighting is paramount. A bright lamp or natural light will help you clearly see the intricate details of the knot. Working on a flat surface provides stability and prevents further tangles.
- Optional: Baby Powder or Olive Oil: For extremely stubborn or tight knots, a tiny amount of lubricant can work wonders. Baby powder can reduce friction between the chains, allowing them to slide apart more easily. A single drop of olive oil (or mineral oil) can also lubricate the metal, making the knot more pliable. Just be sure to clean your necklace thoroughly afterward.
- Magnifying Glass (Optional): If your eyesight isn’t what it used to be, or if the chain is exceptionally fine, a magnifying glass can be a valuable aid for precision work.
Step-by-Step Guide: How to Untangle Knotted Necklaces
Untangling a necklace demands patience and a gentle touch. Rushing the process will only tighten the knots further and can damage your precious jewelry. Follow these steps carefully for the best results:
Step 1: Prepare Your Workspace and Necklace
Begin by laying your tangled necklace flat on a clean, hard, and well-lit surface. Ensure you have ample light to see all the intricacies of the knot. If your necklace has any detachable charms, pendants, or clasps that are loose or easily removable, take them off. This reduces bulk and prevents additional snagging during the process. Gently spread the necklace out as much as possible without forcing it, looking for the main areas of entanglement.
Step 2: Locate the Knot and Apply Lubrication (If Needed)
Identify the tightest part of the knot. This is where you’ll focus your initial efforts. For particularly stubborn knots, this is the ideal time to apply a tiny amount of lubricant. Sprinkle a pinch of baby powder over the knot and gently rub it in with your fingers. This helps reduce friction. Alternatively, place a single drop of olive oil on the knot and rub it gently. The oil will lubricate the metal, making the chain more pliable and easier to separate. Remember, a little goes a long way with oil.
Step 3: Begin Loosening the Knot with Your Fine Tool
This is where your chosen tool—be it a paperclip, toothpick, or sewing needle—comes into play. The key to untangling a knot is to start working from the middle outwards. Carefully insert the tip of your tool into the very center of the tightest part of the knot. Use a gentle poking and wiggling motion to slowly loosen the intertwining loops. Your goal is not to pull them apart, but to create tiny gaps within the knot, allowing the chains to breathe. Avoid applying too much pressure, which can tighten the knot or even break delicate links.
Step 4: Gentle Manipulation and Separation
As you manage to create a bit of space, use your tool to gently push and pull individual strands of the chain away from the main knot. Once a loop is slightly loosened, you can often use your fingernail or the very tips of your fingers to further separate it. Continue this delicate dance, alternating between using your fine tool to create space and your fingers to gently guide the loosened strands. Focus on unraveling one small section at a time. It’s like solving a puzzle; slowly, piece by piece.
Step 5: Persistent Patience Until Freedom
Untangling can be a time-consuming process, especially for complex knots or multiple necklaces tangled together. Remember to focus on one necklace or one knot at a time. Go back and forth between using your fine tool and your fingers, consistently working to separate the intertwined links. Don’t get discouraged if it takes a while; persistence is key. Once the knot is completely loose, gently pull the necklace taut to ensure all kinks are removed. If you used oil, remember to clean your necklace thoroughly with a mild soap and water solution, then dry it completely.
Special Considerations for Untangling a Thin Necklace
Thin necklaces present a unique challenge due to their delicate nature and minuscule links. The principles remain the same, but the execution requires even more finesse:
- Extreme Gentleness: Any forceful pulling can easily break the fragile chain. Always prioritize slow, delicate movements.
- Finer Tools: For very thin chains, a sewing needle or a very sharp toothpick might be more effective than a paperclip, as their points are finer.
- More Lubrication: Thin chains often benefit more from lubrication. A very small amount of baby powder or olive oil can significantly aid in reducing friction and allowing the tiny links to slide past each other.
- Magnification: If available, use a magnifying glass to get a closer look at the intricate twists and turns of the thin chain. This precision can prevent accidental damage.
- Know When to Stop: If you’re struggling with a particularly valuable or extremely delicate thin necklace, it might be wise to take it to a professional jeweler. They have specialized tools and expertise to handle such intricate repairs without causing damage.
The Ultimate Solution: Proper Jewelry Storage to Prevent Tangles
While mastering the art of untangling is a valuable skill, the best defense is a good offense. Implementing proper storage techniques will drastically reduce, if not eliminate, the occurrence of tangled necklaces. Investing a little time in organization now will save you a lot of frustration later.
Individual Storage is Paramount
The golden rule for preventing necklace tangles is individual storage. This means each necklace should have its own space where it cannot interact with other pieces. Here are several effective methods:
- Individual Mini Plastic Bags: Small, sealable plastic bags (like jewelry or craft bags) are incredibly effective and inexpensive. Simply place one necklace in each bag and seal it. This is excellent for travel and drawer storage.
- Jewelry Boxes with Compartments: Many jewelry boxes are designed with specific compartments or slots for necklaces, often with hooks or padded sections to keep them separate. Look for boxes with soft linings to prevent scratching.
- Hanging Jewelry Organizers/Hooks: Wall-mounted or over-the-door organizers with multiple hooks are fantastic for keeping necklaces untangled and easily accessible. Each necklace hangs freely, preventing any contact with others.
- Roll-Up Travel Cases: For jet-setters, specialized travel cases for jewelry often feature individual loops or pockets for necklaces, keeping them secure and tangle-free on the go.
- DIY Straw Method for Thin Chains: For very thin and delicate chains, thread one end of the necklace through a plastic drinking straw. Fasten the clasp, and the straw will keep the chain straight and prevent it from knotting. This is a brilliant hack for travel!
- Padded Necklace Dividers: If you have a larger drawer, you can insert padded dividers to create individual sections for your necklaces.
Tips for Daily Wearers and Travelers
- Store Immediately: After taking off your necklace, don’t just toss it aside. Take a moment to properly store it in its designated tangle-free spot.
- Avoid Mixing While Wearing: While layering necklaces is a trend, be mindful that wearing multiple chains can increase the chance of them tangling during the day, especially if they are of similar lengths or materials.
- Travel Smart: When packing for a trip, always store necklaces individually. The jostling of travel bags is a prime cause of severe tangles.
Quick Summary and Final Tips
To recap, untangling knotted necklaces requires a methodical approach, the right tools, and above all, patience. Always start by identifying the tightest part of the knot, use a fine tool to gently loosen it, and gradually separate the strands. For delicate chains, apply extra care and consider lubrication. However, the most effective strategy is prevention through proper storage.
Remember these golden rules:
- Patience is Your Best Friend: Never rush the untangling process.
- Choose the Right Tools: A paperclip, toothpick, or needle is essential.
- Lubricate When Necessary: Baby powder or a tiny drop of oil can aid stubborn knots.
- Individual Storage Prevents Headaches: Store each necklace separately.
- Clean After Untangling: Especially if you used oil, ensure your jewelry is clean before wearing or storing again.
Conclusion: Reclaim Your Jewelry Collection
Don’t let a tangled necklace keep you from wearing your cherished pieces. With the techniques and storage advice shared in this guide, you now possess the knowledge to confidently tackle even the most intricate knots and ensure your jewelry collection remains organized and beautiful. Embrace these habits, and you’ll find yourself spending less time untangling and more time enjoying your favorite accessories, effortlessly showcasing your style.
RELATED: 31 DIY Necklaces To Make Today
You might also enjoy this project: How to Turn Old Jewelry Into This DIY Statement Necklace