
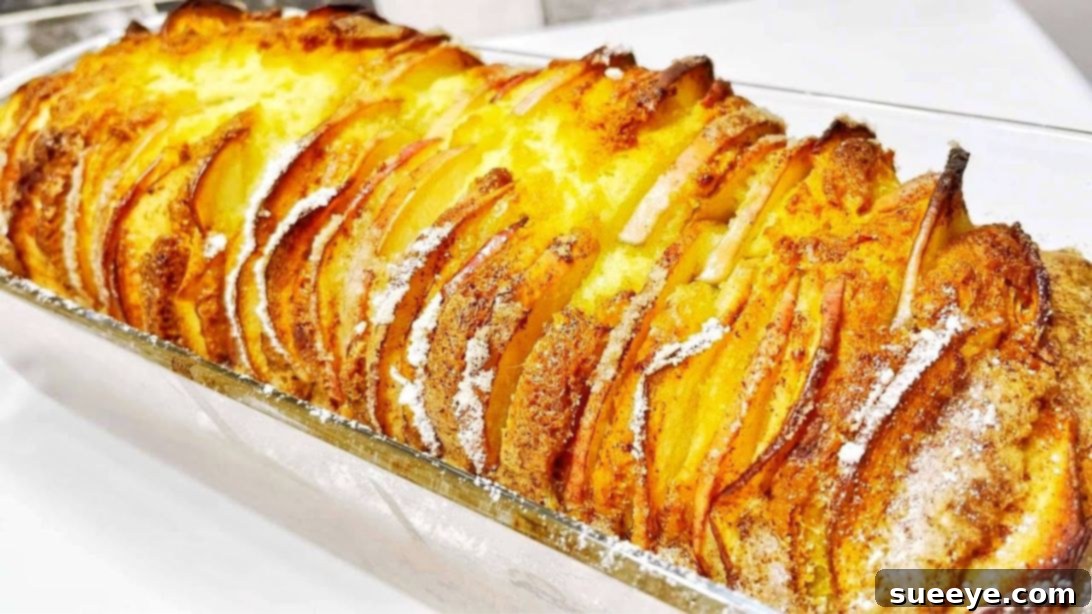
If you have a fondness for the warm, comforting aroma of freshly baked goods, then prepare to fall in love with this incredibly simple yet utterly delicious apple cake. This is more than just a recipe; it’s an invitation to create a moment of pure joy in your kitchen. Inspired by the delightful creation shared by Olesea Slavinski on YouTube, this quick and easy apple cake recipe promises a heavenly dessert experience, requiring just a few common ingredients and four straightforward steps. You’ll be captivated by the harmonious blend of sweet, rich, and subtly tart flavors, beautifully accentuated by a comforting hint of cinnamon. Many of the ingredients are likely already in your pantry, making this a perfect spontaneous treat. Imagine savoring a slice with a steaming cup of tea or a robust coffee – a truly special pairing that elevates this dessert to new heights. Get ready to embark on a delightful baking journey; happy baking awaits!
The Ultimate Guide to Baking a Quick and Easy Apple Cake in 4 Steps
Discover the joy of baking with this foolproof apple cake recipe. Whether you’re a seasoned baker or just starting out, this guide will walk you through creating a moist, flavorful cake that’s perfect for any occasion. From the first whisk to the final garnish, every step is designed for simplicity and maximum deliciousness.
Why This Apple Cake Recipe Will Become Your New Favorite
- Unbelievably Simple: With just four main steps, this recipe is perfect for beginners and busy individuals alike. No complicated techniques or extensive preparation required.
- Pantry-Friendly Ingredients: You won’t need to hunt for obscure items. Most of the ingredients are kitchen staples you probably already have on hand.
- Irresistible Flavor Profile: Experience a perfect balance of sweet apples, warm cinnamon, rich butter, and a tender, moist cake crumb. It’s comfort in every bite!
- Versatile & Customizable: While perfect as is, this cake also offers opportunities for personalization, from different apple varieties to a sprinkle of nuts.
- Crowd-Pleaser: This delightful dessert is universally loved, making it an ideal choice for family gatherings, potlucks, or a cozy evening treat.
- Quick Bake Time: From mixing to baking, this cake comes together efficiently, allowing you to enjoy your homemade masterpiece sooner.
Ingredients: Your Pantry Essentials for a Heavenly Treat
Gathering your ingredients is the first exciting step towards baking this incredible apple cake. Each component plays a crucial role in creating the cake’s signature texture and flavor. For the best results, ensure your eggs and yogurt are at room temperature, as this helps them incorporate more smoothly into the batter, leading to a lighter, more consistent cake.
- 3 large eggs (At room temperature for better emulsion)
- 3/4 cup of granulated sugar (Provides the perfect sweetness and contributes to the cake’s tender crumb)
- 1 teaspoon of vanilla essence (Adds a warm, aromatic depth that complements the apple and cinnamon)
- 4.5 tablespoons of neutral oil (Such as vegetable, canola, or sunflower oil, for moisture and tenderness)
- 1/2 cup of plain yogurt (Full-fat plain yogurt is recommended for richness and a wonderfully moist texture)
- 1 cup and 8 tablespoons of all-purpose flour (Ensure it’s sifted to prevent lumps and create a smooth batter)
- 2 and 1/3 teaspoons of baking powder (The essential leavening agent that gives the cake its lift and airy texture)
- Powdered sugar (For both the apple topping mixture and a final elegant dusting)
- Cinnamon (Ground cinnamon, generously used to infuse that classic apple dessert spice)
- Butter (Unsalted, cold, and thinly sliced – crucial for creating a rich, golden, and slightly crispy topping)
- 2 medium-sized apples (Opt for firm, sweet-tart varieties like Honeycrisp, Gala, Fuji, or Granny Smith for the best flavor and texture contrast)
Essential Baking Tools for Your Apple Cake Adventure
Having the right tools makes the baking process smoother and more enjoyable. Here’s a list of what you’ll need:
- Large Mixing Bowl: For combining your wet ingredients and then the entire batter.
- Hand Mixer or Whisk: Essential for aerating the eggs and sugar, and thoroughly mixing the batter.
- Spatula: Ideal for gently folding in dry ingredients and transferring batter.
- Sifter: To ensure your flour and baking powder are lump-free.
- Baking Dish: A 9-inch round or square baking pan is typically perfect for this recipe. Ensure it’s greased and floured.
- Measuring Cups and Spoons: For accurate ingredient quantities.
- Sharp Knife and Cutting Board: For preparing your apples.
- Small Bowl: For mixing the cinnamon and powdered sugar topping.
Step-by-Step Guide to Your Perfect Homemade Apple Cake
Step 1: Crafting the Silky Batter Base
The foundation of any great cake lies in its batter, and this apple cake is no exception. Begin by adding 3 large eggs, 3/4 cup of granulated sugar, and 1 teaspoon of vanilla essence into a spacious mixing bowl. It’s crucial to whisk these ingredients together using a hand mixer. Don’t just mix until combined; continue whisking until the mixture becomes pale yellow, thick, and fluffy, almost ribbon-like. This aeration is vital as it incorporates air, contributing to the cake’s light and tender texture. Once you’ve achieved this ideal consistency, gently incorporate 4.5 tablespoons of neutral oil and 1/2 cup of plain yogurt into the bowl. Mix all these wet ingredients until they are just well combined. Be careful not to overmix at this stage; a smooth, homogenous mixture is what you’re aiming for, ensuring all components are thoroughly integrated without overworking them.
Step 2: Incorporating Dry Ingredients and Preparing Your Baking Dish
Now it’s time to introduce the dry components that will give our cake its structure. Take a sifter and carefully sift the flour (1 cup and 8 tablespoons) and baking powder (2 and 1/3 teaspoons) directly into your wet batter mixture. Sifting is a critical step as it breaks up any lumps in the flour, aerates the dry ingredients, and ensures they are evenly distributed throughout the batter. Once sifted, take a spatula and gently fold the dry ingredients into the wet mixture. The key here is to fold, not to stir vigorously. Folding helps to incorporate the flour without developing too much gluten, which can result in a tough, chewy cake. Continue folding until the mixture is smooth and just combined, with no visible streaks of dry flour. A light, airy batter is what you want. After your batter is ready, transfer it evenly into a greased and floured baking dish. Ensure the dish is thoroughly coated with butter or baking spray and then lightly dusted with flour to prevent sticking and ensure easy removal of your baked cake.
Step 3: Artfully Arranging Apples and Crafting the Irresistible Topping
This step is where the cake truly comes alive with its signature apple presentation. Begin by thoroughly washing your two medium-sized apples to remove any impurities. Once cleaned, carefully remove the core from each apple. A dedicated apple corer can make this task swift and simple, but a sharp knife works just as well. Next, thinly slice the apples. Aim for consistent, delicate slices, about 1/8 to 1/4 inch thick, as this ensures even cooking and a beautiful presentation. Arrange these thin apple slices on top of the prepared batter in your baking dish. You can create a visually appealing pattern, such as overlapping circles or rows, placing them slightly upright for a rustic charm. In a separate small bowl, combine a generous amount of cinnamon with powdered sugar. The exact ratio can be adjusted to your preference, but a good starting point is 2 parts powdered sugar to 1 part cinnamon. Sift this delightful dry mixture evenly over the arranged apples. This cinnamon-sugar blend will caramelize beautifully during baking, forming a fragrant, slightly crisp topping. Finally, take cold butter and slice it into tiny, pea-sized pieces. Scatter these small butter pieces generously and evenly over the cinnamon-sugar-dusted apples. As the cake bakes, these butter pieces will melt, creating pockets of rich, buttery flavor and contributing to a golden, irresistible crust on top of your cake.
Step 4: Baking to Golden Perfection and Serving Your Masterpiece
With your apple-laden batter now ready, it’s time for the magic of the oven. Carefully place your baking pan or dish into a preheated oven. Bake for approximately 45 minutes at 338 degrees F (or 170 degrees C). Baking times can vary slightly depending on your oven, so it’s always a good idea to keep an eye on the cake towards the end of the suggested time. The cake is done when a toothpick inserted into the center comes out clean, and the top is beautifully golden brown, with the apples softened and caramelized. Once baked to perfection, carefully remove the cake from the oven. While it’s still warm, take some of your remaining cinnamon and powdered sugar mixture and sift a little more on top of the cake. This final dusting enhances both the visual appeal and the delightful spice flavor. Allow the cake to cool in its pan for at least 15-20 minutes on a wire rack before attempting to transfer it. This cooling period allows the cake to set, making it easier to handle and preventing it from crumbling. Once slightly cooled, carefully transfer the cake to a serving plate. Slice generous portions and serve. This apple cake is absolutely divine on its own, but for an extra touch of indulgence, consider serving it with a scoop of vanilla ice cream, a dollop of fresh whipped cream, or a drizzle of warm caramel sauce. Share this delightful treat with friends or family and watch their faces light up with every bite!
Pro Tips for the Ultimate Apple Cake Experience
Elevate your apple cake from great to extraordinary with these expert tips:
- Room Temperature Ingredients: Ensure your eggs and yogurt are at room temperature. This helps them emulsify better with other ingredients, resulting in a smoother batter and a more tender cake.
- Don’t Overmix: When adding the dry ingredients, mix just until combined. Overmixing develops gluten, which can lead to a tough, dense cake.
- Choose the Right Apples: While most apples work, a combination of sweet and tart varieties (like Gala and Granny Smith) offers the best flavor balance. Firm apples hold their shape better during baking.
- Parchment Paper Lining: For extra insurance against sticking and easy removal, line the bottom of your baking dish with parchment paper in addition to greasing and flouring.
- Oven Calibration: Ovens can vary. If you’re unsure about your oven’s accuracy, an oven thermometer can be a worthwhile investment to ensure consistent baking temperatures.
- Customization is Key: Feel free to add a handful of chopped walnuts or pecans to the batter for extra texture, or a pinch of nutmeg to the cinnamon-sugar mix for more warmth.
- Test for Doneness: Always rely on the toothpick test. Insert a wooden skewer or toothpick into the center of the cake; if it comes out clean, the cake is ready.
Frequently Asked Questions (FAQ) About This Delicious Apple Cake
- Q: Can I use different types of apples for this recipe?
- A: Absolutely! While firm, sweet-tart apples like Honeycrisp, Gala, Fuji, or Granny Smith are recommended for their flavor and ability to hold shape, you can experiment with your favorites. A mix of varieties often yields the most complex flavor.
- Q: How should I store the apple cake, and how long does it last?
- A: Store the cooled apple cake in an airtight container at room temperature for up to 2-3 days, or in the refrigerator for up to 5 days. You can also freeze individual slices, wrapped tightly, for up to 1-2 months. Thaw at room temperature before serving.
- Q: Can I make this apple cake gluten-free?
- A: Yes, you can! Substitute the all-purpose flour with a high-quality gluten-free all-purpose flour blend (ensure it contains xanthan gum) in a 1:1 ratio. The texture might be slightly different but will still be delicious.
- Q: What if I don’t have yogurt? Can I substitute it?
- A: Plain full-fat yogurt adds incredible moisture and tenderness. If you don’t have it, sour cream is an excellent 1:1 substitute. Buttermilk can also work, but reduce the amount slightly or compensate with less liquid elsewhere as it’s thinner.
- Q: Can I add nuts or other spices to the cake?
- A: Certainly! For an added crunch and flavor, consider folding 1/2 cup of chopped walnuts or pecans into the batter. A pinch of nutmeg, cardamom, or allspice can also be added to the cinnamon-sugar topping for a more complex spice profile.
- Q: What kind of baking dish size is best for this recipe?
- A: A standard 9-inch round or square baking dish works perfectly. If using a different size, be mindful that the baking time might need slight adjustments; a smaller pan might require more time, and a larger pan less.
Serving Suggestions: Elevate Your Apple Cake Experience
This quick and easy apple cake is a delight on its own, but a few simple additions can transform it into an even more memorable dessert:
- Classic Vanilla Ice Cream: A warm slice of apple cake paired with a scoop of cold, creamy vanilla ice cream is a match made in heaven. The contrasting temperatures and flavors are simply irresistible.
- Fresh Whipped Cream: A dollop of lightly sweetened homemade whipped cream adds an ethereal lightness and richness that complements the density of the cake.
- Caramel Drizzle: A luscious homemade or store-bought caramel sauce drizzled over each slice before serving adds an extra layer of sweetness and sticky indulgence.
- Aromatic Tea or Coffee: For a cozy afternoon treat or a delightful dessert after dinner, serve your apple cake alongside a steaming cup of your favorite tea or a freshly brewed coffee.
- Powdered Sugar & Cinnamon Dust: For a simple yet elegant finish, a light dusting of powdered sugar and a hint of cinnamon is all you need.
- Berries on the Side: A small handful of fresh berries (raspberries, blueberries, or sliced strawberries) can add a touch of freshness and a subtle tart counterpoint.
Conclusion: Enjoy Your Homemade Apple Masterpiece!
There’s a unique satisfaction that comes from baking something delicious from scratch, and this quick and easy apple cake offers that joy in abundance. From its simple ingredients to its straightforward 4-step process, it’s designed to bring a little bit of homemade magic into your life without any fuss. The incredible aroma filling your kitchen, the beautiful golden crust, and the perfect balance of sweet, tart, and spicy flavors make this cake an instant favorite. Whether you’re baking for a special occasion or simply craving a comforting treat, this recipe by Olesea Slavinski is your go-to. So, preheat your oven, gather your ingredients, and get ready to create an apple cake that will undoubtedly impress and delight everyone lucky enough to try a slice. Happy baking, and enjoy every single delightful bite of your homemade masterpiece!