
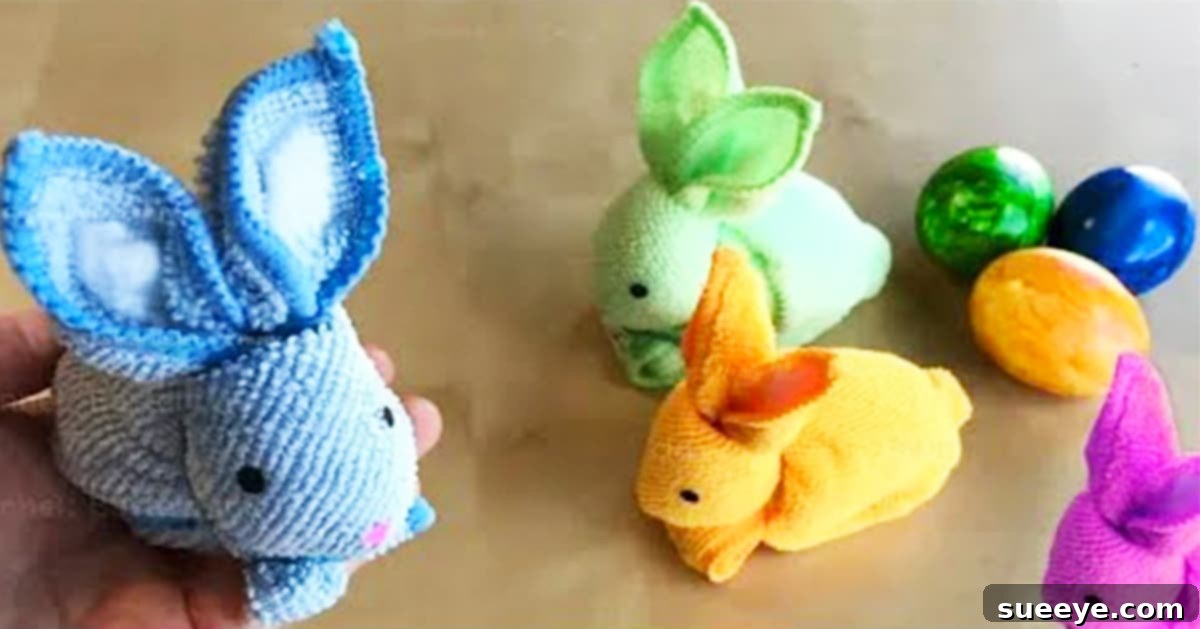
DIY Easter Towel Bunny: An Easy & Adorable Craft for Festive Decor
As spring awakens and the joyous spirit of Easter approaches, there’s no better way to infuse your home with warmth and charm than through delightful handmade decorations. Among the myriad of creative projects, the DIY Easter Towel Bunny stands out as an exceptionally cute, simple, and utterly charming craft. Perfect for adding a whimsical touch to your holiday display, these adorable bunnies are not only fun to make but also serve as versatile decor pieces or thoughtful gifts.
Inspired by the ingenious craft ideas shared by Basteln mit Papier: Craft ideas on YouTube, this project transforms an ordinary towel into an enchanting Easter character. Imagine a cluster of these sweet bunnies gracing your bathroom counter, welcoming guests in the entryway, or nestled within an Easter basket. Their ease of creation makes them an ideal activity for crafters of all skill levels, from seasoned DIY enthusiasts to parents looking for a fun and engaging project to do with their children. Let’s dive into how you can bring these charming towel bunnies to life, adding a unique, personal touch to your Easter celebrations.
Why Craft an Easter Towel Bunny? Benefits and Charm
Beyond their undeniable cuteness, creating DIY Easter towel bunnies offers a host of advantages that make this project a must-try for the holiday season:
- Budget-Friendly Decor: Utilizing common household items like towels and rubber bands, this craft is incredibly affordable. You can repurpose old towels, making it an eco-conscious choice that saves money.
- Quick and Easy Creation: The simple folding techniques mean you can craft several bunnies in one sitting. This makes it perfect for last-minute decorating or for producing a batch of gifts efficiently.
- Versatile Home Accent: These towel bunnies are incredibly adaptable. Place them in bathrooms, guest rooms, on a mantelpiece, or use them as a centerpiece for your Easter brunch table. Their gentle presence adds a festive yet sophisticated touch to any space.
- Delightful Gift Idea: Looking for a unique addition to an Easter basket or a thoughtful hostess gift? A handmade towel bunny is a sweet and memorable present that shows you put in effort and care.
- Engaging Family Activity: This project is fantastic for involving children. Kids can help with folding (for older ones), cutting out facial features, or gluing, fostering their creativity and fine motor skills while spending quality time together.
- Customizable Appeal: With a variety of towel colors, decorative papers, and embellishments, the possibilities for personalization are endless. Create bunnies that match your existing decor or let your imagination run wild with vibrant hues.
Gathering Your Essential Supplies for Your DIY Easter Towel Bunny
One of the best aspects of this DIY project is that it requires only a handful of readily available materials. You likely have most of these items lying around your home already! Here’s what you’ll need to create your charming Easter towel bunnies:
- Towel: A hand towel or a small bath towel works best. The size will determine the size of your bunny. White, pastel colors, or even towels with subtle patterns can be used to create different looks. Ensure it’s clean and ironed for crisp folds.
- Rubber Bands: Several small, sturdy rubber bands will be crucial for securing the towel in its bunny shape. Clear or light-colored bands are ideal if you want them to be less noticeable.
- Construction Paper: Various colors of construction paper will be used to create the bunny’s facial features. Pink for the nose, black for eyes, and thin strips for whiskers are common choices, but feel free to get creative!
- Scissors: A good pair of scissors is needed for cutting the construction paper into desired shapes for the eyes, nose, and whiskers.
- Glue Stick: A standard glue stick is perfect for adhering the paper features to the towel. For a stronger hold, especially if the bunny will be handled frequently, consider other adhesive options.
- Cotton Balls: These soft additions are used to fill out the inside of the bunny ears, giving them a plump, realistic, and adorable appearance.
- Optional Embellishments: Ribbons, small bows, googly eyes, felt scraps, or even fabric paint can be used to add extra personality to your bunny.
Step-by-Step Guide: Crafting Your Adorable Towel Bunny
Creating your Easter towel bunny is a straightforward and enjoyable process. Follow these detailed instructions to transform your simple towel into a festive creature:
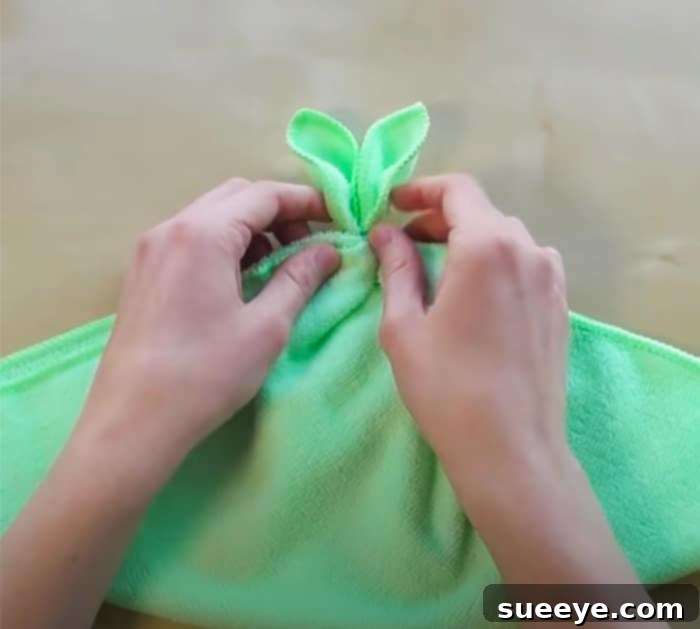
Step 1: Preparing Your Towel – The Foundation
Begin by laying your chosen towel flat on a clean, smooth surface. If your towel has any wrinkles, a quick iron can help achieve sharper folds, resulting in a neater bunny.
Step 2: Forming the Initial Triangle – The Body’s Base
Take one corner of the towel and fold it diagonally to the opposite edge, creating a large triangle shape. Ensure the edges align as neatly as possible. This large triangle will serve as the primary structure for your bunny’s body and ears.
Step 3: Sculpting the Bunny Ears – Iconic Charm
With the towel still in a triangle, identify the two tips of the topmost corner. These will become your bunny’s ears. Carefully fold each of these tips downwards and slightly inwards, shaping them into distinct ear-like forms. Once you are satisfied with the shape and symmetry of the ears, use a rubber band to secure them firmly together at their base. This will hold the ear shape and define the head.
Step 4: Rolling the Body – Creating Volume
Next, focus on the bottom edge of your towel triangle. Starting from this wide base, begin to tightly roll the towel upwards towards the secured ears. Roll it as snugly as possible to create a firm, cylindrical body for your bunny. This rolling motion adds volume and stability to the structure.
Step 5: Defining the Body and Tail – Bringing it to Life
Once you’ve rolled the bottom of the towel up to meet the ears, you will have a somewhat cylindrical shape with the ears protruding. Now, carefully fold the two sides of the rolled towel back towards the center. This action helps to further define the bunny’s body shape and can create a neat, compact form. You can use additional rubber bands, hidden underneath, to secure these folded sections if needed, ensuring the bunny maintains its posture.
For more detailed visual instructions and intricate folding techniques, we highly recommend watching the full tutorial by Basteln mit Papier: Craft ideas on YouTube. Their video provides a clear, step-by-step demonstration that can greatly assist in perfecting your towel bunny.
Step 6: Crafting the Bunny’s Face – Personality & Expression
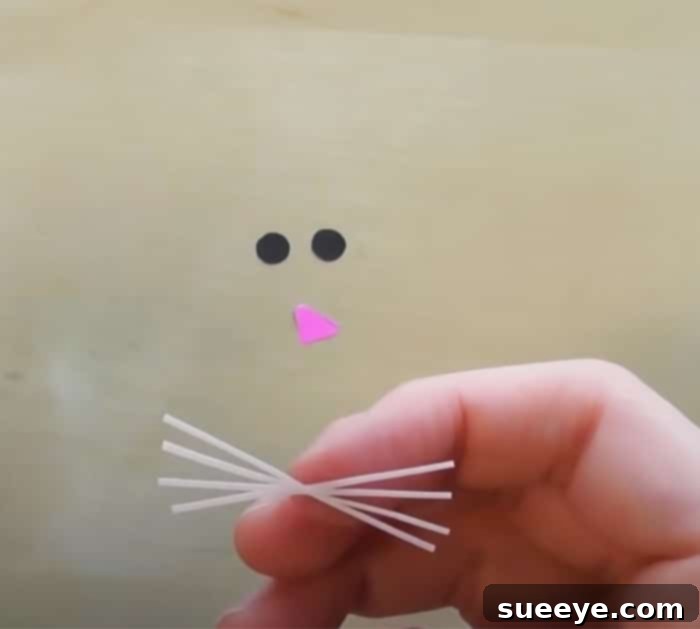
This is where your bunny truly comes to life! Using construction paper, carefully cut out shapes for the eyes, nose, and whiskers. For eyes, simple black circles or ovals work well, or you could opt for small googly eyes for a playful touch. A pink triangle or heart shape makes an adorable nose, and thin strips of black or white paper can form the whiskers. Once cut, arrange them on your bunny’s ‘face’ (the front of the head section) until you’re happy with the expression. Then, use your glue stick to firmly attach them. If you’re concerned about paper features not sticking well to the towel’s fabric, consider using a stronger adhesive like a hot glue gun (with adult supervision) or fabric glue for a more permanent bond.
Step 7: Adding Ear Details – The Soft Touch
To give your bunny’s ears a lovely, soft, and finished look, gently pull apart pieces of cotton balls and tuck them inside the folded ear sections. This adds a charming puffy texture and a touch of realism to the inner ear. You can secure them with a tiny dab of glue if they seem loose.
Step 8: Final Adjustments and Embellishments
Take a moment to fluff up your bunny and adjust any folds to ensure it stands upright and looks its best. This is also the perfect opportunity to add any extra embellishments. Tie a small ribbon or bow around its neck, attach a tiny pom-pom for a tail, or even dab a bit of blush on its cheeks for an extra rosy glow. These small touches can really make your towel bunny unique.
Tips for Success, Creative Variations, and Display Ideas
To make your towel bunny project even more enjoyable and successful, consider these tips and ideas:
- Towel Choice Matters: While any towel can work, consider the fabric. Thicker, less plush towels tend to hold their shape better. Hand towels are ideal for medium-sized bunnies, while washcloths create mini-bunnies perfect for place settings.
- Secure Everything: Don’t be shy with rubber bands, especially if the bunny will be handled. You can always strategically hide them later with ribbons or by tucking them into folds.
- Personalize the Face: Beyond paper, you can use fabric markers for eyes and noses, sew on small buttons, or even use felt for a softer look. Each bunny can have its own personality!
- Dress Them Up: Accessorize your bunnies! Small bows, miniature hats, tiny scarves, or even a little felt carrot can add immense character.
- Theme Your Bunnies: While perfect for Easter, these towel bunnies can be adapted for other occasions. Use different colored towels and accessories for baby showers, spring decor, or even as charming additions to a guest bathroom year-round.
- Involve the Kids Safely: For younger children, pre-cut the facial features and let them handle the gluing. Older children can practice their cutting and folding skills under supervision.
Where to Display Your Charming Towel Bunnies
Once your adorable towel bunnies are complete, the fun continues with finding the perfect spots to showcase them:
- Bathroom Counters: This is a classic choice! They add a playful touch to your guest bathroom or master bath, especially when paired with coordinating towels.
- Guest Rooms: Welcome visitors with a whimsical bunny sitting on their bed or dresser.
- Easter Baskets: Replace traditional basket fillers with a handmade towel bunny for an extra special touch.
- Dining Table Centerpiece: Arrange a few bunnies with flowers and Easter eggs for a delightful festive table setting.
- Mantelpieces and Shelves: Create a charming Easter vignette among your other seasonal decorations.
- Children’s Rooms: A cute and soft addition to a child’s bedroom during the Easter season.
Conclusion: A Heartfelt Touch for Your Easter Celebrations
The DIY Easter towel bunny is more than just a craft; it’s an opportunity to create something beautiful, share joy, and infuse your home with the delightful spirit of spring and Easter. Its affordability, ease of creation, and endless customization options make it a truly rewarding project for individuals and families alike. Whether you’re aiming for charming holiday decor, a unique gift, or simply a fun activity with the kids, these adorable towel bunnies are sure to bring smiles and a touch of handmade warmth to your celebrations.
So, gather your materials, follow these simple steps, and prepare to welcome these cute, fluffy friends into your home this Easter. Happy crafting!