
How to Make Shoes That Are Too Big Fit Perfectly: DIY Hacks for Comfort and Style
There’s nothing quite as frustrating as falling in love with a pair of shoes, only to find they’re just a tad too big when you try them on. Whether it’s an irresistible online purchase with a strict no-return policy or a clearance find you simply couldn’t pass up, oversized footwear can lead to discomfort, blisters, and an unstable stride. But before you banish those beautiful shoes to the back of your closet, know that there are simple, effective, and budget-friendly solutions to transform them into your ideal fit.
I recently faced this exact dilemma after buying a stunning pair of shoes online that turned out to be slightly too large. My search for a solution led me to an excellent video by Kate Color on YouTube, which immediately sparked my interest. The clever techniques Kate shared proved to be a complete game-changer, solving my shoe dilemma with remarkable ease. This guide expands on these fantastic ideas, offering comprehensive strategies to ensure your shoes fit comfortably and securely, allowing you to walk with confidence and style.
Understanding the Common Problem of Ill-Fitting Shoes
Shoes that are even a little too big can cause a surprising amount of discomfort and even pose risks. When your feet slide around inside your shoes, you’re more prone to developing painful blisters, calluses, and corns. Your gait can become unnatural, potentially leading to knee or back pain over time. Furthermore, loose shoes can be a tripping hazard, diminishing both your comfort and your safety.
Several factors contribute to shoes feeling too big:
- Online Shopping Risks: Without the ability to try shoes on, it’s easy to misjudge sizing, especially with variations between brands.
- Foot Swelling: Our feet naturally swell throughout the day. A pair that fit perfectly in the morning might feel loose by evening.
- Brand Sizing Inconsistencies: A size 7 in one brand might differ significantly from a size 7 in another.
- Half Sizes: Sometimes, you’re in between sizes, and going up to the next full size can leave you with excess room.
- Material Give: Leather and other natural materials can stretch out over time, making once-snug shoes feel loose.
The good news is that many of these issues can be rectified with simple DIY hacks, saving you the hassle and expense of returns or purchasing new shoes.
Essential Materials for Your Shoe-Fitting Toolkit
To embark on your journey to perfectly fitting shoes, you’ll want to gather a few key items. These materials are generally inexpensive, readily available, and incredibly effective.
- Cotton Balls: Or alternative soft fillers like tissue paper, facial tissues, lambswool, or even soft fabric scraps. These are ideal for filling space in the toe box.
- Suede Heel Grips: While suede is excellent, silicone or gel heel liners are also highly effective. These adhere to the back of your shoe to prevent heel slippage.
- Full or Half Insoles: (Optional, but highly recommended for more significant size differences) These come in various materials (foam, gel, leather) and help fill overall volume.
- Ball of Foot Cushions / Metatarsal Pads: (Optional) Great for preventing your foot from sliding forward and providing extra cushioning.
The Core Solutions: Cotton Balls and Heel Grips in Detail
The two foundational methods, beautifully demonstrated by Kate Color, are incredibly versatile and effective for addressing common looseness issues in the toe box and at the heel. These methods work particularly well for pumps, ballet flats, and other closed-toe styles.
Method 1: The Cotton Ball Trick for a Snug Toe Fit
If your shoes are too long, or your toes simply have too much wiggle room, the cotton ball trick is your go-to solution. This simple hack ensures your foot stays securely in place, preventing forward sliding and reducing friction.
Detailed Directions for Using Cotton Balls:
- Assess the Gap: Put on your shoes and identify how much extra space there is in the toe box. You want enough to feel comfortable, but not so much that your foot slides forward excessively.
- Gather Your Filler: While cotton balls are classic, you can also use crumpled tissue paper, facial tissues, or even a small piece of lambswool. Choose a material that is soft and won’t cause pressure points.
- Start Small: Begin by taking one or two cotton balls (or a small wad of tissue) and gently stuffing them into the very tip of the shoe’s toe box.
- Try On and Adjust: Put the shoe back on. Walk around a bit. Does it feel tighter? Is it too tight? The goal is to fill the excess space without cramping your toes.
- Add More as Needed: If the shoe still feels loose, add another cotton ball or a bit more tissue. Distribute the material evenly across the width of the toe box. You might need more on one side than the other, depending on the shape of your foot and shoe.
- Repeat for the Other Shoe: Ensure both shoes have a balanced amount of filler for symmetrical comfort.
- Fine-Tune: You may need to experiment a few times to find the perfect amount. The beauty of this method is its customizability – you can easily add or remove material.
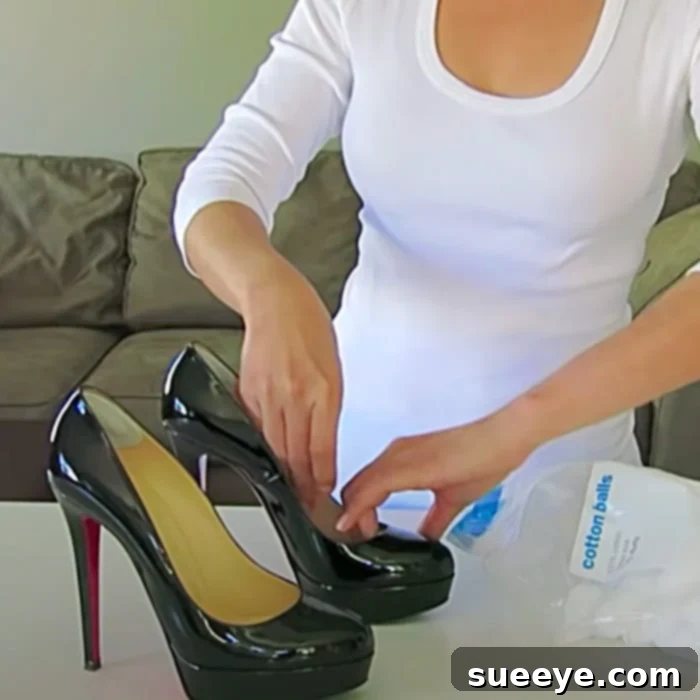
This method is particularly effective for closed-toe shoes like pumps, loafers, and ballet flats where the front of the shoe is solid. It helps create a snugger fit, preventing your foot from sliding forward and reducing pressure on your toes, which often leads to discomfort.
Method 2: Suede Heel Grips for a Secure Ankle
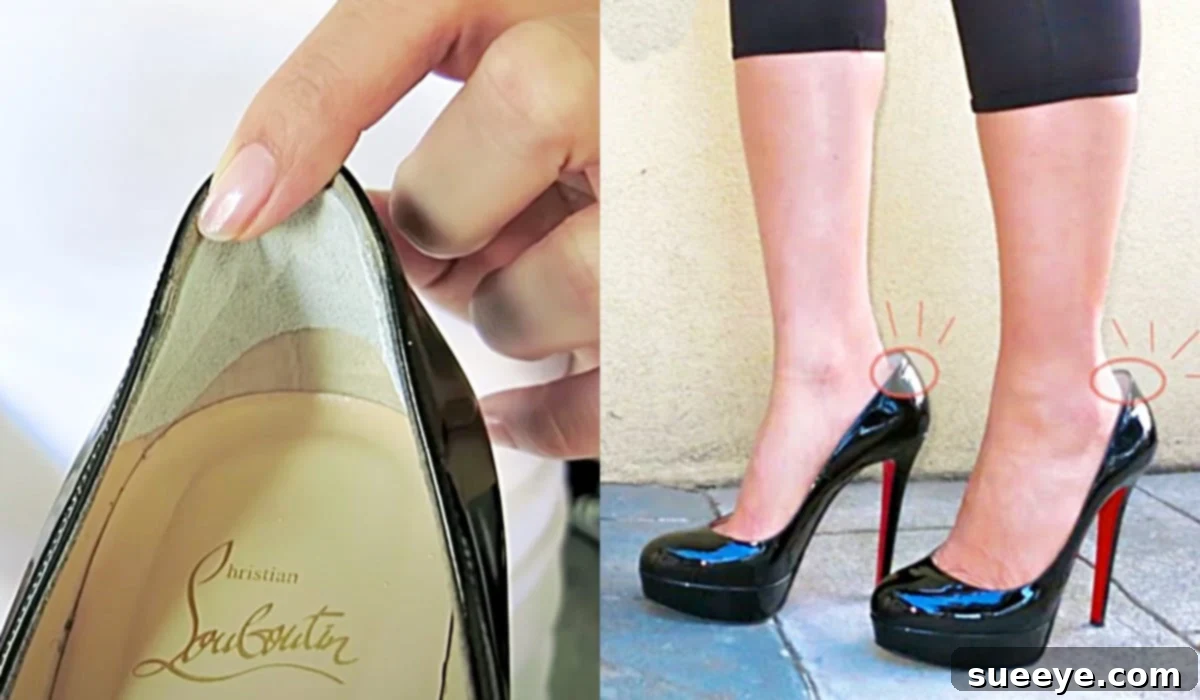
Heel slippage is one of the most common complaints with oversized shoes. It’s not just annoying; it can cause painful blisters and make walking unstable. Suede heel grips are an excellent solution to combat this issue, providing a soft, friction-reducing barrier that keeps your heel firmly in place.
Detailed Directions for Applying Heel Grips:
- Clean the Area: Before applying the heel grip, ensure the inside back of your shoe is clean and dry. Any dirt or oil can compromise the adhesive.
- Peel the Backing: Carefully peel off the protective backing from the heel grip to expose the adhesive side.
- Position Carefully: Align the heel grip along the upper back edge of the shoe’s interior. You want it to sit comfortably against your heel without extending too far down or up.
- Press Firmly: Once positioned, press the grip firmly onto the shoe’s lining, working from the center outwards to eliminate any air bubbles and ensure a strong bond.
- Test the Fit: Slip your foot into the shoe. Does your heel feel more secure? Is there less slippage? Walk around to confirm the comfort and effectiveness.
- Repeat for the Other Shoe: Apply the second heel grip to the other shoe, ensuring it’s at a similar height and position for balanced comfort.
- Consider Material: While suede offers a nice grip, gel or silicone heel liners can also provide excellent cushioning and anti-slip properties, particularly useful for sensitive heels.
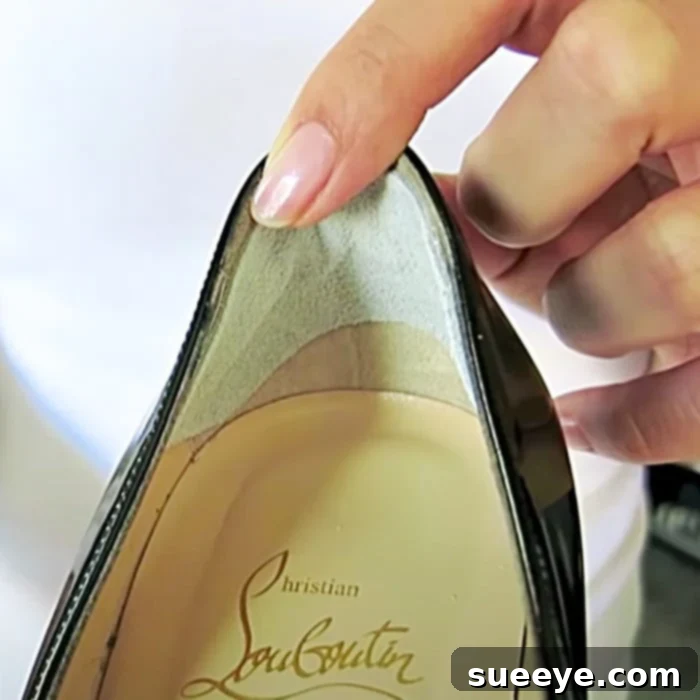
These simple yet effective methods, especially when combined, can completely revolutionize the fit of your slightly oversized shoes. They truly helped me solve my own tragic shoe dilemma, allowing me to enjoy my new footwear without any discomfort!
Beyond the Basics: Other Solutions for Loose Shoes
While cotton balls and heel grips are fantastic starting points, sometimes a shoe requires a bit more intervention to achieve that perfect fit. Here are several other widely used methods to consider, depending on the degree of looseness and the type of shoe.
1. Full and Half Insoles for Overall Volume Reduction
If your shoes feel generally roomy throughout, rather than just in specific areas, a full or half insole can make a significant difference. Insoles work by reducing the internal volume of the shoe, lifting your foot slightly and filling out excess space.
- Full Insoles: These cover the entire footbed of the shoe. They come in various materials – foam for cushioning, gel for shock absorption, and leather for a more natural feel. They’re excellent for shoes that are about a half-size too big.
- Half Insoles (Ball of Foot or Arch Support): These usually sit under the front half of your foot or specifically target the arch. They can prevent your foot from sliding forward, pushing your heel back into place, and provide targeted support.
When selecting an insole, consider the type of shoe. A thin gel insole might work well in a dress shoe, while a thicker foam insole could be perfect for sneakers or boots.
2. Ball of Foot Cushions and Metatarsal Pads
Often, the problem isn’t just overall looseness but a tendency for your foot to slide forward, especially in heels. This pushes your toes into the shoe’s front and leaves a gap at the heel. Ball of foot cushions (also known as metatarsal pads) are designed to prevent this. They provide cushioning and friction under the ball of your foot, effectively stopping forward motion and keeping your foot correctly positioned.
These are typically small, adhesive pads that you place under the metatarsal area (the area just behind your toes). They can be a lifesaver for open-toe heels or sandals where other methods might be visible.
3. Toe Fillers (More Structured Alternatives)
For those who find cotton balls too temporary or lumpy, specialized toe fillers offer a more structured and durable solution. These are typically made from foam or gel and are designed to conform to the toe box, providing a smooth, consistent fill. They are reusable and often more comfortable for extended wear than makeshift options.
4. Adjusting Straps and Laces
For shoes with adjustable elements like laces, buckles, or straps, tightening these components can significantly improve the fit.
- Laced Shoes: Experiment with different lacing techniques. For instance, using a runner’s loop can create a tighter fit around the ankle and prevent heel slippage in athletic shoes.
- Strapped Shoes: Cinch up buckles or adjust Velcro straps. Sometimes, adding an extra hole to a leather strap (professionally done) can provide the necessary snugness.
This method is particularly effective for sandals, Mary Janes, and sneakers where you have direct control over the shoe’s tension.
Choosing the Right Fix for Your Shoes and Feet
With so many options, how do you decide which method is best for your particular shoe dilemma? Consider these factors:
- Degree of Looseness: For a slight gap, cotton balls or heel grips might suffice. For a half-size too big, full insoles or a combination of methods might be needed.
- Shoe Style: Closed-toe shoes allow for discreet use of toe fillers. Heels often benefit most from ball of foot cushions to prevent forward slide. Sandals and open-toe shoes are more challenging for visible solutions, making transparent gel pads ideal.
- Material of the Shoe: Stiff shoes might not accommodate thick inserts easily, while softer shoes have more flexibility.
- Your Comfort Needs: If you have sensitive feet, opt for softer materials like gel or memory foam inserts. If you need firm support, look for denser insoles.
A Comprehensive Step-by-Step Guide to Achieving the Perfect Fit
Let’s consolidate these strategies into a comprehensive guide to make your oversized shoes fit like a dream. This combines the core methods with additional considerations for maximum comfort and effectiveness.
Step 1: Thoroughly Assess the Fit Problem
Put on your shoes and walk around. Pinpoint exactly where the shoe feels loose: Is it in the toe box, the heel, or does the entire shoe feel voluminous? Identifying the specific problem areas will guide your choice of solutions.
Step 2: Gather Your Chosen Materials
Based on your assessment, select the appropriate tools:
- For toe box looseness: Cotton balls, tissue paper, or dedicated toe fillers.
- For heel slippage: Suede, gel, or silicone heel grips.
- For overall looseness: Full or half insoles.
- For forward sliding: Ball of foot cushions.
Step 3: Address the Toe Box (If Needed)
If there’s too much space at the front of your shoes, start with a filler. Take a few cotton balls or a wad of tissue and gently stuff them into the very tip of the shoe. Put the shoe on and test. Add or remove filler until your toes feel comfortably snug without being cramped. This method, as demonstrated by Kate Color, is surprisingly effective for securing the front of your foot.
Step 4: Secure the Heel (If Needed)
For shoes where your heel slips out, clean the inside back of the shoe, then carefully apply a suede, gel, or silicone heel grip. Press firmly to ensure good adhesion. Try the shoe on; your heel should now feel more secure, preventing friction and blistering. This second key step from Kate Color’s video is crucial for stability.
Step 5: Test and Adjust
Walk around in your modified shoes for a few minutes. Pay attention to any pressure points or areas that still feel loose. It might take a bit of trial and error to get the perfect balance. Don’t be afraid to remove and reapply inserts or adjust the amount of toe filler.
Step 6: Consider Additional Aids for Overall Support
If the shoes still feel too big after addressing the toe and heel, or if you need extra cushioning, consider adding a full or half insole. These can fill out the remaining volume and provide added comfort. For high heels, a ball of foot cushion can prevent your foot from sliding forward, complementing the heel grip.
Tips for Preventing Future Shoe Fit Disasters
While these hacks are incredibly useful, prevention is always better than cure. Here are some tips to help you buy shoes that fit right from the start:
- Measure Your Feet Regularly: Foot size can change over time.
- Shop in the Afternoon/Evening: Your feet are typically at their largest due to natural swelling.
- Read Reviews for Sizing Information: Other buyers often mention if a shoe runs big or small.
- Understand Brand Sizing: If you know a particular brand tends to run large, adjust your size accordingly.
- Try Shoes on with the Right Socks/Hosiery: Wear what you intend to wear with the shoes.
- Walk Around the Store: Don’t just sit and try them on. Walk around to assess comfort and fit.
When to Call It Quits: Prioritizing Foot Health
While these DIY hacks are incredibly effective for shoes that are slightly too big, there’s a limit. If a shoe is more than a full size too large, even multiple inserts might not make it truly comfortable or safe. Excessive padding can also lead to new pressure points or an unnatural gait.
Ultimately, your foot health is paramount. If a shoe continues to cause pain, discomfort, or instability despite your best efforts, it might be time to consider returning it (if possible) or letting it go. Investing in properly fitting footwear is an investment in your long-term well-being.
Conclusion: Walk Confidently in Comfort
The frustration of owning a pair of beautiful shoes that just don’t fit is a common one, but it doesn’t have to be a permanent problem. With the simple, ingenious methods like using cotton balls to fill the toe box and suede heel grips to secure the heel, as highlighted by Kate Color, you can easily transform oversized shoes into a comfortable, confident stride. Furthermore, incorporating insoles, ball of foot cushions, and thoughtful adjustments can provide even more tailored solutions.
These shoe hacks empower you to take control of your footwear comfort, extending the life of your favorite shoes and saving you from unnecessary returns or purchases. By understanding your shoe’s specific fit issues and applying the right remedy, you can step out in style and comfort, knowing your shoes fit you perfectly. Say goodbye to slipping heels and cramped toes, and hello to happy feet!