
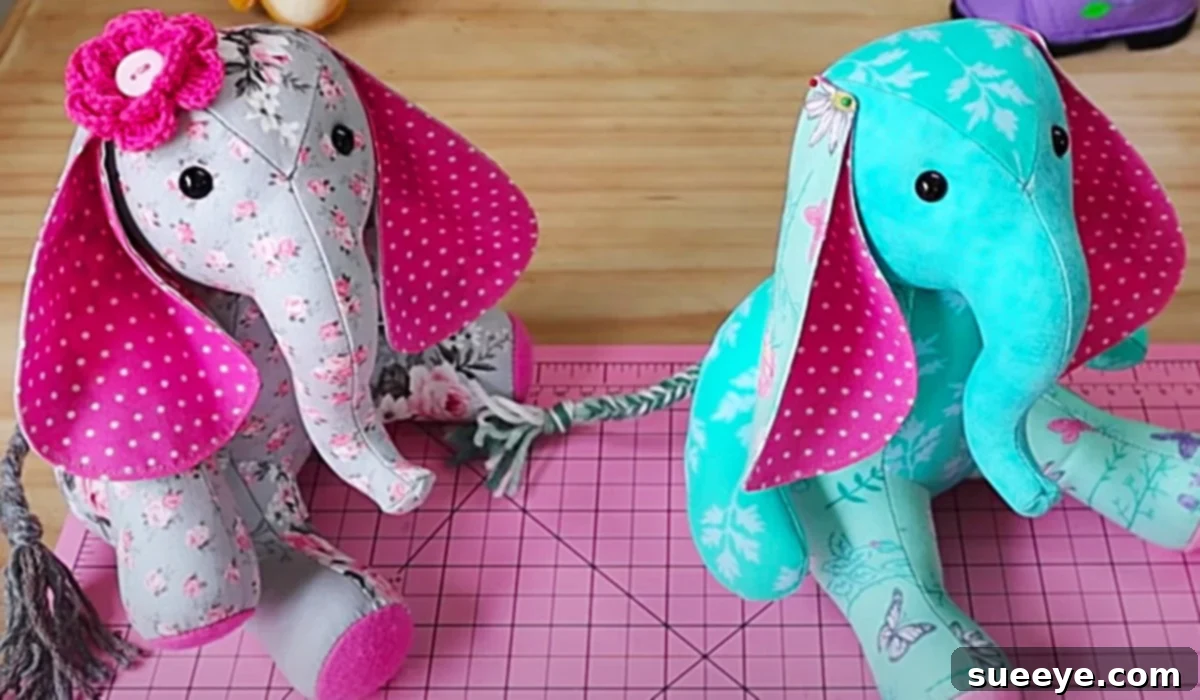
Craft a Charming Patchwork Elephant: Your Ultimate DIY Guide with Free Pattern
There’s a special joy in creating something with your own hands, especially when it results in a treasured item like a cuddly stuffed animal. For enthusiasts of unique crafts and collectors of charming figures, the idea of a handmade elephant often sparks delight. If you’ve been searching for an engaging and rewarding DIY project, look no further than crafting a beautiful patchwork elephant. This comprehensive guide, complete with a free pattern and an incredible video tutorial, will walk you through every step, ensuring a fun and successful crafting experience.
This particular patchwork elephant project stands out not only for its adorable design but also for its accessibility. It comes with a free, printable pattern, eliminating the need to search or purchase one separately. Coupled with a fantastic, easy-to-follow video tutorial from Pay It Forward on YouTube, even beginners can confidently embark on this creative journey. The finished product is incredibly cute, making it an ideal gift for children, a thoughtful present for a new baby, or a charming decorative piece for anyone who appreciates handcrafted elegance.
Why This Patchwork Elephant Project is a Must-Try
Beyond the simple act of sewing, creating a patchwork elephant offers numerous benefits and opportunities for personalization. It’s more than just a craft; it’s a chance to make something truly special:
- Beginner-Friendly: The detailed video tutorial and free pattern are designed to guide you effortlessly, making it perfect for those new to sewing or plush toy creation.
- Personalized Gifts: A handmade patchwork elephant is a deeply personal and heartfelt gift. You can customize fabric choices to match a child’s room, a favorite color scheme, or even use fabrics that hold sentimental value.
- Unique Home Decor: This isn’t just a toy; it’s a charming decorative accent that can add character to a nursery, a child’s bedroom, or any space needing a touch of whimsical charm.
- Skill Development: Undertaking this project helps hone your sewing skills, from cutting and stitching to stuffing and finishing, building confidence for future crafting endeavors.
- Eco-Conscious Crafting: It’s an excellent opportunity to use up fabric scraps, reducing waste and giving new life to forgotten textiles, embodying a sustainable approach to crafting.
- Creative Expression: From choosing fabrics to adding embellishments, this project allows for immense creative freedom, letting your personality shine through in the final design.
Essential Materials for Your Adorable Patchwork Elephant
Before diving into the sewing process, gather all your materials. Having everything ready will ensure a smooth and enjoyable crafting experience. Here’s a detailed look at what you’ll need:
- Free Pattern Download: This is your blueprint! Make sure to download and print it accurately, ensuring the scale is correct for the intended size of your elephant. Printing on sturdy paper can help with tracing.
- Fabric: This is where the “patchwork” magic happens. You’ll need an assortment of cotton fabrics, quilting cotton, or even soft flannel. Consider using a mix of patterns, colors, and textures to achieve a vibrant and interesting patchwork effect. Scraps from previous projects are perfect for this! For the elephant’s main body, aim for durable, non-stretchy fabrics.
- Felt: Ideal for smaller details like the inner ears, or if you prefer to sew on felt eyes rather than embroidering them. Felt is easy to cut and doesn’t fray, making it user-friendly.
- Embroidery Floss: Essential for adding personality to your elephant’s face. Choose black or dark brown floss for eyes and a lighter color for any mouth or decorative stitches you wish to add.
- Thread: All-purpose polyester sewing thread in colors that either match your fabric choices or are neutral (like white or grey) will work well. You’ll need it for both machine and hand sewing.
- A Needle: A sharp hand-sewing needle is crucial for closing the opening and adding details. If you’re using a sewing machine, ensure you have the correct needle type for your fabric.
- Buttons (Optional): If you choose to use buttons for eyes, select ones that are securely attached and child-safe if the elephant is for a baby or small child. Alternatively, embroidered or felt eyes are safer options for young ones.
- Yarn (for the tail): A small amount of yarn, preferably in a coordinating color, will create a lovely little tail for your elephant. Different textures of yarn can add character.
- Stuffing: High-quality polyester fiberfill is recommended for a soft and cuddly finish. Make sure you have enough to firmly stuff the entire elephant, giving it a good shape without being lumpy.
- Basic Sewing Tools (Recommended): Don’t forget sharp fabric scissors, sewing pins, an iron and ironing board, and a fabric marker or chalk for tracing the pattern. A sewing machine will speed up the process, but this project can also be entirely hand-sewn.
Step-by-Step Guide: Crafting Your Patchwork Elephant
Creating your patchwork elephant is a rewarding journey that unfolds in several easy-to-manage steps. The video tutorial by Pay It Forward on YouTube offers excellent visual guidance, which we highly recommend consulting throughout the process. Here’s a detailed breakdown:
1. Preparation: Gathering and Cutting Your Fabric Pieces
The foundation of any great sewing project lies in precise preparation. Begin by downloading and printing your free pattern. Carefully cut out all the paper pattern pieces. Next, select your fabrics for the patchwork design. Lay your chosen fabrics flat and press them with an iron to remove any wrinkles. Pin the paper pattern pieces onto the wrong side of your fabric, ensuring you follow the grainline if indicated. With sharp fabric scissors, meticulously cut out all the fabric pieces for the elephant’s body, ears, and any other components. Remember to transfer any markings from the pattern, such as dart lines or placement guides, using a fabric marker or chalk. Accuracy in this step will greatly impact the final outcome.
2. The Art of Patchwork: Assembling the Elephant Body
This is where your elephant truly starts to take shape! The patchwork design involves sewing individual fabric pieces together to form the larger sections of the elephant’s body. Following the pattern’s instructions, place your fabric pieces right sides together, aligning edges carefully. Pin them in place and stitch them using a consistent seam allowance (typically 1/4 inch or 1/2 inch, as indicated by the pattern). After sewing each seam, press the seams open or to one side with an iron to reduce bulk and create a neat finish. Continue this process, connecting all the body pieces until you have the complete front and back sections of your elephant. The video tutorial is particularly helpful here for visualizing the assembly sequence.
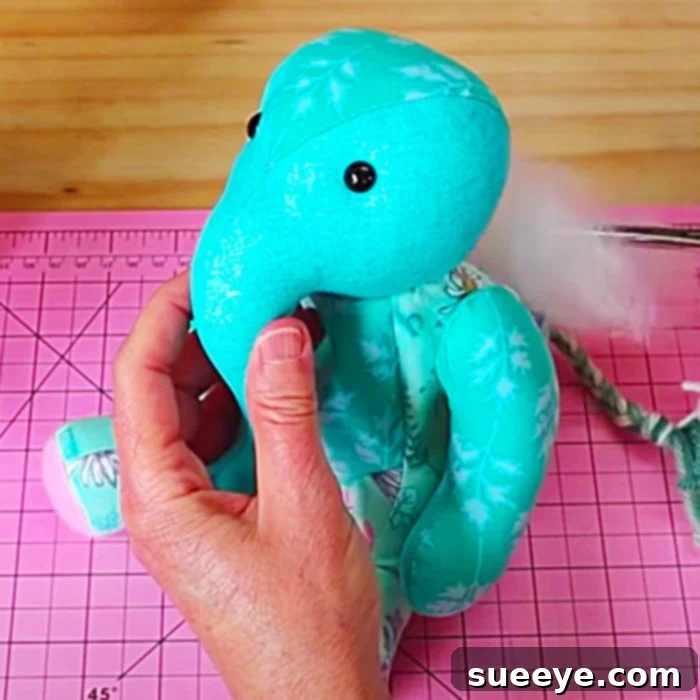
3. Adding Charming Details: Ears, Eyes, and Tail
Once the main body pieces are assembled, it’s time to add the defining characteristics of your elephant. Prepare the ears by sewing the outer fabric pieces to the inner felt pieces (right sides together), leaving an opening for turning. Trim the seams, clip the curves, and turn them right side out, then press. Attach the ears to the designated points on one of the elephant body pieces, usually by basting them in place. For the eyes, you can carefully embroider them using embroidery floss for a soft, child-safe finish. Alternatively, you can cut small circles from felt and applique them on, or securely sew on buttons (if the elephant is not for very young children). Finally, create the tail by braiding yarn or twisting strands together, then securely attach it to the tail placement mark on the elephant’s back piece.
4. Assembling and Stuffing Your Elephant
With all the details in place, it’s time to bring your elephant to life! Place the two main elephant body pieces (front and back) right sides together, carefully aligning all edges and seams. Pin them thoroughly to prevent shifting. Stitch around the perimeter, leaving a designated opening (usually along the belly or back) for turning and stuffing. Trim the seams, especially around curves, and clip any corners to ensure a smooth finish when turned. Carefully turn the elephant right side out through the opening. Now for the fun part: stuffing! Begin by pushing small handfuls of fiberfill into the extremities first – the trunk, ears, and legs – ensuring they are firmly packed. Gradually work your way into the body, distributing the stuffing evenly to achieve a smooth, lump-free, and well-shaped elephant. Don’t rush this step; good stuffing is key to a beautiful finished product.
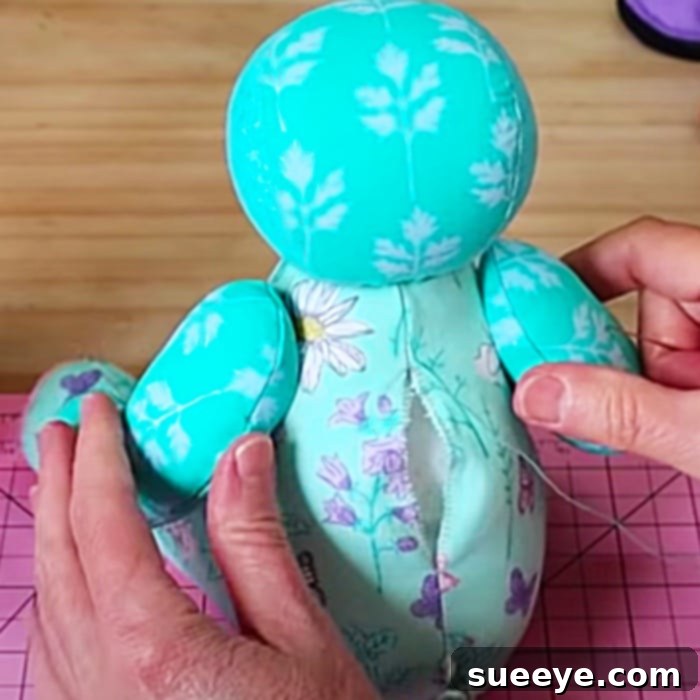
5. The Grand Finale: Closing and Finishing Touches
Once your elephant is stuffed to your satisfaction, it’s time to close the opening. Using a needle and matching thread, hand-stitch the opening closed. The ladder stitch (also known as the invisible stitch) is ideal for this, as it creates a nearly seamless closure that blends beautifully with your sewn seams. Take small, even stitches to ensure durability and a neat finish. After closing the opening, trim any loose threads. Give your elephant a gentle hug and adjust the stuffing if needed to perfect its shape. You can add a small ribbon around its neck, or a little bell if it’s for an older child, for extra charm. Step back and admire your beautiful, handmade creation!
Personalizing Your Patchwork Elephant: Creative Ideas
One of the most exciting aspects of this DIY project is the endless potential for personalization. Instead of traditional patchwork, consider using fabric from old baby clothes or a loved one’s shirt to create a sentimental “memory elephant.” Experiment with different fabric textures like corduroy for the body and satin for the inner ears. You could also embroider initials or a special date onto the elephant’s belly or ear. Add small fabric bows, tiny bells, or even a subtle scent sachet inside the stuffing for a unique sensory touch. The possibilities are truly boundless, allowing you to create an elephant that perfectly reflects its intended recipient or your personal style.
The Perfect Gift or Decorative Accent
This adorable patchwork elephant transcends being just a simple craft project; it becomes a cherished item. It’s an exceptional gift for a newborn, a perfect baby shower present, or a heartwarming birthday surprise for a child of any age. Its unique handmade quality makes it stand out from store-bought toys, often becoming a beloved keepsake. Beyond gifting, it serves as a delightful decorative accent, bringing a touch of whimsical charm and a pop of color to nurseries, children’s rooms, or even a cozy reading nook. Every stitch infused with care and creativity makes this elephant not just an object, but a symbol of affection.
Conclusion: Embrace the Joy of Handmade
Embarking on the journey to create your own patchwork elephant is an incredibly fulfilling experience. From the initial excitement of choosing fabrics to the final satisfaction of seeing your creation come to life, every step is a testament to the joy of handmade crafts. With the provided free pattern and the invaluable guidance of the Pay It Forward video tutorial, you have all the resources needed to craft a truly enchanting elephant. Whether it’s destined to be a treasured toy, a decorative centerpiece, or a heartfelt gift, your handmade patchwork elephant will undoubtedly bring smiles and warmth for years to come. So, gather your materials, unleash your creativity, and start sewing your very own charming companion today!