
Delightful & Easy Creamy Strawberry Cake: Your Next Favorite Dessert
Prepare to be enchanted by this utterly delightful and surprisingly easy-to-make creamy strawberry cake, a recipe perfected by the culinary artistry of Qiong Cooking on YouTube. This isn’t just another dessert; it’s a celebration of fresh flavors and luxurious textures, making it the quintessential centerpiece for your next holiday gathering, birthday party, or any special occasion that calls for a touch of elegance. But why wait for a special event? This cake is so incredibly good, you’ll want to bake it whenever a craving for something truly extraordinary strikes.
Imagine layers of incredibly soft, moist, and tender sponge cake, delicately flavored and infused with a hint of red to capture the essence of its star ingredient. Each layer is generously filled with a luscious, cloud-like cream mixture that perfectly complements the vibrant sweetness of fresh, ripe strawberries. The combination creates a harmonious symphony of tastes and textures that is simply irresistible. Once you experience the unparalleled taste and beautiful presentation of this homemade strawberry cake, you’ll discover a new benchmark for your favorite desserts. Dive into this comprehensive guide and learn exactly how to craft this masterpiece, transforming simple ingredients into a truly unforgettable treat. Prepare to impress your guests and delight your taste buds – let’s get baking!
Ingredients for the Perfect Strawberry Cake:
- 3 tbsp unsalted butter, melted: Using unsalted butter allows you to control the overall saltiness of the cake. Melted butter ensures a smooth, even incorporation into the batter.
- 4 tbsp milk: Adds moisture and helps to create a tender crumb in the cake. Whole milk is recommended for richness.
- 6 tbsp cake flour: Essential for a light, airy, and soft cake texture. Cake flour has a lower protein content than all-purpose flour, preventing a tough crumb.
- 1 tbsp cocoa powder: A small amount adds depth of flavor and enhances the red color of the cake, often used in red velvet style recipes.
- 3 large eggs, separated: The yolks add richness and moisture, while the whites, whipped into a meringue, provide the cake’s signature light and airy structure.
- A dash of lemon juice: A crucial ingredient for stabilizing egg whites, helping them whip up to full volume and hold their peak.
- Red food coloring: Used to achieve the beautiful, vibrant red hue that makes this strawberry cake visually stunning.
- 4 tbsp granulated sugar (for meringue): Sweetens and stabilizes the egg white meringue, creating a glossy, firm structure.
- Fresh strawberries: The star of the show! You’ll need plenty for both the cake filling and the beautiful topping. Choose ripe, firm berries for the best flavor and texture.
- 2 cups heavy whipping cream: Forms the base for the rich and fluffy cream filling and frosting. Ensure it’s very cold for optimal whipping.
- 4 tbsp granulated sugar (for whipped cream): Sweetens the heavy cream, transforming it into a delightful, stable whipped topping.
Step-by-Step Directions to Bake Your Strawberry Dream Cake:
Step 1: Preparing the Batter and Meringue
Begin by combining your wet ingredients to form the foundation of your cake batter. In a large mixing bowl, gently add the melted unsalted butter and the milk. Whisk these two ingredients together thoroughly until they are perfectly combined and smooth. At this stage, incorporate a few drops of red food coloring, mixing well to ensure an even, vibrant hue throughout the liquid base. The amount of coloring can be adjusted to achieve your desired shade of red. This initial blend creates a rich and flavorful liquid base.
Next, focus on your dry ingredients. In a separate bowl, carefully sift together the cake flour and the cocoa powder. Sifting is a critical step as it removes any lumps and aerates the flour, which contributes significantly to the cake’s light and tender texture. Once sifted, gradually add this dry mixture to your liquid butter and milk mixture, whisking continuously until everything is well combined and you have a smooth, uniform batter free of any flour pockets. Take care not to overmix at this stage, as it can develop the gluten too much and lead to a tougher cake.
Now, it’s time to prepare the eggs. Carefully separate the egg whites from the egg yolks. Ensure that absolutely no yolk gets into the whites, as any fat can prevent the whites from whipping properly. Add the egg yolks directly to your batter, whisking them in until they are fully incorporated and the batter achieves a beautifully smooth consistency. The yolks add richness and moisture.
Turn your attention to the egg whites. Place them in a very clean, dry mixing bowl (preferably metal or glass, as plastic can retain oils). Add a dash of lemon juice to the egg whites; the acidity helps to stabilize the proteins, allowing them to whip up to a higher volume and maintain their structure. Begin beating the egg whites on medium speed. Once they start to become foamy, gradually incorporate the 4 tablespoons of granulated sugar, adding it slowly, a tablespoon at a time, while continuously beating. Increase the speed to medium-high and continue beating until medium-stiff peaks form. This means when you lift the whisk, the peaks should hold their shape, perhaps with a slight curl at the tip, looking glossy and smooth. This meringue is crucial for giving the cake its airy, delicate texture.
Step 2: Baking and Preparing the Cake Layers
With your batter and meringue ready, it’s time to combine them. Carefully incorporate about one-third of the meringue into your main cake batter. Gently fold them together using a spatula, employing a delicate technique that involves cutting down through the middle and scooping up from the bottom, rotating the bowl as you go. This initial addition lightens the batter, making it easier to incorporate the remaining meringue without deflating it. Once the first portion is mostly combined, add the rest of the meringue and continue to fold gently until the mixture is uniform and airy. The key here is to preserve as much of the air in the meringue as possible, which is essential for a light, fluffy cake. Overmixing will cause the cake to be dense.
Prepare your baking vessel. Carefully transfer the beautifully airy batter into a round springform pan. For best results, line the bottom of the pan with parchment paper and lightly grease the sides to prevent sticking, ensuring an easy release. A 9-inch (23 cm) springform pan is ideal for this recipe, yielding layers of good thickness. Gently smooth the top of the batter with your spatula.
Place the springform pan into your preheated oven. It’s crucial that the oven is already at the correct temperature of 150°C (300°F) to ensure even baking from the start. Let the cake bake for approximately 50 minutes, or until a wooden skewer or toothpick inserted into the very center of the cake comes out perfectly clean. This indicates that the cake is fully cooked through. A low and slow baking temperature helps to produce a tender, moist crumb.
Once baked, allow the cake to cool in the pan for about 10-15 minutes before carefully unmolding the sides of the springform pan. Transfer the cake to a wire rack to cool completely. Once the cake has cooled entirely, use a long, serrated knife to carefully trim off any domed top to flatten it, ensuring you have even layers. This creates a neat, professional finish for your cake. Then, using the same serrated knife, meticulously slice the cake horizontally into three equal layers. Precision here is key for a well-balanced layered cake.
While your cake is cooling and being prepared, wash and hull your fresh strawberries. Slice some of the strawberries in half lengthwise; these will be used for the elegant exterior decoration. Chop the remaining strawberries into small, uniform chunks; these will form the luscious filling between your cake layers. Set both portions aside, ready for assembly.
Step 3: Assembly and Finishing the Creamy Masterpiece
With your cake layers cooled and strawberries prepped, it’s time to create the dreamy whipped cream filling. In a separate, very large mixing bowl (preferably chilled, along with your whisk attachments), add the heavy whipping cream and the remaining 4 tablespoons of granulated sugar. Using an electric mixer, beat them together on medium-high speed until the cream becomes wonderfully fluffy and holds soft to medium peaks. Be careful not to over-whip, as it can turn granular or even into butter. The ideal consistency is light, airy, and spreadable.
Now, let the layering begin! Place your first cake layer onto your serving plate or cake stand. Using an offset spatula, generously spread a portion of the freshly whipped cream evenly across the top of this layer, extending almost to the edges. Over this creamy layer, sprinkle a good amount of the chopped strawberry chunks, ensuring they are well distributed for a burst of fruit in every bite. Carefully place the second cake layer on top, gently pressing down to secure it. Repeat the process: spread another layer of whipped cream, followed by more strawberry chunks. Finally, place the third and final cake layer on top.
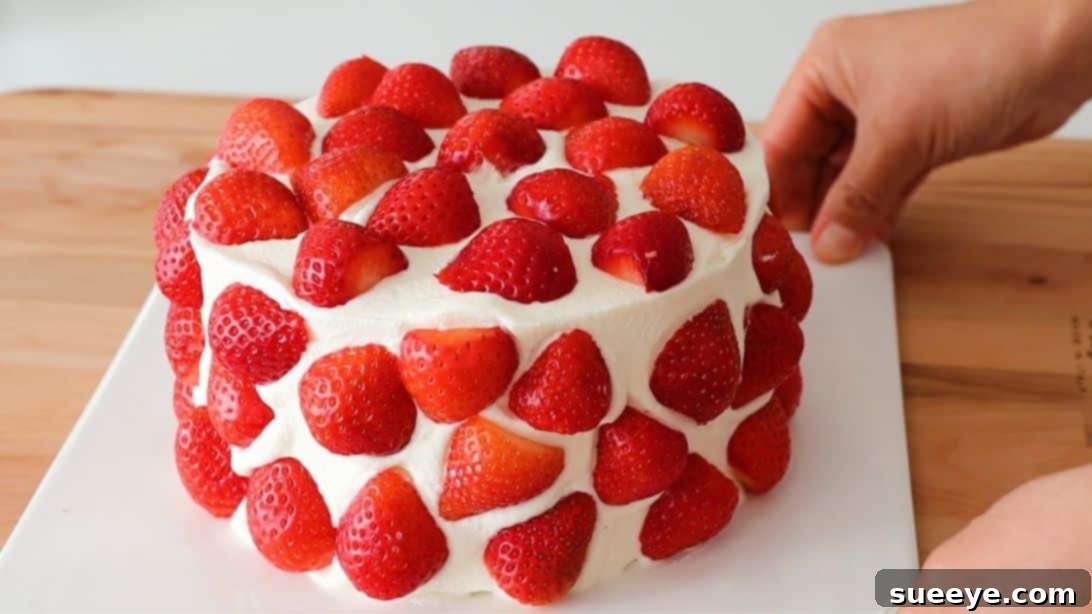
With all layers stacked, it’s time to frost the entire cake. Use the remaining whipped cream to meticulously cover the top and sides of the cake. Take your time to smooth out the cream for a clean, professional finish. An offset spatula or a bench scraper can be very helpful here. Once the cake is fully covered in its creamy blanket, arrange the reserved strawberry halves artistically all over the top and around the sides of the cake. You can place them neatly in rows, in a decorative pattern, or simply scatter them for a rustic charm. The bright red strawberries against the white cream create a stunning visual contrast.
For the best possible experience, and to allow the flavors to meld beautifully and the cream to set firmly, it is highly recommended to let the cake chill in the fridge for at least 2-3 hours before serving. This not only enhances the texture but also makes for cleaner slices. Alternatively, if your patience wears thin, you can serve it immediately and delight in its fresh, creamy goodness right away! Enjoy every single, delectable bite of your homemade, creamy strawberry cake.
This “Super Easy Creamy Strawberry Cake Recipe” truly lives up to its name, delivering an impressive dessert with surprisingly straightforward steps. It’s perfect for both novice bakers looking to challenge themselves and experienced home cooks seeking a reliable and delicious recipe. Don’t be afraid to experiment with different fruit toppings or a sprinkle of chocolate shavings for an extra touch. The beauty of this cake lies in its versatility and its universal appeal.
We hope you thoroughly enjoy making and savoring this magnificent dessert. It’s more than just a cake; it’s an experience waiting to be shared. Give it a try, and let the creamy, fresh flavors transport you to dessert heaven!
*All image credit belongs to Qiong Cooking via YouTube. Follow and subscribe to their channel for more inspiring and delicious recipes!