
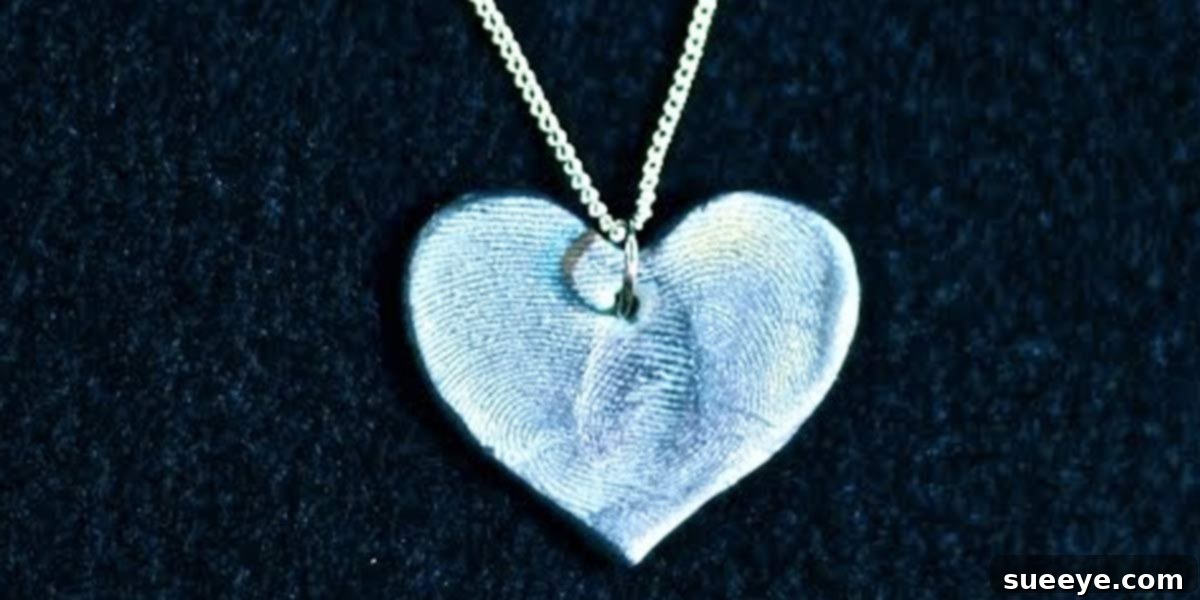
Create Your Own Precious Fingerprint Jewelry: A Guide to Timeless Keepsakes
In a world filled with mass-produced items, there’s an undeniable magic in something truly unique and deeply personal. Fingerprint jewelry stands out as the ultimate keepsake, offering a tangible connection to the people we cherish most. Imagine transforming the delicate whorls and lines of your child’s or loved one’s fingerprint into a beautiful metallic pendant, a charming bracelet accent, or a cherished heirloom that tells a unique story. These aren’t just pieces of jewelry; they are miniature works of art, capturing a moment in time, a touch, a memory that you can carry with you always.
The beauty of creating your own fingerprint jewelry lies in its accessibility. You don’t need specialized training or expensive equipment. This heartfelt project can be brought to life right at your kitchen table, making it a perfect activity for crafters of all skill levels. It’s an incredibly rewarding experience, resulting in a piece that is as unique as the fingerprint it preserves. From a child’s tiny print to an adult’s distinctive pattern, each piece becomes a wearable testament to love and connection.
The Enduring Charm of Personalized Fingerprint Keepsakes
What makes fingerprint jewelry so profoundly special? It’s the intimate connection it fosters. A fingerprint is an inimitable signature, a biological masterpiece unique to every individual. By preserving it in a tangible form, you’re not just creating an accessory; you’re encapsulating a piece of a person’s essence. For parents, it’s a way to hold onto the fleeting innocence of childhood, immortalizing the tiny prints that grow and change so quickly. For partners, it can symbolize an unbreakable bond, a shared identity etched in metal or clay. It transcends typical jewelry, becoming a conversation starter, a source of comfort, and a constant reminder of love and connection.
Moreover, the act of making fingerprint jewelry often involves the loved one whose print is being captured. This hands-on process itself becomes a cherished memory, adding another layer of sentimentality to the final product. It’s an investment not just in materials, but in time, effort, and love, making the finished piece truly priceless.
Essential Materials for Your DIY Fingerprint Jewelry Project
Embarking on this creative journey requires just a few simple materials, most of which can be found at your local craft store or even in your pantry. The primary component will be your choice of clay, each offering distinct advantages:
1. Clay Options:
- Polymer Clay (e.g., Sculpey, Fimo): This is a popular choice for its durability, versatility, and ease of use. Polymer clay comes in a wide array of colors and can be baked in a standard home oven to achieve a hard, permanent finish. It’s relatively forgiving, allowing for reshaping before baking. Once baked and sealed, polymer clay jewelry is water-resistant and holds fine details beautifully.
- Salt Dough: For a more budget-friendly and kid-friendly option, salt dough is an excellent alternative. Recipes for salt dough are abundant across crafting platforms like Pinterest, typically involving just flour, salt, and water. While less durable than polymer clay and susceptible to moisture, salt dough charms can be a fun project, especially with very young children. They dry well and can be painted or sealed to enhance their longevity.
2. Tools and Supplies:
- Rolling Pin: Essential for flattening your clay to an even thickness.
- Parchment Paper or Wax Paper: Prevents clay from sticking to your work surface and aids in transfer.
- Craft Knife or Cookie Cutters: To precisely cut out desired shapes (hearts, circles, ovals, squares).
- Stamping Tools: Your fingers (or your child’s!), along with a steady hand, are the primary tools for making impressions.
- Oven (for polymer clay) or Air-Drying Space (for salt dough): For curing your clay creations.
- Metallic Powder (Optional): To give your finished piece a sophisticated, silver, gold, or bronze metallic sheen. These powders, often mica-based, are brushed onto the clay either before or after baking/drying and then sealed.
- Clear Sealant/Varnish: Crucial for protecting your jewelry, especially salt dough, from moisture, wear, and tear. Options include clear glaze, mod podge, or specialized polymer clay sealants (matte or gloss finishes available).
- Jump Rings and Jewelry Pliers: For attaching your charm to necklaces, bracelets, or keychains.
- Necklace Chains, Bracelet Blanks, or Keychain Rings: To complete your jewelry piece.
- Toothpick or Skewer: For making a hole to thread your jump ring through, ensuring it’s done before baking/drying.
Step-by-Step Guide to Crafting Your Fingerprint Masterpiece
Let’s dive into the creative process! While specific instructions might vary slightly based on your chosen clay, the general steps remain consistent for capturing that perfect print.
Step 1: Gather Your Materials and Prepare Your Workspace
Lay out all your chosen tools and ingredients on a clean, flat surface. Cover your work area with parchment or wax paper to prevent sticking and make cleanup easier. If using polymer clay, ensure your oven is preheating to the temperature recommended by the clay manufacturer.
Step 2: Condition and Prepare the Clay
- For Polymer Clay: Knead a small piece of clay until it becomes soft and pliable. This warms the clay, making it easier to work with and less prone to cracking.
- For Salt Dough: Prepare your salt dough mixture according to your chosen recipe. Ensure it’s smooth and not too sticky or too dry.
Step 3: Shape Your Charm
Using your rolling pin, flatten the conditioned clay to an even thickness, typically about 1/4 inch (6mm). This ensures stability and provides enough depth for a clear fingerprint. Then, use a cookie cutter or craft knife to cut out your desired shape. Popular choices include hearts, circles, ovals, or even small squares. Gently smooth the edges with your fingers if necessary.
Step 4: Capture the Fingerprint Impression
This is the magical moment! Ensure the finger is clean and dry. Gently but firmly press the finger (or thumb) onto the center of your clay shape. Apply even pressure for a few seconds, then carefully lift the finger straight up to avoid smudging. Don’t press too hard, as this can flatten the print’s details. If you’re not happy with the first attempt, simply re-roll the clay and try again. For children, practice on a scrap piece first until you get a feel for the right amount of pressure.
Step 5: Add Hanging Holes and Details (Optional)
Before curing, use a toothpick or skewer to create a small hole near the top of your charm. This is where you’ll attach your jump ring later. You might also choose to engrave initials, a date, or a small symbol onto the back of the charm using a sharp tool for extra personalization.
Step 6: Cure Your Clay Creations
- For Polymer Clay: Carefully transfer your clay shapes onto a baking sheet lined with parchment paper. Bake according to the clay manufacturer’s instructions (temperature and time are crucial for proper curing and color preservation). Allow to cool completely after baking.
- For Salt Dough: Salt dough can be air-dried over several days (flipping occasionally) or baked at a very low temperature (e.g., 200°F / 95°C) for several hours until hardened. The baking time will depend on the thickness of your charms. Ensure they are completely dry to prevent mold.
Step 7: Apply Metallic Powder and Seal (Optional but Recommended)
Once your charms are completely cool and dry, you can apply metallic powder for a lustrous finish. Use a soft brush to lightly dust the powder over the raised areas of the fingerprint or the entire charm. Then, apply a clear sealant according to the product instructions. This step is vital for protecting the clay, especially salt dough, from moisture and wear, and for locking in any metallic powders. Apply multiple thin coats, allowing each to dry thoroughly.
Step 8: Assemble Your Jewelry
Using jewelry pliers, open a jump ring and thread it through the hole you made in your charm. Attach the charm to your chosen necklace chain, bracelet, or keychain. Close the jump ring securely. Your unique fingerprint jewelry is now complete!
Tips for Capturing the Perfect Fingerprint Impression
- Clean Hands are Key: Ensure the finger you’re pressing is clean and free of oils or lotions, which can leave smudges.
- Practice Makes Perfect: Don’t be afraid to practice on a small scrap piece of clay before committing to your final charm. This helps you gauge the right pressure.
- Gentle and Even Pressure: Press the finger down firmly but gently, ensuring even pressure across the entire pad of the finger. Avoid wiggling or twisting.
- Lift Straight Up: To prevent smudging or distorting the impression, lift the finger straight up from the clay once the impression is made.
- Age Matters (Sometimes): While any fingerprint is special, very young babies often have less defined prints. Prints from toddlers and older children tend to be clearer. If using a baby’s print, you might need to try a few times.
Beyond Pendants: Creative Ways to Use Fingerprint Keepsakes
While necklaces are a classic choice, fingerprint charms can be incorporated into a variety of beautiful items:
- Bracelets: Create individual charms for each child or grandchild to wear on a charm bracelet.
- Keychains: A practical and personal item that can be carried daily.
- Ornaments: Perfect for special occasions like Christmas, these can become cherished annual decorations.
- Bookmarks: For the avid reader, a personalized bookmark adds a touch of sentiment to their favorite pastime.
- Magnets: Affix a magnet to the back for a constant reminder on the refrigerator or magnetic board.
- Earrings: Smaller, lighter versions can be made into unique dangle earrings.
The Perfect Gift for Every Special Occasion
Fingerprint jewelry is more than just a craft; it’s a profound expression of love, making it an ideal gift for almost any significant moment in life:
- Mother’s Day: Honestly, can you think of anything more special than giving your mother a piece of jewelry that carries the unique print of her child or grandchild? It’s a gift she will truly cherish for years, a stunning and incredibly personal testament to her love.
- Father’s Day: Dads appreciate sentimental gifts too! A fingerprint keychain or a subtle pendant can be a wonderful way to honor the fathers in your life.
- Grandparents’ Day/Birthdays: Grandparents adore receiving items that connect them to their grandchildren. A charm featuring their little ones’ prints will undoubtedly become a treasured possession.
- Birthdays: For that special person in your life – a sibling, a best friend, or a significant other – a fingerprint gift is a unique and thoughtful way to celebrate them.
- Anniversaries: Couples can create matching charms with each other’s fingerprints, symbolizing their unique bond.
- New Baby Gifts: Welcoming a new arrival? A charm with the baby’s tiny print is an unforgettable keepsake for the new parents.
- Teacher/Caregiver Appreciation: A handmade fingerprint ornament or charm can be a touching thank-you gift, showing genuine appreciation for their care.
I absolutely adore this idea. Since I probably won’t get one for Mother’s Day, I may just have to make one myself and get my grandchildren to put their fingerprints on mine! The joy of creating and the profound meaning behind each piece make it an endeavor well worth undertaking.
Care and Preservation of Your Handmade Keepsake
To ensure your fingerprint jewelry remains a cherished item for years to come, proper care is essential:
- Avoid Harsh Chemicals: Keep your charms away from harsh cleaning products, perfumes, and excessive moisture, especially if made from salt dough.
- Store Properly: When not wearing, store your jewelry in a dry place, perhaps in a jewelry box or a soft pouch, to prevent scratches.
- Re-seal as Needed: For salt dough charms or heavily worn polymer clay pieces, consider re-applying a sealant every few years to refresh their protective layer.
Why DIY Fingerprint Jewelry is So Rewarding
The act of creating something with your own hands, especially something so deeply personal, offers immense satisfaction. It’s a cost-effective way to produce high-quality, custom jewelry that would otherwise be expensive to commission. The creative freedom allows for complete customization – from the choice of clay and shape to the finish and embellishments. Most importantly, it’s an experience that fosters connection, creating lasting memories not just in the finished piece, but in the process of making it. It’s a wonderful way to pause time, even for a moment, and immortalize the unique touch of someone you love.
Conclusion: A Touch of Love, Forever Preserved
Fingerprint jewelry truly embodies the essence of a personalized keepsake. It’s a simple project with profound emotional depth, offering a unique opportunity to create a beautiful, sentimental piece that will be treasured for generations. Whether you’re making it for yourself, as a gift for a loved one, or simply to capture a precious memory, the journey of crafting fingerprint jewelry is as rewarding as the magnificent result. So gather your materials, let your creativity flow, and immortalize those irreplaceable fingerprints into stunning, wearable art. Begin your own crafting adventure today and create a timeless heirloom filled with love and memories.