Outdoor & Garden
19 DIY Landscaping Hacks and Yard Ideas on a Budget
DIY landscaping hacks on a budget: edge a lawn with a plank, build a raised bed for $50, hide the hose inside a planter and 16 more garden ideas.
html PUBLIC "-//W3C//DTD HTML 4.0 Transitional//EN" ""
Most yard work is not hard, it is just unglamorous, and the gap between a yard that looks cared for and one that does not usually comes down to edges. A clean line along a bed, a border that holds the mulch where you put it, a bed that is not slowly being eaten by the lawn. These 19 DIY landscaping hacks and yard ideas start right there and then keep going: a raised planter bed for about $50 in lumber and 3 hours of work, a wine bottle upended in a pot that waters plants while you are on vacation, a wasp trap made from a creamer bottle, a planter that swallows a 75 foot garden hose. Nothing here needs a landscaper or a bobcat. Pick the one that fixes the part of your yard that bothers you most, and do that one first.
1. Sideyard Flower Bed
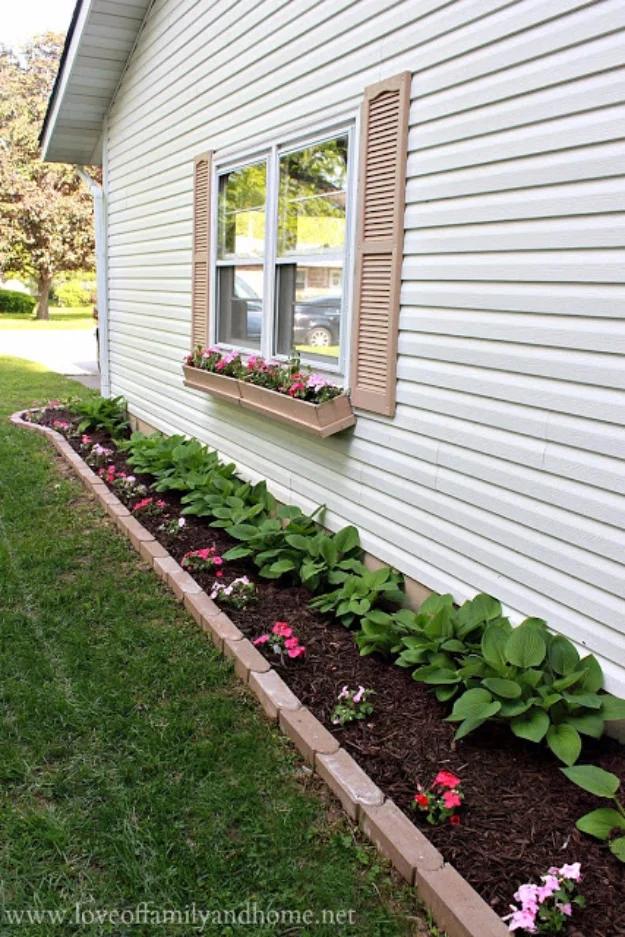
The dead strip down the side of a house, the one that goes back to weeds every spring, turned into a proper bed over two afternoons. Pull the weeds first and see what survived, because hostas planted years earlier were still coming up under all of it. Lay weed control fabric over the whole area and cut holes for the existing plants rather than digging them out. Mulch over the fabric, then set stone edgers one by one along a dug path, keeping each one level and in a straight line, and tuck the fabric underneath every edger as you lay it so nothing creeps back through.
Get the full tutorial at Love of Family & Home.
2. Easy Way To Edge A Lawn
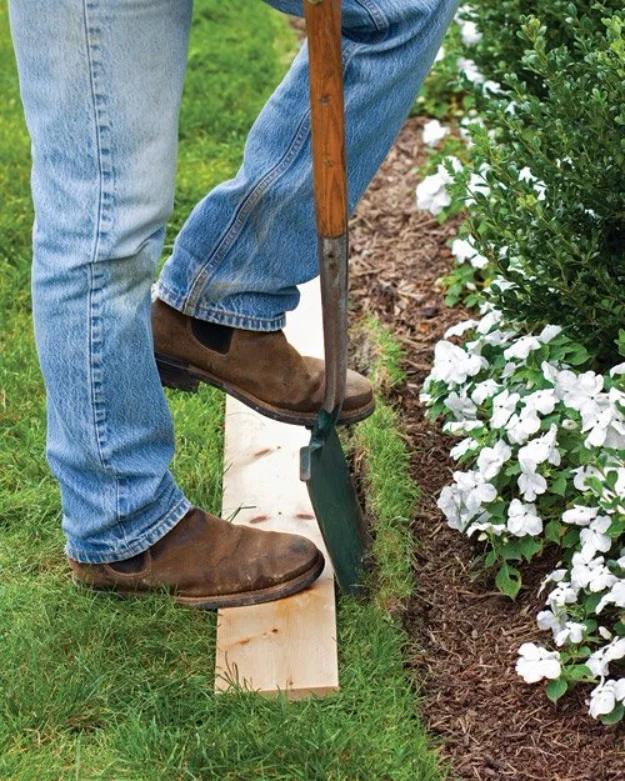
Stand a plank of wood on edge along the line you want, step on it, and let it do the straightening for you while a spade cuts along the face. That is the whole hack, and it is the difference between an edge that wanders and one that reads as a drawn line. The board keeps the spade vertical and stops the blade wandering into the bed. A power edger is the faster tool for long walkways and driveways where you have no room to pull the soil back, but for curving bed edges a spade against a board gets you a cleaner result for nothing.
Get the full tutorial at 1001 Gardens.
3. How to Make a Brick Raised Garden Planter
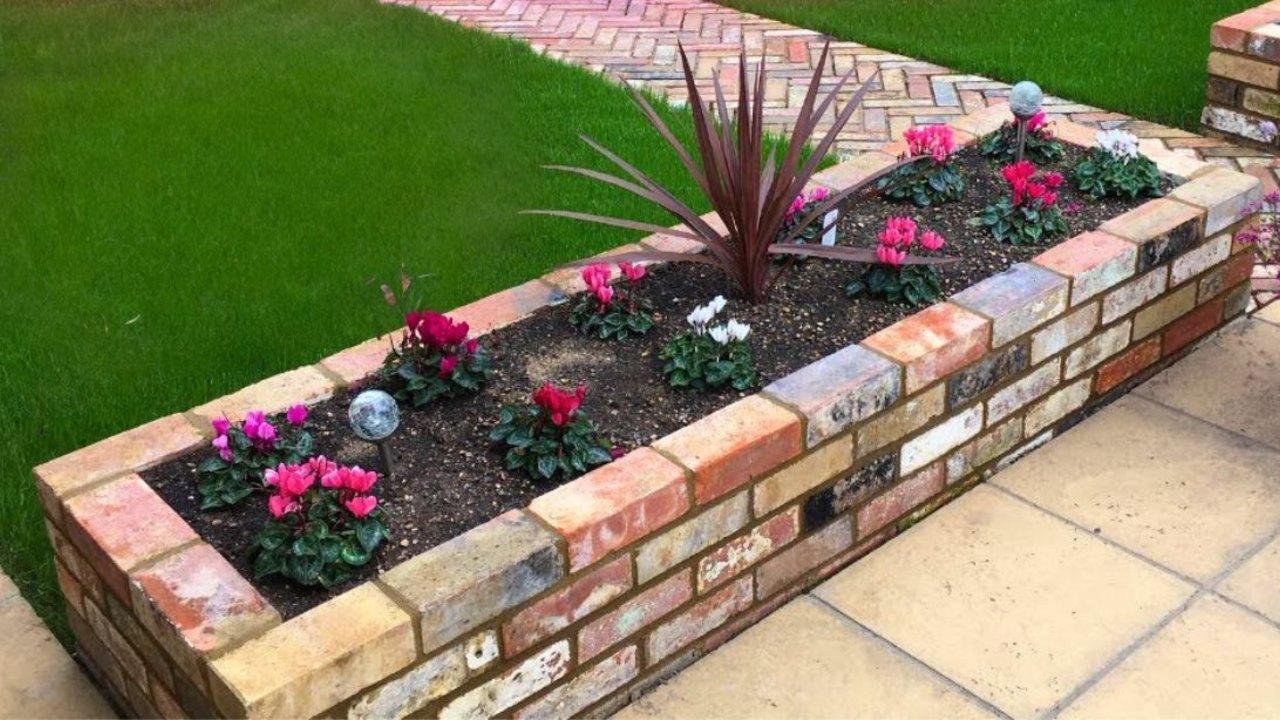
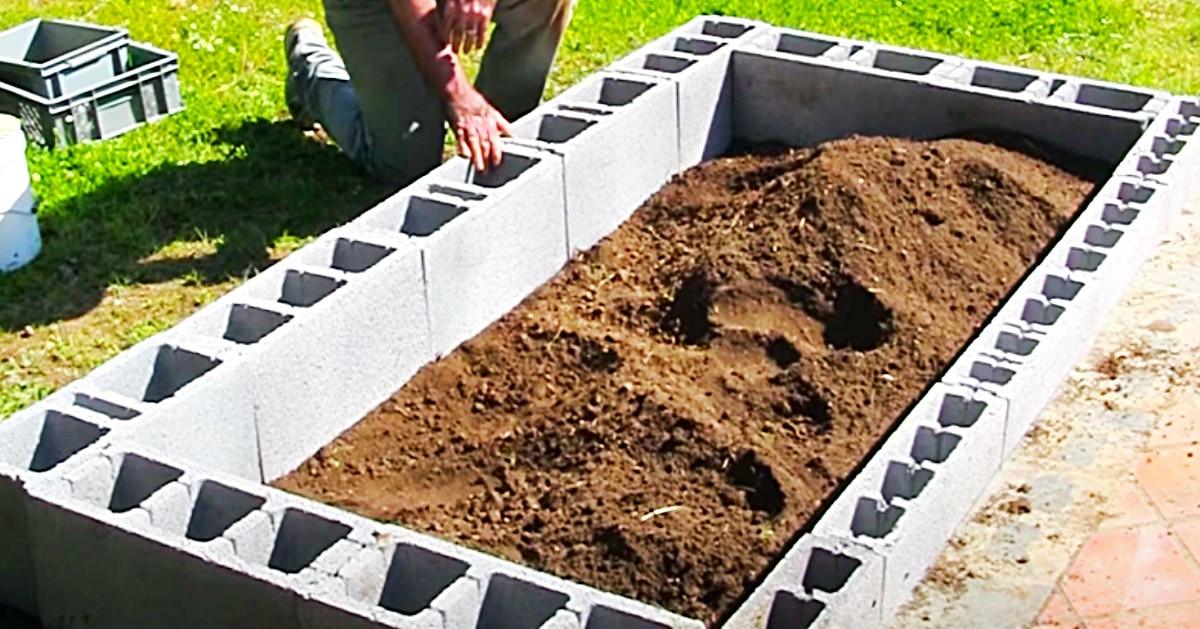
A brick raised bed with a soak away built into it, which is the part that makes it last. Set out the footings for whatever size you want, dig down about 6 inches, and stand a pipe vertically in the soil with geotextile fabric around the sides for the soak away. Pour concrete to a few inches below the top of that pipe, flatten it, and push two slender pipes in horizontally beside the vertical one so they sit half embedded. Then lay the brick walls on the cured footing. A raised bed means fewer weeds, better drainage, healthier soil and no bending over.
Get the full tutorial at Sueeye.
4. How To Build A Raised Bed Using Pallets
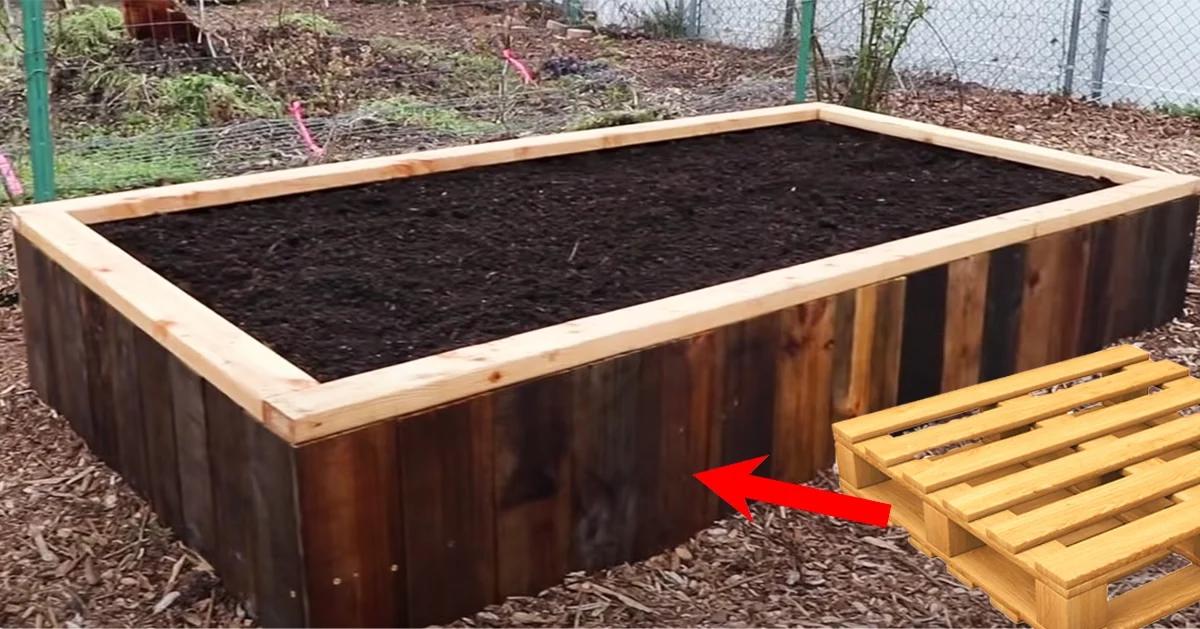
Free pallets from a garden center or recycling center, cut down into boards and built into a raised bed. Cut as close to each board as you can get without hitting a nail, which gives you clean lengths to work with for the border. Once the frame is built, paint the wood with linseed oil, because that is what buys you a few more years out of softwood sitting in wet soil. Leave it natural or paint the pallets if you want it tidier looking. Keeping herbs and vegetables together in one box also makes weeding a far smaller job than a scattered garden.
Get the full tutorial at Sueeye.
5. DIY Wine Bottle Edging For Your Garden
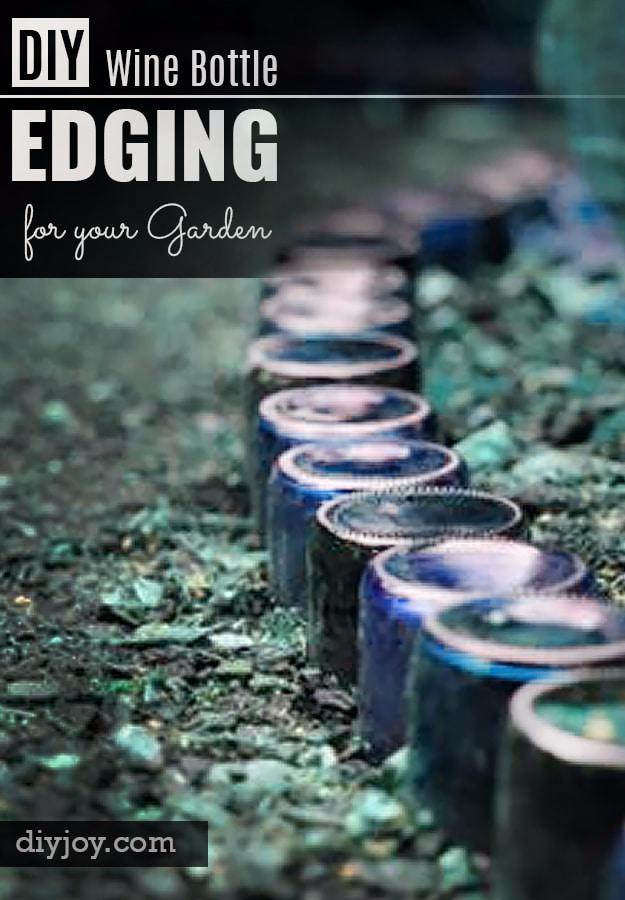
Empty wine bottles sunk neck down in a row along a bed, so only the colored bases show above the soil. It is free edging that holds mulch back and catches light in a way no plastic border ever will. Green and blue bottles read best together. Dig a narrow trench along the bed line, set the bottles in tight against each other with the bases just proud of the soil, then backfill and tamp down hard so none of them tip when the hose goes past. Save bottles all winter and you will have enough by spring.
Get the full tutorial at Sueeye.
6. Use Coffee Grounds In The Garden
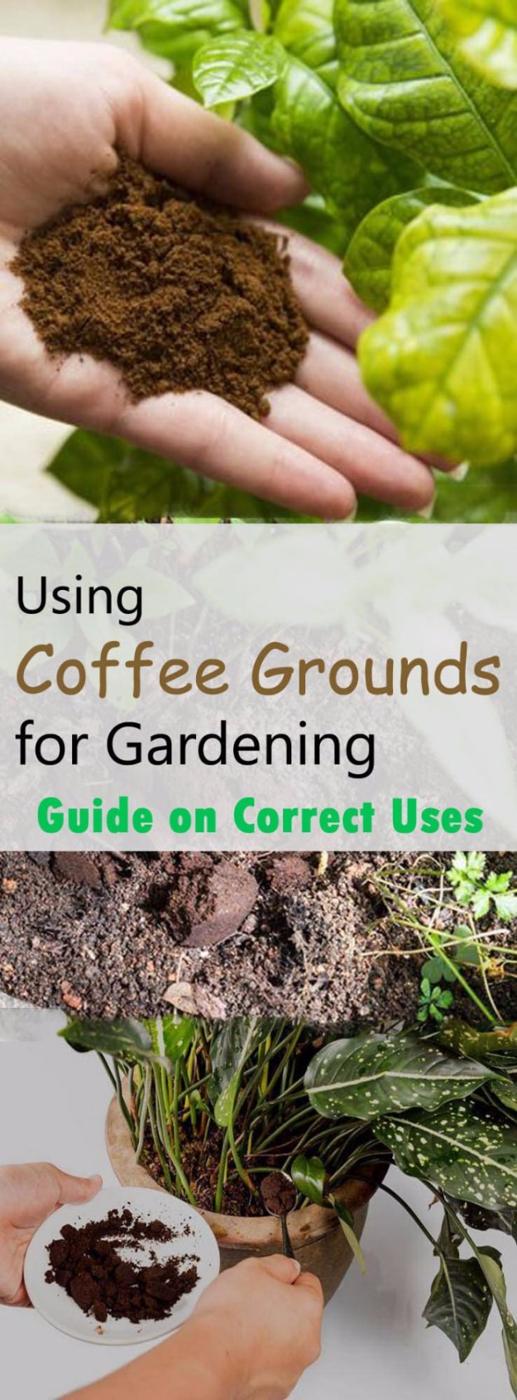
Coffee grounds do help in a garden, just not for the reason everyone repeats. They barely change soil pH, because most of the acid goes into the cup during brewing, and the 2% nitrogen in them is not available to plants until the grounds break down. What they genuinely do is improve soil structure fast, adding organic matter that improves drainage, water retention and aeration, and they bring small amounts of phosphorus, potassium, calcium, manganese, zinc and iron with them. Keep them to 20 to 25 percent of a compost pile, no more, because higher levels suppress the microorganisms doing the work.
Get the full tutorial at Balcony Garden Web.
7. Wine Bottle Self Watering DIY For Your Garden
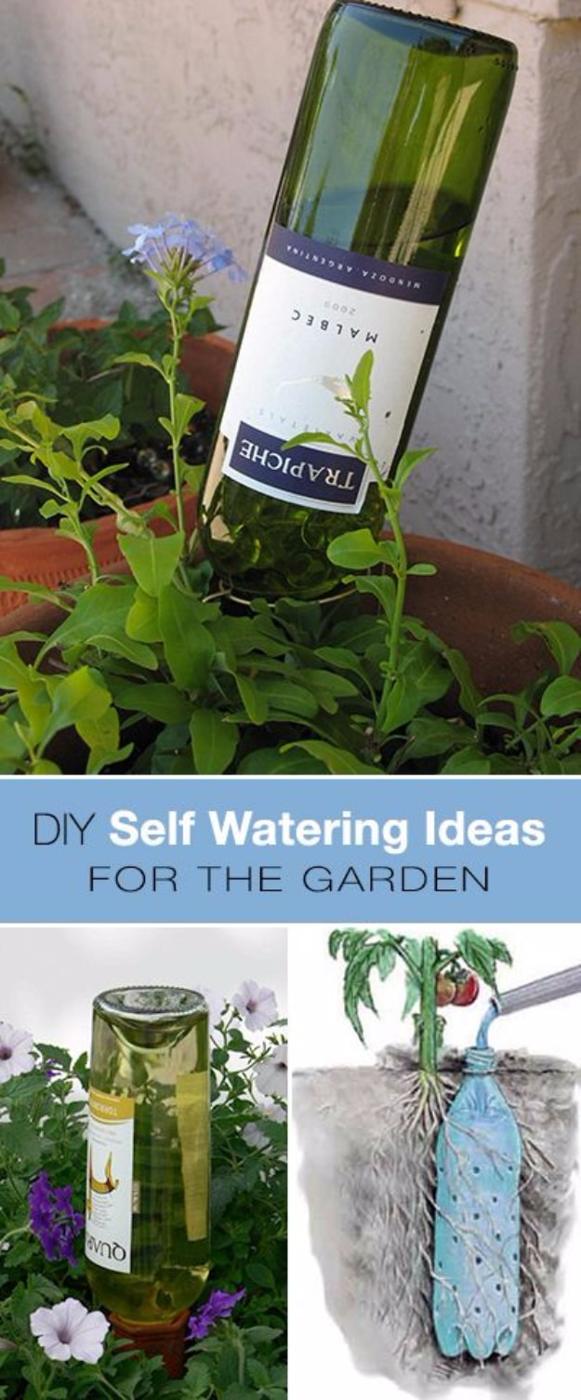
Fill a wine bottle with water, turn it upside down and bury the neck in the soil beside the roots, leaving the open neck just above the surface. The water seeps out over several days and keeps the ground evenly moist, which is what saves the plants while you are away for a week. How long a bottle lasts varies, so fill one and watch it before you leave rather than trusting it blind. Plant Nanny stakes support the neck and control the flow, and burying the bottle properly cuts evaporation and encourages roots to grow down after the water.
Get the full tutorial at The Garden Glove.
8. DIY Wasp Trap
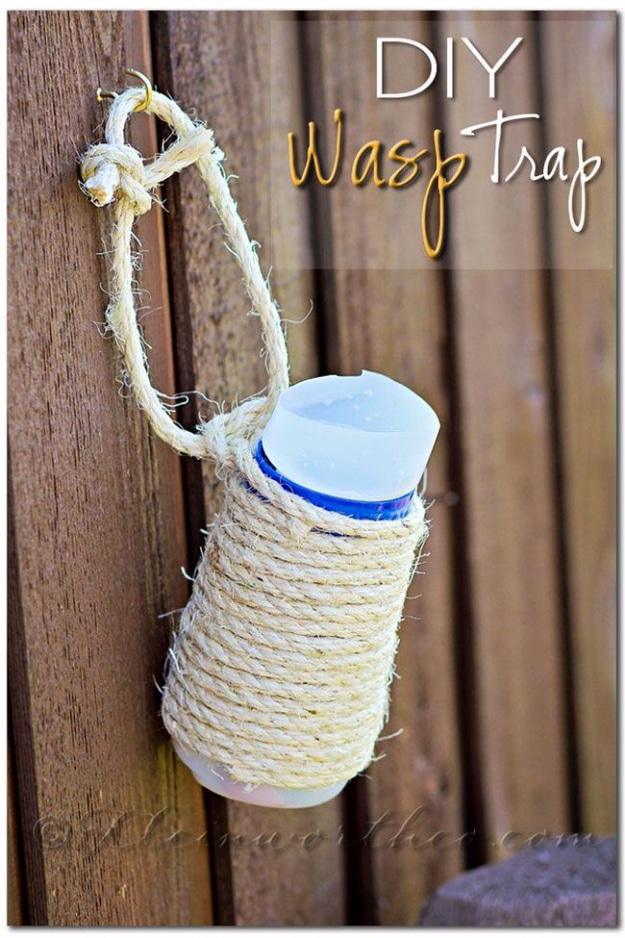
A recycled plastic creamer bottle wrapped in twine, hung on a fence, doing a job nobody enjoys. The bait recipe worth knowing: one cup of vinegar with four tablespoons each of salt and sugar, which pulls in wasps and leaves most of the beneficial bees alone. Hang the trap away from where people actually gather, not next to the table, or you have just invited them over. The real control is finding nests early in spring and checking every few days, because wasps favor horizontal surfaces under something, like roof eaves, the underside of a barbecue, or under a bench.
Get the full tutorial at The Garden Glove.
9. Install Exterior Mirrors to Create the Illusion of Space in your Garden
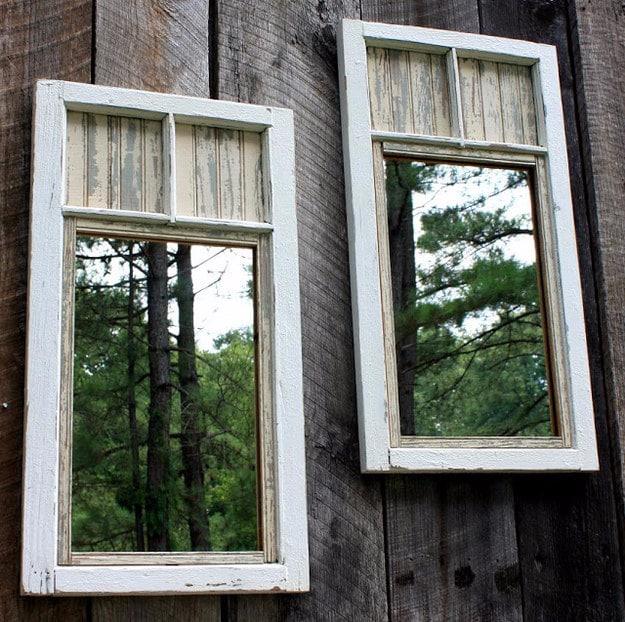
Two salvaged window sashes with mirrors set into the lower openings and vintage beadboard filling the space up top, hung on the side of a barn so they reflect the trees opposite. They came out of a barn near the farm, two of six the old farmer finally wanted rid of, and they were the right candidates precisely because their panes were broken and their muntins missing. Cutting the frames down is what opened the spaces the mirror glass drops into. Worth knowing before you copy it: these came straight back down once the photographs were taken, because a mirror facing open sky is a hazard to birds.
Get the full tutorial at The Brambleberry Cottage.
10. DIY Garden Stepping Stones
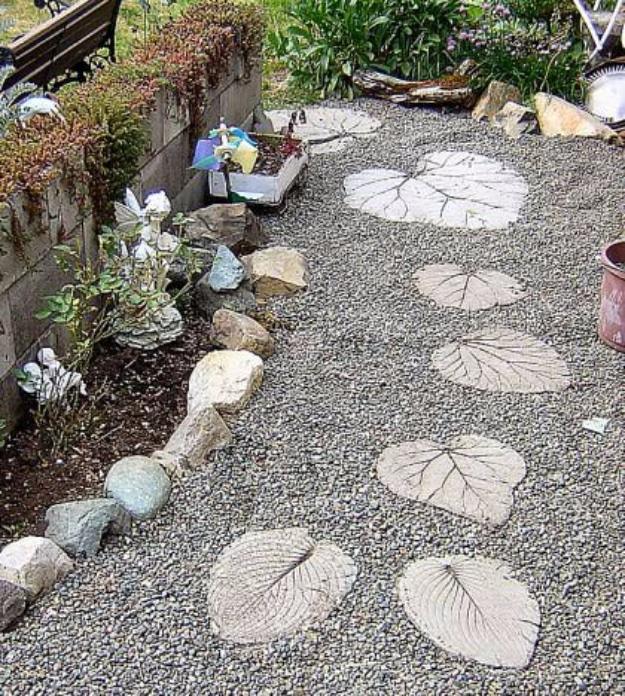
Pour concrete into a mold, let it thicken for an hour, then press leaves, sea glass or pebbles into the surface and leave it overnight before turning it out. Cure for one to three weeks before it goes anywhere near a foot. Almost anything smooth works as a mold, including disposable plastic containers, cake pans and plastic lined boxes, and a spray of Pam helps the stone release. The trick worth knowing: on a large or detailed stone, lay a piece of chicken wire in after the first half of the concrete goes in, then pour the rest over it. That is what stops cracking.
Get the full tutorial at The Garden Glove.
11. Easy Clay Craft Plant Markers
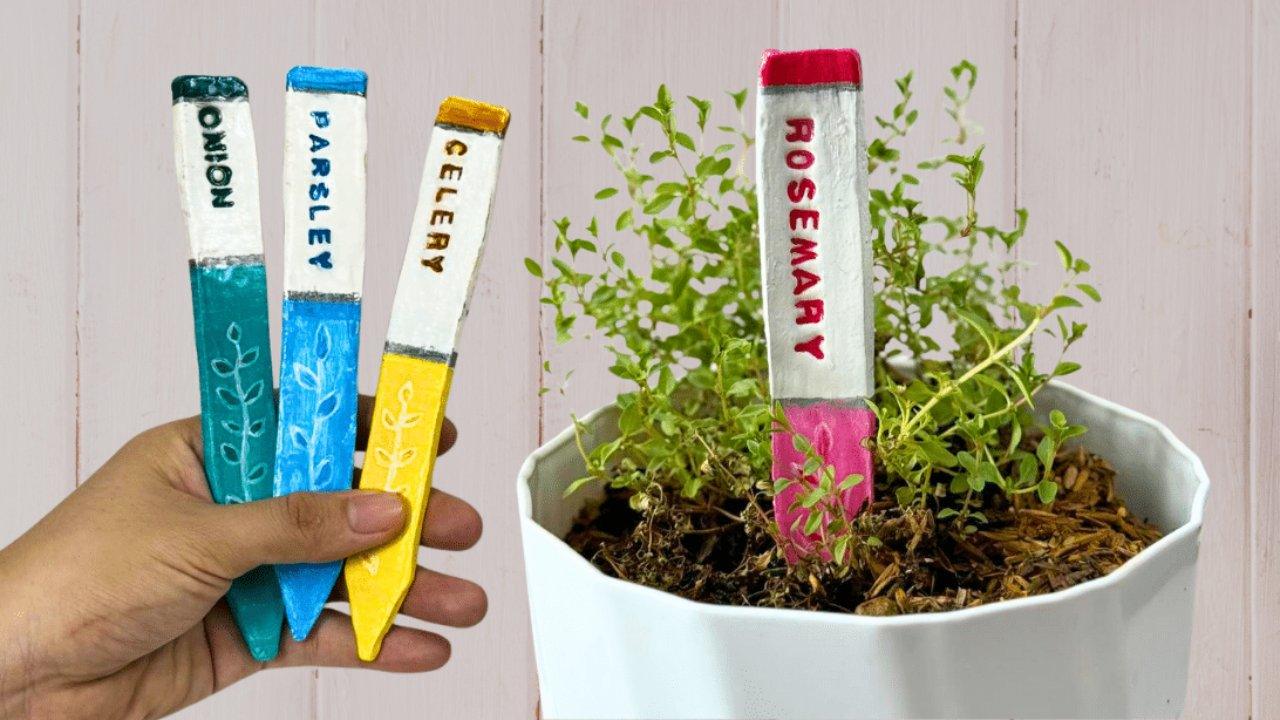
Air dry clay, rolled flat, cut into tags, pointed at one end and painted with the name of whatever is growing in that pot. Once a herb garden passes about four pots nobody can tell the parsley from the celery seedlings, and these fix it permanently. Air dry clay needs no kiln and no oven, just a flat surface and a day or two of patience. Cut the point before the clay dries, not after, and keep the tags thick enough that a push into dense potting soil does not snap them. Imperfect edges are part of the charm here.
Get the full tutorial at Sueeye.
12. Pond Paradise In The Backyard
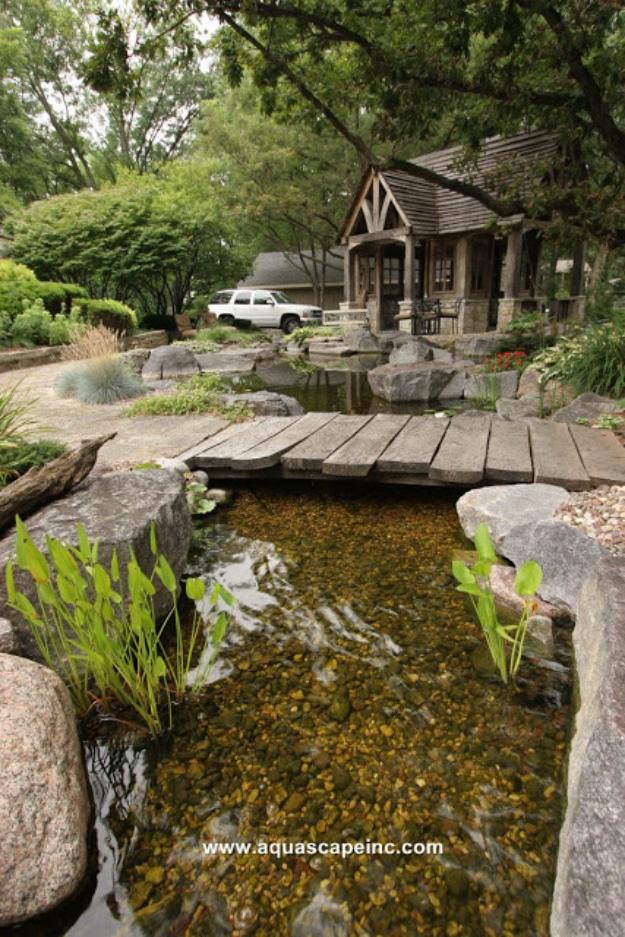
A sloping wooded lot is usually treated as a problem, and this one answers it with water. The slope that makes the yard awkward is exactly what makes the waterfalls work, and the stream twists around the existing trees rather than pretending they are not there. An upper pond spills into a second waterfall and down over cascading rock, with a flagstone patio and fireplace at the top and a lower patio further down for a different view of the same water. A rustic footbridge crosses the stream where you can sit and put your feet in. Waterlilies and koi do the rest.
Get the full tutorial at Aquascape.
13. Toad Stools In The Garden
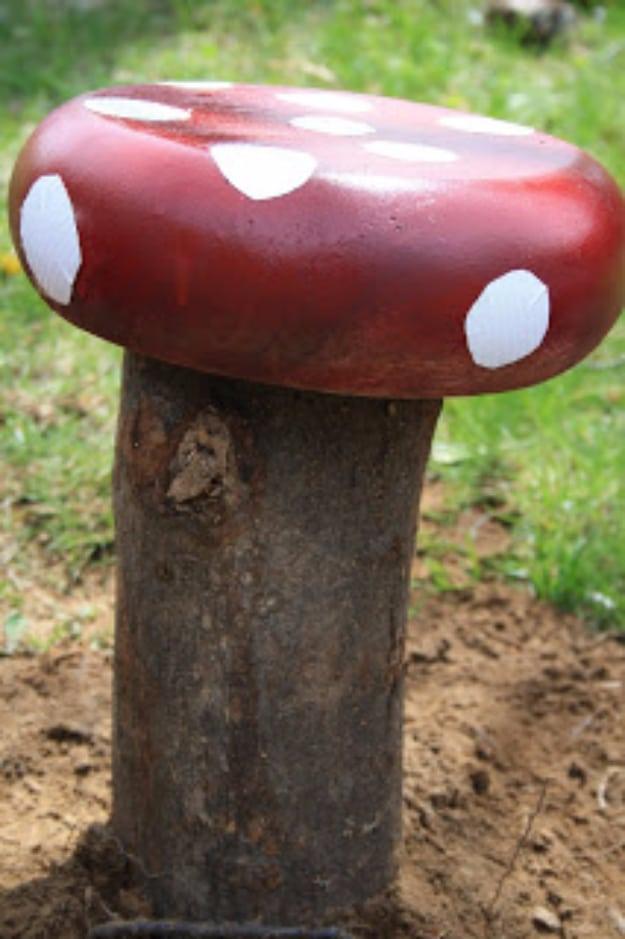
An old metal mixing bowl spray painted red, dotted with white duct tape circles and set on a cut log, and the yard has a toadstool in it. The idea came out of an old Family Fun magazine and costs almost nothing if the bowl comes from a second hand store. Scrub the dirt off the outside of the bowl first, spray it outdoors on newspaper and follow the drying times on the can. The duct tape spots are cut as circles and stuck on afterwards. Weatherproof tape holds up outside, and smaller bowls make a cluster of little ones to tuck around a bed.
Get the full tutorial at Twig and Toadstool.
14. Build A Raised Bed Planter
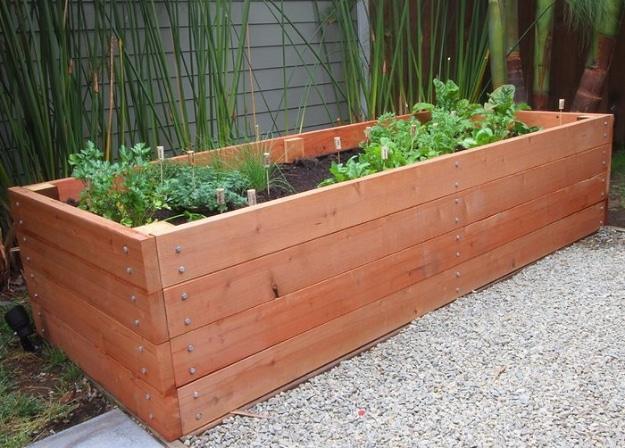
About $50 in lumber and roughly 3 hours start to finish for a full size raised planter bed. Assemble the two short end pieces first, then attach the long sides, which goes together far cleaner in that order. Flip it and set it on 4×4 corner posts that hang a few inches below the box and sink into the ground, so the whole thing is anchored rather than sliding around. A black liner in the bottom knocks weeds down, and sealing the wood or using pressure treated is what makes it survive more than one season. Measure your space and write the numbers down before you buy a board.
Get the full tutorial at Remove and Replace.
15. DIY Hose Hiding Outdoor Planter
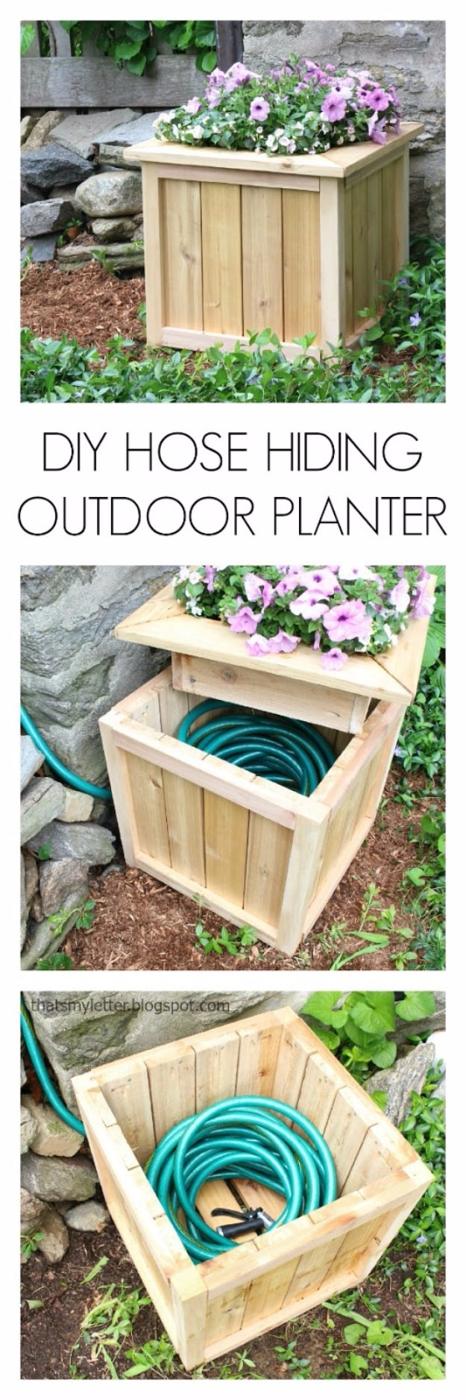
A wooden planter box that lifts off to reveal 75 feet of garden hose coiled underneath it. The flower box on top is the lid: lift it, move it aside, pull out what you need. The build uses pocket holes throughout, with slats predrilled at the edges and attached to cross supports using glue and 1 1/4 inch countersunk screws from the inside, then the short side pieces joined to the legs with glue and pocket hole screws. Free plans come with the tutorial. Clear the spot, lay fresh mulch and set the planter down before you wind the hose back in.
Get the full tutorial at Jaime Costiglio.
16. Make Rock Mulch Look Amazing
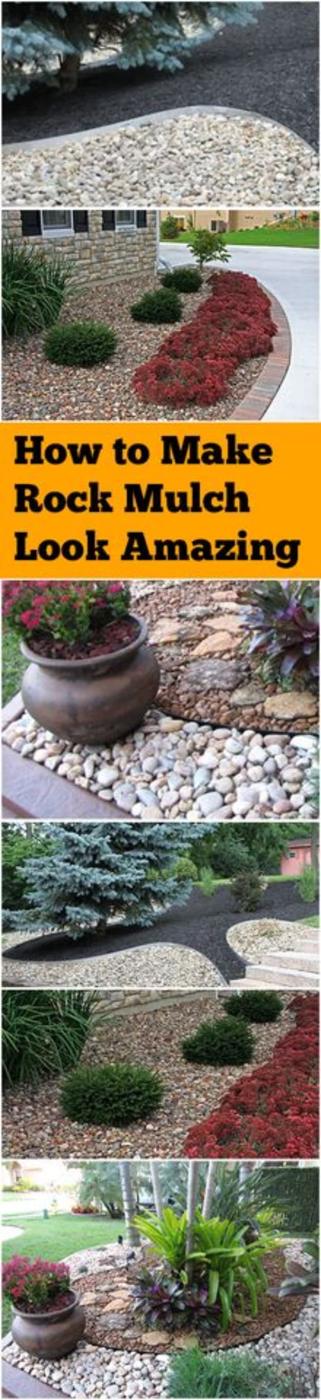
Rock mulch goes flat and boring the moment it is one color across a whole bed, and these six ideas are all about breaking that up. Run an inner and outer circle of dark and light rocks so the contrast does the work. Use rock to surround a different mulch, like bark, instead of replacing it. Pick a rock color that coordinates with the plants and the rest of the landscaping rather than whatever the yard center had most of. Mix sizes as well as colors. And for something different, ring a favorite tree with hand painted stones.
Get the full tutorial at Bless My Weeds.
17. Build A Garden Pond
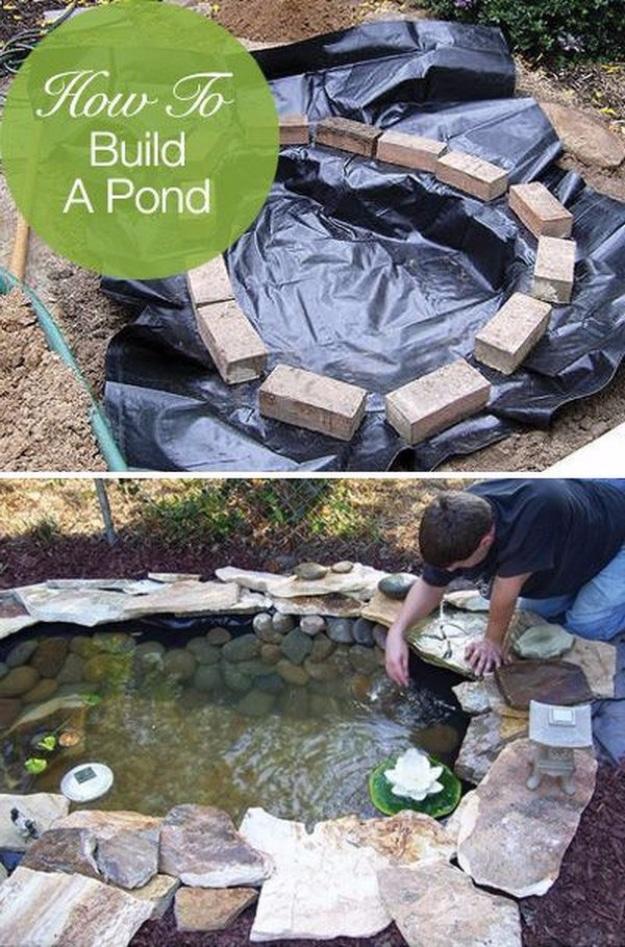
A small garden pond dug by hand, lined, edged in slate and finished in a weekend. Size the hole to the space you have and leave extra room around the sides for rocks. Lay a plank across the hole with a spirit level on it to check how even the sides are and adjust, knowing you will not get it right the first time. Spread the liner, hold it down with bricks and press it into the walls with your hands and feet, then half fill with water and set bricks around the edge before committing. Fit any pump or fountain before you backfill the dirt.
Get the full tutorial at HomeWise.ie.
18. Repot Succulents The Easy Way
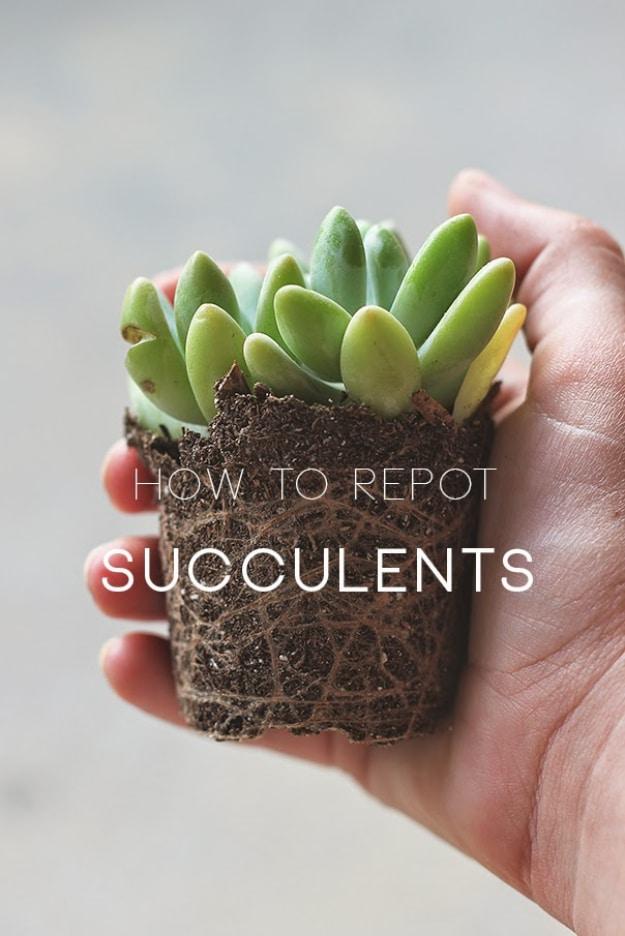
Four pots of succulents from the nursery turn into far more than four, because a single nursery pot is usually several plants crowded in together and each one wants its own space. Two things are worth knowing before you buy. Colour is not decoration on these: the purple, orange and yellow ones need real heat and sun, so indoors you want the plain green ones if you want them to survive the summer with the air conditioning on. And the rose shaped varieties carry tiny buds around the base that pull off easily and root from their orange stems pushed into dirt. That is where the free plants come from.
Get the full tutorial at Hello Hydrangea.
19. Brick Edging For Your Flower Beds
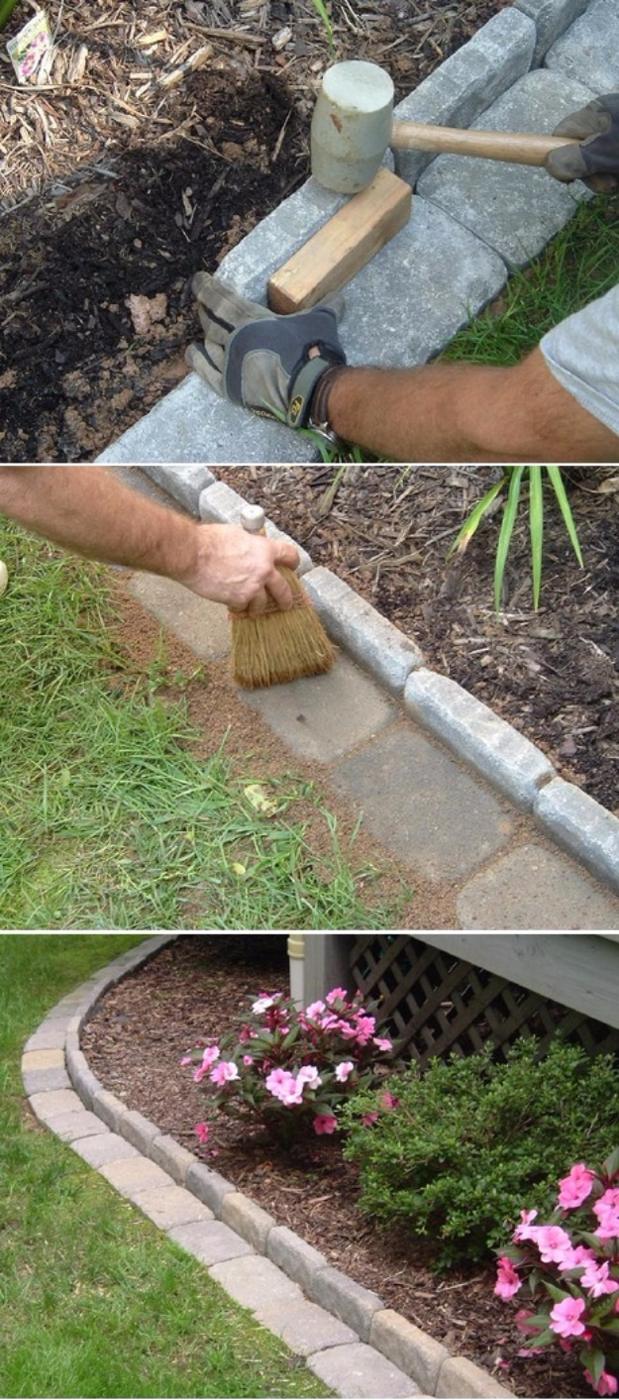
Concrete pavers set flush along a bed edge so the mower runs straight over them, which is what makes this maintenance free rather than one more thing to trim around. It also stops the lawn creeping into the bed and the mulch or decorative stone creeping out into the lawn. The supply list is 6 by 9 inch concrete pavers, sand, a lawn edging tool, a shovel, a garden trowel and a no bounce rubber mallet, with weed guard and a 2 1/2 inch wood block as useful optional extras. Finish by brushing sand into the joints with a stiff brush or whisk broom.
Get the full tutorial at World of Lush Gardens.