
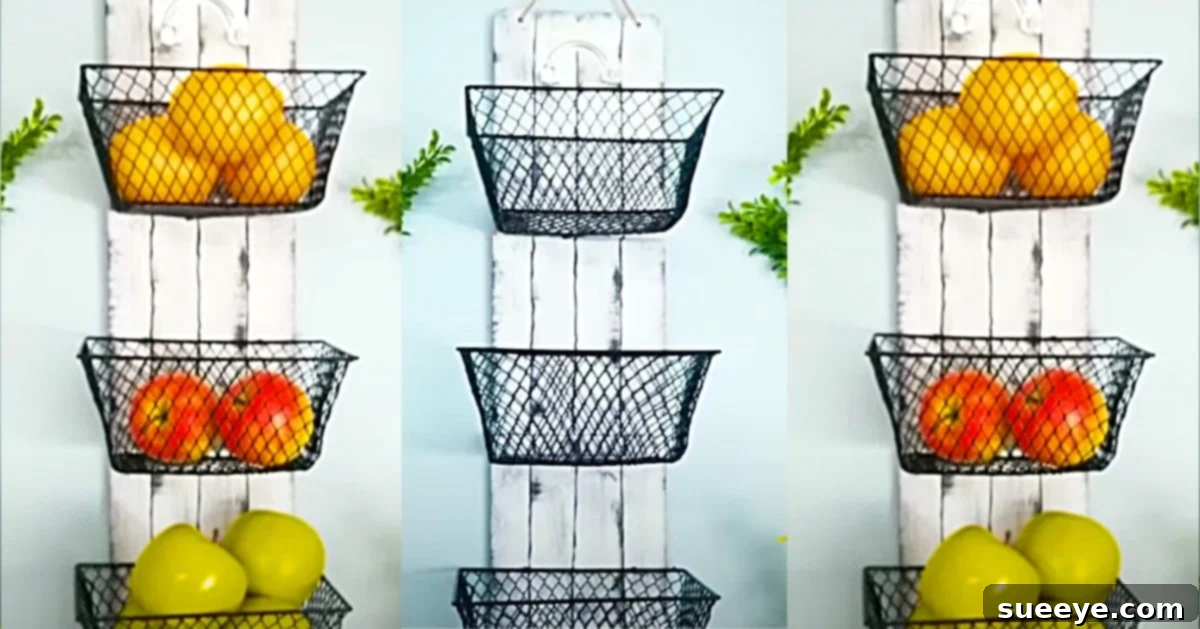
DIY Dollar Tree Wall Mounted Fruit Basket: Stylish & Affordable Kitchen Organization
Are you tired of cluttered countertops and fruit bowls taking up valuable space in your kitchen? Imagine a practical yet charming solution that not only keeps your produce fresh and easily accessible but also adds a rustic touch to your home decor, all without breaking the bank. This incredible DIY Dollar Tree wall-mounted fruit basket project offers just that! Inspired by a brilliant video tutorial from She So Craft-Dee on YouTube, this idea instantly captivated us with its simplicity, affordability, and immense potential.
Crafting your own wall-mounted fruit basket is a fantastic way to introduce vertical storage into your kitchen, freeing up precious counter space. What makes this project truly stand out is its reliance on readily available and inexpensive materials, primarily sourced from your local Dollar Tree. This means you can achieve a high-end look on a budget, making it an accessible and rewarding venture for any DIY enthusiast. Beyond its primary function as a fruit and vegetable holder, this versatile piece can easily be repurposed as a decorative planter for indoor or outdoor spaces, a clever storage solution for craft supplies, or even a unique organizer for bathroom essentials. The possibilities are endless, and the satisfaction of creating something so functional and beautiful with your own hands is truly unparalleled.
Why Choose a Wall-Mounted Fruit Basket?
In the pursuit of an organized and efficient kitchen, every inch of space counts. A wall-mounted fruit basket offers numerous advantages over traditional countertop bowls:
- Maximize Space: By utilizing vertical space, you free up your kitchen counters, making them appear cleaner and more spacious. This is particularly beneficial for smaller kitchens or those with limited surface area.
- Improved Produce Freshness: Storing fruits and vegetables in an open, airy basket promotes better air circulation, which can help them last longer by preventing moisture buildup and spoilage.
- Easy Accessibility: Hanging your produce at eye level makes it incredibly easy to see what you have and grab what you need, encouraging healthier eating habits.
- Aesthetic Appeal: This DIY project doesn’t just offer functionality; it also adds a charming, farmhouse-inspired aesthetic to your kitchen. It transforms everyday items into a decorative display.
- Versatility Beyond Fruit: While ideal for fruits and vegetables, these baskets can hold an array of items, from kitchen linens and spices to mail, keys, or even small potted herbs.
Materials for Your Dollar Tree Wall Mounted Fruit Basket
One of the most appealing aspects of this project is its budget-friendly material list. Most items can be found at Dollar Tree, allowing you to create a stunning piece for a fraction of the cost of store-bought alternatives. Here’s what you’ll need:
- Decorative Signs (2): The original project uses one “beware” and one “love” sign. Look for sturdy, flat wooden or MDF signs that can serve as the back panel of your unit. Choose designs or words that fit your personal style, as the backs of these will be painted.
- Rectangle Metal Baskets (3): These are the core components for holding your items. Opt for baskets with a mesh or slatted design that allows for good air flow. Ensure they are uniform in size for a cohesive look.
- Zip Ties: A strong and simple way to secure the baskets to the back panel. Choose zip ties that are sturdy enough to hold the weight of your items.
- Utility Hooks with Screws: These will be used for mounting your finished basket system securely to the wall. Select hooks that are appropriate for the weight you intend to hang and the type of wall you have (drywall anchors may be needed).
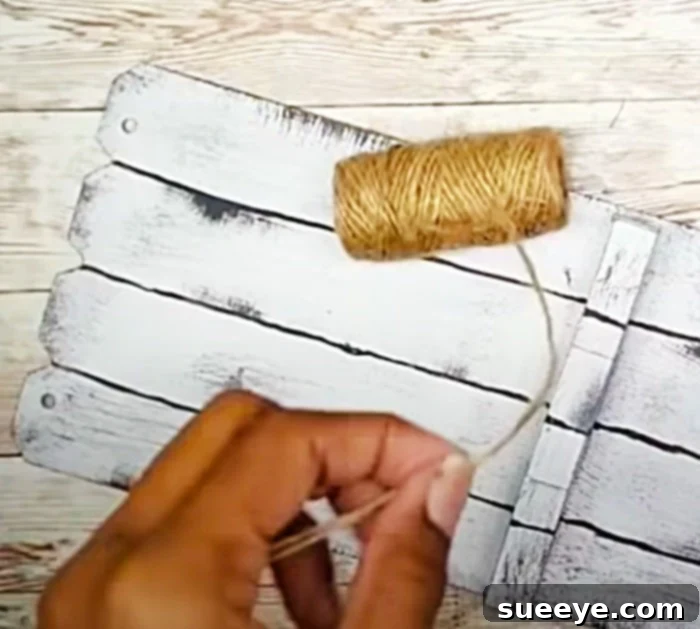
- Jute Twine: Primarily for decorative purposes, adding a rustic and cohesive feel to the project. It can also be used to reinforce connections or create hanging loops if preferred.
- Tumbling Blocks (e.g., Jenga blocks): These small wooden blocks can be used for spacing, decorative accents, or even creating small “feet” for added stability or depth.
- Hot Glue Gun: Essential for quickly and securely attaching various elements.
- Hot Glue Sticks: Ensure you have an ample supply.
- Optional: Paint and Paintbrushes: Acrylic craft paint in your desired color (for the signs), sandpaper (for light sanding before painting), and a clear sealant (for durability).
- Tools: Scissors or cutters (for zip ties), a drill or screwdriver (for utility hooks), a measuring tape or ruler, and a pencil for marking.
Step-by-Step Directions to Craft Your Wall Mounted Basket
Crafting this elegant storage solution is surprisingly straightforward. Follow these detailed steps to bring your Dollar Tree fruit basket to life:
Step 1: Prepare Your Back Panels
Begin by preparing your decorative signs. Since you’ll be using the back of the signs as the visible surface, you’ll want to ensure they look polished.
- Select and Clean: Choose two signs that complement each other in size and shape. Gently clean them to remove any dust or debris.
- Paint (Optional but Recommended): If you want a uniform or custom color, paint the back of your signs. Acrylic craft paint works wonderfully and dries quickly. You can choose a color that matches your kitchen decor, or a neutral tone like white, cream, or a soft gray for a classic farmhouse look. Apply multiple thin coats for even coverage, allowing each coat to dry completely.
- Seal (Optional): For added durability and protection, especially if the basket will be in a high-moisture area like a kitchen, apply a clear matte or satin sealant once the paint is fully dry.
- Connect the Signs: If your signs are individual, you’ll need to join them to create a longer back panel. Use strong hot glue, wood glue, or small brackets on the back side to securely connect them side-by-side or stacked vertically, depending on your desired layout. Ensure the connection is robust enough to support the baskets and their contents.
Step 2: Assemble the Baskets onto the Back Panel
This is where your fruit basket begins to take shape. Precision here will ensure a sturdy and aesthetically pleasing finished product.
- Layout the Baskets: Arrange your three rectangular metal baskets on the prepared back panel. Experiment with the spacing between them. You might want them evenly spaced, or closer together for certain items. Use a ruler or tumbling blocks as spacers to ensure consistent gaps.
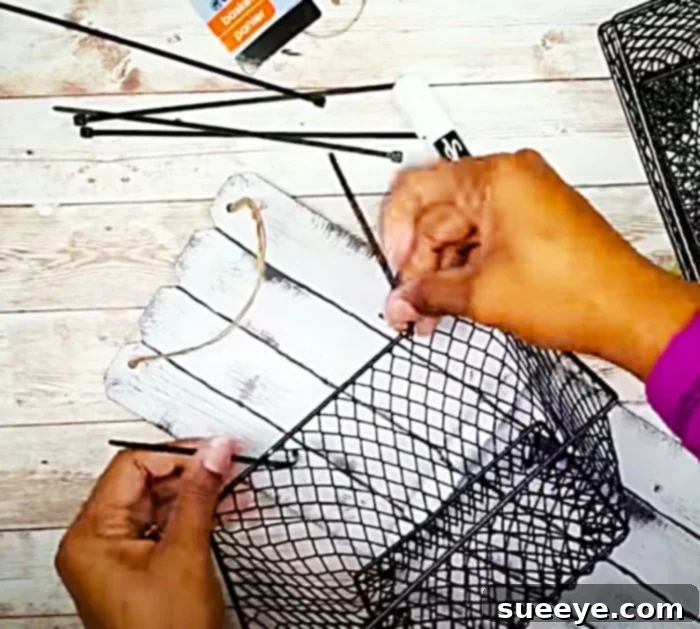
- Secure with Zip Ties: Once you’re satisfied with the placement, use zip ties to securely attach each basket to the back panel. Thread the zip ties through the mesh of the baskets and around the back panel. For each basket, use at least two zip ties per side (four total) to ensure maximum stability. Pull them as tight as possible.
- Trim Excess Zip Ties: After tightening, use scissors or wire cutters to neatly trim any excess length from the zip ties, so they are not visible from the front.
- Reinforce with Hot Glue (Optional): For extra security, especially if you plan to store heavier items, you can add dabs of hot glue between the back of the baskets and the sign panel where they meet. This creates an even more rigid structure.
Step 3: Add Decorative Touches and Prepare for Mounting
Now for the final touches that make your DIY project truly unique and ready for display.
- Incorporate Jute Twine: Wrap jute twine around the edges of your back panel, around the basket rims, or weave it through some of the mesh openings for a rustic, decorative effect. Secure the ends with hot glue. This adds texture and a finished look.
- Utilize Tumbling Blocks: Hot glue tumbling blocks strategically. You can place them along the bottom edge of the signs as decorative “feet” to prevent scuffing the wall, or glue them between baskets for consistent spacing and added visual interest. You could even paint them and use them to spell out a word like “FRUIT” or “HOME.”
- Attach Utility Hooks: Determine the best spots for your utility hooks on the top back edge of your assembled unit. These will be what you hang the entire piece from. Use strong hot glue to attach them securely to the wooden signs, ensuring they are level and spaced appropriately for balanced hanging. For heavier loads, you might consider small screws through the hooks into the wooden signs if the material allows, for maximum security.
Step 4: Mount Your Wall Basket
The final step is to securely mount your beautiful new storage solution to your wall.
- Choose Your Location: Select a suitable spot in your kitchen or desired area. Consider accessibility, visibility, and proximity to where you’ll use the items stored in the baskets.
- Mark the Wall: Hold the assembled fruit basket against the wall in your chosen location. Use a pencil to mark where the utility hooks (attached in Step 3) will rest on the wall.
- Install Wall Anchors (If Needed): If you’re hanging the basket on drywall and plan to store heavy items, it’s highly recommended to use appropriate wall anchors (e.g., drywall anchors) before inserting screws. Follow the manufacturer’s instructions for the anchors. If screwing into a stud, anchors aren’t necessary.
- Install Screws: Screw two strong screws (or picture hanging hooks) into the wall at your marked points, ensuring they are level and spaced to perfectly hold the utility hooks of your basket. Leave a small portion of the screw head protruding to hook the basket onto.
- Hang Your Basket: Carefully lift your assembled wall basket and hook the utility hooks onto the screws on the wall. Gently test its stability before loading it with items. Ensure it feels secure and doesn’t wobble.
This is such an easy, attractive, and incredibly functional idea, I just love it! It transforms a few inexpensive items into a centerpiece of organization.
Customization Ideas & Personalization
One of the joys of DIY projects is the ability to tailor them to your unique style. Here are a few ways to personalize your Dollar Tree wall-mounted fruit basket:
- Paint & Finish: Experiment with different paint colors to match your kitchen’s existing palette. Consider distressing the paint for a shabby chic look, or adding a metallic spray paint for a modern touch.
- Stencils & Decals: Apply stencils or vinyl decals to the back panel with words like “Produce,” “Farm Fresh,” or “Eat Your Veggies.”
- Basket Liners: Line the baskets with decorative fabric, parchment paper, or even small chalkboard labels to identify contents or add a pop of color.
- Alternative Back Panels: Instead of two signs, you could use a single larger Dollar Tree cutting board, a decorative placemat glued to a sturdy cardboard backing, or even a piece of reclaimed wood for a more rustic feel.
- LED Lighting: For a dramatic effect, adhere battery-operated LED strip lights behind the baskets or along the back panel to create a warm glow.
Beyond Fruits: Versatile Uses for Your DIY Basket
While designed as a fruit basket, the versatility of this Dollar Tree creation extends far beyond the kitchen. Here are some inspiring alternative uses:
- Vertical Herb Garden: Line the baskets, add some small pots with your favorite herbs, and place it near a sunny window.
- Craft Supply Organizer: Perfect for holding skeins of yarn, paint tubes, brushes, or small fabric scraps in a craft room.
- Bathroom Storage: Keep toiletries, extra hand towels, toilet paper rolls, or bath bombs neatly organized and within reach.
- Entryway Catch-All: Mount it near your door to hold mail, keys, sunglasses, or small accessories as you come and go.
- Kids’ Room Organizer: Store small books, art supplies, or plush toys, keeping clutter off the floor.
- Home Office Nook: Keep stationery, notepads, pens, or small office supplies tidy and accessible.
Tips for a Successful DIY Project
To ensure your Dollar Tree wall-mounted fruit basket turns out perfectly and lasts for years, keep these tips in mind:
- Plan Your Layout: Before gluing or zipping, lay out all your components to visualize the final product. Measure and mark for even spacing.
- Quality Adhesion: Don’t skimp on hot glue. Apply generous amounts where needed, especially for structural connections. For maximum strength, consider wood glue for joining the signs if they are wood.
- Secure Mounting: Always use appropriate hardware for your wall type. If unsure, consult a hardware store professional. A wobbly basket can lead to accidents and damage.
- Allow Drying Time: If painting, ensure each coat is thoroughly dry before proceeding to the next step. This prevents smudging and ensures a professional finish.
- Test Before Loading: Once mounted, gently pull on the basket to ensure it’s securely attached to the wall before placing any items inside. Gradually load it to test its weight capacity.
The Rewarding Experience of DIY
Embarking on a Dollar Tree DIY project like this wall-mounted fruit basket offers more than just a functional item; it provides a deeply satisfying experience. You get to exercise your creativity, save money, and create something truly unique that reflects your personal style. It’s an empowering way to tackle home organization, proving that beautiful and practical solutions don’t have to come with a hefty price tag. Plus, the sense of accomplishment you feel every time you glance at your handmade creation is invaluable.
Conclusion: Elevate Your Home Organization, Affordably
This Dollar Tree wall-mounted fruit basket is a shining example of how affordable materials, a little creativity, and some straightforward instructions can culminate in a remarkably functional and stylish home decor piece. Whether you’re aiming to declutter your kitchen, add a charming rustic touch, or simply enjoy the process of crafting something beautiful, this project is an excellent choice. Its versatility means it can adapt to various storage needs across your home, making it an incredibly valuable addition.
So, gather your Dollar Tree treasures, unleash your inner crafter, and get ready to transform your space with this easy, budget-friendly, and immensely rewarding DIY project. We encourage you to give it a try and discover the joy of creating practical elegance for your home!