
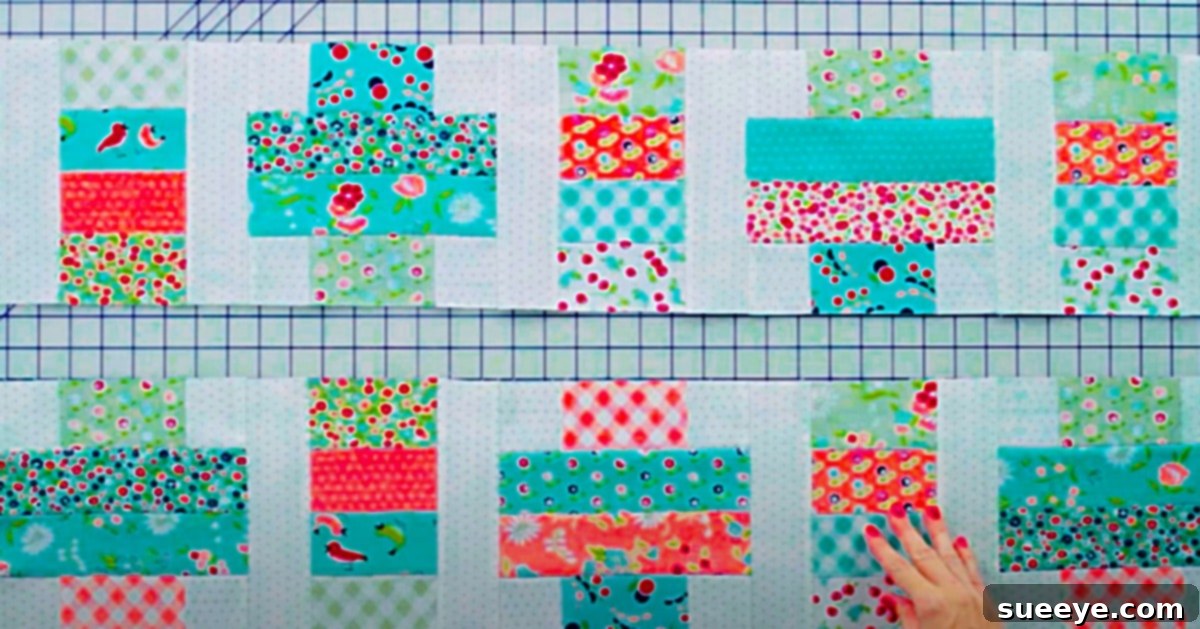
How to Create a Stunning Jelly Roll Slice Quilt with a Free Pattern – Your Easy DIY Guide
There’s nothing quite like the warmth and satisfaction of creating something beautiful with your own hands, and for many, quilting holds a special place in the heart. As a passionate quilter myself, I find immense joy in every stitch, especially as the vibrant days of summer unfold. The season feels brighter, and my home cozier, when adorned with unique, DIY decorative accessories. Patchwork remnants, particularly those from cheerful jelly rolls, can be transformed into incredibly inviting patterns that breathe life into any space.
My quest for the perfect summer project recently led me to an inspiring discovery. While searching for a creative quilting idea to brighten my daughter’s bedroom, I stumbled upon a captivating video tutorial by the esteemed quilting experts at The Fat Quarter Shop. This tutorial showcased a beautiful jelly roll twist quilt, and I instantly knew it was the project I had been searching for. The timing couldn’t have been more perfect; I already had a collection of bright, summer-themed fabric jelly rolls and remnants, purchased on sale at JoAnn’s Fabrics for an absolute steal. They were waiting patiently for their purpose, and now I had found it!
What makes this specific project even more appealing for any quilting enthusiast, whether you’re a seasoned pro or just starting your journey, is the availability of a free pattern from The Fat Quarter Shop. This invaluable resource simplifies the entire process, making it incredibly accessible to everyone. With clear, easy-to-follow instructions, I quickly began to bring my basic twist pattern to life. All you truly need to embark on this creative adventure is a jelly roll (or an assortment of pre-cut fabric strips), some soft batting, and a complementary quilt backing fabric. Gather these essentials, and you’ll be ready to dive into the wonderful world of quilting!
The Allure of Jelly Rolls: Simplifying Your Quilting Journey
For those new to the quilting world, you might be wondering, “What exactly is a jelly roll?” A jelly roll is a delightful bundle of pre-cut fabric strips, typically 2.5 inches wide by 44 inches long, all carefully coordinated by color, designer, or theme. These bundles usually contain 40 strips, offering a harmonious palette that eliminates the guesswork of fabric selection. This convenience is a game-changer, especially for beginners or those looking for a quick and satisfying project.
The beauty of using jelly rolls lies in their versatility and the significant time they save. Instead of spending hours meticulously cutting individual strips from yardage, you can jump straight into the fun part: sewing! This not only speeds up the quilting process but also ensures uniformity in your strips, leading to more professional-looking results. The pre-selected fabrics guarantee a cohesive and visually appealing finished quilt, making it a fantastic choice for projects like our Jelly Roll Slice Quilt, where the interplay of colors and patterns creates a captivating design.
Essential Tools and Materials for Your Jelly Roll Slice Quilt
Before you begin sewing, it’s helpful to gather all your necessary tools and materials. Having everything at hand ensures a smooth and enjoyable quilting experience. Here’s what you’ll need for your Jelly Roll Slice Quilt:
- A Jelly Roll: The star of our show! Choose one with colors and patterns that speak to you. If you don’t have a jelly roll, you can cut your own 2.5-inch strips from fat quarters or yardage.
- Quality Thread: Select a durable polyester or cotton thread that matches or complements your fabrics. A good quality thread minimizes breakage and ensures strong seams.
- A Sewing Machine: Any standard sewing machine capable of a straight stitch will work. Ensure it’s in good working order and has been recently oiled.
- A Rotary Cutter: This essential tool makes cutting fabric quick, precise, and effortless. A sharp blade is crucial for clean cuts.
- A Cutting Mat: Protect your work surface and your rotary cutter blade with a self-healing cutting mat. Sizes vary, so choose one that fits your workspace.
- A Quilter’s Ruler: A clear acrylic ruler with clear markings, typically 6 x 24 inches, is invaluable for accurate measuring and cutting of fabric strips and blocks.
- Batting: This is the middle layer of your quilt, providing warmth and loft. Choose a type that suits your preference, such as cotton, polyester, or a blend.
- Quilt Backing Fabric: A single piece of fabric or pieced fabric to serve as the back of your quilt. Ensure it’s slightly larger than your quilt top.
- Basic Sewing Supplies: Pins or wonder clips, an iron and ironing board, and a seam ripper (just in case!).
While the initial tutorial mentioned cutting 2×5 inch strips, for this particular Jelly Roll Slice Quilt, the beauty is that you primarily work with the pre-cut 2.5-inch strips from your jelly roll, streamlining the preparation phase significantly.
Step-by-Step Directions: Crafting Your Jelly Roll Slice Quilt Blocks
The journey to creating your Jelly Roll Slice Quilt begins with understanding the core technique behind the unique “slice” effect. This method is incredibly clever and surprisingly simple, making it accessible even for those with minimal quilting experience. The genius behind this specific design is wonderfully demonstrated in the video tutorial by The Fat Quarter Shop.
You start by selecting several jelly roll strips. The pattern will guide you on how many strips to choose for each “slice” unit, but typically you’ll be working with sets of three or four contrasting or complementary strips. The first step involves sewing these jelly roll strips together along their long edges, creating a striped panel. It’s crucial to maintain a consistent 1/4-inch seam allowance throughout this process. This precision is key to ensuring your finished blocks fit together perfectly. After sewing each seam, press it open or to one side, according to the pattern’s recommendations. Pressing is a quilter’s best friend, creating flat, crisp seams that contribute to the overall neatness and quality of your quilt.
Once you have sewn your strips into a panel, the “slice” magic happens. Following the simple instructions provided in the free pattern, you will take your rotary cutter and ruler to make diagonal cuts across your newly sewn strip set. These diagonal cuts are what create the distinctive “twist” or “slice” effect in the quilt blocks. The angle and spacing of these cuts are crucial and will be clearly outlined in the pattern. It’s important to keep your ruler steady and make clean, precise cuts.
After making your diagonal cuts, you will then reassemble these sliced segments in a slightly shifted order, sewing them back together. This reassembly creates the illusion of movement and depth within each block, giving it that delightful “twist.” You’ll repeat this process to create multiple individual blocks. This might sound complex, but the video tutorial breaks it down into very manageable steps, making it incredibly straightforward. You’ll be amazed at how quickly these dynamic blocks come together.
Assembling Your Quilt Top: From Blocks to a Beautiful Creation
With your individual Jelly Roll Slice blocks now complete, the next exciting phase is assembling them into the full quilt top. This is where your vision truly starts to take shape. Begin by laying out your finished blocks on a design wall or a clean floor. Experiment with different arrangements to find the most aesthetically pleasing pattern. You might orient some blocks one way and others another to enhance the “twist” effect, creating a mesmerizing visual flow across the quilt. This step is a fantastic opportunity to unleash your creativity and ensure the final layout is exactly what you envision.
Once you are happy with your block arrangement, begin sewing the blocks together into rows. Again, maintaining that consistent 1/4-inch seam allowance is paramount for all your seams to align perfectly. Press the seams of alternating rows in opposite directions (e.g., press seams of row 1 to the right, row 2 to the left). This technique, known as “nesting” seams, allows them to interlock perfectly when you join the rows, minimizing bulk and ensuring flat, crisp intersections. After sewing all your rows, carefully join the rows together to form your complete quilt top. Take your time, pin generously at seam intersections, and press thoroughly after each seam. The result will be a beautifully pieced quilt top, ready for the next stages of quilting.
The Finishing Touches: Basting, Quilting, and Binding
Creating the quilt top is a significant achievement, but the journey isn’t over yet! The next crucial steps involve transforming your pieced top into a finished, functional quilt: basting, quilting, and binding.
Basting Your Quilt Sandwich
Basting is the process of temporarily securing the three layers of your quilt – the backing, the batting, and the quilt top – together. This “quilt sandwich” needs to be smooth and free of wrinkles to prevent puckering during the quilting process. Lay your backing fabric face down on a clean, flat surface, taping it securely to keep it taut. Next, smooth your batting over the backing, ensuring it’s free of wrinkles. Finally, center your quilt top over the batting, face up, and smooth it carefully. You can baste your layers using safety pins, basting spray, or long hand stitches. For a project of this size, safety pins placed every 4-6 inches are a popular and effective method, ensuring all three layers remain perfectly aligned.
Quilting Your Layers Together
Quilting is the decorative stitching that holds all three layers of your quilt sandwich together. This is where your quilt truly takes on its unique texture and character. For a Jelly Roll Slice Quilt, simple straight-line quilting can beautifully complement the geometric design without overpowering it. You might choose to quilt along the seam lines of your blocks, or create a grid pattern, or even stitch a few lines within each “slice” to emphasize the twist. If you’re feeling adventurous, free-motion quilting allows for more organic, flowing designs. Choose a quilting design that you feel comfortable executing. Remember to start quilting from the center of the quilt and work your way outwards to help prevent fabric shifting and puckering.
Binding Your Quilt
The final step in completing your quilt is adding the binding, which finishes and protects the raw edges. This provides a neat frame for your beautiful work. Typically, binding strips are cut 2.5 inches wide, sewn together end-to-end to create one long strip, and then pressed in half lengthwise. You will attach this folded strip to the raw edge of your quilt, sewing it first to the front and then wrapping it around to the back. It can be hand-stitched or machine-stitched on the back for a durable finish. Take your time with the corners to achieve crisp, mitered edges that add a professional touch to your Jelly Roll Slice Quilt.
Tips for a Successful Jelly Roll Slice Quilt Project
To ensure your Jelly Roll Slice Quilt project is as enjoyable and successful as possible, keep these valuable tips in mind:
- Consistent Seam Allowance: The 1/4-inch seam allowance is critical in quilting. Use a seam guide or mark your machine with painter’s tape to maintain accuracy.
- Press, Don’t Iron: When pressing seams, lift and place your iron rather than sliding it, which can stretch and distort your fabric.
- Sharp Tools Are Your Friends: Ensure your rotary cutter blade is sharp for clean, precise cuts. Dull blades can fray fabric and lead to inaccuracies.
- Take Your Time: Quilting is a meditative process. Rushing can lead to mistakes. Enjoy each step, and don’t hesitate to use your seam ripper if needed.
- Pre-Wash Your Fabrics (Optional): Some quilters prefer to pre-wash their jelly rolls to pre-shrink the fabric and check for colorfastness, though many contemporary jelly rolls are designed to be used without pre-washing.
- Pin Generously: Use plenty of pins when joining strips, blocks, and especially when basting, to keep fabric layers from shifting.
- Watch the Video: The Fat Quarter Shop video tutorial is an excellent visual guide. Watch it a few times before starting and refer back to it during your process.
Customizing Your Jelly Roll Slice Quilt
While the free pattern provides a fantastic foundation, don’t hesitate to add your personal touch to your Jelly Roll Slice Quilt. This quilt is incredibly versatile! You can experiment with different color schemes—perhaps a monochrome palette for a sophisticated look, or a wild mix of colors for a truly eclectic feel. Consider the size of your quilt; the pattern can easily be adjusted to create anything from a small baby quilt to a generous bed throw by simply making more or fewer blocks. You could also introduce sashing (strips of fabric between blocks) to add another design element or use a contrasting fabric for your binding to make it pop. The possibilities are endless, allowing you to create a one-of-a-kind heirloom that perfectly reflects your style.
Making a Jelly Roll Slice Quilt is a truly rewarding experience. It’s a project that combines the simplicity of pre-cut fabrics with a clever design technique, resulting in a visually dynamic and utterly charming quilt. The fact that it comes with a free, easy-to-follow pattern from quilting experts makes it an ideal endeavor for anyone looking to create something beautiful without feeling overwhelmed. So, gather your materials, follow these guidelines, and embark on your own quilting adventure. You’ll soon have a stunning, handmade quilt that adds warmth, color, and a touch of personal flair to your home.