
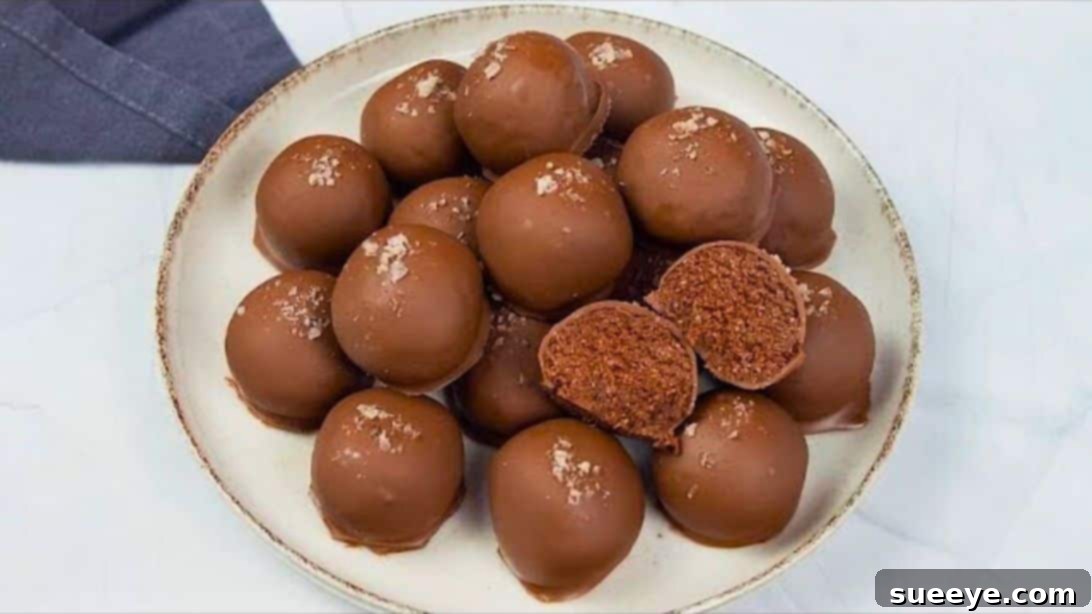
Prepare to tantalize your taste buds with these utterly delightful **Coconut Brownie Truffles**, a brilliant creation by the culinary innovators at Cookist Wow. These exquisite no-bake treats are a chocolate lover’s dream, offering a harmonious symphony of flavors and textures in every bite. Imagine the rich, deep notes of premium chocolate perfectly complemented by the exotic, nutty sweetness of coconut and the comforting, buttery essence of hazelnut. A touch of golden honey adds natural sweetness and a binding quality, while a delicate sprinkle of flaky sea salt elevates the entire experience, cutting through the sweetness and enhancing the complex flavors.
What makes these coconut brownie truffles truly exceptional is their incredible simplicity. You don’t need to be an experienced baker to whip up a batch of these impressive sweets. With just five readily available ingredients and no oven required, they are the epitome of an easy dessert. This recipe is perfect for last-minute gatherings, a thoughtful homemade gift, or simply when you crave a decadent treat without the fuss. The process is straightforward: blend your core ingredients, chill the mixture, form into elegant balls, coat them in melted chocolate, and finish with a flourish of flaky salt. The result is a sophisticated dessert that looks as good as it tastes, promising to impress anyone who tries them. Get ready to embark on a sweet adventure that proves gourmet treats can indeed be effortlessly simple.
RELATED: Looking for more quick and delicious no-bake options? Don’t miss these fantastic recipes: No-Bake 10-Minute Fudgy Brownies Recipe. These recipes are perfect companions to your coconut brownie truffles, offering a variety of effortless indulgences.
For more easy dessert ideas to expand your repertoire, explore these equally simple and delicious recipes:
- 3-Ingredient No-Bake Oreo Balls
- 6-Ingredient Old-Fashioned Bourbon Balls
- Quick and Easy Apricot Balls
Essential Ingredients for Easy Coconut Brownie Truffles
Crafting these delectable truffles requires only a handful of staple ingredients, making them a convenient choice for any home cook. The magic truly lies in the quality of these components, so opt for the best you can find to ensure the most flavorful results.
- 2 cups of Hazelnut Cream: This ingredient forms the rich, creamy base of our truffles, contributing a luxurious texture and a distinctly nutty flavor. Think of popular hazelnut spreads; a good quality one will provide the perfect balance of sweetness and roastiness. It also acts as a primary binder, holding the truffle mixture together beautifully.
- 3/5 cup of Coconut Flour: Unlike regular flour, coconut flour is incredibly absorbent and lends a unique, subtly sweet coconut flavor to the truffles. It’s naturally gluten-free and helps to achieve the desired dense, brownie-like consistency. Make sure to sift it for an even mix.
- 2/3 cup of Honey: Honey serves as a natural sweetener, adding a lovely floral note that complements the other flavors. Beyond its sweetness, honey is crucial for the truffle’s texture, helping to bind the ingredients and keep them moist and tender.
- 2 cups of Chocolate: The star of the show! You’ll need chocolate for coating your truffles. Dark chocolate offers a sophisticated bitterness that contrasts wonderfully with the sweetness of the filling, while milk chocolate provides a creamier, milder profile. Semi-sweet is a versatile choice. Opt for good quality chocolate chips or a baking bar, as this will affect both the taste and the melting consistency.
- Flaky Salt (e.g., Maldon Sea Salt): A crucial finishing touch! A pinch of flaky salt doesn’t just add a visual appeal; it’s a flavor enhancer. The salt crystals provide a delightful textural contrast and brilliantly cut through the sweetness of the chocolate and honey, awakening the palate and highlighting all the other delicious flavors.
Equipment You’ll Need:
- Large mixing bowl
- Sifter (for coconut flour)
- Spatula or sturdy spoon for mixing
- Parchment paper
- Baking sheet or large plate
- Tablespoon or small cookie scoop
- Heatproof bowl (for melting chocolate)
- Microwave or saucepan for double boiler method
- Fork or dipping tools (for coating truffles)
Mastering the Art of Coconut Brownie Truffles: A Step-by-Step Guide
Follow these simple steps to create your own batch of irresistible coconut brownie truffles. Each stage is designed for ease and ensures a perfect outcome, even for beginner bakers.
Step 1: Prepare the Truffle Base
Begin by carefully sifting the coconut flour directly into a spacious mixing bowl. Sifting is an important step as it helps to aerate the flour and remove any lumps, ensuring a smooth and consistent truffle mixture. Once the coconut flour is in the bowl, add the hazelnut cream and the honey. Using a sturdy spatula or a wooden spoon, mix all the ingredients thoroughly. Continue mixing until everything is fully combined and a uniform, thick dough-like consistency is achieved. The mixture should be relatively firm but still pliable, with no visible streaks of individual ingredients. This foundational step is key to the truffles’ texture and flavor.
Step 2: Form and Chill the Truffle Balls
Once your truffle mixture is ready, it’s time to shape it. Take approximately one tablespoon of the mixture – a small cookie scoop works perfectly for uniform sizing – and gently roll it between your palms to form a smooth, compact ball. The mixture might be slightly sticky, so a light dusting of cocoa powder on your hands can help, or you can slightly dampen your hands if needed. As you form each ball, place it onto a plate or baking sheet that has been lined with parchment paper. This prevents sticking and makes transfer easier later on. Repeat this process until all the mixture has been transformed into delightful little truffle balls. Once all truffles are formed, place the plate or baking sheet into the refrigerator and chill for a minimum of 30 minutes. This chilling period is crucial; it allows the truffles to firm up, making them much easier to handle and ensuring the chocolate coating adheres perfectly without melting the truffle itself.
Step 3: Melt the Chocolate Coating
While your truffles are chilling, prepare your chocolate coating. Add the two cups of chocolate (chips or finely chopped bar) into a heatproof bowl. You have two excellent methods for melting chocolate until it’s perfectly smooth and glossy: the microwave or a double boiler.
- Microwave Method: Heat the chocolate in 20-30 second intervals, stirring well after each interval. It’s important to stir even if the chocolate doesn’t look fully melted, as residual heat will continue the melting process. Continue until the chocolate is smooth and there are no lumps. Be careful not to overheat, as this can cause the chocolate to seize and become grainy.
- Double Boiler Method: Place the heatproof bowl over a saucepan containing a couple of inches of simmering water, ensuring the bottom of the bowl does not touch the water. The steam from the simmering water will gently melt the chocolate. Stir continuously until the chocolate is completely smooth and melted. This method provides more controlled heat, reducing the risk of burning or seizing the chocolate.
Ensure the melted chocolate is smooth, fluid, and at a good dipping temperature – not too hot to melt the truffles, but warm enough to be easily worked with.
Step 4: Coat the Truffles in Chocolate
Retrieve your chilled truffle balls from the refrigerator. Using a fork or a specialized dipping tool, carefully drop one truffle into the melted chocolate. Submerge it completely, then lift it out, allowing any excess chocolate to drip back into the bowl. Gently tap the fork against the edge of the bowl to encourage the excess to run off. This ensures a thin, even coating and prevents pooling at the base. Once coated, carefully transfer the truffle back onto the parchment paper-lined plate or baking sheet, leaving a small space between each one. Repeat this process with all the remaining truffle balls, ensuring each one receives a generous, smooth coat of chocolate.
Step 5: Garnish, Set, and Serve
Immediately after coating each truffle and before the chocolate has a chance to set, sprinkle a pinch of flaky salt on top of it. This creates a beautiful visual contrast and, more importantly, provides that essential balance of sweet and savory flavors. Once all the truffles are coated and garnished, let the chocolate set completely. You can either leave them at room temperature in a cool place, or for a quicker set, place them back into the refrigerator for about 15-30 minutes. Once the chocolate is firm to the touch, your homemade coconut brownie truffles are ready to be served! Arrange them on a pretty platter and enjoy these decadent, easy-to-make treats. They are perfect with a cup of coffee or as an after-dinner indulgence.
Why You’ll Absolutely Adore These Coconut Brownie Truffles
There are countless reasons why these delightful no-bake truffles will become a fast favorite in your home. Firstly, their simplicity is unmatched. Requiring only five ingredients and no baking, they are the ultimate solution for anyone craving a gourmet-quality dessert without the hassle. This makes them perfect for busy weeknights, impromptu gatherings, or when you simply don’t want to turn on the oven.
Beyond their ease, the flavor profile is truly exquisite. The blend of rich chocolate, creamy hazelnut, tropical coconut, and sweet honey creates a harmonious and indulgent taste that appeals to nearly everyone. The addition of flaky sea salt is a game-changer, providing a sophisticated counterpoint to the sweetness and enhancing every single flavor note. These truffles aren’t just a dessert; they’re an experience – a small bite of pure bliss that transports you to a world of rich, satisfying flavors.
They are also incredibly versatile. Whether you’re preparing for a holiday party, looking for a unique homemade gift, or simply treating yourself, these truffles fit every occasion. Their elegant appearance makes them perfect for special events, yet their effortless preparation means you can enjoy them anytime. Say goodbye to complicated dessert recipes and hello to your new go-to indulgence!
Tips for Achieving Truffle Perfection
While this recipe is incredibly forgiving, a few expert tips can elevate your coconut brownie truffles from great to absolutely extraordinary:
- Ingredient Quality Matters: Since there are so few ingredients, the quality of each really shines through. Use a good quality hazelnut cream (like a premium brand of chocolate-hazelnut spread), high-quality chocolate for melting, and distinct flaky sea salt for the best flavor and texture.
- Don’t Skimp on Chilling: The 30-minute chilling time for the truffle mixture is crucial. It firms up the balls, making them easier to handle, shape, and coat. If they’re too warm, they’ll be sticky and may melt when dipped in warm chocolate.
- Melt Chocolate Carefully: Whether using a microwave or double boiler, melt the chocolate slowly and gently. Overheating can cause chocolate to seize (become thick and clumpy) or burn. If using a microwave, stir frequently in short bursts. For a double boiler, ensure no water or steam gets into the chocolate, which can also cause seizing.
- Achieve a Smooth Coating: When dipping, let the excess chocolate drip off thoroughly. Gently tapping the fork against the edge of the bowl helps achieve a thin, even layer, preventing thick, clunky bottoms.
- Immediate Salting: Sprinkle the flaky salt on the truffles immediately after coating them in chocolate, while the chocolate is still wet. This ensures the salt adheres properly and doesn’t just fall off.
- Uniform Size: For a professional look, use a small cookie scoop or measure with a tablespoon to ensure all your truffles are roughly the same size. This also helps them chill and set evenly.
Creative Variations and Customizations for Your Truffles
While the classic coconut brownie truffles are undeniably delicious, this recipe is also incredibly versatile, inviting you to experiment with flavors and textures. Here are some ideas to inspire your culinary creativity:
- Alternative Coatings: Instead of plain melted chocolate, try white chocolate for a lighter contrast, or milk chocolate for a sweeter profile. You could also drizzle contrasting chocolate over the dark chocolate coating for an artistic touch.
- Flavor Boosters: A few drops of vanilla extract, almond extract, or even a hint of rum or coffee extract can be added to the truffle mixture for an extra layer of flavor complexity.
- Topping Innovations: Beyond flaky salt, consider rolling your finished truffles in finely shredded coconut (toasted or untoasted), cocoa powder, finely chopped nuts (like hazelnuts, almonds, or pecans), colorful sprinkles, or even finely crushed cookies.
- Nut Butter Swaps: If you’re not a fan of hazelnut cream or want to try something different, consider using almond butter or cashew butter. Ensure they are smooth and creamy for the best texture.
- Vegan Option: To make these truffles vegan-friendly, ensure your hazelnut cream and chocolate are dairy-free. Most good quality dark chocolates are naturally vegan, but always check labels. Maple syrup can be used as a delicious alternative to honey.
- Spiced Truffles: Add a pinch of cinnamon, cardamom, or even a tiny amount of cayenne pepper to the truffle mixture for a warm, subtly spicy kick.
- Miniature Delight: For bite-sized treats, make smaller balls (half a tablespoon) for a more delicate presentation, perfect for large dessert platters.
Storing Your Homemade Coconut Brownie Truffles
To keep your delicious coconut brownie truffles fresh and delightful, proper storage is key:
- Room Temperature: If your kitchen is cool (below 70°F or 21°C) and not humid, you can store the truffles in an airtight container at room temperature for up to 2-3 days. Keep them away from direct sunlight or any heat sources, as the chocolate coating can melt.
- Refrigeration: For longer freshness, especially in warmer climates or if you prefer a firmer texture, store the truffles in an airtight container in the refrigerator for up to 1-2 weeks. It’s best to let them come to room temperature for about 10-15 minutes before serving for the optimal flavor and texture experience.
- Freezing: These truffles freeze beautifully! Place them in a single layer on a parchment-lined baking sheet and freeze until firm (about 1-2 hours). Once firm, transfer them to a freezer-safe airtight container or bag. They can be stored in the freezer for up to 1-2 months. Thaw them in the refrigerator overnight or at room temperature for an hour before serving.
Always ensure your storage container is airtight to prevent the truffles from drying out or absorbing any unwanted odors from your fridge or freezer.
Coconut Brownie Truffles Recipe – Your Guide to Sweet Perfection
Embark on a delightful culinary journey and create these irresistible coconut brownie truffles today. With minimal effort and maximum flavor, they are guaranteed to become a staple in your dessert repertoire. Enjoy the process of crafting these beautiful treats, and savor every indulgent bite!