
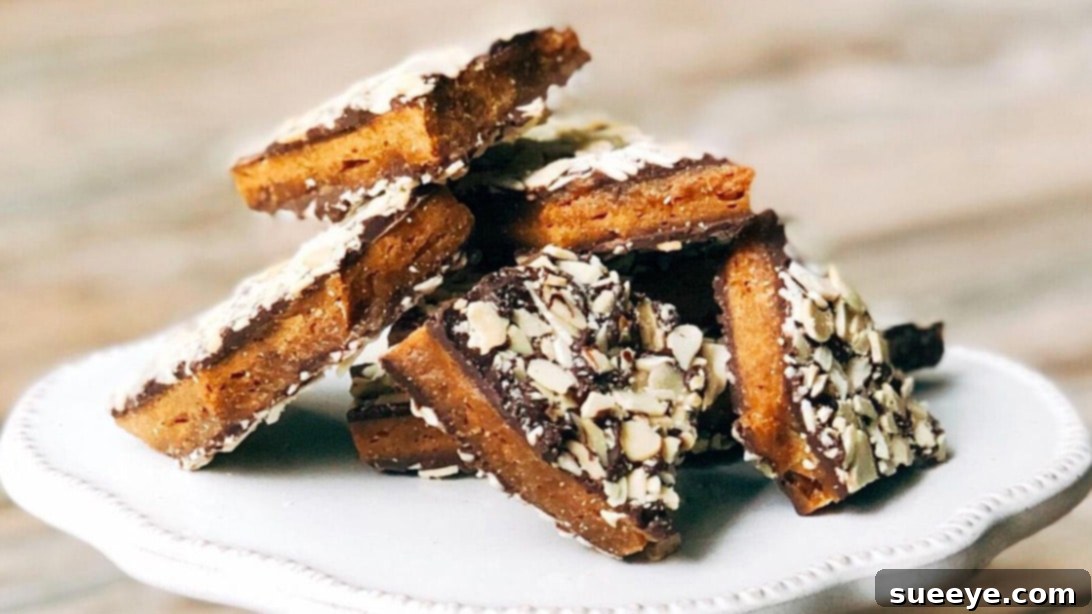
Ultimate Guide to Homemade Nutty Butter Crunch Toffee: A Perfect Recipe
There are days when nothing satisfies quite like a decadent, crunchy, and richly nutty butter crunch toffee. The sheer joy of that first bite—the snap of the crisp toffee, the smooth melt of chocolate, and the satisfying crunch of toasted nuts—is truly unparalleled. Recently, a strong craving for this classic confection led me down a delightful online rabbit hole. To my pleasant surprise, many of the essential ingredients were already stocked in my pantry, making the prospect of homemade toffee an exciting reality.
After sifting through numerous recipes, a particular video from Whippoorwill Holler on YouTube truly caught my eye. Her butter crunch toffee looked absolutely perfect—impeccably crunchy and beautifully coated. What made her approach stand out was not just the simplicity of her recipe, but also her ingenious personal hacks that elevate traditional toffee making to a whole new level. This guide distills her fantastic method, enhanced with additional tips and insights, to help you create your own perfect batch of butter crunch toffee that will impress everyone.
Why Make Your Own Butter Crunch Toffee?
While store-bought toffee can be good, nothing quite compares to the freshness and flavor of homemade. When you make toffee yourself, you control the quality of ingredients, ensuring a superior taste and texture. Plus, there’s an immense sense of satisfaction that comes from creating such a delightful treat from scratch. Homemade butter crunch toffee is not just a dessert; it’s a labor of love, a perfect gift, and an irresistible indulgence that your family and friends will rave about.
Essential Tools for Toffee Making
Having the right equipment can make all the difference when crafting perfect butter crunch toffee. Here’s what you’ll need:
- Heavy-Bottomed Non-Stick Pan: A pan with at least a 4-inch height and a thick bottom ensures even heating and prevents burning.
- Candy Thermometer: Absolutely crucial for accurate temperature control, which is the key to perfect toffee texture.
- Wooden Spatula or Heat-Resistant Silicone Spatula: For stirring the butter and sugar mixture.
- Parchment Paper: Essential for lining your baking sheet, preventing the toffee from sticking.
- Baking Sheet: A sturdy sheet pan for pouring and cooling the toffee.
- Double Boiler Setup (or Heatproof Bowl over a Saucepan): For gently melting and tempering the chocolate.
- Rubber Spatula: For spreading chocolate evenly.
- Measuring Cups and Spoons: For precise ingredient measurements.
- Sharp Knife or Mallet: For breaking the cooled toffee into pieces.
Ingredients for Nutty Butter Crunch Toffee
High-quality ingredients are the foundation of exceptional toffee. Opt for good butter and fresh nuts for the best results.
- 1 pound (4 sticks) unsalted butter, preferably high-quality
- 1 ½ cups granulated sugar
- 3 tablespoons water, room temperature
- ½ teaspoon fine sea salt (for the toffee base)
- 1 ½ teaspoons pure vanilla extract
- 12 ounces chocolate wafers or chips (divided for tempering)
- 1 cup nuts, chopped (almonds or pecans are excellent choices)
- A sprinkle of flaky sea salt (for finishing)
Step-by-Step Directions: Crafting Your Perfect Butter Crunch Toffee
1. Prepare Your Workspace
Before you begin, ensure all your ingredients are measured and ready. Line a large baking sheet with parchment paper. This preparation is critical because once the toffee reaches the correct temperature, you’ll need to pour it quickly. Buttering the sides of your non-stick pan is a smart trick to prevent sugar crystals from clinging and causing graininess in your finished toffee.
2. Start the Toffee Base
In your heavy-bottomed non-stick pan, add 1 pound of sliced unsalted butter. Begin to melt the butter over medium heat, stirring occasionally with a wooden or heat-resistant silicone spatula. The goal is to melt it gently and evenly. Once the butter is mostly melted, add the 1 ½ cups of granulated sugar. Stir constantly to combine the butter and sugar thoroughly. Continue stirring, ensuring the mixture is well incorporated, then add 3 tablespoons of room temperature water. The water helps dissolve the sugar, preventing crystallization and creating a smoother toffee.
3. Cook to Perfection
Increase the heat to medium-high and attach your candy thermometer to the side of the pan, making sure the tip doesn’t touch the bottom. This is the most crucial stage for achieving that signature butter crunch texture. You’ll need to stir the mixture frequently, but not constantly, allowing it to bubble and thicken. Watch for the color to change from a pale yellow to a beautiful, rich amber. This indicates the sugars are caramelizing, developing that deep, buttery flavor. Continue cooking until the thermometer registers precisely 300 degrees Fahrenheit (150 degrees Celsius), which is the “hard crack” stage. This temperature ensures your toffee will be perfectly crisp, not chewy.
4. Flavor and Pour
Immediately remove the pan from the heat once it reaches 300°F. Swiftly stir in ½ teaspoon of fine sea salt and 1 ½ teaspoons of pure vanilla extract. Be careful as the mixture will bubble vigorously. Stir well to ensure these flavors are evenly distributed. Without delay, pour the hot toffee mixture onto your prepared parchment-lined baking sheet. Allow it to spread naturally; resist the urge to spread it too thin with a spatula, as this can affect the texture. Let it sit undisturbed to cool and harden completely. This can take 30-60 minutes at room temperature, or you can place it in the refrigerator for about 15-20 minutes to speed up the process.
5. Prepare the Chocolate Layer
While the toffee cools, prepare your chocolate. Tempering chocolate is key for a glossy finish and a satisfying snap. If you don’t temper, the chocolate might bloom (develop gray streaks) and lack firmness. Set up a double boiler by placing a heatproof glass bowl over a saucepan with an inch or two of simmering water, ensuring the bowl does not touch the water. Add about two-thirds of your 12 ounces of chocolate wafers or chips to the bowl. Gently melt the chocolate, stirring occasionally, until it reaches approximately 122 degrees Fahrenheit (50 degrees Celsius). Remove the bowl from the heat.
Add the remaining one-third of your chocolate chips to the melted chocolate. Stir continuously until these “seed” chocolates are fully melted and the mixture cools down to 82 degrees Fahrenheit (28 degrees Celsius). This process helps stabilize the chocolate crystals. Once it reaches 82°F, briefly place the bowl back over the simmering water, stirring constantly until the chocolate gently warms back up to between 88-91 degrees Fahrenheit (31-33 degrees Celsius). Do not overheat! This precise temperature range is crucial for perfectly tempered chocolate that will set beautifully and be firm and shiny.
6. Toast the Nuts
To enhance the flavor and crunch of your topping, gently toast your chopped nuts. Spread the nuts in a dry pan over medium-low heat and toast them for 5-7 minutes, stirring frequently, until fragrant and lightly golden. Be careful not to burn them. Remove from heat and let them cool slightly. This step adds a depth of flavor that raw nuts simply can’t match.
7. Assemble and Finish
Once your toffee base is completely hard and cool, and your chocolate is perfectly tempered, it’s time to layer! Pour the tempered chocolate over the cooled toffee, using a rubber spatula or spoon to spread it evenly from edge to edge. Work relatively quickly before the chocolate starts to set. Immediately sprinkle the toasted, chopped nuts over the melted chocolate, pressing them gently to ensure they adhere. For an extra touch of gourmet flavor and to cut through the sweetness, finish with a light sprinkle of flaky sea salt over the entire surface. This subtle saltiness beautifully complements the rich chocolate and buttery toffee.
8. Set and Break
Allow the chocolate and nuts to set completely. You can place the baking sheet in the refrigerator for about 5-10 minutes to speed this up, but be cautious not to leave it in for too long, as extreme cold can sometimes affect the chocolate’s texture. Once the chocolate is firm to the touch, gently peel the parchment paper away from the hardened toffee slab. Place the toffee on a sturdy surface and use a sharp knife or the back of a wooden spoon (or even a small mallet) to break it into desired-sized pieces. Irregular shards add to its rustic charm.
Tips for Perfect Butter Crunch Toffee Every Time
- Don’t Rush the Melting: Slowly melting the butter and sugar helps prevent crystallization and ensures a smoother texture.
- Accurate Temperature is Key: A reliable candy thermometer is your best friend. Don’t eyeball it; precise temperatures dictate the toffee’s texture.
- Stirring Matters: Stirring frequently prevents burning on the bottom, but don’t over-stir once the sugar starts to caramelize, or it can cause crystallization.
- Patience with Cooling: Let the toffee cool completely before adding chocolate or breaking it. Rushing this step can result in a gooey mess.
- Tempering Chocolate: If you’re nervous about tempering, you can simply melt chocolate and pour it, but understand it might not have the same snap or sheen. For best results, follow the tempering steps.
- Quality Ingredients: Good butter and chocolate make a noticeable difference in the final taste.
Storage and Serving Suggestions
Store your homemade butter crunch toffee in an airtight container at room temperature for up to two weeks, or in the refrigerator for even longer. If storing in the fridge, let it come to room temperature for a few minutes before serving for optimal flavor and texture. This delightful treat is perfect for holiday gifts, party platters, or simply as an everyday indulgence. Serve it alongside coffee or tea, or crush it to sprinkle over ice cream for an extra special dessert.
Enjoy Every Crunchy Bite!
There’s immense satisfaction in creating something so incredibly delicious from simple ingredients. This nutty butter crunch toffee, inspired by Whippoorwill Holler’s practical wisdom, is more than just a sweet treat; it’s a testament to the joy of homemade confectionery. So go ahead, follow these steps, and prepare to delight in every single crunchy, buttery, chocolatey, and nutty bite. Happy toffee making!