
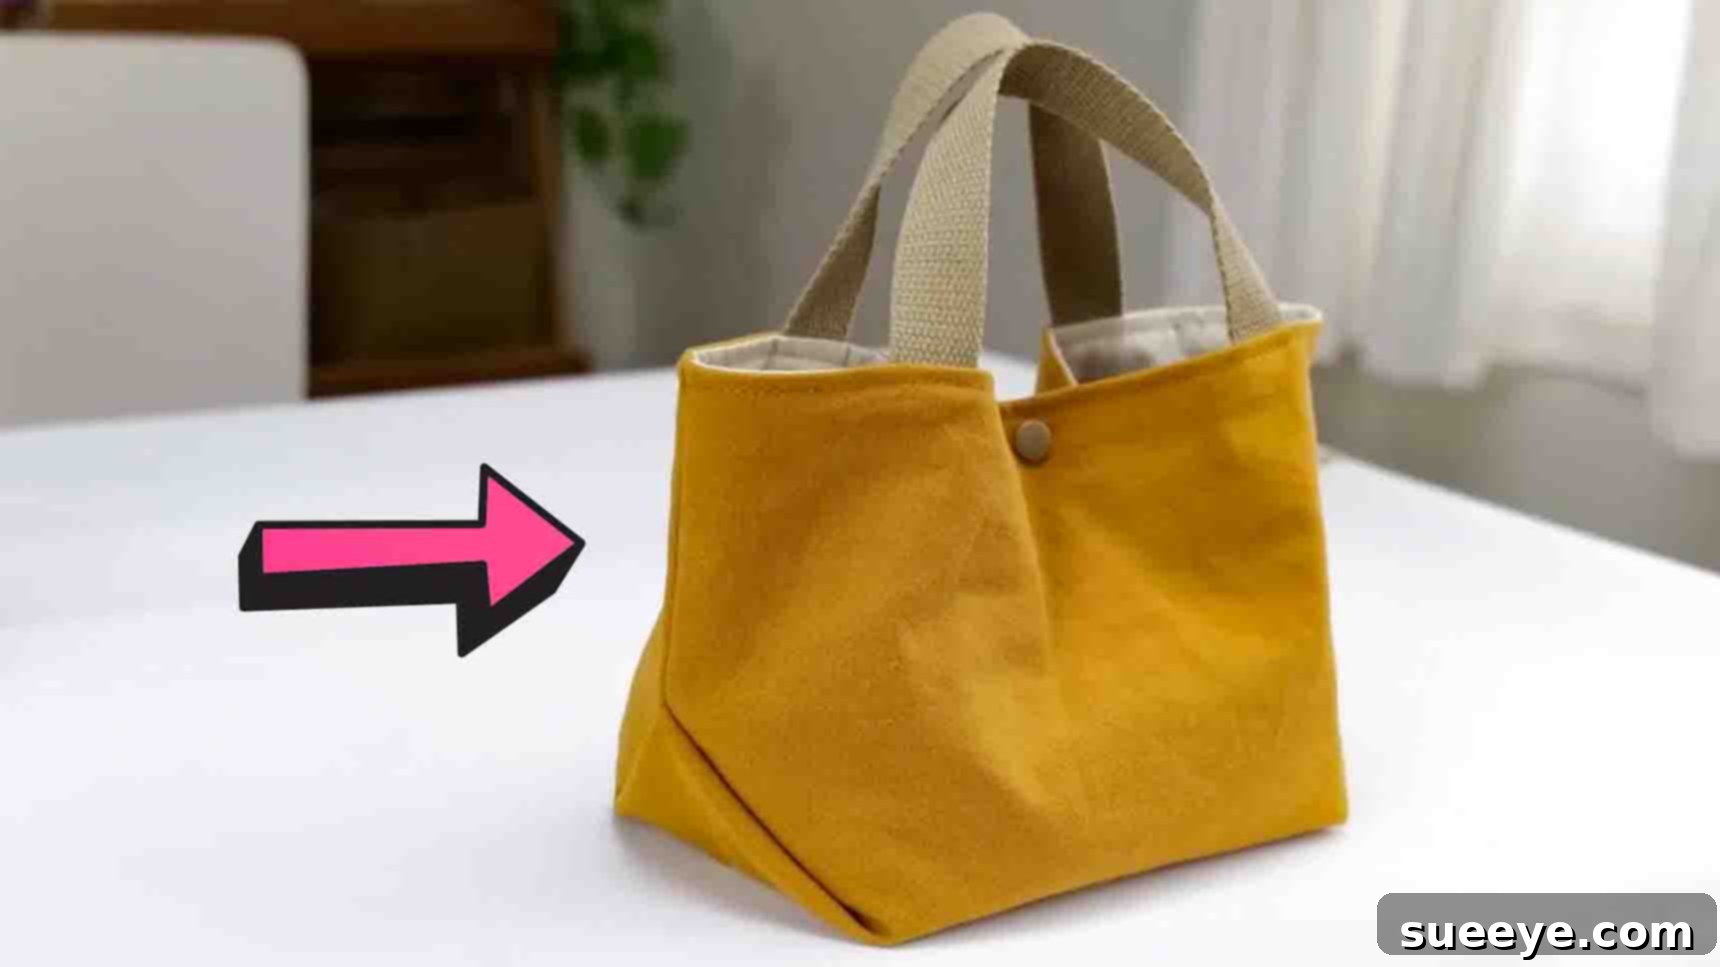
Master the 5-Minute DIY Tote Bag: Your Ultimate Beginner’s Guide to Quick & Stylish Crafting
Imagine creating a charming, practical accessory that perfectly reflects your style, all in less time than it takes to brew your morning coffee. Sound impossible? Think again! I recently stumbled upon an incredible tutorial by Ae PooiM on YouTube that showed me how to craft an adorable DIY tote bag in a jaw-dropping five minutes. Yes, five whole minutes! The moment I saw this versatile and stylish bag, I knew I had to try it. True to the promise, it was incredibly simple, and the results were so delightful that my friends immediately started asking where I bought such a unique piece whenever I used it. If you’re looking for a quick, rewarding, and beginner-friendly sewing project that yields fantastic results, you’ve found it. Join me as we dive into creating your very own cute tote bag with this detailed guide, building upon Ae PooiM’s brilliant concept.
Why Sew Your Own Tote Bag? More Than Just a Craft Project
In an era of conscious consumption, a DIY tote bag isn’t just a fashion statement; it’s a practical, eco-friendly choice and a rewarding creative endeavor. Here’s why mastering this 5-minute tote bag tutorial is a fantastic idea:
- Unbeatable Speed: Seriously, five minutes! This project shatters the myth that sewing has to be time-consuming. It’s perfect for instant gratification.
- Beginner-Friendly: If you’re new to sewing, this tutorial is your perfect starting point. It uses basic stitches and simple construction, building confidence with every seam.
- Eco-Conscious Choice: Say goodbye to single-use plastic bags. Your homemade fabric tote is reusable, durable, and contributes to a greener planet.
- Endless Customization: Express your personality! Choose fabrics that speak to you – vibrant patterns, elegant solids, or even upcycled materials. Make it truly yours.
- Thoughtful Gifts: A handmade tote bag makes an incredibly personal and practical gift for friends, family, or teachers.
- Functional & Versatile: From carrying groceries and books to beach essentials or your daily necessities, a tote bag is an indispensable accessory.
This project is more than just making a bag; it’s about discovering the joy of creation, the satisfaction of sustainability, and the thrill of a surprisingly quick craft.
Gather Your Essential Sewing Supplies: What You’ll Need
One of the beauties of this easy tote bag project is that it requires minimal supplies, many of which you might already have on hand. For best results and a smooth crafting experience, ensure you have these items ready:
- Main Fabric Pieces (Inner and Outer Color): You’ll need two rectangles, each measuring approximately 18 & 1/2 inches by 12 & 5/8 inches.
- Choosing Your Fabric: Opt for medium-weight cotton fabrics like quilting cotton, canvas, or denim for durability and ease of sewing. Consider a fun pattern for your outer fabric and a coordinating solid for the inner lining to add a professional touch. Pre-wash and iron your fabric beforehand to prevent shrinkage later.
- Fabric Strips for Handles: Two strips, each 10 inches by 1 inch.
- These will form the comfortable handles of your tote. You can use the same fabric as your outer bag or a contrasting color for an extra design element.
- Clips or Pins: Essential for holding your fabric layers together securely before stitching. Fabric clips are particularly handy for thicker materials or for avoiding pin marks.
- Sharp Scissors or Rotary Cutter with Mat: For precise and clean fabric cuts. A rotary cutter is often faster and more accurate for straight lines.
- Ruler or Measuring Tape: Accuracy is key in sewing, especially for achieving those crisp, professional lines.
- Fabric Marker or Chalk: For marking your fabric without leaving permanent stains. Disappearing ink pens are also a great option.
- Plastic Snap Buttons: One or two, depending on your preference for securing the bag’s opening.
- Alternatively, you could use a magnetic snap or even omit a closure for an open tote.
- Sewing Machine: The workhorse of this project! Ensure it’s threaded with appropriate thread (polyester all-purpose thread is a good choice) and has a fresh needle suitable for your fabric type.
Having all your materials prepped and organized before you begin will make the sewing process even quicker and more enjoyable.
Step-by-Step Guide: Crafting Your 5-Minute Tote Bag
Follow these detailed instructions, inspired by Ae PooiM’s ingenious method, to create your stylish and practical tote bag. Remember, precision in measuring and careful stitching will lead to the best results.
Step 1: Assembling the Main Body and Handles
This initial stage involves attaching the handles, combining the outer and inner fabrics, and creating the foundational structure of your tote, including its unique boxy bottom.
- Prepare Your Outer Fabric and Handles:
- Lay your outer fabric piece flat on your work surface, ensuring the right side is facing up. This is the side of the fabric that will be visible on the outside of your finished bag.
- Take your two handle strips. Position one handle strip on the short edge of the outer fabric, approximately 2 & 3/4 inches in from each side. The raw edges of the handle should align with the raw edge of the outer fabric.
- Secure the handle in place with fabric clips or pins. Repeat this process for the second handle strip on the opposite short edge of the outer fabric.
- Stitch the handles in place: Using your sewing machine, stitch the handles to the outer fabric along the edge where they meet, with a small seam allowance (e.g., 1/4 inch). Backstitch at the beginning and end of each stitch line for added security. This will temporarily hold them while you add the lining.
- Attach the Inner Lining:
- Now, place your inner fabric piece directly on top of the outer fabric, with the wrong side of the inner fabric facing up. This means the right sides of both the outer and inner fabrics are now facing each other, sandwiched together.
- Align all edges perfectly. Pin or clip generously around the entire perimeter, making sure the handle strips are tucked neatly inside, away from the edges you are about to stitch.
- Sew the sides and top/bottom: Using a 3/8-inch seam allowance, stitch along both long sides and both short sides (where the handles are). It’s crucial to stitch over the previously attached handles to secure them firmly between the outer and inner fabric layers. Remember to leave a gap of about 3-4 inches along one of the short edges of the inner fabric. This gap is essential for turning the bag right side out later.
- Forming the Box Corners (The Secret to Structure):
- Carefully bring the two side seams together, aligning them perfectly. You’ll notice that this creates a triangular shape at each corner of the fabric.
- Using your ruler and fabric marker, measure 2 & 3/8 inches from the tip of each corner (where the seams meet) and draw a straight line perpendicular to the seam. This line indicates where you will sew to create the flat bottom of your tote.
- Repeat this for all four corners.
- Fold the fabric at each corner, ensuring the drawn lines are perfectly aligned and clip them securely.
- Stitch the corners: Stitch along these drawn lines on both the top (outer fabric) and bottom (inner fabric) edges with a 3/8-inch seam allowance. This step is what gives your tote bag its defined, flat bottom. Trim off the excess fabric from these corners, leaving about a 1/4-inch seam allowance.
Step 2: Finishing Your Tote Bag
With the main stitching complete, it’s time to turn your project into a functional and beautiful tote bag.
- Turn the Bag Right Side Out:
- Carefully reach through the gap you left in the inner fabric and begin pulling the entire project right side out. Take your time with this step, gently pushing out all the corners and seams to ensure they are crisp. A blunt tool like a chopstick or a turning tool can help you achieve sharp corners without damaging the fabric.
- Close the Gap:
- Once the bag is fully turned and all seams are pressed, it’s time to close the opening in the inner lining. You can either machine stitch it very close to the edge for a quick finish or hand-stitch it using a ladder stitch (invisible stitch) for a more seamless appearance. If machine stitching, fold the raw edges of the gap inward by about 3/8 inch and press flat before sewing.
- Push the Inner Fabric In:
- Gently push the inner fabric lining down into the bag. Smooth out the edges and corners from the inside, ensuring the lining sits neatly against the outer fabric.
- Topstitch for a Polished Finish:
- For a professional and durable finish, topstitch around the entire top edge of the tote bag. This not only secures the inner lining in place but also adds strength to the handles and gives your bag a crisp, neat look. Stitch about 1/8 to 1/4 inch from the top edge.
- Attach the Plastic Snap Button:
- Finally, attach a plastic snap button (or two, if you prefer) to the center of the top opening of your tote bag. Follow the manufacturer’s instructions for attaching your specific snap buttons. This will provide a convenient closure for your bag, keeping its contents secure.
Pro Tips for a Perfect 5-Minute DIY Tote Bag
Even though this is a quick project, a few expert tips can elevate your results from good to exceptional:
- Pre-Wash Your Fabric: Always wash and dry your fabric before cutting and sewing. This pre-shrinks the material, preventing your finished bag from distorting after its first wash.
- Press as You Go: Ironing seams flat as you complete each step makes a huge difference. It creates sharper edges, helps your pieces align better, and gives your final product a professional finish.
- Backstitch at Start and End: Always backstitch at the beginning and end of each seam. This reinforces your stitches and prevents them from unraveling, ensuring your tote bag lasts longer.
- Use the Right Needle and Thread: Match your needle type and thread weight to your fabric. A universal needle works for most cottons, but a denim needle is better for heavier fabrics. All-purpose polyester thread is strong and versatile.
- Take Your Time with Corners: While it’s a 5-minute project, don’t rush the corners. Accurate marking and stitching of the box corners are key to a well-structured bag.
- Trim Seam Allowances: After sewing, trim your seam allowances, especially on corners. This reduces bulk and allows the fabric to lay flatter when turned right side out.
Customize Your Tote Bag: Endless Possibilities
The beauty of a DIY project is the freedom to personalize. Here are some ideas to make your tote bag truly unique:
- Add Pockets: Integrate an interior patch pocket for your phone or keys, or an exterior pocket for quick access items.
- Embellishments: Consider adding embroidery, fabric paint, iron-on patches, or appliques to reflect your style.
- Different Closures: Instead of plastic snaps, try magnetic snaps, a zipper, or even a simple loop and button closure for a different look and security level.
- Adjust Size: Easily adapt the initial fabric measurements to create a larger market tote, a smaller lunch bag, or a cute clutch.
- Handle Variations: Experiment with different handle materials like webbing, rope, or even longer fabric straps for a shoulder bag conversion.
- Contrasting Fabrics: Play with contrasting patterns or textures for your outer and inner fabrics, or even for the handles, to create visual interest.
Let your creativity shine! This simple tote bag pattern is a fantastic canvas for your imagination.
Caring for Your Handmade Tote: Maintenance Tips
To ensure your beautiful 5-minute tote bag remains in pristine condition, proper care is essential. The best cleaning method largely depends on the fabric you choose:
- Cotton/Canvas Totes: Most cotton and canvas tote bags can be machine washed on a gentle cycle with cold water. Use a mild detergent. To maintain shape and prevent excessive wrinkling, air dry or tumble dry on a low setting.
- Delicate Fabrics: If you’ve chosen more delicate fabrics or added intricate embellishments, hand washing might be preferable. Gently spot clean or soak in cool water with a small amount of mild soap, then air dry.
- Ironing: If your tote becomes wrinkled, iron it on a medium heat setting. For outer fabrics with prints, you might want to iron on the reverse side to protect the design.
- Stain Treatment: Address stains promptly with a gentle stain remover suitable for your fabric type.
By following these simple care instructions, your DIY tote bag will continue to be a functional and fashionable accessory for a long time.
Final Thoughts on Your DIY Tote Bag Journey
There’s immense satisfaction in creating something beautiful and functional with your own hands, especially when it’s as quick and straightforward as this 5-minute DIY tote bag. What starts as two pieces of fabric and a few strips quickly transforms into a practical, stylish accessory that’s perfect for countless uses – from a chic shopping companion to a personalized gift.
This project, inspired by the fantastic tutorial from Ae PooiM, truly democratizes sewing, proving that you don’t need years of experience or complex patterns to achieve stunning results. It’s an ideal gateway project for anyone looking to dip their toes into the world of fabric crafts or for seasoned sewers seeking a speedy, gratifying make.
So, gather your materials, fire up your sewing machine, and get ready to impress yourself and everyone around you with your handmade creation. Once you’ve made one, you might find yourself wanting to make a dozen more – in every color and pattern imaginable! Happy sewing!