
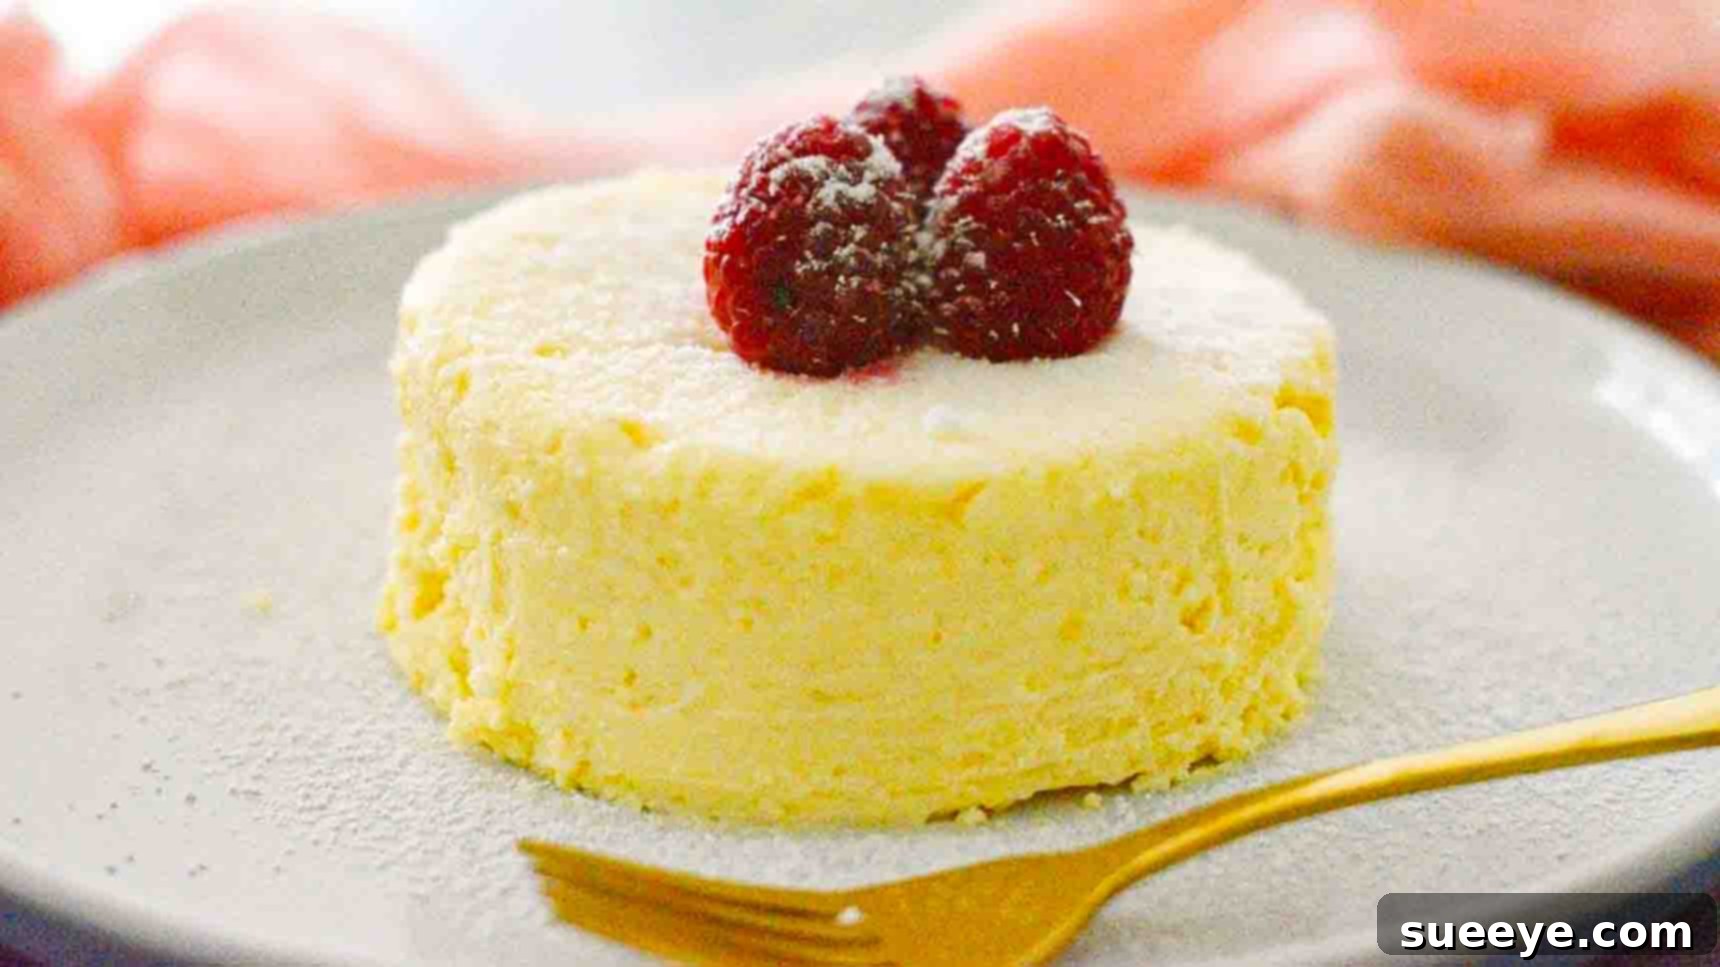
Are you craving a rich, creamy cheesecake but don’t have hours to bake? Imagine a decadent dessert that comes together in mere minutes, satisfying your sweet tooth without the guilt of excess sugar or carbs. Look no further than this revolutionary Microwave Cheesecake recipe, popularized by culinary enthusiast Gunjan Vaidya on YouTube. This incredible dessert isn’t just fast; it’s also meticulously crafted to be low-carb, sugar-free, and gluten-free, making it an ideal choice for nearly any dietary preference or requirement. Whether you’re adhering to a ketogenic lifestyle, managing blood sugar levels, avoiding gluten, or simply seeking a healthier alternative to traditional desserts, this recipe offers a perfect solution. With just four simple ingredients, you can whip up a personalized, perfectly portioned cheesecake that’s ready to chill and enjoy. Say goodbye to long baking times and complicated steps, and prepare to indulge in a truly delightful and guilt-free treat today!
Quick & Easy Microwave Cheesecake: Low-Carb, Sugar-Free, Gluten-Free Delight
In a world where time is a precious commodity, the idea of a gourmet dessert prepared in minutes seems almost too good to be true. Yet, this 1-Minute Microwave Cheesecake delivers on that promise, offering an incredibly simple yet profoundly satisfying experience. It’s an ingenious solution for those sudden cheesecake cravings, last-minute guests, or simply a well-deserved personal treat after a long day. This recipe transcends mere convenience; it’s a testament to how humble ingredients and a clever technique can yield extraordinary results. By focusing on minimal steps and readily available components, it democratizes the art of cheesecake making, making it accessible to even the most novice home cooks.
The Magic of Microwave Cheesecakes: Speed, Simplicity, and Satisfaction
Traditional cheesecakes are renowned for their delicate texture and rich flavor, but they often come with a lengthy preparation and baking process, sometimes requiring water baths and extended cooling periods. The beauty of a microwave cheesecake lies in its stark contrast to this complexity. It harnesses the efficiency of your microwave oven to set the cheesecake batter quickly, transforming it from a liquid mixture into a firm, creamy dessert in less than a minute. This rapid cooking method is not just about saving time; it’s also about offering immediate gratification without compromising on taste or texture. When executed correctly, a microwave cheesecake boasts a wonderfully smooth consistency, a slight tang from the cream cheese, and a comforting sweetness, remarkably similar to its oven-baked counterparts. It’s an ideal option for single servings, allowing you to enjoy a freshly made dessert without the commitment of preparing a full-sized cake.
Beyond speed, the simplicity of this particular recipe is a major draw. With only four core ingredients, it minimizes shopping lists and reduces the chances of errors. This streamlined approach makes it perfect for busy individuals, students, or anyone who appreciates a straightforward path to deliciousness. Moreover, the ability to control portion sizes effortlessly is a significant advantage, particularly for those monitoring their intake. Each ramekin holds a perfect individual serving, preventing overindulgence and ensuring that every bite is savored consciously. It’s truly a game-changer for spontaneous dessert cravings.
Embracing Health: Low-Carb, Sugar-Free, and Gluten-Free Advantages
One of the most compelling aspects of this microwave cheesecake recipe is its remarkable adaptability to various dietary needs. By design, it’s crafted to be low-carb, sugar-free, and gluten-free, making it a stellar choice for a diverse audience. Let’s delve into what these benefits mean and why they’re so significant:
- Low-Carb: For individuals following ketogenic, Atkins, or other low-carbohydrate diets, traditional cheesecakes are often off-limits due to their high sugar and flour content. This recipe cleverly bypasses those issues, allowing you to enjoy a rich dessert without spiking blood sugar or disrupting ketosis. The primary ingredients – cream cheese, egg, and a sugar substitute – are naturally low in carbohydrates, making it a perfect keto-friendly treat.
- Sugar-Free: The use of powdered sweetener instead of conventional sugar makes this cheesecake suitable for diabetics, those monitoring their sugar intake, or anyone trying to reduce added sugars in their diet. Modern sugar substitutes offer excellent taste profiles without the caloric load or glycemic impact of sugar, ensuring you get all the sweetness with none of the drawbacks. This allows for guilt-free indulgence, promoting better metabolic health.
- Gluten-Free: Without any flour or gluten-containing ingredients, this recipe is naturally safe for individuals with celiac disease, gluten sensitivity, or those simply opting for a gluten-free lifestyle. While many cheesecakes don’t contain flour in the filling, some crusts do. This particular recipe focuses on a crustless approach, eliminating any potential gluten concerns entirely. This inclusivity ensures that more people can enjoy a delicious dessert without dietary restrictions.
This trifecta of dietary benefits makes Gunjan Vaidya’s microwave cheesecake not just a treat, but a smart, health-conscious choice that doesn’t compromise on flavor or satisfaction.
Essential Ingredients & Why They Work Their Magic
The beauty of this recipe lies in its simplicity, requiring only four core ingredients, each playing a crucial role in creating the perfect microwave cheesecake. Understanding their function will help you achieve optimal results every time.
1. Cream Cheese (5 oz, Room Temperature)
Cream cheese forms the luscious, creamy base of any cheesecake. For this recipe, it’s imperative to use full-fat cream cheese for the best texture and flavor. Low-fat or fat-free versions often contain stabilizers and excess water, which can result in a rubbery or watery cheesecake. The key instruction here is “room temperature.” Why is this so important? When cream cheese is at room temperature, it’s significantly softer and more pliable, allowing it to blend smoothly with other ingredients. Cold cream cheese will be lumpy, making it difficult to achieve the silky, uniform consistency essential for a truly decadent cheesecake. Plan ahead by taking your cream cheese out of the refrigerator at least 30-60 minutes before you start mixing.
2. Large Egg (1)
The egg serves as both a binder and a leavening agent, contributing to the structure and richness of the cheesecake. It helps to emulsify the mixture, preventing separation and ensuring a cohesive texture. As the egg proteins cook, they set the cheesecake, giving it its characteristic firmness. Using a large egg provides the right balance of moisture and structure for a single-serving portion. Avoid using extra-large or jumbo eggs, as they might introduce too much liquid, potentially altering the consistency.
3. Vanilla Extract (1/2 tsp)
Vanilla extract is the secret weapon for enhancing the overall flavor profile of the cheesecake. Its warm, aromatic notes complement the tanginess of the cream cheese and the sweetness of the sweetener, adding depth and complexity. Opt for pure vanilla extract for the most authentic and rich flavor. While imitation vanilla can be used, it may lack the nuanced taste that real vanilla provides. This small addition makes a significant difference in the final taste experience.
4. Powdered Sweetener (2 tbsp)
As this is a sugar-free recipe, a powdered sweetener is essential. There are several excellent options available, each with slightly different characteristics:
- Erythritol: A sugar alcohol that is naturally occurring, erythritol has a mild sweetness, about 70% that of sugar, and very few calories. It’s often favored for its low glycemic impact and good digestive tolerance.
- Monk Fruit Sweetener: Derived from monk fruit, this natural sweetener is calorie-free and significantly sweeter than sugar. It often comes blended with erythritol to provide bulk and an easier 1:1 sugar replacement ratio.
- Stevia: A natural sweetener extracted from the stevia plant, it is also calorie-free and very potent. Some people detect a slight aftertaste, so choosing a high-quality blend is crucial.
- Xylitol: Another sugar alcohol, xylitol is about as sweet as sugar but with fewer calories. It’s important to note that xylitol is toxic to dogs, so keep it away from pets.
Using a powdered sweetener (like confectioners’ style erythritol or monk fruit blend) is key because it dissolves more readily and creates a smoother batter than granular sweeteners, which can sometimes leave a grainy texture. Adjust the amount to your personal taste, as sweetness preference varies.
Essential Equipment for Your Microwave Cheesecake
To successfully create this delightful dessert, having the right tools can make the process even smoother:
- Mixing Bowl: A medium-sized bowl for combining your ingredients.
- Whisk or Fork: For thoroughly blending the cream cheese, egg, vanilla, and sweetener until smooth. An electric hand mixer can also be used for an even silkier consistency, but it’s not strictly necessary.
- Ramekins or Souffle Cups (2): These are critical for individual portioning and microwave cooking. Standard 4-6 oz ramekins are ideal. Ceramic or glass microwave-safe dishes are essential. Small mugs or other microwave-safe individual bowls can also work. Ensure they are wide enough for even cooking.
- Measuring Spoons and Cups: For accurate measurement of ingredients, especially the vanilla extract and sweetener.
- Rubber Spatula: Useful for scraping down the sides of the bowl and ensuring all ingredients are incorporated, and for transferring the mixture into ramekins.
Step-by-Step Guide to Perfection: Crafting Your Microwave Cheesecake
Follow these detailed directions carefully to ensure your microwave cheesecake turns out perfectly creamy and delicious every time.
Step 1: Prepare the Base Mixture
Begin by adding 5 ounces of softened, room-temperature cream cheese into a medium-sized mixing bowl. The room temperature cream cheese is paramount here; it will prevent lumps and ensure a velvety smooth batter. Next, crack one large egg directly into the bowl with the cream cheese. Using a whisk or a fork, gently begin to mix these two ingredients together. Stir slowly at first to break down the cream cheese, then gradually increase speed to combine them thoroughly. The goal is to achieve a uniform, creamy consistency with no visible lumps of cream cheese. Once the cream cheese and egg are well-integrated, add 1/2 teaspoon of vanilla extract and 2 tablespoons of your chosen powdered sweetener. Continue mixing diligently. It’s crucial to mix until the consistency is not only smooth but also light and airy. Scrape down the sides of the bowl with a rubber spatula to ensure all ingredients are fully incorporated. This thorough mixing prevents a grainy texture and ensures an even cook in the microwave.
Step 2: Portioning and Microwaving
Prepare two microwave-safe ramekins or souffle cups by lightly greasing them with a thin layer of olive oil or a non-stick cooking spray. This step is essential to ensure the cheesecakes can be easily removed later without sticking. Carefully divide the prepared cheesecake mixture evenly between the two greased ramekins, using a spoon or spatula to spread the mixture smoothly and uniformly. This equal distribution helps in achieving consistent cooking. Place one ramekin into the microwave. Set the microwave to cook for approximately 45 seconds. Microwave wattages vary significantly, so this time might need slight adjustment. A good indicator of doneness is when the edges appear set and slightly puffed, but the center still has a slight jiggle. If it’s still very liquid, add 10-15 seconds more, checking frequently. Once the first cheesecake is cooked, repeat the process with the second ramekin. Microwaving them individually ensures more even cooking and prevents overcooking one while the other remains undercooked. After both cheesecakes have been microwaved, allow them to cool at room temperature for a few minutes before transferring them to the refrigerator. This brief cooling period helps them firm up before chilling.
Step 3: Chill and Serve
The chilling phase is crucial for the cheesecake’s texture and flavor development. Once the cheesecakes have cooled slightly at room temperature, transfer both ramekins to the refrigerator. Chill them for at least one hour. This extended chilling time allows the cheesecake to fully set, develop its creamy, firm texture, and lets the flavors meld beautifully. While it might be tempting to eat them sooner, patience truly pays off here. After an hour, carefully remove the cheesecakes from the fridge. They can be served directly from the ramekins or, if thoroughly greased, you can gently run a knife around the edge and invert them onto a serving plate. Garnish with fresh berries, a dollop of sugar-free whipped cream, or a sprinkle of unsweetened cocoa powder for an extra touch of elegance. Enjoy your perfectly portioned, delicious, and guilt-free microwave cheesecake!
Tips for a Flawless Microwave Cheesecake
While this recipe is incredibly straightforward, a few expert tips can elevate your microwave cheesecake from good to absolutely fantastic:
- Room Temperature Ingredients are Key: We can’t stress this enough for the cream cheese. If it’s too cold, your batter will be lumpy, no matter how much you mix, leading to an uneven texture.
- Don’t Overmix: While thorough mixing is important for smoothness, overmixing, especially after adding the egg, can incorporate too much air, which might cause the cheesecake to puff up excessively in the microwave and then fall dramatically, resulting in a less dense texture. Mix just until smooth and combined.
- Know Your Microwave: Microwave wattage varies significantly. A 1000-watt microwave will cook faster than a 700-watt one. Start with the recommended 45 seconds, but be prepared to adjust. It’s always better to start with less time and add in 10-second increments than to overcook. An overcooked cheesecake can become rubbery or tough.
- Check for Doneness: The cheesecake is done when the edges are set and slightly puffed, but the very center still has a slight jiggle. It will continue to set as it cools and chills. Avoid cooking until the entire surface is completely firm and dry.
- Grease Ramekins Thoroughly: A well-greased ramekin ensures easy release if you plan to unmold your cheesecake. Use olive oil, melted butter, or cooking spray.
- Chill Properly: The chilling time isn’t just for setting; it significantly enhances the flavor and firms up the texture. Don’t skip or shorten this step if you want the best results.
- Individual Cooking: Cooking one ramekin at a time is highly recommended. This ensures that each cheesecake receives even microwave energy, preventing one from being overcooked while the other is undercooked.
Creative Variations and Customizations for Your Cheesecake
Once you’ve mastered the basic recipe, the possibilities for customization are endless. Here are some ideas to add your personal touch to this delightful microwave cheesecake:
- Zesty Lemon or Lime: Add 1/2 teaspoon of fresh lemon or lime zest to the batter for a bright, citrusy kick. A tiny squeeze of juice can also be added, but be careful not to add too much liquid.
- Chocolate Lover’s Dream: Mix in 1-2 tablespoons of unsweetened cocoa powder to the batter for a chocolate cheesecake. You can also melt a square of sugar-free chocolate and swirl it in lightly before microwaving.
- Coffee Infusion: Dissolve 1/4 teaspoon of instant espresso powder or coffee granules in a tiny bit of hot water (just enough to dissolve) and add it to the batter for a subtle coffee flavor.
- Nut Butter Swirl: Before microwaving, add a dollop of sugar-free peanut butter, almond butter, or cashew butter to the top and swirl it gently with a toothpick for a nutty marble effect.
- Spiced Delights: A pinch of cinnamon, nutmeg, or pumpkin pie spice can transform your cheesecake into a seasonal treat, especially appealing during fall.
- Fruity Toppings (Post-Chill): After chilling, top your cheesecake with fresh berries (strawberries, blueberries, raspberries), a sugar-free fruit compote, or a thin layer of sugar-free jam.
- Crunchy Crust (Optional): While this recipe is crustless, you can create a quick low-carb crust. Mix 2 tablespoons of almond flour with 1 teaspoon of melted butter and a pinch of sweetener. Press it into the bottom of the ramekin before adding the cheesecake batter and chilling the crust in the fridge for 10 minutes first.
- Caramel or Chocolate Drizzle: A sugar-free caramel sauce or chocolate syrup drizzled over the chilled cheesecake adds a luxurious finish.
Experiment with these variations to discover your favorite combinations and make this versatile recipe truly your own. The beauty of individual portions means you can try a different flavor every time!
Conclusion: Your Go-To Quick & Healthy Dessert
This microwave cheesecake recipe is more than just a quick dessert; it’s a testament to how simple ingredients, when combined with a clever technique, can create something truly special. It provides a convenient, healthy, and incredibly satisfying option for anyone craving cheesecake, especially those adhering to low-carb, sugar-free, or gluten-free diets. By following these detailed steps and embracing the tips for success, you’re well on your way to enjoying a perfectly creamy, delightfully rich, and perfectly portioned cheesecake in mere minutes. So, next time a craving strikes, remember that a delicious, guilt-free indulgence is just a microwave away. Happy dessert making!