
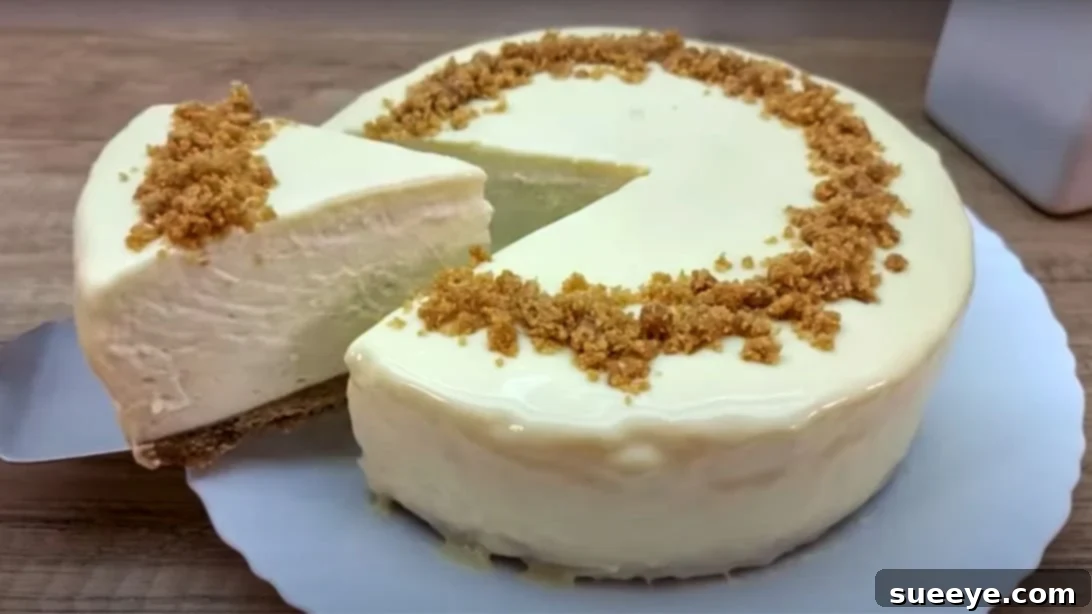
5-Minute Cream Cheese Dessert: A No-Bake, No-Flour Delight
In our fast-paced lives, the thought of spending hours in the kitchen to create a delectable dessert can often feel daunting. This is where the magic of quick, no-bake recipes truly shines. Imagine a dessert that comes together in mere minutes, requires no oven, and delivers an unbelievably rich and creamy experience. We’re thrilled to share such a recipe: a heavenly 5-minute cream cheese dessert that promises to uplift your spirits and satisfy your sweet cravings without any fuss. This super easy creation, requiring minimal effort, is perfect for any occasion – from a casual weeknight treat to an impressive last-minute party offering. Thanks to the creative minds behind schnell rezept on YouTube, this recipe has taken the internet by storm, and for good reason. It’s a testament to how simple ingredients can transform into something truly extraordinary.
This remarkable dessert stands out not only for its speed but also for its accessible ingredients and straightforward method. Forget about complicated baking techniques, multiple bowls, or the need for advanced culinary skills. If you have a blender or food processor, a hand mixer, and a refrigerator, you’re already halfway there. Whether you’re a seasoned dessert maker or a complete beginner, this recipe is designed for foolproof success, ensuring a delightful treat every single time. Get ready to impress yourself and your loved ones with a dessert that tastes like it took hours to prepare but actually comes together in just a flash.
The Essential Ingredients for Your Quick Dessert
One of the beauties of this 5-minute cream cheese dessert lies in its simplicity, reflected in its concise list of readily available ingredients. Each component plays a crucial role in building the dessert’s delightful texture and rich flavor profile. We’ll be using classic dessert staples to create a harmonious balance of creamy, sweet, and slightly tangy notes.
- 7.7 ounces (approximately 220g) cookie biscuits (digestive biscuits, graham crackers, or similar plain cookies work best)
- 3.5 ounces (approximately 100g) unsalted butter
- 14.1 ounces (approximately 400g) mascarpone cheese or cream cheese (full-fat recommended)
- 1.7 ounces (approximately 50g) powdered sugar (confectioners’ sugar)
- 5.2 ounces (approximately 150g) white chocolate, for the filling
- 10.5 ounces (approximately 300g) whipping cream (with 33-36% fat content for best results)
- 5.2 ounces (approximately 150g) white chocolate, for the topping
- 5.2 ounces (approximately 150g) cream (heavy cream or whipping cream) for the topping ganache
Ingredient Breakdown and Smart Substitutions
Understanding the role of each ingredient can help you achieve the best results and even inspire creative variations. Let’s delve a little deeper into what makes this dessert so special:
The Biscuit Base: Foundation of Flavor
The cookie biscuits form the crunchy, flavorful base of our dessert. While the recipe suggests generic “cookie biscuits,” options like digestive biscuits, graham crackers, or even shortbread cookies are excellent choices due to their neutral flavor and crumbly texture when processed. If you prefer a chocolatey twist, OREO cookies (with or without the cream filling) can also be used, but you might want to slightly reduce the powdered sugar in the filling to balance the sweetness. The butter acts as the binder, holding the crumbs together to form a sturdy crust. Unsalted butter is preferred as it allows you to control the overall saltiness of the dessert; however, if only salted butter is available, simply omit any additional salt you might consider adding to other components.
The Creamy Filling: The Heart of the Dessert
The star of the filling is undoubtedly the mascarpone or cream cheese. Mascarpone offers a richer, silkier, and slightly sweeter profile, creating a truly luxurious texture. Cream cheese, on the other hand, provides a tangier, denser, and more familiar cheesecake-like flavor. Both work beautifully, so choose based on your preference or what’s readily available. Ensure your cheese is at room temperature before mixing to prevent lumps and achieve a perfectly smooth consistency. Powdered sugar is crucial for the filling as it dissolves easily, ensuring a smooth, grit-free texture and adding the necessary sweetness. Granulated sugar might not dissolve as well, potentially leaving a grainy mouthfeel. White chocolate contributes a delicate sweetness and a subtle, creamy cocoa butter flavor, enriching the filling. When melting white chocolate, always do so gently, either over a double boiler or in short bursts in the microwave, stirring frequently to prevent burning.
The Whipped Cream: Lightness and Volume
High-fat whipping cream (33-36%) is essential for achieving the desired volume and stability in your whipped cream. This aerated component lightens the cream cheese mixture, making the filling incredibly airy and melt-in-your-mouth. It’s important to whip the cream until it forms stiff peaks but avoid over-whipping, which can turn it grainy. Keep your cream and mixing bowl chilled before whipping for optimal results.
The White Chocolate Topping: A Glossy Finish
The second portion of white chocolate, combined with additional cream, creates a luscious ganache-like topping. This provides an extra layer of flavor and a beautiful, glossy finish to your dessert. Again, gentle melting and thorough mixing are key to a smooth topping.
Step-by-Step Preparation Guide for Instant Sweetness
Now that you have all your ingredients ready and understand their roles, let’s dive into the incredibly simple preparation process. Remember, the key to this “5-minute” dessert is efficient preparation and careful execution of each step.
Crafting the Perfect Biscuit Base
Begin by preparing your ingredients, ensuring everything is measured out and within reach. This will streamline the entire process, living up to the “5-minute” promise.
- Crush the Biscuits: Take your 7.7 ounces of cookie biscuits and place them into a food processor. Process until they are finely ground into even crumbs. The consistency should be similar to sand, with no large chunks remaining. If you don’t have a food processor, you can place the cookies in a sturdy Ziploc bag and crush them with a rolling pin or the bottom of a heavy pan until finely crushed.
- Melt the Butter: In a separate microwave-safe bowl or a small saucepan, gently melt the 3.5 ounces of unsalted butter. Be careful not to overheat it; you want it just melted and smooth.
- Combine and Form the Crust: Pour the melted butter over the biscuit crumbs in the food processor (or a mixing bowl if you crushed them manually). Pulse or mix thoroughly until the crumbs are evenly coated and resemble wet sand. The mixture should hold together when pressed between your fingers.
- Prepare the Pan: Get an 18cm (approximately 7-inch) springform pan ready. This type of pan is ideal for no-bake desserts as it allows for easy release. Line the bottom with parchment paper if desired, though it’s not strictly necessary.
- Press the Base: Transfer the buttered biscuit crumbs into the prepared springform pan. Use the back of a spoon or the bottom of a flat-bottomed glass to firmly press the mixture evenly across the bottom of the pan. Ensure it’s compact and level. This creates a sturdy foundation for your dessert. Place the pan in the refrigerator while you prepare the filling to allow the base to firm up slightly.
Whipping Up the Silky Cream Cheese Filling
This is where the creamy magic happens! Ensure your mascarpone or cream cheese is at room temperature for the smoothest possible mixture.
- Whip the Cheese: In a large mixing bowl, add the 14.1 ounces of mascarpone or cream cheese. Using a hand mixer, whisk it well until it becomes smooth and lump-free. This should only take a minute or two.
- Add Powdered Sugar: Incorporate the 1.7 ounces of powdered sugar into the whipped cheese. Continue whisking until the sugar is fully combined and the mixture is even creamier.
- Melt White Chocolate (for filling): Gently melt the first 5.2 ounces of white chocolate. You can do this in a microwave in 15-second intervals, stirring after each, or over a double boiler. Be careful not to overheat it, as white chocolate can seize easily.
- Combine Chocolate with Cheese Mixture: Pour the melted white chocolate into the cream cheese and powdered sugar mixture. Mix well with the hand mixer until everything is thoroughly combined, resulting in a smooth, luxurious filling base.
- Whip the Cream: In a separate, chilled, long glass container or a deep mixing bowl, pour the 10.5 ounces of cold whipping cream (33-36%). Using clean beaters, blend the cream with your hand mixer until it forms stiff peaks. Be careful not to over-whip, which can cause it to become grainy.
- Fold in Whipped Cream: Gently add the whipped cream to the cream cheese, powdered sugar, and white chocolate mixture. Using a spatula, carefully fold the whipped cream into the cheese mixture until just combined. The goal is to maintain as much air as possible, so fold gently rather than mixing vigorously.
Assembling Your Dessert Masterpiece
With the crust ready and the filling perfectly creamy, it’s time to bring it all together.
- Layer the Filling: Retrieve the springform pan with the biscuit crust from the refrigerator. Gently pour the cream cheese filling mixture over the crust.
- Even Out the Layer: Use a spatula to carefully spread the filling evenly across the pan, ensuring a smooth and level surface. This creates a beautiful, clean presentation.
The Irresistible White Chocolate Topping
A final touch of white chocolate ganache elevates this dessert, adding another layer of creamy indulgence.
- Prepare the Topping Mixture: In a microwave-safe bowl, combine the second 5.2 ounces of white chocolate with the 5.2 ounces of cream.
- Melt and Mix: Heat in the microwave in short bursts (15-20 seconds), stirring well after each interval, until the chocolate is fully melted and smoothly combined with the cream. Alternatively, use a double boiler method. Mix until you have a glossy, uniform white chocolate ganache.
Chilling and Final Touches
The chilling process is crucial for the dessert to set properly and for the flavors to meld beautifully. Patience, even for a “5-minute” dessert, yields delicious rewards.
- Initial Chill: Place the springform pan with your assembled dessert into the refrigerator for at least 30 minutes, or until the cream cheese layer is slightly firm to the touch. This initial chill helps the dessert stabilize before adding the final topping.
- Unmold Gently: Once chilled, carefully run a thin knife or offset spatula around the inside edge of the springform pan to loosen the dessert from the sides. Gently release and lift the springform ring.
- Pour Topping and Decorate: Pour the white chocolate and cream mixture (your ganache) evenly over the top of the chilled dessert. If desired, sprinkle some extra biscuit crumbs, white chocolate shavings, or fresh berries on top for decoration.
- Final Chill: Return the dessert to the fridge for another 30 minutes to allow the topping to set and the entire dessert to firm up to perfection.
- Serve and Enjoy: Once fully chilled and set, slice the dessert with a warm, clean knife for neat portions. Enjoy every delightful bite of your homemade, quick, and incredibly satisfying cream cheese dessert!
Expert Tips for a Flawless Dessert Every Time
Even with such a simple recipe, a few insider tips can elevate your dessert from good to absolutely phenomenal:
- Room Temperature Ingredients: Ensure your mascarpone or cream cheese is at room temperature. This is vital for achieving a smooth, lump-free filling. Cold cream cheese will be difficult to whip and can result in a lumpy texture.
- Don’t Overmix: When combining the ingredients for the filling, mix until just combined. Overmixing, especially after adding the whipped cream, can deflate the air and make the dessert dense rather than airy.
- Quality Chocolate: Use good quality white chocolate for both the filling and the topping. Better chocolate will melt more smoothly and provide a superior flavor profile.
- Proper Whipping Cream: Always use cold whipping cream and a chilled bowl and beaters for the best results when whipping cream. This helps the cream whip up faster and hold its volume better.
- Chill Time is Crucial: While it’s a “5-minute” assembly, the chilling time is non-negotiable. It allows the dessert to firm up, makes it easier to slice, and allows the flavors to meld beautifully. Don’t rush this step!
- Clean Slices: For perfectly clean slices, dip your knife in hot water and wipe it clean before each cut.
Creative Variations and Serving Suggestions
While delicious as is, this 5-minute cream cheese dessert is a fantastic canvas for your creativity. Here are a few ideas to customize it:
- Different Crusts: Experiment with different cookie types like chocolate wafers, ginger snaps, or even a mixture of nuts and dates for a healthier twist. You can also add a pinch of cinnamon or cocoa powder to your biscuit crumbs for extra flavor.
- Flavorful Fillings: Incorporate citrus zest (lemon or orange), a teaspoon of vanilla extract, almond extract, or a swirl of fruit purée (like raspberry or passion fruit) into the cream cheese mixture for different flavor profiles. You could also try melting milk or dark chocolate instead of white chocolate for a richer filling.
- Topping Innovations: Beyond the white chocolate ganache, consider a rich dark chocolate ganache, a berry coulis, caramel sauce, or a simple dusting of cocoa powder. Fresh fruits like strawberries, blueberries, raspberries, or sliced kiwi make excellent toppings and add a burst of freshness and color. A sprinkle of toasted nuts or coconut flakes can also add texture.
- Individual Servings: Instead of a large springform pan, assemble this dessert in individual ramekins, small glasses, or mason jars for charming single-serve portions. This is great for parties or meal prep.
- Serving Suggestions: This dessert pairs wonderfully with a cup of coffee, a glass of sparkling wine, or a scoop of vanilla bean ice cream (if you dare to add more indulgence!). It’s also delightful simply on its own.
Storage Instructions
To keep your delicious dessert fresh, cover it loosely with plastic wrap or aluminum foil and store it in the refrigerator. It will remain fresh and delightful for up to 3-4 days. While it can technically be frozen, the texture of the cream cheese filling might change slightly upon thawing, becoming a bit softer. If you do freeze it, ensure it’s well-wrapped to prevent freezer burn and thaw it in the refrigerator overnight before serving.
Why You’ll Love This No-Bake Wonder
This 5-minute cream cheese dessert isn’t just a recipe; it’s a revelation for anyone who loves sweets but is short on time. Its no-bake nature means you don’t have to heat up your kitchen, making it perfect for warmer months. The absence of flour caters to those looking for gluten-free options (ensure your biscuits are also gluten-free if needed). Most importantly, it’s incredibly versatile and undeniably delicious. The creamy texture, combined with the subtle sweetness of white chocolate and the crunch of the biscuit base, creates a perfectly balanced indulgence. It’s a fuss-free dessert that delivers maximum flavor with minimum effort, proving that sometimes, the simplest things are the most satisfying.
Conclusion
So, the next time a sweet craving strikes, or you need a quick dessert to impress, remember this incredible 5-minute cream cheese dessert. It’s an effortless recipe that doesn’t compromise on taste or presentation. Give it a try, experiment with your favorite variations, and prepare to fall in love with its simplicity and exquisite flavor. Happy dessert making!