
Easy Inkjet Image Transfer Technique: Transform Your Photos into Stunning Art
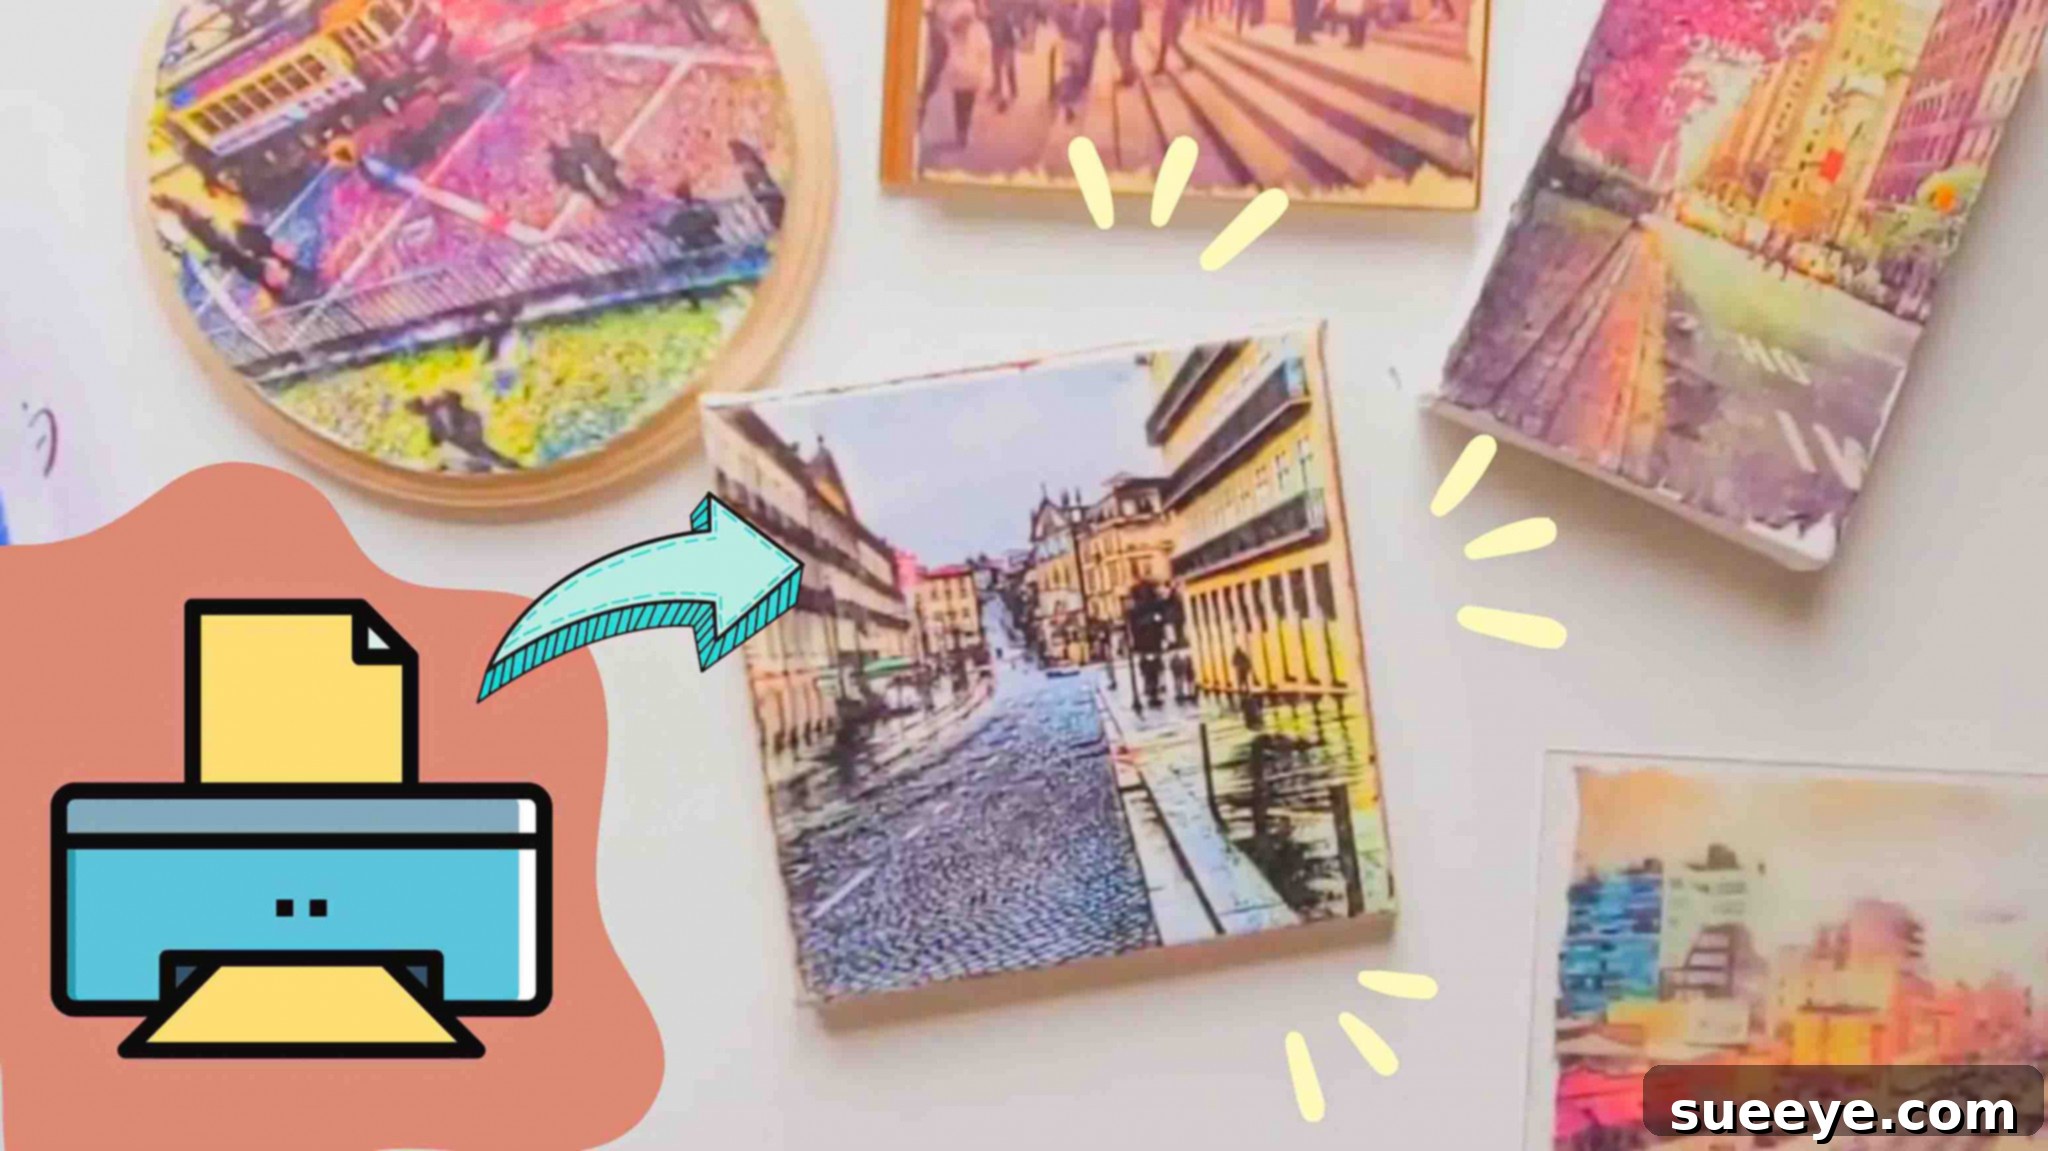
Are you searching for an engaging and rewarding creative project to brighten your weekend? Look no further! This comprehensive guide will walk you through an incredibly fun, easy, and beginner-friendly method for transferring inkjet images or photo prints onto a variety of surfaces. Imagine transforming your favorite memories onto wood, canvas, paper, or even glass, creating truly unique and personalized art pieces. What makes this technique stand out is its simplicity—no complicated wetting or tedious rubbing required! The finished results are not only visually stunning but also easily archival, ensuring your creations last for years to come.
Inspired by the fantastic tutorials from Nitsa Creative Studio on YouTube, this method empowers you to achieve professional-looking image transfers with minimal effort. Whether you’re a seasoned crafter or just starting your DIY journey, this technique promises a fulfilling experience and beautiful artwork you’ll be proud to display or gift. Dive in and learn how to master this captivating inkjet image transfer process by following our detailed steps below.
Essential Materials for Your Inkjet Image Transfer Project
Gathering the right supplies is the first step towards a successful and enjoyable image transfer experience. Most of these items are readily available at craft stores or even around your home. Here’s a detailed list of what you’ll need, along with a brief explanation of why each item is important for achieving optimal results:
- Standard Copy Paper (Office Depot brand or similar): This is crucial for printing your mirrored image. Unlike photo paper, standard copy paper allows the inkjet ink to sit more on the surface, making it ideal for transfer. The less coating, the better the ink release.
- Fiskars Traditional Bone Folder (6-inch): While not strictly mandatory, a bone folder is incredibly useful for smoothing out air bubbles and ensuring excellent, even contact between your image and the surface without damaging either. An old credit card, a plastic ruler, or even the side of a pen can serve as an effective alternative.
- 1-inch Masking Tape: Essential for creating clean, crisp borders on your canvas or chosen surface. It acts as a protective barrier, preventing the matte medium from spreading and helps frame your transferred image perfectly, giving it a professional, finished look.
- 32 oz Liquitex Matte Medium: This is the hero of our project! Matte medium acts as both a powerful adhesive and an effective transfer agent. It’s specifically designed to lift the ink from the paper and bond it securely to your chosen surface. The matte finish helps reduce glare, giving your transfer a subtle, artistic, and less reflective appearance.
- 5 x 7-inch Artist Canvas Panels (12 packs): Canvas panels are a fantastic starting point for image transfer due to their smooth, rigid surface and affordability. They provide a stable base and are widely available in multi-packs at art supply stores, making them perfect for practicing or creating a series.
- Darice Wood Rectangle Plaque (Natural): If you prefer working with wood, a natural wood plaque offers a rustic and charming base for your transfers. For best results, ensure the surface is smooth; light sanding (with fine-grit sandpaper) might be beneficial for raw wood to eliminate any splinters or rough patches.
- Clear Acrylic Spray (e.g., Krylon Crystal Clear): This final coating is vital for protecting your transferred image from dust, moisture, and UV damage, ensuring its longevity and archival quality. It also enhances the vibrancy of the transferred colors and provides a beautiful, durable finish.
Having all your materials organized and within reach before you start will streamline the process and make your crafting session much more enjoyable and efficient. Proper preparation is key to a smooth and successful inkjet image transfer.
Step-by-Step Guide to the Easy Inkjet Image Transfer Method
Step 1: Prepare Your Image and Surface for Transfer
The initial phase of our image transfer project involves careful preparation of both your chosen photograph and the surface you’ll be working on. Paying meticulous attention to these details will significantly impact the clarity, vibrancy, and overall success of your final transfer.
Print Your Mirrored Photo
Begin by selecting an image you love. This could be a cherished personal photograph, a captivating vintage illustration, a graphic design, or even text. An absolutely critical step here is to **print your chosen photo as a mirrored image**. Since you’ll be placing the image face-down onto the canvas, mirroring it ensures that any text or directional elements appear correctly once transferred. Most photo editing software (like Photoshop, GIMP, or even basic image viewers) or your printer’s settings will have an option to ‘flip horizontally’ or ‘mirror image’. Double-check this before printing!
It is equally important to print this image on **standard copy paper, not photo paper**. Inkjet photo paper is specifically designed to hold ink permanently on its surface, which makes it unsuitable for this transfer method as the ink will not readily release. Standard, uncoated copy paper allows the water-soluble inkjet inks to be easily lifted by the matte medium. For the best results, print your image using an inkjet printer, as the water-based inks are key to this technique. While not strictly necessary, you can enhance the vibrancy of your photo by editing it in a photo editor app beforehand, adjusting the hue and saturation to make colors pop even more after transfer. High contrast images generally yield the best results.
Prepare Your Canvas (or Wood) Surface
Next, prepare your canvas panel (or wood plaque). To achieve clean, professional-looking borders around your transferred image, carefully apply 1-inch masking tape along the edges of the canvas. This creates a neat frame and protects the surrounding area from the matte medium, ensuring a crisp separation between your image and the canvas edge. Once your image is printed and mirrored, trim any excess blank space around the photo, making sure the paper is slightly smaller than your taped canvas area if you desire a distinct border.
Apply the Matte Medium
Now comes the application of the star ingredient: Liquitex matte medium. Using a clean, flat brush, apply a generous and remarkably even layer of the matte medium onto the surface of your canvas panel. It is paramount to completely cover the entire area where your image will be placed, ensuring there are no dry spots, thin areas, or pooling. The medium acts as a strong adhesive and the primary vehicle for the ink transfer, so thorough, consistent coverage is absolutely key to an even and complete transfer. Avoid overworking the medium, as this can create streaks or air bubbles.
Position and Press Your Image
Immediately after applying the matte medium, carefully place your photo printout, **facing down**, onto the wet surface of the canvas. Take your time to align it perfectly, as repositioning after initial contact can cause smudging. Once positioned, gently press it down with your fingers, working from the center outwards to ensure good initial contact across the entire image. To eliminate any trapped air bubbles, which can cause patchy or incomplete transfers, use an old credit card, a ruler, or your bone folder. Systematically scrape across the back of the paper, applying firm, even pressure. This action not only removes air bubbles but also helps to press the image firmly into the wet medium, ensuring maximum ink release and adhesion.
Partial Drying
Finally, allow the transfer to dry for approximately **3 minutes**. This partial drying time is exceptionally crucial for the success of the transfer. You want the matte medium to become tacky and form a strong initial bond with both the ink and the surface, but it must not dry out completely. If the medium dries out entirely, the ink will not release from the paper. If it’s too wet, the image might smudge or peel off with the paper. Environmental factors like humidity and room temperature can influence drying time, so keep a close eye on it. The goal is for the medium to firmly grip the paper and the ink, but still allow for the paper to be removed in the next step without tearing the transferred image.
Step 2: Reveal, Clean, and Seal Your Transferred Image
With the initial transfer complete and the medium partially dry, the next steps focus on carefully revealing your transferred image, tidying up any residual paper, and finally sealing your artwork for lasting protection and durability. This is where your artwork truly begins to take shape!
Remove the Paper Backing
After the crucial 3-minute drying period, it’s time for the exciting reveal! Start from one corner of the paper and **slowly and gently peel the paper back**. You should begin to see your image magically appear on the canvas as the ink adheres to the medium. Take your time with this step; quick or forceful peeling can tear the transferred image or leave behind excessive paper residue. If parts of the image don’t seem to be transferring well, you can try gently re-pressing that specific area with your finger before peeling further. The key here is patience and a steady, delicate hand to avoid damaging your nascent artwork.
Clean Up Residual Paper Fibers
Even with careful peeling, it’s common to have some thin layers of paper fiber or residue left behind on the transferred image. This is perfectly normal and expected for this type of transfer! To get rid of these left-out papers and achieve a clearer, crisper image, gently scrub the surface using a dry sponge. A soft, clean cloth, a cotton swab, or even your fingertips can also work effectively. The goal is to lightly abrade and roll away the paper fibers without disturbing or damaging the delicate ink layer beneath. This optional yet highly recommended step significantly enhances the clarity, detail, and finish of your transferred image, making the colors more vibrant and the lines sharper. If you encounter very stubborn residue, a slightly damp (almost dry) cloth can be used very sparingly, but be cautious not to re-wet the ink too much, which could cause smudging.
Apply Clear Acrylic Spray for Protection and Vibrancy
Once you’re completely satisfied with the clarity of your image and all excess paper has been meticulously removed, it’s time to protect your beautiful artwork. Apply a good, even amount of **clear acrylic spray** over the entire transferred image. For best coverage and to avoid drips or uneven patches, spray in smooth, overlapping passes. Start by moving in one direction (e.g., up and down), then repeat the process from side to side. Always ensure you’re in a well-ventilated area when using aerosol sprays and maintain the recommended distance from your artwork as per the product instructions. This acrylic spray serves as a powerful sealant, protecting your image from moisture, dust, and harmful UV fading, making it truly archival and giving it a professional, durable finish. An added bonus is that it often tends to deepen the colors slightly, enhancing the overall vibrancy and bringing out the rich tones of your transferred photo.
Remove Masking Tape and Admire
Finally, once the clear acrylic spray has dried completely (always check the product instructions for specific drying times, typically ranging from 15-30 minutes, or longer for full cure), carefully remove the masking tape from around the photo. This will reveal beautifully crisp, clean borders, giving your artwork a refined and polished look. Step back and admire your stunning, hand-crafted inkjet image transfer! You’ve successfully transformed a simple print into a unique piece of art.
Why This Inkjet Image Transfer Method Works So Well: The Simple Science
Understanding the simple science behind this inkjet image transfer technique can enhance your appreciation for its effectiveness and help you troubleshoot if issues arise. The success of this method largely hinges on the properties of inkjet ink and the acrylic matte medium. Inkjet printers use water-soluble inks that, when printed on standard copy paper, sit closer to the surface rather than being fully absorbed deep into the paper fibers, as would happen with laser toner or specialized coated photo papers. The Liquitex matte medium, being an acrylic polymer emulsion, acts as a temporary adhesive. When applied wet over the ink, it essentially “grabs” and encapsulates the ink pigments. As the medium dries and becomes tacky, it forms a strong bond with the canvas (or other chosen surface). When the paper backing is then carefully peeled away, the ink, now firmly adhered to the matte medium layer, is lifted cleanly from the paper and transferred onto your chosen substrate. The subsequent application of clear acrylic spray then acts as a permanent sealant, protecting the newly transferred image from moisture, dust, UV fading, and general wear, making it durable and truly archival.
Tips for Achieving Perfect Inkjet Image Transfers Every Time
While the process is wonderfully straightforward, a few expert tips can significantly elevate your results and help you avoid common pitfalls, leading to more consistent and stunning image transfers:
- High-Quality Image Selection: Always start with high-resolution images that boast good contrast. Blurry or low-resolution images will transfer as such, and clarity can sometimes diminish slightly during the process. Sharp details and vibrant colors in the original print translate to better transfers.
- Test Prints Are Your Best Friend: Especially if working on an important project or a new surface, do a small test transfer on a scrap piece of your chosen surface. This invaluable step helps you gauge optimal drying times for your environment, perfect matte medium application thickness, and the ideal peeling technique for your specific materials.
- Experiment with Diverse Surfaces: Don’t limit yourself to canvas! This technique is incredibly versatile. Try transferring onto smoothly sanded wood (untreated or sealed with gesso for brighter results), thick cardstock, terracotta pots, glass, or even metal. Each surface will offer a unique texture, absorbency, and aesthetic to your transferred image.
- Control Your Environment: Work in as dust-free an environment as possible to prevent particles from embedding in your wet medium. Humidity can significantly affect drying times, so be aware that transfers might take longer to become tacky in very humid conditions, requiring slight adjustments to the 3-minute waiting period.
- Gentle Touch is Key: From placing the image to meticulously peeling the paper and gently scrubbing residue, gentleness is paramount throughout the entire process. Force can lead to smudges, tears in the transferred image, or incomplete transfers.
- Consider Multiple Coats for Porous Surfaces: If transferring onto a very porous surface like raw, unsealed wood, consider applying a very thin base coat of matte medium, allowing it to dry completely. Then, apply your generous wet coat for the actual transfer. This base coat can help prevent the transfer medium from soaking too deeply into the wood, ensuring more ink stays on the surface for a clearer transfer.
Unleash Your Creativity: Inspiring Project Ideas with Inkjet Image Transfers
The versatility of this easy inkjet image transfer technique opens up a world of creative possibilities, allowing you to personalize and transform everyday items into unique works of art. Beyond simple canvas art, consider these inspiring project ideas to expand your crafting horizons:
- Personalized Gifts: Create truly heartfelt and memorable gifts by transferring family photos onto wooden cutting boards (for display only, not food use), custom coasters, decorative wooden boxes, or even smooth river stones. Design unique wall art featuring special memories, meaningful quotes, or artistic graphics for friends and loved ones.
- Stunning Home Decor: Design bespoke wall hangings, decorative plaques, or even revarnish old furniture pieces with transferred images to give them a completely new life and character. Imagine custom art for your kitchen, a personalized welcome sign for your living room, or charming nursery decor featuring whimsical illustrations.
- Mixed Media Art Masterpieces: Incorporate transferred images into larger mixed media pieces, combining them seamlessly with paint, collage elements, drawing, and other textures for complex, layered, and visually compelling artwork. Transfers can serve as focal points or subtle background details.
- Enrich Your Journaling and Scrapbooking: Add unique photographic elements to your art journals, junk journals, or scrapbooks. Transferring images allows you to create visual narratives, personal timelines, and personalized spreads that are far more engaging than simply gluing down a photo.
- Upcycled and Revamped Items: Give new life to plain ceramic tiles, glass jars, metal tins, or old book covers by transferring striking images onto their surfaces. This turns ordinary, forgotten objects into decorative treasures or functional art pieces.
This method actively encourages experimentation. Don’t be afraid to try different images, explore various surfaces, and play with color adjustments in your photo editor to find your unique artistic style. The possibilities are truly endless, limited only by your imagination!
Troubleshooting Common Inkjet Image Transfer Issues and Solutions
Even with careful attention to detail, you might encounter a few hiccups along the way when learning a new craft. Here’s a quick and practical guide to common inkjet image transfer issues and how to effectively resolve them, ensuring your next project is a success:
- Incomplete or Patchy Transfer:
- Cause: This is often due to insufficient matte medium application, the medium drying too quickly before the paper was applied, or inadequate pressure applied during the initial pressing stage.
- Solution: Ensure you apply a generous, even coat of matte medium, covering the entire area where the image will sit. Work quickly to place and press the image. Apply consistent, firm pressure with a bone folder or old card to remove all air bubbles and ensure full contact between the paper, medium, and surface.
- Blurry or Smudged Image:
- Cause: The image might have shifted during initial placement, or while you were pressing it down. It could also occur if the medium was too wet during the paper peeling process, causing the ink to lift unevenly.
- Solution: Be precise and careful when placing the image; once it touches the wet medium, avoid repositioning at all costs. Apply pressure carefully and evenly. Ensure you wait the recommended 3 minutes (or slightly more if in humid conditions) for partial drying before gently peeling the paper.
- Excessive Paper Residue Remaining on the Image:
- Cause: This typically happens if not enough pressure was applied during the initial pressing, or if the medium wasn’t quite tacky enough during the peeling process, causing paper fibers to stick.
- Solution: Vigorously yet gently scrub the surface with a dry sponge or a soft, clean cloth in a circular motion. For very stubborn bits, a slightly damp (almost dry) cloth can help lift the residue, but use with extreme caution to avoid disturbing the transferred ink. Patience and gentle persistence are key for this step.
- Colors Not Vibrant Enough or Appear Faded:
- Cause: The original image lacked vibrancy or high contrast, or the transfer process slightly diluted the intensity of the colors.
- Solution: Always enhance saturation and hue in your photo editor before printing the image. Often, the clear acrylic spray applied at the final stage deepens colors and adds a protective sheen, which can significantly enhance the overall vibrancy. Don’t be discouraged before the final sealing step!
Remember, practice makes perfect. Each transfer you attempt will teach you something new about the process and help you refine your technique, leading to increasingly beautiful and flawless results.
Conclusion: Your Journey into the World of Image Transfer
The easy inkjet image transfer technique offers a wonderful gateway into creative expression, allowing you to transform ordinary photos and digital prints into extraordinary art pieces with minimal effort and maximum impact. From personalized, heartfelt gifts to stunning, bespoke home decor and intricate mixed media projects, the applications are as limitless as your imagination. We sincerely hope this detailed guide, inspired by the innovative creativity of Nitsa Creative Studio, has provided you with all the confidence, knowledge, and inspiration you need to embark on your own exciting image transfer adventure.
Embrace the joy of DIY crafting, experiment fearlessly with different images, explore a variety of surfaces, and most importantly, have immense fun watching your cherished memories and artistic visions come to life in a whole new, tangible dimension. Gather your materials this weekend, follow these simple, step-by-step instructions, and prepare to be utterly amazed by the stunning, archival results you can achieve right in your own creative space. Happy crafting!