
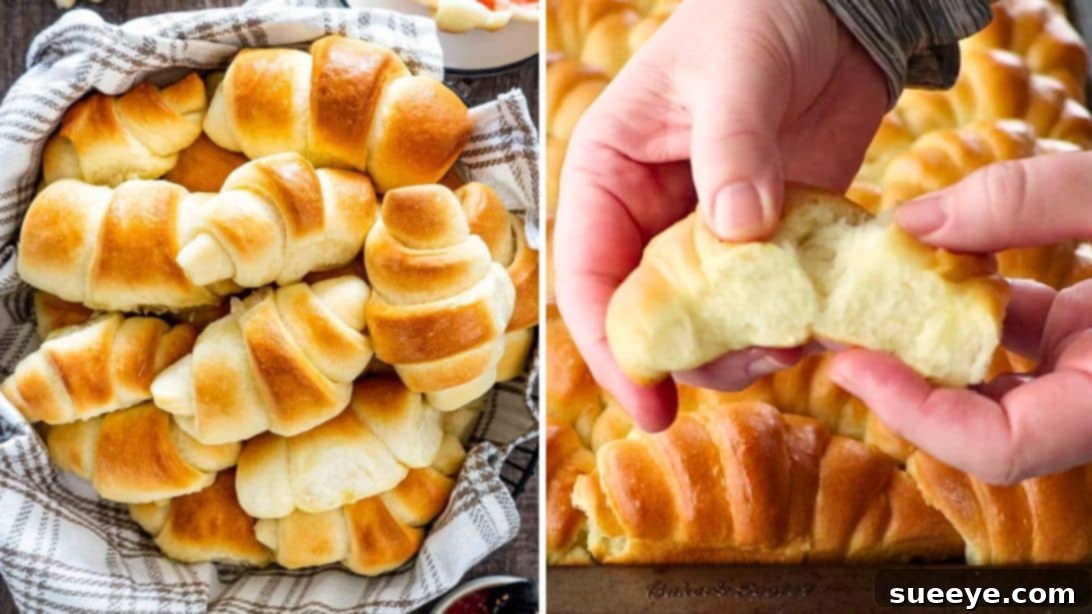
There’s truly nothing quite like the aroma of freshly baked bread filling your kitchen, and these homemade crescent rolls are an absolute game-changer. Imagine pulling apart a warm, golden-brown roll, incredibly soft and flavorful, straight from your oven. These aren’t just any rolls; they are so tender, so buttery, and so utterly delicious that they might just become your new favorite baking project. Perfect for any occasion, whether it’s a casual family dinner, a festive holiday meal, or simply a treat to elevate your breakfast, these crescent rolls are best served warm and pair exquisitely with any spread, jam, butter, or even a savory topping you can dream of.
RELATED: Sausage Cream Cheese Crescent Rolls Recipe
One of the greatest joys of making bread from scratch, especially a recipe as rewarding as this, is the incredible difference in taste and texture compared to anything you can buy in a store or even a professional bakery. Homemade rolls offer a freshness and quality that is simply unmatched. Plus, the process itself is surprisingly straightforward and deeply satisfying. If you’ve been hesitant to try baking yeast breads, this crescent roll recipe is the perfect starting point, designed to guide you to success. We’re thrilled to share this fantastic recipe, inspired by the wonderful video tutorial from the talented Joanna Cismaru on YouTube. Get ready to impress your family and friends with these irresistible, fluffy delights!
Why Homemade Crescent Rolls Are the Best Choice
Opting for homemade crescent rolls over store-bought alternatives comes with a myriad of benefits. Firstly, the unparalleled freshness and flavor are immediately noticeable. When you bake at home, you control every ingredient, ensuring only the highest quality components make it into your dough. This means no artificial preservatives or unpronounceable additives – just pure, wholesome goodness. The result is a roll that is remarkably soft, tender, and infused with a rich, buttery taste that pre-packaged versions simply can’t replicate.
Beyond taste, there’s an immense sense of accomplishment that comes with baking bread from scratch. The process of mixing, kneading, watching the dough rise, and finally pulling golden rolls from the oven is incredibly therapeutic and rewarding. It’s a culinary journey that connects you more deeply with your food. Moreover, making your own crescent rolls is often more cost-effective in the long run, especially when feeding a crowd. You’ll find that a few basic pantry staples transform into a generous batch of rolls, making them perfect for entertaining or stocking up your freezer for future enjoyment.
Essential Ingredients for Perfect Homemade Crescent Rolls:
Crafting these delectable crescent rolls requires a handful of common baking ingredients. Quality matters here, especially for the butter and flour, as they form the backbone of your rolls’ flavor and texture.
- 1 cup of water, lukewarm (around 105-115°F or 40-46°C)
- 1 tbsp of active dry yeast
- ¾ cup of milk
- ¼ cup of sugar
- ¾ cup of butter, unsalted (divided)
- 1 large egg
- 4-5 cups of all-purpose flour (start with 4 and add more as needed)
- ½ tbsp of salt
Step-by-Step Guide to Making Crescent Rolls from Scratch:
Follow these detailed instructions to create beautifully soft and fluffy crescent rolls that will impress everyone at your table.
Step 1: Activate the Yeast and Prepare the Wet Ingredients
Begin by activating your yeast. In a small bowl, combine the lukewarm water with the active dry yeast. Give it a gentle stir to ensure the yeast dissolves, then let it sit undisturbed for about 10 to 15 minutes. During this time, the yeast should become foamy and bubbly, indicating that it’s alive and ready to work its magic. This critical step ensures your dough will rise beautifully.
Next, prepare the dairy mixture. In a separate microwave-safe bowl, combine the milk, sugar, and ¼ cup of the unsalted butter. Microwave this mixture for approximately 1 minute, or until the butter is completely melted and the sugar has dissolved. Be careful not to overheat it.
Step 2: Combine Wet and Dry Ingredients for the Dough
Once the milk mixture is out of the microwave, whisk it thoroughly until all ingredients are well incorporated and smooth. Allow this mixture to cool down significantly before proceeding. It’s crucial that it’s no warmer than lukewarm (around 110°F or 43°C) before adding the egg, otherwise, the heat can cook the egg prematurely. Once cooled, whisk in the large egg until fully combined.
Now, it’s time to assemble the dough. In the bowl of a stand mixer fitted with a dough hook attachment, add 4 cups of all-purpose flour along with the salt. Give them a quick beat to combine. Then, pour in both the cooled milk mixture and the activated yeast mixture. Start the mixer on low speed, gradually increasing it as the ingredients come together.
Step 3: Knead, First Rise, and Divide the Dough
Continue to beat the dough with the dough hook for about 5-7 minutes on medium-low speed, until a smooth, elastic dough forms. The dough should pull away from the sides of the bowl. If it seems too sticky, add the remaining flour (up to 1 cup) one tablespoon at a time until you reach the desired consistency – soft but not overly sticky.
Lightly oil a large mixing bowl. Transfer the kneaded dough into the oiled bowl, turning it once to coat all sides. Cover the bowl tightly with a clean damp kitchen towel or plastic wrap to prevent drying. Allow the dough to rest in a warm, draft-free place for about 1 to 1.5 hours, or until it has doubled significantly in size. This first rise, also known as bulk fermentation, develops the flavor and texture of your rolls.
Once the dough has doubled, gently punch it down to release the trapped gases (degas). Transfer the dough to a lightly floured surface, then divide it into two equal parts. Take one half of the dough and roll it out into a large 14-inch circle using a rolling pin. Aim for an even thickness across the entire circle.
Step 4: Shape the Crescent Rolls and Prepare for Second Rise
With your 14-inch dough circle ready, gently spread half of the remaining unsalted butter (which should be softened, not melted) evenly over the top surface. This butter layer will create those wonderful flaky layers in your rolls. Using a pizza cutter or a sharp knife, cut the circle into 12 equal wedge-shaped pieces, much like slicing a pizza. To do this, first cut it in half, then into quarters, then each quarter into three equal wedges, as demonstrated in the video tutorial.
Starting from the wide end of each dough triangle, gently roll it up towards the pointed tip. As you roll, slightly curve the ends inwards to form the classic crescent shape. Place these beautifully shaped rolls onto a baking sheet that has been greased with butter or lined with parchment paper, ensuring there’s enough space between each roll for them to expand. Repeat this process with the second half of your dough and the remaining softened butter.
Step 5: Final Rise, Bake, and Serve
Once all your crescent rolls are shaped and placed on the baking sheets, cover them again loosely with plastic wrap or a damp towel. Allow them to rest in a warm place for their final rise (often called proofing) for another 30-45 minutes, or until they have visibly puffed up and nearly doubled in size once more. While the rolls are proofing, preheat your oven to 350°F (175°C).
When your oven is preheated and the rolls have completed their second rise, carefully transfer the baking sheet into the oven. Bake the crescent rolls for approximately 20 to 25 minutes, or until they turn a beautiful golden brown on top and are cooked through. Keep an eye on them towards the end to prevent over-baking, which can dry them out.
As soon as the rolls emerge from the oven, and while they are still hot, generously brush their tops with a little extra melted butter. This step adds an irresistible sheen, enhances the flavor, and keeps the crust wonderfully soft. Serve these freshly baked, warm crescent rolls immediately and enjoy the fruits of your labor! They are truly best straight out of the oven.
Tips for Perfectly Soft and Fluffy Crescent Rolls:
- Yeast Temperature is Key: Ensure your water is lukewarm (105-115°F/40-46°C) for activating yeast. Too cold, and the yeast won’t activate; too hot, and it will kill it.
- Don’t Rush the Rise: Patience is a virtue in baking! Allow the dough to rise fully in a warm, draft-free environment. This is crucial for developing flavor and achieving a light, airy texture.
- Measure Flour Correctly: For best results, spoon flour into your measuring cup and level it off with a straight edge, rather than scooping directly from the bag, which can compact the flour and lead to a denser dough.
- Softened Butter for Layers: When spreading butter on the rolled-out dough, ensure it’s softened to room temperature, not melted. This allows for even distribution and contributes to those wonderful, flaky layers.
- Don’t Overbake: Overbaking can lead to dry, tough rolls. Keep a close eye on them during the last few minutes of baking. They should be golden brown, not deep brown.
- Warm Environment for Rising: If your kitchen is cool, you can create a warm spot by turning your oven on for a minute, then turning it off and placing the dough inside (with the door ajar).
Serving Suggestions for Homemade Crescent Rolls:
These versatile rolls can be enjoyed in countless ways. For breakfast or brunch, serve them with homemade jams, preserves, honey butter, or a dollop of cream cheese. They also make an excellent accompaniment to savory meals. Pair them with a hearty soup, a crisp salad, roasted chicken, or a rich stew. For a simple snack, just enjoy them plain with a cup of coffee or tea. You can even transform them into a sweet treat by brushing them with melted butter and sprinkling with cinnamon sugar before or after baking, or by adding a simple powdered sugar glaze.
Storage and Reheating Homemade Crescent Rolls:
Storing Freshly Baked Rolls: Once cooled, store leftover crescent rolls in an airtight container at room temperature for up to 2-3 days. They tend to dry out quickly, so proper sealing is important.
Freezing Baked Rolls: For longer storage, allow the baked rolls to cool completely, then place them in a freezer-safe bag or container. They can be frozen for up to 2-3 months. To reheat, thaw at room temperature, then warm gently in a preheated oven at 300°F (150°C) for about 5-10 minutes, or until soft and warm again.
Freezing Unbaked Dough: You can also freeze the shaped, unbaked crescent rolls. After shaping, place them on a baking sheet and freeze until solid. Then transfer them to a freezer-safe bag. When ready to bake, place the frozen rolls on a greased baking sheet, cover, and let them thaw and rise in a warm place for several hours (4-6 hours or overnight in the fridge) before baking as directed.
Making homemade crescent rolls from scratch is a rewarding experience that yields incredibly delicious results. With this detailed guide and Joanna Cismaru’s helpful video, you’re well on your way to baking perfect, fluffy, and soft rolls every time. So, gather your ingredients, set aside some time, and get ready to fill your home with the inviting aroma of freshly baked bread. Happy baking!
*All image credit belongs to Joanna Cismaru via YouTube. Follow and subscribe to her channel for more amazing recipes and tutorials!