
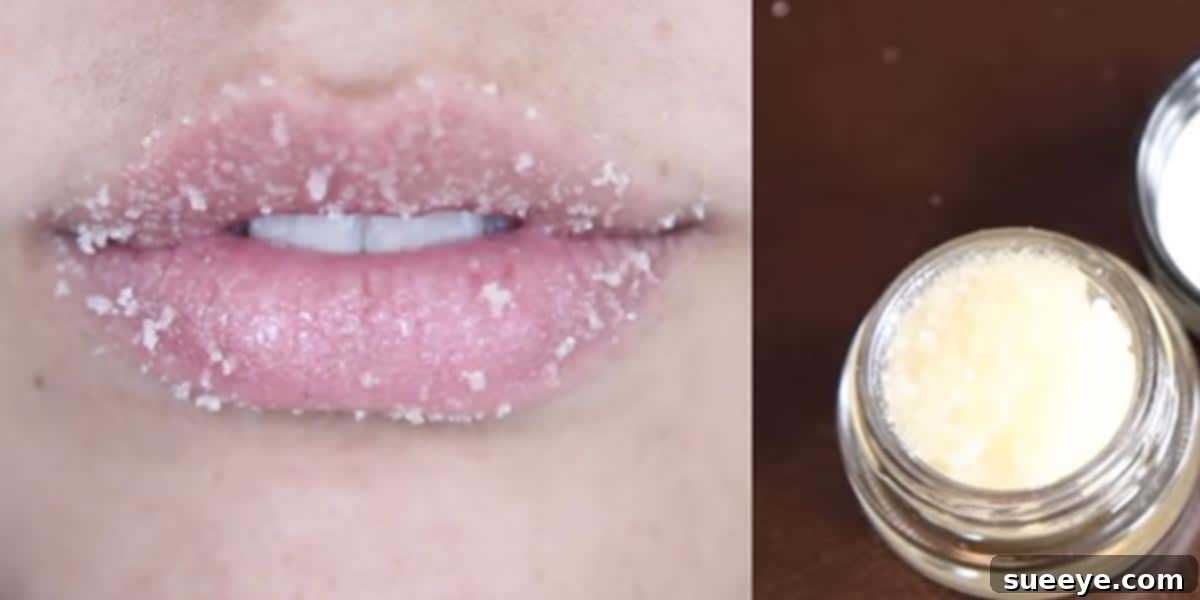
Unlock Velvety Smooth Lips: The Ultimate DIY Sugar Lip Scrub Guide
The relentless assault of dry weather, harsh winds, and even indoor heating can leave our lips feeling chapped, cracked, and far from their best. This all-too-common problem can make wearing lipstick a frustrating experience, transforming a smooth application into a cakey, uneven mess reminiscent of a crayon. For a long time, I struggled with finding a solution. My search for an affordable, effective lip scrub in local stores repeatedly came up empty-handed. And while fancy online options promised salvation, I simply couldn’t justify spending upwards of $10, plus shipping, for what seemed like a simple beauty product.
My quest for perfect pout led me to a simple yet profound discovery: the vast majority of effective lip scrubs rely on just two key components – sugar for gentle exfoliation and a nourishing oil for deep moisture. This revelation instantly sparked the idea of a DIY solution, and it turned out to be a game-changer! Crafting my own homemade lip scrub took literally minutes and cost me absolutely nothing, as all the ingredients were already staples in my pantry. Beyond solving my own lip woes, this easy recipe opened up a world of thoughtful and incredibly affordable gift ideas for friends, especially when paired with some charming packaging.
If you’ve never ventured into the world of DIY sugar scrubs, this is your sign to start. It’s astonishingly simple to create, yet the results are truly remarkable. The sugar acts as a natural, gentle exfoliant, effectively buffing away dry, flaky skin to reveal the soft, smooth lips underneath. An added bonus? It tastes delightful! Paired with the incredible moisturizing power of coconut oil, which helps the sugar work its magic, you’re left with lips that feel incredibly soft and look healthy. The beauty of a homemade lip scrub lies in its customizability – you can infuse it with your favorite flavors and aromas, making it a truly personalized treat.
I found myself so enamored with the process and results that I’ve already made several different variations. While this guide will primarily focus on a delightful lemon honey drop flavor, the possibilities are endless. You can easily find a wide array of extracts in the baking aisle of your local grocery store to create whimsical flavors like bubblegum, refreshing peppermint, or indulgent chocolate. Prepare to discover a new favorite self-care ritual!
Why Your Lips Crave Exfoliation: More Than Just a Pretty Pout
Beyond simply looking good, regular lip exfoliation is a vital step in maintaining optimal lip health. Our lips are delicate and exposed to environmental aggressors daily, making them prone to dryness and damage. A lip scrub offers numerous benefits:
Removes Dead Skin Cells: Just like the rest of our skin, lips accumulate dead skin cells. These flakes can make your lips look dull, uneven, and textured. Exfoliation gently sloughs away these cells, revealing the fresh, vibrant skin beneath.
Improves Lipstick Application: Smooth lips are the perfect canvas for any lip color. When lips are chapped or flaky, lipstick can appear patchy, settle into cracks, and wear off unevenly. A well-exfoliated pout ensures a seamless, long-lasting application that truly pops.
Boosts Circulation: The gentle massaging action of a lip scrub can help stimulate blood flow to your lips, giving them a natural, healthy flush and a plumper appearance.
Promotes Healing: By removing the barrier of dry skin, a lip scrub allows your lips to better absorb moisturizing balms and treatments, accelerating the healing process for chapped or damaged areas.
Enhances Absorption of Lip Balms: Post-exfoliation, your lips are primed to soak up all the goodness from your favorite lip balm, mask, or treatment. This ensures deeper hydration and more effective nourishment, leading to longer-lasting softness.
The Magic of DIY: Why Make Your Own Lip Scrub?
While the market is flooded with lip care products, opting for a homemade lip scrub comes with a host of compelling advantages:
Cost-Effective Solution
One of the most immediate benefits is the significant cost savings. High-end lip scrubs can be surprisingly expensive, especially when you factor in shipping costs for online purchases. By making your own, you utilize inexpensive, readily available ingredients, often already found in your kitchen, dramatically reducing the expense without compromising quality.
Natural Ingredients You Trust
When you DIY, you have complete control over what goes into your product. This means you can avoid harsh chemicals, artificial fragrances, dyes, and preservatives often found in commercial scrubs. You know exactly what you’re putting on your delicate lips – pure, natural ingredients that nourish and protect.
Customization at Your Fingertips
The ability to tailor your lip scrub to your exact preferences is unparalleled. Want a specific flavor? Add an extract. Prefer a coarser or finer scrub? Adjust the sugar type. You can experiment with different oils, honey, and natural colorings to create a scrub that’s uniquely yours, reflecting your personal taste and needs.
Simple & Quick to Make
You don’t need to be a beauty guru or a seasoned chemist to whip up a batch of lip scrub. The process is incredibly straightforward, requiring minimal time and effort. In just a few minutes, you can have a fresh, effective product ready to use, making it an ideal choice for busy individuals.
Understanding the Key Ingredients for a Perfect Pout
Let’s dive deeper into the star ingredients that make up a fantastic DIY lip scrub:
The Exfoliant: Sugar
Sugar is the hero of our lip scrub, acting as a gentle yet effective abrasive. Its crystalline structure provides the perfect texture to delicately buff away dead skin cells without being too harsh on the sensitive skin of your lips. Plus, it’s edible, so you don’t have to worry about accidentally ingesting it!
- Granulated Sugar (White Sugar): This is the most common and accessible option. Its fine to medium grain provides a good balance of exfoliation and gentleness, suitable for most lip types.
- Brown Sugar: With a slightly softer texture and a hint of molasses, brown sugar offers a milder exfoliation. It’s also known for its humectant properties, meaning it helps draw moisture into the skin, making it extra nourishing.
The Moisturizer: Nourishing Oils
The oil component is crucial for hydrating and softening your lips, providing a protective barrier, and allowing the sugar to glide smoothly without causing irritation.
- Coconut Oil: The Star Performer: Virgin coconut oil is an exceptional choice for lip scrubs. It’s deeply moisturizing, rich in fatty acids, and has natural antimicrobial properties. Its smooth texture makes it ideal for blending, and it solidifies at cooler temperatures, giving your scrub a pleasant consistency. It’s also known for its soothing and healing benefits, perfect for chapped lips.
- Other Lip-Loving Oils: Don’t limit yourself to just coconut oil!
- Olive Oil: A fantastic emollient, rich in antioxidants and vitamins.
- Almond Oil: Lightweight, easily absorbed, and packed with Vitamin E, known for its skin-repairing qualities.
- Jojoba Oil: Mimics the skin’s natural sebum, providing excellent balance and hydration without feeling greasy.
- Vitamin E Oil: Often added as an extra boost for its powerful antioxidant and healing properties.
Sweetness & Healing: Honey
Beyond its delicious taste, honey is a powerhouse ingredient for lip care. It’s a natural humectant, meaning it attracts and retains moisture, helping to keep lips hydrated and plump. Honey also boasts incredible antiseptic and healing properties, making it beneficial for soothing and repairing chapped, irritated lips.
Flavor & Fun: Extracts and Essential Oils
This is where you can truly personalize your scrub and make it an aromatic delight!
- Baking Extracts: Easily found in the baking aisle, these provide a burst of flavor and scent. Popular choices include lemon, vanilla, peppermint, almond, orange, or even fun options like bubblegum or cotton candy.
- Food-Grade Essential Oils: If using essential oils, ensure they are high-quality, food-grade, and safe for internal (incidental ingestion) use. Always dilute them properly and use them sparingly, as they are very potent. Peppermint, lavender (check safety for ingestion), or citrus oils can add a lovely aroma and subtle benefits, but always research safety first.
Your 3-Minute DIY Lip Scrub Recipe: Lemon Honey Drop
This recipe is designed for ease and effectiveness, bringing a burst of citrusy sweetness to your lip care routine. Remember, precision isn’t paramount here; feel free to adjust to your desired consistency and taste.
What You’ll Need:
- 1 tablespoon granulated sugar (or brown sugar for a softer scrub)
- 1 teaspoon virgin coconut oil (melted if solid, then allowed to cool slightly)
- 1/2 teaspoon honey (local and raw if possible for extra benefits)
- A few drops of lemon extract (or fresh lemon zest for a natural touch)
- Small mixing bowl
- Spoon or small spatula
- Small airtight container for storage (a repurposed lip balm tin or a small jar works perfectly!)
Step-by-Step Instructions:
- Combine Sugar: In your small mixing bowl, place the tablespoon of granulated sugar. This will be the base of your exfoliating scrub.
- Add Coconut Oil: Measure out the virgin coconut oil. If it’s solid, gently warm it until it becomes liquid (a quick microwave burst or placing the jar in warm water works). Allow it to cool slightly so it doesn’t dissolve the sugar too quickly. Add the liquid coconut oil to the sugar.
- Introduce Honey: Next, add the half-teaspoon of honey. The honey will provide additional moisture and its renowned healing properties.
- Infuse with Flavor: Add a few drops of lemon extract. Start with 2-3 drops, mix, and smell/taste. Add more if you desire a stronger lemon flavor. If using fresh lemon zest, a pinch will suffice.
- Mix Thoroughly: Using your spoon or spatula, stir all the ingredients together until they are well combined. You’re aiming for a consistency that is thick but spreadable, with the sugar still distinct enough to provide exfoliation. If it’s too dry, add a tiny bit more oil. If too wet, add a little more sugar.
- Transfer to Container: Once mixed to your satisfaction, carefully spoon the homemade lip scrub into your clean, airtight container.
- Set and Store: If the coconut oil was melted, the scrub might be a bit soft. Place the container in the refrigerator for about 10-15 minutes to allow the coconut oil to re-solidify slightly, achieving a firmer, more scoopable texture.
And just like that, in under 3 minutes, you’ve created a luxurious, all-natural lip scrub ready to transform your pout!
Customizing Your Lip Scrub: Endless Possibilities
The beauty of DIY lies in its adaptability. Once you’ve mastered the basic recipe, you can unleash your creativity and experiment with different flavors, scents, and even colors.
Flavor Variations
- Refreshing Peppermint: Add a few drops of food-grade peppermint extract for a cooling, invigorating sensation that also slightly plumps the lips.
- Indulgent Chocolate: Mix in a tiny amount of unsweetened cocoa powder and a drop of vanilla extract for a delicious, dessert-like scrub.
- Sweet Vanilla: A splash of vanilla extract creates a classic, comforting aroma and taste.
- Fruity Fun: Experiment with raspberry, strawberry, or cherry extracts for a playful, fruity scrub.
- Spicy Cinnamon: A tiny pinch of cinnamon powder can create a warming, plumping effect (use sparingly, as it can be irritating in large amounts).
Natural Coloring (Optional)
While not necessary, you can add a hint of natural color to your scrub for visual appeal:
- A tiny pinch of beet powder (for pink/red hues).
- A dash of turmeric (for a subtle golden tint – use very little to avoid staining).
How to Use Your Homemade Lip Scrub for Best Results
Proper application ensures you get the most out of your exfoliating efforts:
- Dampen Lips: Start with clean, slightly damp lips. You can lightly wet them with water or simply use after a shower.
- Apply: Scoop a small pea-sized amount of scrub onto your fingertip.
- Gently Massage: Gently rub the scrub onto your lips in small, circular motions for about 30-60 seconds. Be gentle, especially if your lips are sensitive or very chapped.
- Rinse or Wipe: Rinse off the scrub with warm water or gently wipe it away with a soft, damp cloth. You can even lick off any excess, given its natural, delicious ingredients!
- Follow Up: Immediately apply a nourishing lip balm or a thick layer of coconut oil to lock in moisture and protect your newly softened lips.
Aim to use your lip scrub 1-3 times a week, depending on your lip’s condition and sensitivity. Over-exfoliating can lead to irritation.
Storage Tips for Freshness and Longevity
To keep your DIY lip scrub fresh and effective:
- Airtight Container: Always store your scrub in a clean, airtight container. This prevents contamination and keeps the ingredients fresh.
- Cool, Dry Place: Store at room temperature in a cool, dry place, away from direct sunlight or excessive heat. Because it contains coconut oil, it might soften in very warm environments. If this happens, a quick stint in the fridge will firm it up.
- Shelf Life: Since this scrub contains no preservatives, it’s best used within 2-3 weeks. If you notice any changes in smell, color, or texture, it’s time to make a fresh batch. Always use clean hands or a small spatula to scoop out the scrub to prevent introducing bacteria.
Beyond the Scrub: A Holistic Approach to Lip Care
While lip scrubs are fantastic, they are just one piece of the puzzle for truly healthy lips. Consider these additional steps:
- Stay Hydrated: Drinking plenty of water is fundamental for overall skin health, including your lips.
- Regular Lip Balm Use: Apply a nourishing lip balm daily, especially before bed and when going outdoors. Look for balms with natural oils, butters, and beeswax.
- Sun Protection: Lips can get sunburned too! Use a lip balm with SPF, especially during prolonged sun exposure.
- Avoid Licking Lips: While tempting, licking your lips can actually make them drier as saliva evaporates, taking moisture with it.
Embrace Your Softest Lips Yet!
The journey to irresistibly soft, smooth lips doesn’t have to be expensive or complicated. With this simple, natural, and customizable DIY sugar lip scrub, you hold the power to banish chapped skin and embrace a perfectly prepped pout. You’ll not only save money but also gain the satisfaction of creating a beneficial product tailored specifically for you. So, gather your ingredients, take a few minutes, and indulge in this delightful self-care ritual. Your lips will thank you!
As a bonus, if you’re a visual learner, watching someone go through the process can be incredibly helpful. You can find excellent visual guides, like the one Tiffy Quake shares, to see exactly how to make a luscious lip scrub step by step, ensuring you achieve the softest lips imaginable!