
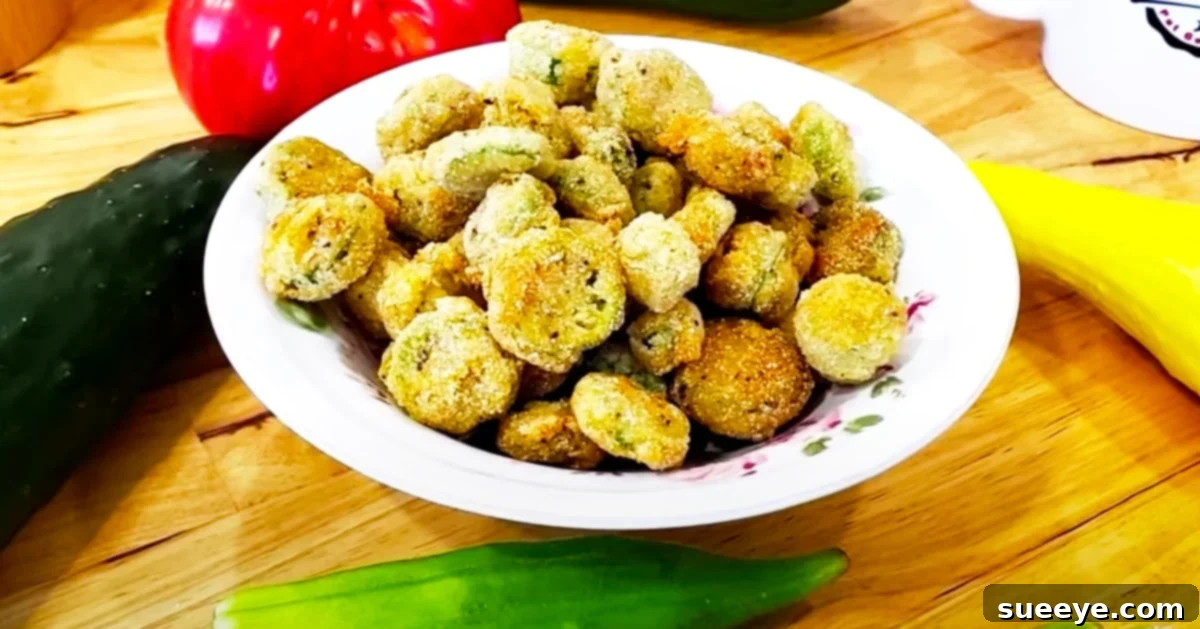
Few dishes encapsulate the heart and soul of Southern cuisine quite like Crispy Fried Okra. For many, including myself, okra was traditionally experienced in soups or stews, often leading to a texture that some might find off-puttingly “slimy.” However, there’s a world of difference when okra is prepared the Southern way: deep-fried to a golden, irresistible crisp. This transformation not only eliminates the dreaded sliminess but elevates the humble vegetable into a coveted snack or a delightful side dish that even the most reluctant eaters can’t resist. Thanks to timeless wisdom passed down through generations, particularly from beloved online personalities like The Hillbilly Kitchen, mastering this classic is easier than you might think.
The Enduring Appeal of Crispy Fried Okra
Fried okra is more than just a dish; it’s a culinary institution in the American South. Its appeal lies in its simplicity and the sheer joy of biting into a perfectly golden, crunchy piece. It’s the kind of comfort food that evokes memories of family gatherings, backyard barbecues, and lazy Sunday afternoons. What truly sets a great fried okra recipe apart is its ability to deliver an exceptionally crispy exterior while keeping the interior tender and flavorful, completely banishing any trace of the mucilaginous texture that fresh okra can sometimes possess. This very method proves invaluable for parents or anyone looking to introduce more vegetables into a picky eater’s diet, as frying can make almost any vegetable an exciting treat. Personally, discovering properly fried okra has completely changed my perception, turning a once-avoided vegetable into one I genuinely crave.
Unveiling Granny’s Secrets: A Timeless Recipe from The Hillbilly Kitchen
When it comes to authentic Southern cooking, few sources are as trusted and endearing as The Hillbilly Kitchen on YouTube. Their tutorial for fried okra isn’t just a recipe; it’s a masterclass rooted in generations of culinary wisdom, specifically from “granny’s” own kitchen. This video shares invaluable tips and secrets that ensure every batch of fried okra turns out extra crispy and utterly delicious. It highlights specific techniques that prevent the breading from falling off and ensures a consistent, satisfying crunch with every bite. The beauty of this exact method is its versatility, allowing you to apply the same principles to fry various other vegetables such as zucchini, summer squash, or even green beans, yielding equally delightful results. The charm of the tutorial is further enhanced by the engaging stories shared throughout, making the cooking process an even more enjoyable and enriching experience.
Essential Ingredients for Perfect Fried Okra
Achieving the perfect crispy fried okra begins with selecting the right ingredients and understanding their individual roles. This recipe calls for a simple yet effective combination that guarantees a delectable outcome. Always aim for the freshest possible ingredients for the best flavor and texture.
What You’ll Need:
- 6 to 8 Pods of Fresh, Tender Okra
- 1 Large Egg
- ½ cup Self-rising Cornmeal Mix
- 1 teaspoon Granulated Sugar
- ¼ teaspoon Fine Sea Salt
- ¼ teaspoon Freshly Ground Black Pepper
- Plenty of Oil for Frying (e.g., vegetable, canola, or peanut oil)
Ingredient Breakdown & Tips:
- Fresh, Tender Okra: The foundation of this dish. Look for bright green pods that are firm to the touch and relatively small (around 2-4 inches). Larger pods can be tougher and more fibrous. Freshness is key to avoiding an overly slimy texture before frying.
- Large Egg: The egg acts as a crucial binder, creating a moist surface that allows the cornmeal mixture to adhere effectively to the okra. Without a proper egg wash, your breading is more likely to fall off during frying.
- Self-rising Cornmeal Mix: This is a game-changer! Self-rising cornmeal already contains leavening agents (baking powder and salt), which contribute to a lighter, crispier, and more airy coating than regular cornmeal. If you only have regular cornmeal, you can create a substitute by mixing ½ cup cornmeal with ½ teaspoon baking powder and a pinch of salt.
- Granulated Sugar: A subtle but important addition. The sugar doesn’t make the okra sweet, but rather helps in the caramelization process during frying, contributing to that beautiful golden-brown color and a more balanced flavor profile, complementing the savory notes.
- Fine Sea Salt & Freshly Ground Black Pepper: These are your basic seasonings, essential for enhancing the natural flavors of the okra and the cornmeal. Feel free to adjust quantities to your personal preference. For an extra kick, consider adding a pinch of cayenne pepper, garlic powder, or onion powder to your cornmeal mix.
- Oil for Frying: Choose an oil with a high smoke point, such as vegetable oil, canola oil, peanut oil, or even corn oil. The quantity needs to be sufficient to submerge the okra slices, ensuring even cooking and a consistent crisp.
Step-by-Step Guide to Crispy Perfection
Following these detailed steps, infused with granny’s timeless wisdom, will ensure your fried okra is perfectly crispy and delicious every time. Precision in preparation and timing are your allies here.
Preparation is Key: Slicing the Okra
Begin by thoroughly washing and drying your fresh okra pods. Trimming off the very ends (both stem and tip) is often recommended, but be careful not to cut too much of the cap, as it holds the pod together. Next, slice the okras into uniform pieces, approximately half an inch to one inch thick. Consistency in thickness is vital for even cooking; slices that are too thick will cook unevenly, while those that are too thin might burn.
The Coating Process: Egg Wash and Breading
In a medium bowl, beat your large egg until the yolk and white are fully combined. Add the sliced okra to the beaten egg mixture, tossing gently to ensure every piece is thoroughly coated. The egg wash is critical for the breading to adhere properly. Let the okra sit in the egg mixture for a few minutes while you prepare your dry coating.
In a separate, shallow dish or a sturdy Ziploc bag, combine the self-rising cornmeal mix, sugar, salt, and pepper. Mix these dry ingredients well to ensure the seasonings are evenly distributed throughout the cornmeal. Now, transfer the egg-coated okra into the cornmeal mixture. The trick here is to coat them individually, or in small batches, tossing gently to prevent the pieces from sticking together and ensuring each slice gets a generous, even layer of breading. Shake off any excess coating.
The Critical Resting Period: A True Granny’s Secret
This step is often overlooked but is absolutely vital for crispy fried okra where the breading stays put. Once the okra pieces are coated, arrange them in a single layer on a wire rack set over a baking sheet. Let them rest undisturbed for about 10-15 minutes at room temperature. This resting period allows the moisture from the okra and the egg wash to be absorbed by the cornmeal, creating a sort of paste that adheres strongly to the okra. This adherence prevents the breading from separating from the okra and falling off into the hot oil during frying, guaranteeing a uniformly crispy result.
Achieving Golden, Crispy Frying
While your okra is resting, heat a generous amount of your chosen frying oil in a large, heavy-bottomed skillet or Dutch oven over medium-high heat. You’ll need enough oil to deep-fry the okra, typically 2-3 inches deep. The ideal oil temperature for frying okra is around 350-375°F (175-190°C). If you don’t have a thermometer, you can test the oil by dropping a small pinch of cornmeal into it; it should sizzle vigorously and immediately float to the surface. Ensure the oil is hot enough before adding the okra, as oil that isn’t hot enough will result in greasy, soggy okra.
Carefully add the breaded okra to the hot oil in batches, making sure not to overcrowd the pan. Overcrowding will lower the oil temperature, leading to less crispy results. Fry the okra for 3-5 minutes, turning occasionally with a slotted spoon or spider, until each piece is beautifully golden brown and crispy. Once cooked, use the slotted spoon to remove the fried okra from the oil, allowing any excess oil to drain back into the pan. Transfer the crispy okra to a fresh wire rack lined with paper towels to absorb any remaining oil and allow air to circulate, maintaining its crispness. Season immediately with a sprinkle of extra salt if desired, while it’s still hot. Repeat with the remaining batches until all the okra is perfectly fried. Serve hot and enjoy!
Beyond Okra: Adapting This Frying Technique
The beauty of this classic Southern frying technique lies in its incredible versatility. The same principles that create perfectly crispy fried okra can be applied to a variety of other vegetables, offering a delicious way to enjoy produce that might otherwise be overlooked. For instance, consider using this method for sliced zucchini or summer squash. Simply prepare them by slicing into similar thicknesses as the okra, follow the exact same egg wash, cornmeal coating, and resting steps, then fry until golden and crisp. The result is a delightful side dish or snack that transforms these common garden vegetables. This technique also works wonders for green beans, turning them into a fun, crunchy alternative to the usual steamed variety, and can even be adapted for making beloved fried pickles, which share a similar textural appeal. It’s a fundamental technique that opens up a world of crispy vegetable possibilities!
Serving Suggestions and Culinary Pairings
Crispy fried okra is incredibly versatile and can be enjoyed in numerous ways. It makes an outstanding snack all on its own, perhaps with a simple squeeze of lemon or a dash of hot sauce for an added kick. As a side dish, it pairs wonderfully with classic Southern comfort foods such as fried chicken, barbecue ribs, pulled pork, or a hearty catfish fry. For dipping, consider a creamy ranch dressing, a spicy comeback sauce, or a tangy remoulade. It’s also a fantastic addition to a vegetable platter or a vibrant summer spread, providing a delightful crunch and unique flavor that complements other dishes. No matter how you choose to serve it, be sure to enjoy it fresh and hot for the ultimate experience.
From Skeptic to Enthusiast: My Journey with Okra
Overall, this experience reminds me of my love for fried pickles – that same delightful crunch and savory satisfaction. For a long time, I never truly appreciated okra, especially when it appeared in soups, where its inherent sliminess often overshadowed its flavor. But discovering a perfectly fried version is a revelation. I never really had fried okra until more recently, but I think I’ll start to like it. This recipe, with its focus on achieving an extra crispy texture and the critical resting period for the breading, completely transforms the vegetable. It’s truly remarkable how a simple preparation method can change one’s entire perception of an ingredient. I have grown to like okra more, and I can’t wait to make this myself, embracing the crispy, crunchy goodness that this traditional recipe promises. It’s a testament to the power of traditional cooking methods and the enduring appeal of Southern culinary heritage.