
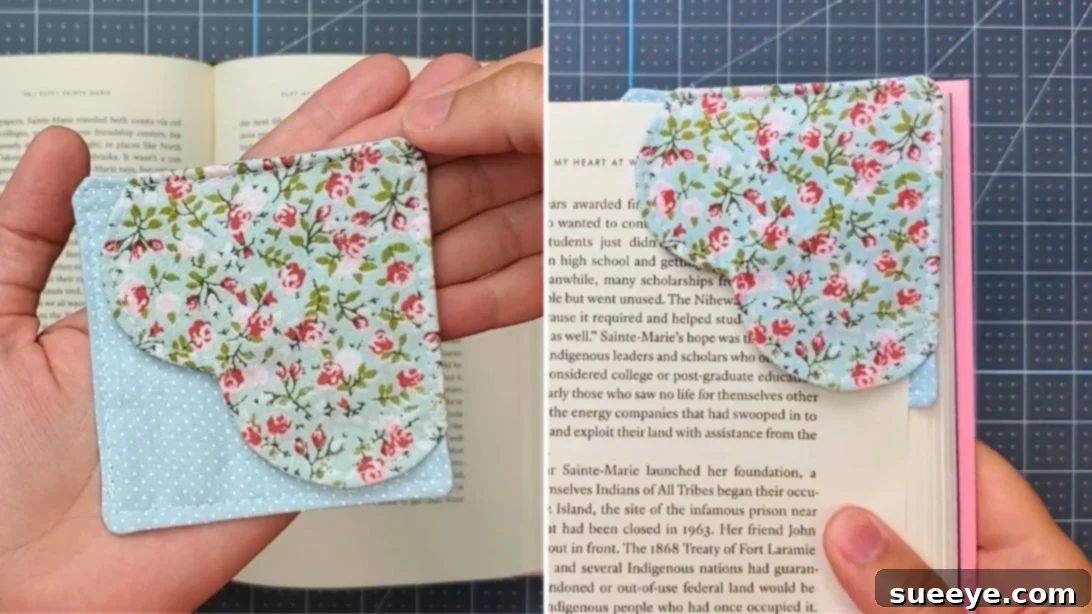
DIY Heart-Shaped Fabric Bookmark: Perfect for Book Lovers and Sewing Enthusiasts
Are you a passionate reader who also loves to get creative with your hands? Do you find yourself with an ever-growing pile of fabric scraps from past sewing projects? If so, we have the perfect solution that combines both your passions: a delightful DIY heart-shaped fabric bookmark! Not only is this project incredibly charming and practical, but it’s also an excellent way to use up those smaller fabric pieces that are too precious to discard. Imagine marking your favorite pages with a beautifully handcrafted, soft bookmark that truly reflects your love for books and sewing.
We stumbled upon a fantastic video tutorial by TTHandmade on YouTube, which inspired us to share this wonderful craft with you. Their ingenious design makes crafting these adorable fabric bookmarks simple, straightforward, and incredibly rewarding. Whether you’re a seasoned seamstress or just starting your sewing journey, this project is designed for success.
Why Craft a Heart-Shaped Fabric Bookmark?
Beyond being an excellent scrap buster, creating your own fabric bookmarks offers a myriad of benefits and appeals:
- Unique & Personalized Gifts: These handmade bookmarks make thoughtful and unique gifts for friends, family, teachers, or any bookworm in your life. Add their initials, choose fabrics in their favorite colors, or even incorporate a small embroidered detail for a truly personalized touch. They’re perfect as stocking stuffers, small birthday presents, or ‘just because’ tokens of appreciation.
- Eco-Friendly Crafting: Give new life to your leftover fabric pieces, reducing waste and contributing to more sustainable crafting practices. It’s a wonderful way to minimize your environmental footprint while indulging in your creative hobbies.
- Beginner-Friendly Project: This DIY heart-shaped bookmark is ideal for those new to sewing. It involves basic straight and curved stitching, simple pattern cutting, and minimal materials. It’s a great way to practice fundamental sewing skills without feeling overwhelmed, building confidence for more complex projects down the line.
- Durable and Practical: Unlike paper bookmarks that can tear or fold easily, fabric bookmarks are soft, durable, and gentle on your book pages. They add a touch of warmth and personality to every reading session.
- Therapeutic & Relaxing: Engaging in a creative activity like sewing can be incredibly therapeutic. The repetitive motion, the focus required, and the satisfaction of seeing a project come to life can be a wonderful stress reliever and a joyful way to spend your free time.
Looking for other quick scrap-busting projects? Don’t miss this 10-Minute Scrap Buster Drawstring Bag for another fantastic way to utilize your fabric remnants. Or, if you prefer a simpler bookmark design, explore our guide on how to make a DIY Corner Bookmark.
Essential Materials and Tools for Your Heart Bookmark
Gathering your materials is the first exciting step in any DIY project. For this heart-shaped fabric bookmark, you’ll need just a few basic items, most of which you might already have in your sewing kit. The beauty of this project lies in its simplicity and accessibility.
- Fabric Scraps: You’ll need four pieces of 4 x 4 inch square fabric. We recommend choosing two pieces for your main (outer) fabric and two for your backing (lining) fabric. Opt for medium-weight cotton or quilting cotton for best results, as they are easy to work with and hold their shape well. Don’t be afraid to mix and match patterns and solids to create a truly unique look!
- Lightweight Fusible Non-Woven Interfacing: Similar to brands like Pellon. This is crucial for adding structure and stability to your bookmark, preventing it from flopping and ensuring it holds its shape beautifully. Fusible interfacing means it has an adhesive on one side that bonds to your fabric when ironed, making it incredibly easy to apply.
- Matching Thread: Choose a good quality polyester all-purpose thread that either matches your fabric or provides a pleasing contrast for topstitching.
Tools You’ll Need:
- Sewing Machine: A standard sewing machine will make this project quick and enjoyable.
- Iron and Ironing Board: Essential for applying interfacing and pressing seams flat for a professional finish.
- Fabric Scissors or Rotary Cutter and Mat: For precise cutting of your fabric squares and the heart shape.
- Ruler and Fabric Marker/Chalk: For accurate measuring and marking your cutting lines.
- Pinking Shears (Optional but Recommended): These zig-zag edge scissors help reduce bulk in seam allowances and prevent fraying, giving your bookmark a neater edge once turned right side out.
- Pins or Fabric Clips: To hold fabric layers together while sewing.
- Point Turner (Optional): Useful for gently pushing out corners and curves for a crisp finish.
Step-by-Step Guide: Crafting Your Fabric Heart Bookmark
Follow these detailed steps to create your own charming heart-shaped fabric bookmark. Take your time with each step, and remember that practice makes perfect!
Step 1: Preparing Your Fabric and Interfacing
Begin by cutting two of your 4×4 inch fabric squares (these will be your main outer fabric pieces) and two pieces of your fusible interfacing to the same 4×4 inch dimensions. Place one fabric square right-side up on your ironing board, then center a piece of fusible interfacing on top, adhesive side down. Carefully iron to fuse the interfacing to the wrong side of your fabric, following the manufacturer’s instructions. Repeat this process for the second main fabric square. This step gives your fabric the necessary body and stiffness for a durable bookmark.
Step 2: Designing and Cutting Your Heart Shape
Take one of your interfaced 4-inch squares and place it right-side down (interfacing facing up). This will be the template for your heart. Using a fabric marker or chalk, follow these precise measurements to draw half of your heart:
- From the bottom-right corner, measure up 3.14 inches along the right edge and make a mark.
- Next, measure 2 inches horizontally from the upper-right corner towards the left edge and make another mark.
- From the bottom-right corner, measure 1.18 inches upwards along the right edge. Place your ruler horizontally at this mark and measure 1/4 inch from the right edge towards the center. Make a final mark.
Connect these marks to form a smooth curve for half of your heart. Carefully fold the fabric square in half vertically, ensuring your drawn line is perfectly aligned. With the fabric still folded, cut along the curved line you’ve drawn. When you unfold it, you’ll have a perfectly symmetrical heart shape. Use this first heart as a template to cut an identical heart shape from your other main interfaced fabric square.
Step 3: Assembling the Outer Heart Pieces
Now, take your two heart-shaped fabric pieces. Place them right sides together, carefully aligning all edges. Pin them in place to prevent shifting. Using your sewing machine, sew along the curved edges of the heart, leaving the top straight edge (where the heart points inward) unsewn. Use a 1/4 inch seam allowance. Once sewn, use pinking shears to carefully trim the seam allowance around the curves. This step helps to reduce bulk, allowing the heart to turn out smoothly and lay flat. If you don’t have pinking shears, you can make small notches into the seam allowance with regular scissors. Finally, flip the heart right side out, gently pushing out all curves. Press it flat with an iron. To give it a crisp, professional finish, topstitch along the curved parts of the heart, close to the edge.
Step 4: Attaching the Heart to a Backing Square
Select one of your remaining 4×4 inch fabric squares (this will be one side of your bookmark’s backing) and place it right-side up. Position your sewn heart shape on top of this square, aligning its bottom-left corner with the bottom-left corner of the square. Ensure the straight edges of the heart align perfectly with the edges of the square. Pin the heart in place along its straight edges. Stitch along these straight edges of the heart, securing it to the backing fabric. This creates a pocket where your book page will slide in.
Step 5: Final Assembly and Turning
Take your last 4×4 inch fabric square (the other side of your bookmark’s backing) and place it on top of the assembly from Step 4, right sides together. Carefully align all four edges of the squares. Pin all around the perimeter. Using a 1/4 inch seam allowance, sew all the way around the edges. **Crucially, remember to leave a small opening (about 1.5 to 2 inches) along one of the curved parts of the heart or a straight edge of the square – this will be your turning hole.** Before turning, trim the corners diagonally to reduce bulk and ensure crisp corners. Then, carefully flip the entire piece right side out through the opening you left. Use a point turner or a dull pencil to gently push out all corners and edges, making them as crisp as possible. Press the entire bookmark flat with your iron.
Step 6: Closing the Opening and Finishing Touches
Once your bookmark is turned right side out and pressed, you’ll need to close the turning opening. You can do this by hand using a ladder stitch for an invisible finish, or by machine with a very narrow seam allowance, topstitching close to the edge. For extra durability and a polished look, topstitch all around the entire perimeter of the bookmark, approximately 1/8 inch from the edge. This not only secures the turning hole but also gives your bookmark a professional, finished appearance. Your beautiful heart-shaped fabric bookmark is now complete and ready to bring joy to your reading!
Tips for Success and Creative Variations
To ensure your DIY heart-shaped bookmark project is a resounding success and to encourage further creativity, consider these additional tips and ideas:
- Fabric Selection: While quilting cotton is recommended for beginners, feel free to experiment with other non-stretch fabrics like linen blends, felt, or even repurpose old denim. Consider contrasting patterns and solid colors for a dynamic look.
- Personalization Beyond Initials: Beyond adding initials, you can use fabric paint to add small designs, attach tiny charms or beads to the top corner, or even incorporate a small piece of decorative ribbon or elastic if you wish for a page-holding loop.
- Precision is Key: Especially in Step 2, accurate measuring and cutting of your heart shape will significantly impact the final look of your bookmark. Take your time with a good ruler and a sharp cutting tool.
- Pressing Power: Don’t underestimate the power of a good iron! Pressing at each stage (interfacing, seams, and final shape) will make a huge difference in the neatness and professionalism of your finished bookmark.
- Troubleshooting: If your curves aren’t perfectly smooth when you turn the heart right side out, use the tip of a point turner or a chopstick to gently push out the fabric from the inside. Don’t be afraid to repress areas that seem a bit bulky.
- Care Instructions: Since these are fabric, they might get dirty over time. For light stains, spot clean with a damp cloth and mild soap. For a deeper clean, hand wash gently in cool water, reshape, and lay flat to dry.
- Explore Other Shapes: Once you’ve mastered the heart, apply the same techniques to create bookmarks in other shapes like stars, circles, or even simple squares with decorative stitching.
Embrace Your Crafty Side!
There you have it – a comprehensive guide to crafting your very own heart-shaped fabric bookmark. This project is a testament to the joy of handmade items, offering both a creative outlet and a practical, charming accessory for your beloved books. It’s a rewarding way to use up those precious fabric scraps, create thoughtful gifts, and add a personal touch to your reading experience.
So, gather your materials, fire up your sewing machine, and get ready to stitch some love into your next read. Don’t forget to share your beautiful creations with us – we love seeing your unique fabric choices and personalized touches! Happy sewing and happy reading!