
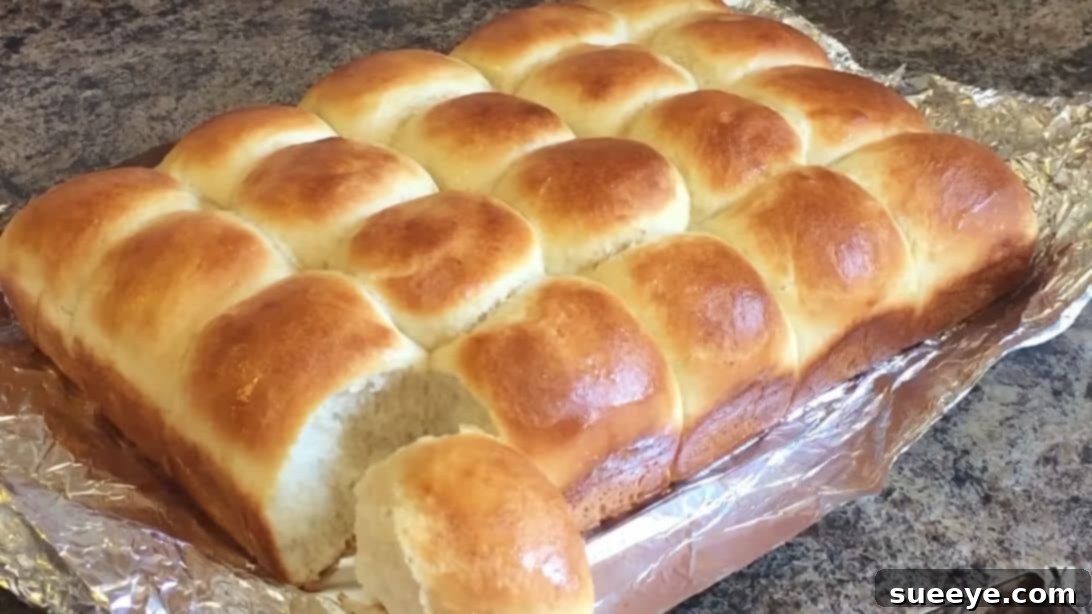
Effortlessly Delicious: The Ultimate No-Knead Dinner Rolls Recipe for Beginners
Imagine the aroma of freshly baked bread wafting through your home – warm, inviting, and utterly irresistible. Now imagine achieving that without the strenuous effort of kneading! Our ultimate recipe for no-knead dinner rolls makes this dream a delicious reality. These rolls are so soft, incredibly fluffy, and bursting with flavor, they’re guaranteed to become a staple in your kitchen. Whether you’re a seasoned baker or just starting your journey into the wonderful world of bread making, this recipe by In The Kitchen With Gina Young is an absolute game-changer. When I first tried these at home, my guests were astounded, asking for the secret ingredient – they simply couldn’t believe I had made such perfect rolls from scratch, and with such ease!
RELATED: If you love the simplicity of no-knead recipes, be sure to check out our No-Knead Baguette Recipe for another fantastic bake!
Why Choose No-Knead Dinner Rolls?
The concept of “no-knead” bread has revolutionized home baking, making it accessible to everyone. Traditional bread making often involves extensive kneading, a technique that develops gluten and gives bread its characteristic texture. However, with no-knead methods, time does the work for you. A longer fermentation period, typically during the rising process, allows the gluten to develop naturally, resulting in an exceptionally tender crumb without any manual labor. This means:
- Minimal Effort: No need for strong arms or expensive stand mixers. A simple bowl and spoon are all you require.
- Beginner-Friendly: Perfect for those intimidated by traditional bread making. Fewer steps mean less room for error.
- Exceptional Texture: The slow fermentation yields a depth of flavor and a wonderfully soft, airy texture that’s hard to beat.
- Time-Saving (Active Time): While the overall process involves waiting for the dough to rise, your active involvement is incredibly short.
- Versatile: These rolls pair perfectly with almost anything, from savory stews to sweet jams.
This particular recipe exemplifies all these benefits. It calls for common pantry staples like rapid-rise yeast, sugar, milk or water, flour, salt, an egg, and butter. You won’t need a stand mixer or even a handheld mixer – mixing by hand yields equally delicious results! Serve them warm with butter, spreads, jam, rich gravies, hearty soups, or use them as the base for delectable sandwiches or mini sliders. Once you try these no-knead dinner rolls, you’ll undoubtedly agree they are destined to become your go-to recipe for homemade bread.
Easy No-Knead Dinner Rolls Ingredients
Gathering your ingredients correctly is the first step to baking success. Ensure all your ingredients are fresh and measured accurately.
- 2 packets of rapid-rise yeast (Fleischmann’s recommended): Rapid-rise yeast is designed to work faster than active dry yeast, reducing proofing times. Ensure it’s not expired for optimal rising.
- 1/4 cup of granulated sugar: Adds a touch of sweetness to the rolls and contributes to browning.
- 1 teaspoon of granulated sugar (for yeast activation): A small amount of sugar acts as food for the yeast, helping to activate it and ensuring a vigorous rise.
- 1 to 1 1/3 cups of lukewarm water or milk: The temperature is crucial here. Lukewarm (around 105-115°F or 40-46°C) is ideal for activating yeast without killing it. Milk will result in a richer, softer crumb, while water will yield a slightly chewier texture.
- 4 cups of all-purpose flour: While some bread recipes call for bread flour, all-purpose flour works perfectly for these tender rolls, providing a good balance of structure and softness.
- 1 teaspoon of salt: Essential for flavor and to control the yeast’s activity. Don’t skip it!
- 1 large egg: Adds richness, helps with browning, and contributes to the rolls’ tender texture.
- 5 tablespoons of melted unsalted butter: Provides moisture, flavor, and helps achieve that beautiful golden crust and soft interior. Make sure it’s melted but not scorching hot.
How to Make Yeast Dinner Rolls: A Step-by-Step Guide
This recipe breaks down the process into simple, manageable steps. Follow these instructions carefully for perfect, fluffy dinner rolls every time.
Step 1: Prepare Your Dry Ingredients
Begin by adding the 4 cups of all-purpose flour to a large mixing bowl. If you’re using a stand mixer with a dough hook attachment, use its bowl. Otherwise, a spacious standard mixing bowl is perfectly fine. Whisk in the 1/4 cup of granulated sugar and the 1 teaspoon of salt. This ensures these dry ingredients are evenly distributed throughout the flour before the wet ingredients are introduced, preventing lumps and ensuring consistent flavor.
Step 2: Activate the Yeast
In a separate measuring cup or small bowl, combine your lukewarm water or milk (1 to 1 1/3 cups). Ensure the liquid is truly lukewarm – too hot will kill the yeast, and too cold won’t activate it. Stir in the 1 teaspoon of sugar and the two packets of rapid-rise yeast. Give it a gentle mix. Let this mixture sit undisturbed for 8 to 10 minutes. You’ll know the yeast is active and healthy when it becomes foamy and frothy on top, indicating it’s alive and ready to make your rolls rise beautifully.
Step 3: Combine Wet Ingredients
While your yeast is activating, add the large egg to your flour mixture (if using a stand mixer, you’d add it to the bowl). If mixing by hand, you can create a well in the center of your dry ingredients. Whisk these ingredients on low speed if using a mixer, or with a spoon/whisk if by hand, until just combined. Scrape down the sides of the bowl to ensure everything is incorporated.
Step 4: Form the Dough
Once your yeast mixture is bubbly and fragrant, carefully pour it into the flour and egg mixture. Begin mixing on low speed (or by hand with a sturdy spoon or spatula). As the dough starts to come together, slowly drizzle in the 5 tablespoons of melted butter. Continue mixing until all the ingredients are well combined and a shaggy dough begins to form. At this stage, the dough will be quite sticky, which is normal for a no-knead recipe.
Step 5: First Rise (Bulk Fermentation)
If using a stand mixer, switch to the dough hook attachment and continue mixing on medium-low speed for a few minutes until the dough forms a cohesive ball and pulls away from the sides of the bowl. Even without a mixer, the dough will become more manageable with continued stirring. Lightly flour your work surface and transfer the dough onto it. Gently turn the dough around a few times, folding it over itself, just enough to make it less sticky and form a relatively smooth ball – remember, no intensive kneading is required! Place the dough into a lightly greased large bowl, then flip it over once to ensure the top is also lightly greased. Cover the bowl with a damp tea towel or plastic wrap. Place the bowl in a cold oven (do not turn the oven on!) and let it rise for approximately 1 hour, or until it has visibly doubled in size. The cold oven acts as a draft-free environment with a consistent temperature, ideal for rising.
Step 6: Shape the Rolls and Second Rise (Proofing)
Once the dough has completed its first rise, gently “punch it down” a few times to release the trapped air bubbles. This step is crucial for an even texture in your final rolls. Transfer the dough to your lightly floured work surface. Divide the dough into equal portions and form them into smooth, round balls. For consistent size, you can use a kitchen scale. Arrange these dough balls in a baking dish lined with aluminum foil (or parchment paper), leaving a little space between each roll as they will expand. Cover the baking dish again with a damp tea towel or plastic wrap and return it to the cold oven. Allow them to rise for another 35 minutes, or until they look puffy and have nearly doubled in size again. This second rise (proofing) is essential for achieving light and airy rolls.
Step 7: Bake and Serve
Preheat your oven to 400°F (200°C) during the last 10-15 minutes of the second rise. Once the rolls are fully proofed, gently brush the tops with a little extra melted butter – this will help create a beautiful golden crust and add more flavor. Place the baking dish into the preheated oven and bake for 20 to 22 minutes, or until the rolls are deeply golden brown on top and cooked through. You can check for doneness by ensuring an internal temperature of around 200-210°F (93-99°C) with an instant-read thermometer. As soon as they come out of the oven, brush the tops with melted butter one more time for extra shine and flavor. Let them sit in the pan for about 5 minutes before serving. This allows them to cool slightly and firm up, making them easier to handle. Serve warm and enjoy!
Tips for Perfect No-Knead Dinner Rolls
- Measure Accurately: Especially flour and liquid. Too much flour can make rolls dense; too little, too sticky.
- Yeast Freshness: Always check the expiration date of your yeast. An inactive yeast means no rise.
- Lukewarm Liquid: The ideal temperature for activating yeast is between 105-115°F (40-46°C). Use a thermometer if unsure.
- Don’t Rush the Rise: Dough rising is all about patience. Cold temperatures slow it down, warm temperatures speed it up. Adjust rising times as needed.
- Grease the Bowl: Lightly greasing the bowl prevents the dough from sticking during the first rise, making it easier to handle.
- Even Sizing: Try to make your dough balls uniform in size so they bake evenly.
- Use a Damp Cloth: Covering the dough with a damp tea towel or plastic wrap prevents a dry skin from forming on the dough, which can hinder rising.
- Brush with Butter: The final butter brushings add incredible flavor, shine, and a soft crust.
Troubleshooting Common No-Knead Roll Issues
- Rolls Didn’t Rise: This is almost always due to inactive yeast (expired, or killed by too hot liquid) or too cold a rising environment. Ensure yeast is fresh and liquid is lukewarm.
- Rolls Are Dense: Could be insufficient rising time, too much flour, or the yeast wasn’t fully activated. Make sure dough is light and airy before baking.
- Tops Are Too Brown/Burned: If the tops are browning too quickly, you can loosely tent the rolls with aluminum foil for the last 5-10 minutes of baking.
- Rolls Are Sticky: This is normal for no-knead dough. A light dusting of flour on your hands and work surface helps manage it. Avoid adding too much extra flour to the dough itself, as this can make them tough.
Serving Suggestions and Variations
These versatile no-knead dinner rolls are perfect for any meal. Enjoy them:
- Classic Style: Warm with a generous slather of butter.
- With Savory Meals: As an accompaniment to hearty stews, chili, soups, or roasted meats.
- Sweet Delights: Topped with jam, honey, or a sprinkle of cinnamon sugar for breakfast or brunch.
- Sandwich Bases: Their soft texture makes them ideal for small sandwiches, particularly great for sliders or packed lunches.
- Garlic & Herb: Before baking, mix some dried garlic powder, parsley, or Italian seasoning into the melted butter for brushing.
- Cheesy: Fold in 1/2 cup of shredded cheddar or Parmesan cheese when forming the dough balls.
Storage and Reheating
Leftover dinner rolls can be stored in an airtight container at room temperature for 2-3 days. For longer storage, freeze them in a freezer-safe bag for up to 2-3 months. To reheat, you can briefly warm them in a microwave for 15-30 seconds, or for best results, wrap them in foil and reheat in a 300°F (150°C) oven for 10-15 minutes until soft and warm.
No-Knead Yeast Dinner Rolls Video Recipe
For a visual guide to perfecting these delightful rolls, check out the original recipe video by In The Kitchen With Gina Young. Seeing each step demonstrated can be incredibly helpful for new bakers, bringing the process to life and ensuring your success.
Making delicious homemade dinner rolls doesn’t have to be a daunting task. With this simple no-knead recipe, you’re just a few easy steps away from enjoying warm, fluffy, and incredibly flavorful bread right from your oven. Give it a try, and prepare to be amazed at how effortlessly you can create bakery-quality rolls that will impress everyone at your table!