
Craft Your Own Modern Oasis: A Comprehensive DIY Concrete Sink Tutorial
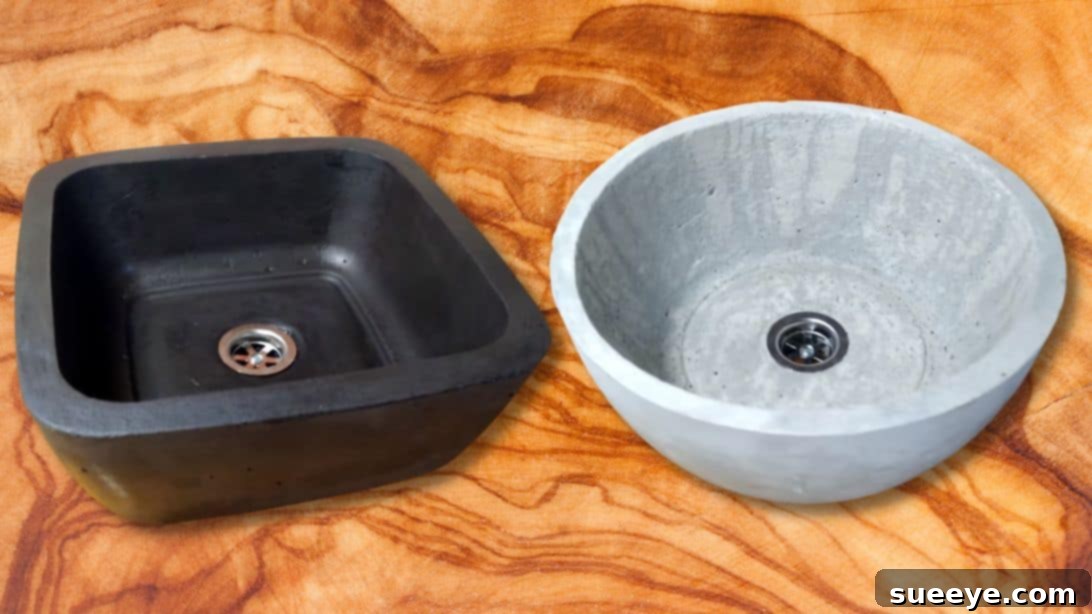
The allure of cement finishes has steadily captured the hearts of homeowners and interior design enthusiasts alike. From sophisticated walls to contemporary fixtures, integrating concrete elements is a surefire way to inject a dose of modern, industrial chic into any space. However, achieving this sought-after aesthetic, particularly with custom pieces like concrete sinks, often comes with a hefty price tag. But what if you could achieve that sleek, high-end look without breaking the bank? This comprehensive guide will walk you through creating your very own DIY concrete sink, empowering you to infuse your home with cutting-edge design while adhering to a budget-friendly approach. Drawing inspiration from the ingenious methods demonstrated by S&Vdesign, this tutorial provides detailed instructions, tips, and insights to ensure your concrete sink project is a resounding success.
Why Choose a DIY Concrete Sink for Your Home?
Opting for a handmade concrete sink offers a myriad of benefits beyond just cost savings. It’s an opportunity to create a truly unique fixture that reflects your personal style and meets the specific demands of your space. Concrete is an incredibly versatile material, allowing for a wide range of customization in terms of shape, size, color, and texture. Unlike mass-produced sinks, your DIY concrete creation will possess a distinctive character and a story, becoming a conversation piece in your bathroom, laundry room, or utility area.
Beyond aesthetics, concrete sinks are renowned for their exceptional durability. Once properly mixed, poured, and sealed, concrete becomes a robust surface that can withstand daily use for many years. Its inherent strength makes it resistant to scratches, chips, and general wear and tear, far surpassing many conventional sink materials. Furthermore, working with concrete allows for the incorporation of special additives that enhance its properties, such as increased strength and reduced porosity, ensuring a long-lasting and resilient fixture. This project not only delivers a stylish upgrade but also a durable and functional addition to your home.
Essential Materials for Your Concrete Sink Project
Before embarking on this exciting DIY journey, gathering the right materials is crucial. Each component plays a vital role in the success, durability, and aesthetics of your concrete sink. Here’s a detailed list of what you’ll need, along with insights into their importance:
- Two Identical Water Containers with a Smooth Surface: These will serve as your primary molds for the inner and outer shapes of the sink. Ensure they are sturdy and have a smooth interior to facilitate easy demolding and a clean finish.
- Utility Knife: Essential for precise cutting and trimming of the plastic containers. A sharp blade ensures clean lines and prevents accidental damage.
- Metal Strip or Similar Rigid Object (for Formwork): This piece will create the crucial space for the sink basin and ensure the inner mold is securely positioned. Its rigidity is key to maintaining the sink’s structural integrity during the curing process.
- Hot Glue Gun and Sticks: Used to firmly secure the metal strip to the outer mold, creating a watertight seal and holding the formwork in place.
- Plasticizer: A chemical admixture that improves the workability of the concrete mix without adding excessive water. This results in a stronger, denser concrete with fewer air bubbles, leading to a smoother finish.
- Microfiber (for Reinforcement): Tiny synthetic fibers added to the concrete mix to enhance its tensile strength and minimize the risk of cracking, especially important for thin-walled sections of the sink.
- Solution Dyes (Black and White Recommended): Allows for custom coloring of your concrete. Black and white can be mixed to achieve various shades of gray, mimicking natural stone or creating a contemporary aesthetic.
- Portland Cement: The binder that reacts with water to form the hard matrix of the concrete. Quality cement is fundamental for a strong, durable sink.
- Fine Sand: The aggregate component that provides bulk and workability to the concrete mix. Using fine sand helps achieve a smoother surface finish.
- Water: Reacts with cement to initiate the hydration process, forming the concrete. Precise water-to-cement ratio is critical for strength and workability.
- Two Screws: For temporarily securing the inner formwork to the outer mold during the pouring process, preventing movement.
- Angle Grinder with Cutting and Grinding Discs: Indispensable for cutting the plastic containers, smoothing rough edges of the cured concrete, and preparing the surface for sealing.
- Sink Drain Assembly: The functional component that allows water to exit the sink. Ensure it’s suitable for your desired plumbing connections.
- Cement Varnish or Concrete Sealer: A protective coating applied to the finished concrete to make it water-resistant, stain-resistant, and easier to clean. It also enhances the color and durability of the surface.
- Paintbrush: For applying the cement varnish or sealer evenly to the concrete surface.
Step-by-Step Guide: Crafting Your Own Concrete Sink
Creating a beautiful and functional concrete sink is a rewarding process that combines careful preparation with hands-on craftsmanship. Follow these detailed steps to bring your vision to life:
Step 1: Preparing Your Outer Mold
Begin by preparing the larger of your two identical water containers, which will serve as the outer mold for your concrete sink. If your container features a curved or uneven top section, it’s essential to carefully trim it to create a flat, consistent rim. Use an angle grinder with a cutting disc for precision, taking care to cut along the sides while leaving two small, symmetrical handles on opposite sides of the container. These handles will be instrumental in the next step, providing anchor points for your inner formwork. Safety is paramount during this step; always wear appropriate eye protection and gloves when operating power tools.
Step 2: Creating the Inner Formwork
Now, focus on preparing the inner formwork, which defines the basin of your concrete sink. Take the outer mold prepared in Step 1. Using either a utility knife or the angle grinder, carefully cut a small, shallow line at the bottom of each of the two handles you left. These lines will serve as slots for inserting your metal strip. Once the slots are made, thread the metal strip through them, ensuring that both ends extend outwards evenly. The extended ends will act as hooks later on, securely holding the inner mold in place. Use hot glue to generously secure the metal strip to the outside of the container where it passes through the slots, creating a rigid and watertight connection. This inner formwork needs to be perfectly stable and smooth, as any imperfections will transfer directly to the finished concrete surface.
Step 3: Mixing and Pouring the Concrete
This step is critical for the strength and appearance of your DIY concrete sink. In a separate, clean container, meticulously combine your plasticizer, microfiber, desired solution dye (for color), cement, and sand. Start by dry-mixing these components thoroughly to ensure an even distribution of all additives and pigments. Gradually add water while continuously mixing, aiming for a consistency similar to thick pancake batter or oatmeal – neither too wet nor too dry. A proper mix is pliable enough to flow into the mold but not so watery that it compromises strength. The plasticizer will significantly improve its workability, allowing for a dense mix with less water.
Next, take the second, unmodified container that will act as your outer mold. Using a marker, carefully delineate the intended bottom depth of the sink and mark the exact center points where the handles of your inner formwork (from Step 2) will align. Pour a initial layer of your prepared concrete solution into this outer container, filling it up to the marked bottom depth of the sink. Carefully place the inner formwork on top of this initial concrete layer, aligning its handles with the marks you made. Secure the inner formwork firmly in place using two screws, ensuring it remains centered and does not shift. To prevent the inner formwork from floating or moving during the subsequent pour, place several heavy aggregates or objects inside its basin. Now, carefully pour the remaining mortar mixture around the inner formwork, filling the entire mold. Once filled, gently vibrate the mold – by tapping its sides or using an orbital sander without paper – to release any trapped air bubbles. Air bubbles can lead to weak spots and an imperfect surface finish. Allow the concrete to cure undisturbed for a minimum of three days. The curing process is vital; ensure the mold is kept in a consistently humid environment, perhaps covered with plastic sheeting, to prevent rapid drying and potential cracking.
Step 4: Demolding, Finishing, and Sealing
After a minimum of three days of diligent curing, it’s time for the exciting moment of demolding. Carefully dismantle the outer and inner formwork from your newly formed concrete sink. If you encounter difficulty, hot water can often help the plastic molds expand slightly, making removal easier. Once demolded, inspect your concrete sink for any rough edges or imperfections. Use an angle grinder with a grinding disc to carefully smooth the top edges and any other areas that require refinement, aiming for a perfectly even and smooth surface. Precision here ensures a professional finish.
Next, mark the exact center of the sink basin where the drain will be installed. Using a suitable drill bit for concrete, carefully create the drain hole. Start with a smaller pilot hole and gradually enlarge it to the correct diameter for your sink drain assembly. Once the hole is drilled, thoroughly clean the entire concrete sink surface, removing all dust and debris. This step is crucial for proper adhesion of the sealant. Finally, apply a high-quality cement varnish or concrete sealer using a brush. Apply at least two to three thin, even coats, allowing each coat to dry completely according to the manufacturer’s instructions before applying the next. This sealing process will protect your concrete sink from water damage, stains, and general wear, making it hygienic and easy to maintain. Allow the final coat of varnish to cure fully before installing the drain and integrating your new, custom concrete sink into your home.
Tips for a Flawless Finish
Achieving a professional-grade concrete sink requires attention to detail at every stage. Here are some invaluable tips to help you succeed:
- Accurate Measurements: Always measure your ingredients precisely, especially the water-to-cement ratio. Inconsistent ratios can lead to weaker concrete or an overly difficult mix to work with.
- Thorough Mixing: Spend ample time mixing your concrete. Undermixed concrete will have weak spots and inconsistent color.
- Vibrate for Perfection: Don’t skip the vibration step. Even subtle tapping can release countless tiny air bubbles that would otherwise create pockmarks on your finished surface.
- Patient Curing: Resist the temptation to demold too early. The full three days (or more, depending on environmental conditions) are essential for the concrete to gain sufficient strength and hardness.
- Smooth Formwork: Any texture or imperfection on your mold surfaces will transfer to the concrete. Ensure your containers are clean, smooth, and free of defects. You can even apply a mold release agent for easier demolding.
- Practice Makes Perfect: If this is your first time working with concrete, consider doing a small test piece to get a feel for the mix consistency and curing process before tackling the main sink.
Maintaining Your New Concrete Sink
Once your beautiful DIY concrete sink is installed and sealed, proper maintenance will ensure its longevity and pristine appearance. Clean your concrete sink regularly with mild soap and water. Avoid abrasive cleaners, harsh chemicals, or scouring pads, as these can strip the sealer and damage the surface. Promptly wipe up spills, especially those from acidic substances like citrus juices, vinegar, or harsh chemicals, which can etch the concrete. Depending on the usage and the type of sealer applied, your concrete sink may require re-sealing every 1-3 years to maintain its protective barrier. This simple step will keep your custom creation looking as stunning as the day you made it.
The Rewards of a Handmade Concrete Sink
Creating your own DIY concrete sink is more than just a home improvement project; it’s an opportunity for creative expression and a testament to your craftsmanship. You’ve transformed simple materials into a functional work of art, designed to elevate your living space. By following this detailed tutorial, you not only achieve a high-end aesthetic at a fraction of the cost but also gain the satisfaction of knowing you built it with your own hands. Embrace the modern charm and lasting durability of your new custom concrete sink, a true centerpiece born from your dedication and ingenuity.