
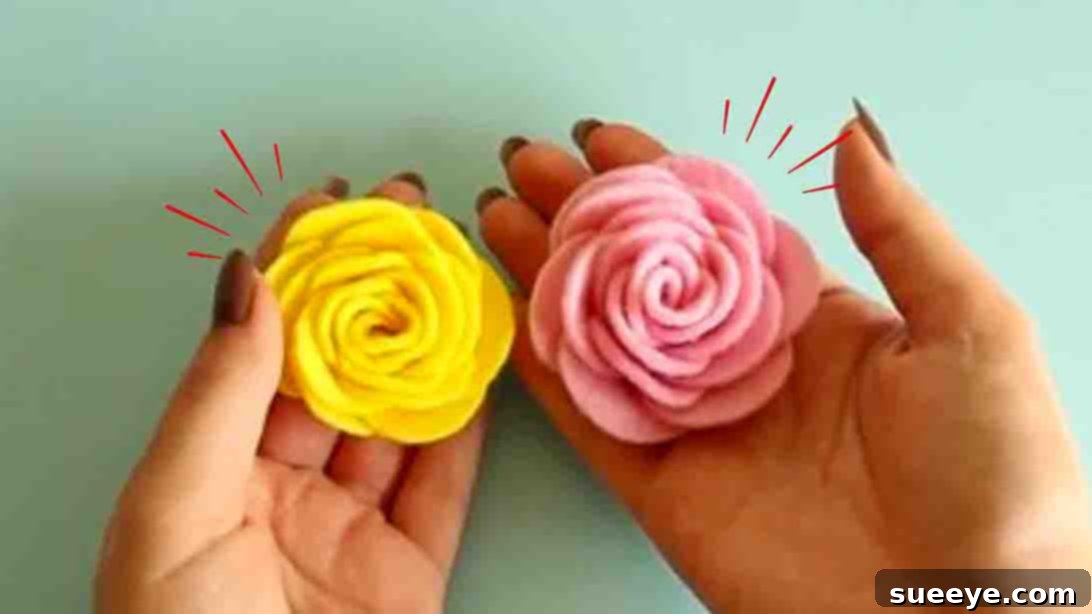
Mastering the Art of DIY Felt Roses: A Comprehensive Step-by-Step Tutorial
Felt roses are more than just simple embellishments; they are timeless pieces of textile art that bring a touch of elegance and whimsy to any creation. Their classic aesthetic and enduring charm make them incredibly versatile, perfect for adorning a vast array of projects. Imagine transforming ordinary items into extraordinary masterpieces: from charming handmade cards and intricate scrapbook layouts to stylish hair accessories, bespoke clothing accents, and captivating home decor items like wreaths or garlands. Despite their seemingly intricate appearance, these beautiful felt flowers are surprisingly easy to craft, making them an ideal project for crafters of all skill levels. If you’re ready to dive into the world of felt flower making, this comprehensive tutorial, inspired by the fantastic guide from Miss Tricks Mix Crafts and DIY on YouTube, will walk you through every step.
Whether you’re looking to add a personalized touch to a gift, create unique accessories, or simply explore a relaxing new crafting hobby, learning to make felt roses is a rewarding endeavor. This guide aims to demystify the process, demonstrating the step-by-step journey of creating these stunning felt roses from scratch. You’ll learn everything from selecting the perfect felt colors to mastering the delicate art of shaping and assembling each petal, ensuring your finished roses are lifelike and truly impressive. Let’s gather our materials and begin crafting these evergreen beauties!
RELATED: Easy DIY Pipe Cleaner Rose Tutorial (for more floral inspiration!)
Why Choose Felt for Crafting Roses?
Felt stands out as an exceptional material for crafting artificial flowers, especially roses, due to its unique properties. Unlike many other fabrics, felt does not fray when cut, which simplifies the crafting process significantly and results in clean, crisp edges for your petals. This characteristic is particularly beneficial for intricate shapes and allows for greater precision. Felt is also wonderfully pliable and holds its shape well once molded, making it ideal for creating three-dimensional forms like rose petals that maintain their delicate curves. Available in a dazzling array of colors, felt allows for endless creative possibilities, from classic reds and pinks to vibrant purples, subtle creams, or even multi-toned blossoms. Its soft texture adds a luxurious feel to your finished projects, making felt roses not only visually appealing but also tactilely pleasant. Furthermore, felt is durable and resistant to minor wear and tear, ensuring your handmade roses remain beautiful for years to come.
Materials You’ll Need:
Before embarking on your felt rose crafting journey, ensure you have all the necessary supplies readily available. High-quality materials will contribute significantly to the beauty and longevity of your finished roses.
- Felt Fabrics in Different Colors: Choose high-quality craft felt or wool-blend felt for the best results. The variety of colors will allow you to create realistic or imaginative roses. Consider different shades of pink, red, yellow, or even white for a classic look, and green for optional leaves or a calyx.
- Sharp Scissors: A good pair of fabric scissors is crucial for making clean, precise cuts. Dull scissors can lead to jagged edges, which will affect the overall appearance of your petals.
- Needle and Thread: Opt for a sturdy sewing needle and thread that either matches your felt color for a seamless look or contrasts for a deliberate design element. A strong thread is essential for gathering the felt pieces securely.
- Hot Glue Gun and Glue Sticks: A hot glue gun is your best friend for quick and strong assembly. Make sure you have enough glue sticks on hand, as you’ll use it to secure your petals into the rose shape.
- (Optional) Fabric Marker or Chalk: Useful for marking your felt before cutting, especially if you prefer to draw your circles before cutting them freehand.
- (Optional) Rose Template or Circle Punch: While not strictly necessary, using a template or a circle punch of a consistent size can help ensure uniformity in your petals, especially if you’re making many roses.
Step-by-Step Directions to Craft Your Felt Roses:
Step 1: Preparing and Shaping Your Petals
The foundation of a beautiful felt rose lies in its petals. For a medium-sized rose, begin by cutting nine circular pieces from your chosen felt fabric. Pink is a classic choice, but feel free to experiment with any color you desire. Aim for circles approximately 2-2.5 inches in diameter for a noticeable, yet not overly large, rose. Once you have all nine felt circles, take one and carefully fold it exactly in half. Now, with the folded edge facing you, cut directly into the middle of the folded circle, essentially creating a semi-circular cut, but do not cut through the fold entirely – leave about 1/8 to 1/4 inch intact at the fold. This creates two distinct ‘petal halves’ joined at the center. Repeat this precise folding and cutting technique with all nine of your felt circles. This unique cut is what allows the petals to curl naturally and form the beautiful rose shape.
Next, it’s time to sew these petal pieces together. Take your needle and thread. Pick up one of your cut felt pieces and, along its straight, cut edge, begin a running stitch. A running stitch is a simple up-and-down stitch that gathers fabric. Position the next felt piece so that it slightly overlaps the first one along its straight edge, and continue your running stitch, sewing through both layers where they overlap. The key here is consistent, slight overlapping – about 1/4 to 1/2 inch is usually ideal – to create a continuous strip of gathered felt. Continue this process until all nine pieces are sewn together in a long, slightly overlapping row. Once you reach the end of the last piece, gently pull the thread to start gathering the entire strip. As you pull, the felt will naturally begin to round and curl, forming the base of your rose. Adjust the gathering until you are satisfied with the tightness and roundness of the piece, then securely tie off the thread with a knot and trim any excess.
Step 2: Assembling Your Rose Core with Hot Glue
With your gathered felt strip ready, it’s time to transform it into a beautiful rose. Begin by applying a small dab of hot glue to one end of your gathered felt piece. This will be the very center, or bud, of your rose. Carefully start rolling the felt strip inwards from this glued end. The initial rolls should be tight to create a compact, realistic bud. As you continue to roll, periodically apply small dots or thin lines of hot glue along the straight edge of the felt, securing each rotation as you go. It’s crucial to give the hot glue a few seconds to dry and set before continuing to roll. This prevents the felt from unraveling and ensures a firm, stable rose structure. As you move towards the outer layers of the rose, you can gradually loosen your rolling technique slightly to create fuller, more open petals, mimicking the natural bloom of a rose. Continue applying glue and rolling until the entire strip is wound into a beautiful, circular rose shape. Once you reach the end, secure the final edge with a generous dab of hot glue, pressing it firmly against the base of the rose until it sets completely.
Congratulations, you’ve just made your first felt rose! The beauty of this craft is its repeatability and adaptability. Now, armed with this technique, you can repeat these steps with other colors of felt to create a vibrant bouquet or a collection of matching roses. Experiment with different felt shades – perhaps a lighter pink for the core and a darker shade for the outer petals to create depth, or even entirely different color combinations for a whimsical effect. You can also vary the size of your initial felt circles to create roses of different diameters, perfect for diverse applications.
Tips for Crafting Perfect Felt Roses Every Time
While the basic steps are simple, a few expert tips can elevate your felt roses from good to truly magnificent:
- Quality of Felt Matters: Invest in good quality felt. Wool blend felt offers a softer feel, richer colors, and better shape retention compared to acrylic craft felt, though acrylic felt is more budget-friendly and still works well.
- Consistent Cutting: Strive for consistency when cutting your circles and the central fold. Uniform pieces will lead to a more symmetrical and professional-looking rose. Consider using a stencil or a template.
- Even Gathering: When doing the running stitch, try to keep your stitches even and your overlaps consistent. This ensures that the gathering tension is uniform, leading to a smoother rose shape when pulled.
- Less is More with Hot Glue: Use small amounts of hot glue. Too much glue can seep through the felt, harden, and make your rose stiff and visibly messy. Apply it sparingly and strategically.
- Patience While Rolling: Don’t rush the rolling process. Allow each section of glue to set for a few seconds before continuing to roll. This ensures the rose maintains its shape and doesn’t unravel.
- Experiment with Petal Counts: While nine pieces create a beautiful rose, don’t be afraid to experiment. Use fewer pieces for smaller, tighter buds or more for larger, fuller, more open blooms.
- Add Greenery: For a more realistic look, cut out a few leaf shapes and a calyx (the green part beneath the rose petals) from green felt and hot glue them to the base of your finished rose.
- Vary Your Colors: Don’t limit yourself to single-color roses. Try making a rose with two or three different shades of felt, starting with the darkest in the center and moving to lighter shades outwards for a gradient effect.
Creative Ways to Use Your Handmade Felt Roses
Once you’ve mastered the art of making felt roses, a world of creative possibilities opens up. These versatile embellishments can transform everyday items into unique treasures:
- Fashion Accessories: Attach a felt rose to a plain hair clip, headband, or brooch pin to create stunning, personalized accessories. Adorn hats, scarves, or even a simple jacket lapel for an elegant touch.
- Home Decor: Arrange a collection of felt roses in a small vase for an everlasting floral display that requires no watering. Use them to embellish decorative pillows, curtains, or tie-backs. Create beautiful wreaths for seasonal decor or intricate garlands for special occasions.
- Gift Embellishments: Elevate your gift wrapping by hot-gluing a handmade felt rose to the top of a present. They make a thoughtful alternative to traditional bows and can even be kept as a keepsake.
- Scrapbooking & Card Making: Add a three-dimensional element to your scrapbook layouts, memory albums, or handmade greeting cards. Their soft texture adds depth and interest to paper crafts.
- Applique & Clothing Embellishment: Securely stitch or glue felt roses onto bags, clothing, or fabric projects for a unique applique design. Ensure they are sewn on securely if the item will be washed.
- Event Decorations: Craft charming corsages or boutonnieres for weddings, proms, or other special events. Use them as part of centerpieces or party favors for a rustic or whimsical theme.
- Nursery Decor: Create sweet garlands, mobile elements, or wall decor for a baby’s nursery, adding a soft, enchanting touch.
DIY Felt Rose Tutorial
Crafting felt roses is a delightful and rewarding experience that combines simplicity with stunning results. With just a few basic materials and these step-by-step instructions, you can create an endless array of beautiful, durable felt flowers perfect for any project or occasion. Whether you’re a seasoned crafter or just starting your DIY journey, the satisfaction of creating something so elegant with your own hands is truly unparalleled. Don’t hesitate to experiment with different colors, sizes, and techniques to develop your unique style. We encourage you to try this tutorial from Miss Tricks Mix Crafts and DIY and unleash your creativity. Share your beautiful felt rose creations with us – happy crafting!