
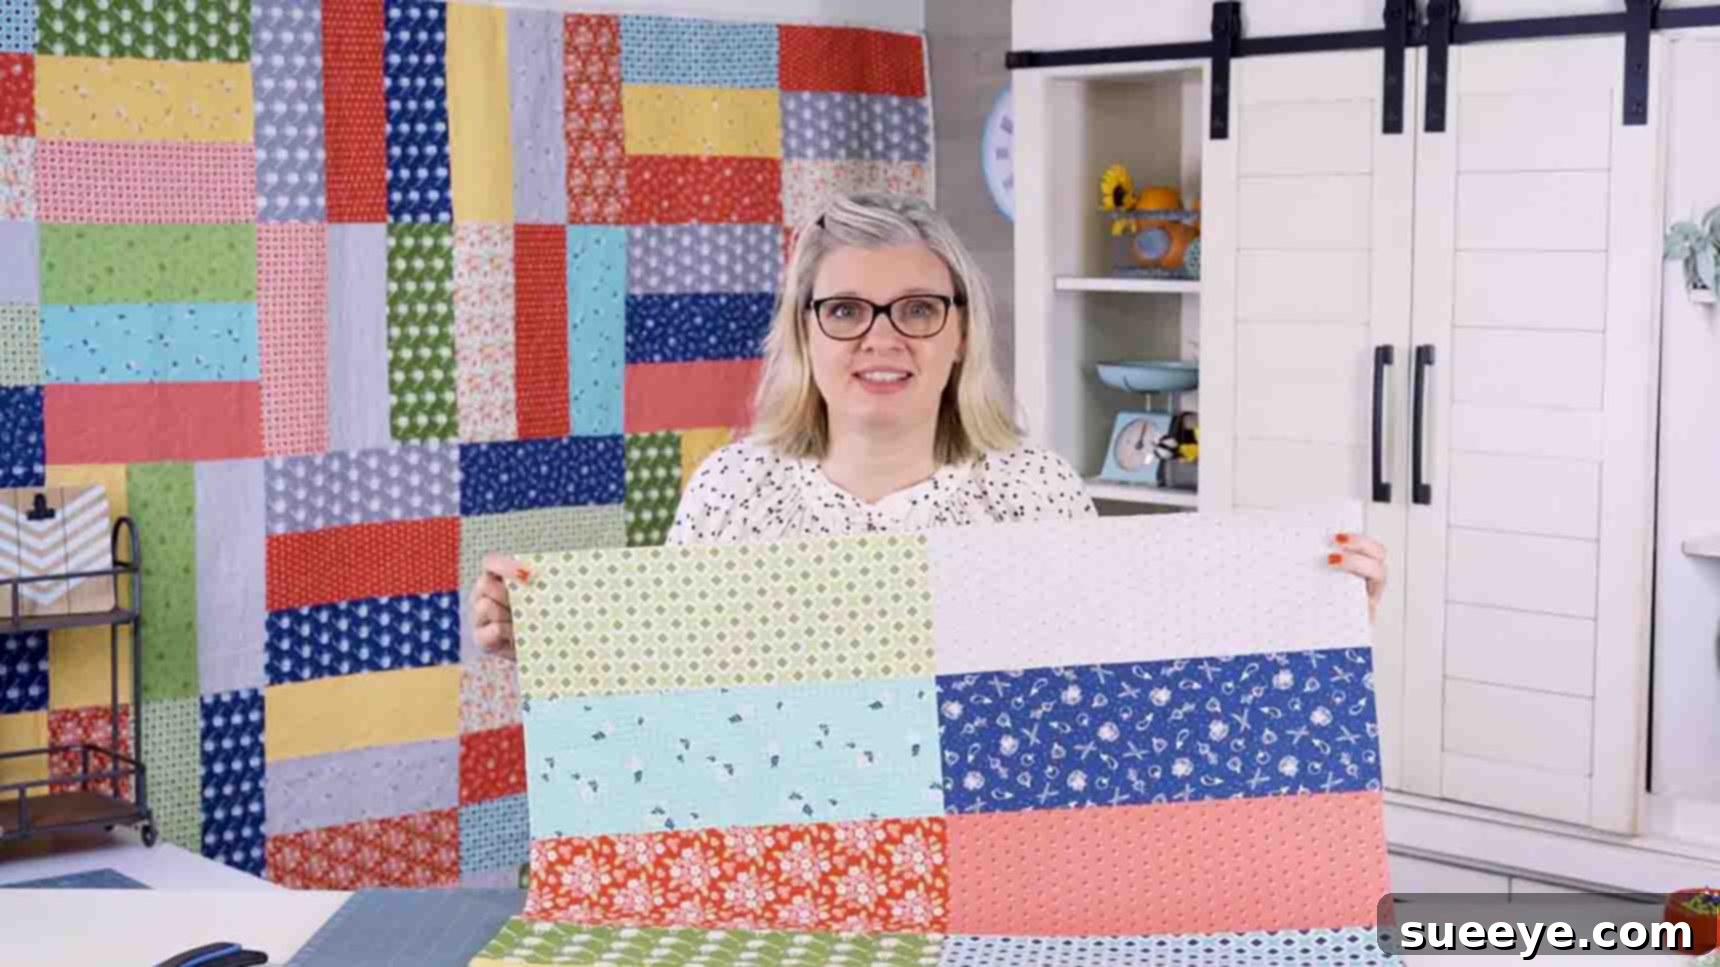
Master the Half-Yard Jam Quilt: An Easy & Beginner-Friendly Tutorial
Are you searching for a delightful and accessible quilting project that’s perfect for passing the time, whether you’re a seasoned quilter or just starting your journey? Look no further! This comprehensive guide will walk you through creating the popular Half-Yard Jam Quilt, a fantastic design championed by the experts at Fat Quarter Shop on YouTube. Renowned for its straightforward approach and charming results, this quilt pattern is truly beginner-friendly, requiring only a few half-yard fabric cuts, backing material, and binding. Dive into the world of quilting with confidence and watch your beautiful Half-Yard Jam Quilt come to life!
This tutorial expands on the original video instructions, providing extra tips, detailed explanations, and a clear, step-by-step process to ensure your success. You’ll not only learn how to assemble this gorgeous quilt but also gain valuable insights into quilting techniques that will serve you in future projects. Get ready to transform simple fabric into a stunning heirloom!
Essential Materials for Your Half-Yard Jam Quilt
Before you begin sewing, gathering all your materials is crucial for a smooth and enjoyable quilting experience. The Half-Yard Jam Quilt lives up to its name by primarily utilizing half-yard fabric cuts, making fabric selection both fun and manageable. Here’s a detailed list of what you’ll need:
- Eighteen (18) 1/2-yard fabric cuts: These will form the colorful and dynamic quilt top. Choosing a variety of coordinating prints and solids can create a truly spectacular effect. Consider fabrics from the same collection for a cohesive look, or mix and match for a scrappier, more eclectic feel.
- 7/8 yard binding fabric: The binding provides a neat, durable finish to the edges of your quilt. Select a fabric that complements your quilt top, either by matching a dominant color or by providing a subtle contrast.
- 8 & 3/8 yards backing fabric: The backing is the foundation of your quilt. While it’s largely unseen, it contributes to the quilt’s overall feel and durability. A wide-back fabric can minimize seams, or you can piece together standard width fabrics for a creative back design.
- For a printable guide, make sure to grab the free PDF quilt pattern from Fat Quarter Shop. This pattern provides essential diagrams and detailed cutting instructions that perfectly complement this tutorial.
Recommended Tools (Not Included Above, but Highly Recommended):
- Rotary cutter, self-healing mat, and quilting ruler for precise cutting.
- Sharp fabric scissors.
- Sewing machine with a 1/4-inch piecing foot (optional, but very helpful).
- Good quality cotton thread that blends with your fabrics.
- Iron and ironing board for pressing seams.
- Pins or wonder clips for holding fabric together.
- Seam ripper (every quilter’s essential friend!).
Precise Cutting Instructions for Your Quilt Project
Accuracy in cutting is paramount in quilting, as it directly impacts how well your blocks and rows will align. Take your time with this step, ensuring each piece is cut to the exact specified dimensions. Remember the golden rule: measure twice, cut once!
Cut each 1/2-yard fabric into:
- 3 – 5 & 1/2″ x 32″ strips (54 total, designated as Fabric A): These longer strips will be the building blocks of your “jam units.” For efficient cutting, fold your half-yard fabric carefully and use your rotary cutter and ruler. If your fabric is directional, pay attention to how you fold and cut to ensure your prints face the desired way in the final quilt.
Cut binding fabric into:
- 10 – 2 & 1/2″ x WOF strips (Fabric B): “WOF” stands for “Width of Fabric,” which is typically 42-44 inches wide. These strips will be joined end-to-end to create one long strip for your quilt binding. The 2 1/2-inch width is standard for a double-fold binding, providing a sturdy and attractive finish.
Step-by-Step Directions to Assemble Your Half-Yard Jam Quilt
Now that your fabrics are perfectly cut, it’s time to bring them together! Follow these detailed steps to construct your beautiful Half-Yard Jam Quilt top. Pay close attention to seam allowances and pressing instructions for the best results.
Step 1: Constructing the Fabric Strip Units
Begin by selecting six of your Fabric A strips. These strips will form a single foundational unit, which you will then replicate. The beauty of the Half-Yard Jam Quilt lies in the arrangement of these strips, creating a stunning visual effect. Sew these six strips together along their long edges using a precise 1/4″ seam allowance. Maintaining a consistent seam allowance is critical for your blocks to come out the correct size and for all your pieces to fit together smoothly.
Once sewn, press your seams. The pattern likely specifies whether to press seams open or to one side. Generally, pressing to one side is common for strip piecing, often alternating directions between adjacent seams to help them nest later. Use an iron to ensure your seams are flat and neat, which will significantly improve the accuracy of your subsequent cuts and stitches. For visual interest, make sure to use different prints or colors within each six-strip unit. You will need to create a total of nine of these elongated, pieced units.
From each of these long, pieced strips, you’ll now perform a technique that makes this quilt a true “shortcut.” First, carefully trim off one side of the long strip to create a perfectly straight edge, ensuring accuracy for your sub-cuts. Then, from this newly straightened edge, sub-cut two 15 & 1/2″ wide strips. This will yield two segments from each of your nine long units. After cutting the first 15 & 1/2″ strip, flip the remaining length of the unit and cut the second 15 & 1/2″ strip. This efficient cutting method helps minimize waste and speeds up the process. You will make a total of 18 of these individual “jam units,” which are the main blocks of your quilt.
Step 2: Assembling the Quilt Blocks and Quilt Top
With all your individual jam units prepared, it’s time to bring them together to form the quilt blocks and ultimately, the complete quilt top. This step involves carefully joining two jam units at a time to create larger, cohesive blocks.
Pick two different jam units. To ensure the patterns align beautifully and the seams nest perfectly, place them right sides together. It is absolutely crucial to make sure that the seams from each unit are going in opposite directions at every intersection. This technique, known as “nesting seams,” helps reduce bulk and allows your seams to interlock, resulting in perfectly matched points and flatter blocks. Pin generously at every intersection where seams meet, ensuring that these critical points stay aligned as you sew. Don’t rush this pinning stage; it’s vital for a professional-looking finish.
Once pinned, take your units to the sewing machine. Using an accurate 1/4″ seam allowance, sew the two jam units together. Consistency is key here; a precise 1/4″ seam ensures that your finished blocks will be the correct size. After sewing, press the new seam open or to one side, as per the pattern’s recommendation, to further flatten the block. You will repeat this process to create nine of these larger blocks.
With your nine blocks complete, the final step for the quilt top is assembly. Lay all nine blocks out on a large flat surface (your floor or a design wall works perfectly) to arrange them in your desired configuration. This allows you to visualize the overall design and make any aesthetic adjustments before sewing. Once you’re satisfied with the layout, sew all your rows together. Typically, you’ll sew three blocks together to form a row, then sew the three rows together to complete the quilt top. Remember to use a 1/4″ seam allowance for these joins and press your seams carefully, perhaps alternating pressing directions between rows to reduce bulk where the rows meet.
Why the Half-Yard Jam Quilt is Perfect for You
This particular quilt pattern has gained immense popularity, and for good reason! It offers several advantages that make it an excellent choice for quilters of all skill levels:
- Beginner-Friendly: The repetitive nature of creating the strip units and blocks is excellent for practicing consistent seam allowances and perfecting your pressing techniques. There are no complex shapes or intricate piecing methods involved.
- Quick to Assemble: As a “shortcut” quilt, the design is engineered for efficiency. The larger fabric units and sub-cutting methods significantly reduce the time spent cutting and piecing individual small components, allowing you to see a finished quilt top much faster than with more traditional patterns.
- High Visual Impact: Despite its simplicity, the Half-Yard Jam Quilt produces a striking, dynamic pattern. The interplay of colors and prints within the strip sets creates a beautiful visual flow that looks far more complex than it truly is.
- Economical with Fabric: Utilizing half-yard cuts makes fabric selection easy and often more affordable. It’s a fantastic way to use up those beautiful half-yard remnants you might have in your stash or to justify buying new ones!
- Versatile Design: The Half-Yard Jam Quilt is incredibly adaptable. You can make it as vibrant or as subdued as you like, depending on your fabric choices. It’s perfect for baby quilts, lap quilts, or even a stunning bed-sized masterpiece by simply scaling up the number of blocks.
Beyond the Quilt Top: Finishing Your Project
While this tutorial primarily focuses on creating the quilt top, a finished quilt also involves three crucial steps: basting, quilting, and binding. Once your quilt top is complete, you’ll layer it with batting (the soft inner layer) and your backing fabric. This “quilt sandwich” is then basted together, typically with pins or spray adhesive, to hold the layers securely.
Next comes the actual quilting, which can be done by hand or machine. This involves stitching through all three layers to secure them and add texture to your quilt. For beginners, simple straight-line quilting or a meandering free-motion design can be very effective. Finally, the binding strips you cut earlier will be joined, pressed, and sewn around the perimeter of the quilt to create a clean, durable edge. This step provides the finishing touch and truly completes your Half-Yard Jam Quilt, transforming it into a functional and beautiful piece of textile art.
Conclusion: Your Journey to a Beautiful Half-Yard Jam Quilt
Congratulations! You now have all the knowledge and detailed steps required to create your very own Half-Yard Jam Quilt. This project is a testament to how simple techniques, when applied thoughtfully, can yield incredibly rewarding results. It’s an ideal way to build your quilting confidence, practice essential skills, and create something truly unique.
The joy of quilting comes not just from the finished product, but from the mindful process of cutting, stitching, and watching your vision unfold. So, gather your beautiful half-yard fabrics, set up your sewing machine, and embark on this wonderful creative adventure. Don’t forget to visit the Fat Quarter Shop website for more inspiration and supplies, and share your finished Half-Yard Jam Quilt with the quilting community – we’d love to see your creations!