
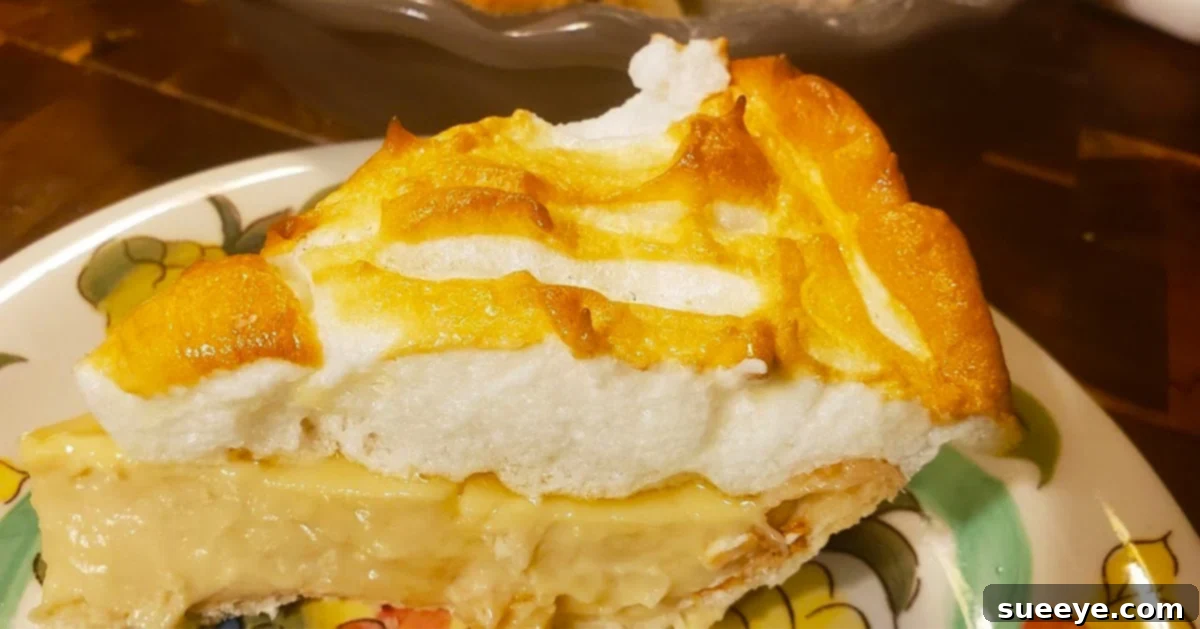
Master the Art of Old-Fashioned Butterscotch Pie: A Creamy, Dreamy Dessert Tradition
Step back in time and savor the rich, nostalgic flavors of a classic butterscotch pie. This beloved dessert, with its velvety smooth filling and often topped with a cloud of sweet meringue, is a testament to simple ingredients coming together to create something truly extraordinary. If you’ve never experienced the magic of butterscotch in pie form, you’re in for a delightful treat. It’s a dish that evokes comfort, tradition, and the warmth of home-baked goodness, making it a perfect centerpiece for any gathering, from cozy family dinners to festive holiday celebrations.
Butterscotch pie is more than just a dessert; it’s an experience. Its unique flavor profile, a delightful blend of caramelized brown sugar, rich butter, and fresh cream, creates a filling that is both intensely sweet and wonderfully balanced. Unlike the more common pumpkin or apple pies often seen during the fall and winter holidays, butterscotch pie offers a refreshing change, a “wild card” that can surprise and enchant your guests. Its creamy, custard-like texture, combined with the airy sweetness of a homemade meringue, elevates it to a level of sophistication that belies its simple preparation.
The beauty of this pie lies in its straightforward nature. With just a few pantry staples and a little attention on the stovetop, you can transform humble ingredients into a decadent butterscotch filling. For those who appreciate the genuine flavors of yesteryear, keeping old recipes alive is a joy, and this butterscotch pie perfectly encapsulates that sentiment. It’s an easy recipe to follow, making it accessible even for novice bakers, yet yielding results that taste like they came straight from a grandma’s kitchen.
The Irresistible Allure of Butterscotch: A Flavor Journey
Before we dive into the recipe, let’s appreciate what makes butterscotch so captivating. At its heart, butterscotch is a confection made primarily from brown sugar and butter, often with cream or milk, cooked together until it reaches a specific temperature and consistency. This process creates a deep, complex flavor that is distinct from caramel, which typically uses white sugar. The molasses notes in brown sugar give butterscotch its characteristic warmth and a slightly richer, more nuanced taste. When these flavors are concentrated into a smooth, creamy pie filling, the result is nothing short of heavenly.
Our butterscotch pie recipe embraces this classic combination, delivering a filling that is both intensely flavorful and incredibly smooth. The addition of heavy cream enhances its luxurious texture, while a hint of vanilla rounds out the sweetness, creating a dessert that is truly irresistible. Whether you prefer a crisp, flaky crust or a more traditional graham cracker base, this butterscotch filling will shine, becoming the star of your dessert table.
Why This Recipe is Your New Go-To
This particular recipe draws inspiration from timeless techniques, ensuring an authentic taste and perfect consistency. It’s designed to be approachable, guiding you through each step with clarity. You’ll find that crafting a homemade butterscotch pie is not only rewarding but also surprisingly simple. Imagine the aroma filling your kitchen as the filling thickens and the meringue toasts to a perfect golden-brown – it’s an experience that truly embodies the joy of baking.
While the essence of this recipe is traditional, it’s also versatile. You can choose to top your pie with the classic meringue, which adds a stunning visual appeal and a delightful textural contrast, or opt for a simpler dollop of freshly whipped cream. Either way, the star remains the rich, creamy butterscotch filling. This makes it an ideal choice for various occasions; its elegance suits holiday feasts, while its comforting nature makes it perfect for a Sunday afternoon treat. We’ve even been inspired by experts like Whippoorwill Holler, whose online tutorials demonstrate just how achievable these “old flavors” are for today’s home cooks.
Ingredients for a Divine Butterscotch Pie
Creating a truly remarkable butterscotch pie starts with selecting the right ingredients. Each component plays a vital role in achieving that perfect balance of sweetness, creaminess, and rich flavor. Pay attention to the quality of your ingredients, as they will directly impact the final taste and texture of your pie.
For the Velvety Pie Filling:
- 1 cup firmly packed light brown sugar: The foundation of our butterscotch flavor. Brown sugar, with its molasses content, provides a richer, deeper caramel-like taste compared to white sugar. Pack it tightly for accurate measurement.
- 1/4 cup cornstarch: Our essential thickening agent. Cornstarch ensures the filling sets beautifully into a firm yet tender custard, preventing a runny pie. Whisking it well with dry ingredients initially prevents lumps.
- 1/2 tsp salt: A crucial ingredient that balances the sweetness and enhances all the other flavors, preventing the pie from tasting overly sugary.
- 2 cups whole milk: Provides the liquid base and contributes to the creamy texture. Whole milk is recommended for its higher fat content, resulting in a richer filling.
- 2/3 cup heavy cream: Elevates the richness and silkiness of the filling, adding a luxurious mouthfeel that is characteristic of premium butterscotch.
- 3 tbsp unsalted butter: Added at the end, butter melts into the warm filling, intensifying the butterscotch flavor and adding a glossy sheen. Unsalted butter allows you to control the overall saltiness.
- 2 tsp pure vanilla extract: Aromatic vanilla perfectly complements and enhances the sweet, buttery notes of the butterscotch. Add it off the heat to preserve its delicate flavor.
- One pre-baked 9-inch pie crust: A crucial base for your filling. Ensure it’s fully baked and cooled to prevent a soggy bottom.
For the Luscious Meringue Topping:
- 4 large egg whites: The star of our meringue. Ensure they are at room temperature for maximum volume when whipped.
- 1/8 tsp cream of tartar: A stabilizer for the egg whites. It helps them whip up faster, achieve greater volume, and hold their stiff peaks longer, preventing weeping.
- 4 tbsp granulated sugar: Sweetens the meringue and helps create a stable, glossy structure. Add it gradually once the egg whites are foamy.
- 1/2 tsp pure vanilla extract: Adds a delicate aroma and flavor to the meringue, complementing the pie’s filling.
Detailed Directions: Crafting Your Old-Fashioned Butterscotch Pie
Patience and precision are key to achieving a perfect butterscotch pie. Follow these steps carefully, and you’ll be rewarded with a dessert that’s both beautiful and incredibly delicious. Remember, the journey from ingredients to a finished pie is part of the joy of baking!
Part 1: Preparing the Silky Butterscotch Filling
- Combine Dry Ingredients: In a medium-sized heavy-bottomed saucepan, whisk together the brown sugar, cornstarch, and salt until thoroughly combined. This initial step is important for preventing lumps later on.
- Add Liquids Gradually: Slowly pour in the whole milk and heavy cream, whisking continuously to ensure the cornstarch dissolves completely into the liquids. This creates a smooth base for your custard.
- Cook Over Medium-High Heat: Place the saucepan over medium-high heat. Continue to whisk constantly. This continuous stirring is crucial to prevent the bottom from scorching and to ensure even cooking and thickening of the mixture.
- Bring to a Boil and Thicken: Continue whisking until the mixture comes to a full boil. Once boiling, reduce the heat to low and continue to cook, stirring vigorously, for another 1-2 minutes until the filling is visibly thick and coats the back of a spoon. It should have the consistency of a thick pudding.
- Remove from Heat and Finish: Remove the saucepan from the heat. Stir in the unsalted butter and pure vanilla extract until the butter is completely melted and incorporated. The butter will add richness and a lovely sheen to your filling.
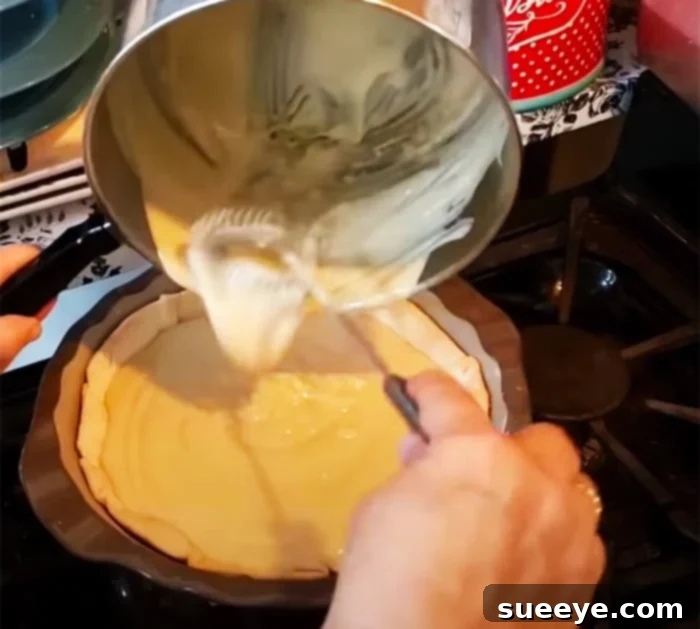
- Pour into Pie Crust: Immediately pour the hot butterscotch filling into your pre-baked and cooled 9-inch pie crust.
- Cool and Chill: To prevent a “skin” from forming on top of the filling, gently place a piece of plastic wrap directly onto the surface of the hot pie filling, ensuring it touches every part. Allow the pie to cool at room temperature for about 30 minutes, then transfer it to the refrigerator to chill for at least 3-4 hours, or preferably overnight, until it is completely set. This chilling step is essential before adding the meringue.
Part 2: Creating the Fluffy Meringue Topping
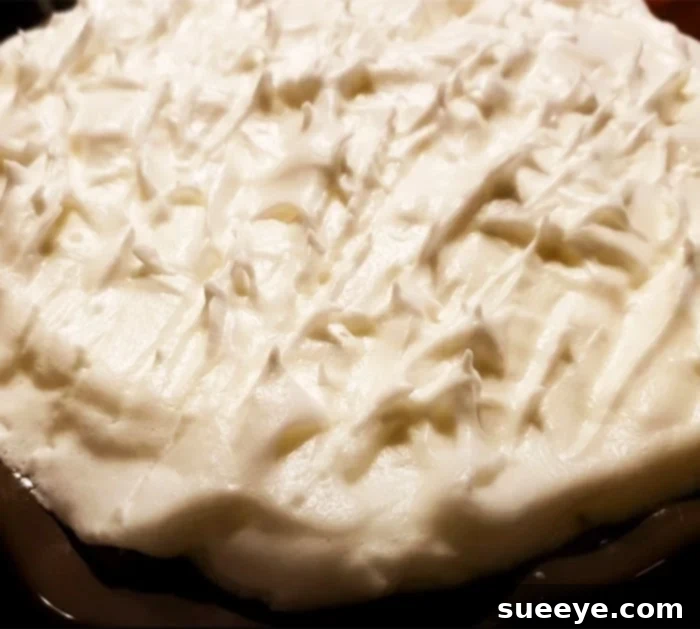
A golden, peaks-filled meringue adds both beauty and a delightful textural contrast to your butterscotch pie. If you’re new to making meringue, don’t fret – it’s easier than you think! For a fantastic visual guide and additional tips, we highly recommend watching the Whippoorwill Holler tutorial on YouTube, which offers clear and comprehensive instructions for mastering this classic topping.
- Prepare Your Equipment: Ensure your mixing bowl (preferably glass or metal) and beaters are impeccably clean and free of any grease or egg yolk, as even a tiny speck can prevent the egg whites from whipping properly.
- Whip Egg Whites: In your clean mixing bowl, begin beating the room-temperature egg whites on medium speed until they become foamy.
- Add Cream of Tartar: Add the cream of tartar to the foamy egg whites. This will help stabilize them and achieve greater volume. Increase the speed to medium-high.
- Gradually Add Sugar: Once the egg whites form soft peaks (meaning they hold their shape but the tips curl over), begin to gradually add the granulated sugar, about one tablespoon at a time, while continuing to beat on medium-high speed. Do not dump all the sugar in at once, as this can deflate the whites.
- Achieve Stiff, Glossy Peaks: Continue beating until the egg whites are stiff, glossy, and hold firm peaks. When you lift the beaters, the meringue should stand straight up without collapsing.
- Incorporate Vanilla: Gently fold in the vanilla extract, just until combined.
- Spread Meringue: Carefully spoon or pipe the meringue over the *completely chilled* butterscotch pie filling. Ensure the meringue touches the edges of the crust all around to prevent it from shrinking back during baking. You can create decorative swirls with the back of a spoon or a spatula.
- Bake the Meringue: Preheat your oven to 350°F (175°C). Place the pie in the preheated oven and bake for 10-15 minutes, or until the meringue is beautifully golden brown on top. Keep a close eye on it to prevent burning.
- Cool and Serve: Once the meringue is golden, remove the pie from the oven. Allow it to cool at room temperature for at least 30 minutes before slicing and serving. This helps the meringue set and the flavors meld.
Tips for Butterscotch Pie Perfection
Even the simplest recipes benefit from a few expert tips. Here’s how to ensure your butterscotch pie turns out perfectly every time:
- Preventing Lumps: Whisking your dry ingredients thoroughly and then gradually adding the liquids while continuously stirring is the best defense against a lumpy filling. If you still encounter lumps, you can press the warm filling through a fine-mesh sieve before pouring it into the crust.
- The Chilling Game: Don’t rush the chilling process for the filling. A fully chilled filling is crucial for a pie that sets beautifully and for ensuring the meringue doesn’t “weep” or sink when added.
- Meringue Mastery: For the best meringue, ensure your egg whites are at room temperature (they whip to a higher volume). Absolutely no egg yolk should get into the whites. Use a clean, dry bowl and beaters.
- Meringue Shrinkage: To prevent your meringue from shrinking, make sure it touches the pie crust all around the edges. This creates a seal that helps it adhere.
- Alternative Toppings: If meringue isn’t your preference, or if you’re short on time, a generous dollop of freshly whipped cream is a fantastic alternative. You can even sprinkle a little cinnamon or cocoa powder on top for an extra touch.
Serving and Storing Your Delicious Creation
Once your butterscotch pie is baked and cooled, it’s ready to be the star of your dessert spread! This pie is best served chilled, allowing the flavors to fully develop and the filling to remain perfectly set. Slice it with a sharp, warm knife for clean cuts.
To store any leftovers, cover the pie loosely with plastic wrap or aluminum foil and refrigerate. It will remain delicious for 2-3 days. While meringue-topped pies are always best enjoyed fresh, the rich filling will hold up beautifully.
Conclusion: A Timeless Dessert Awaiting Your Touch
In a world of ever-changing culinary trends, the old-fashioned butterscotch pie remains a steadfast classic, a comforting reminder of simpler times and heartwarming flavors. Its creamy texture, rich butterscotch taste, and elegant meringue topping make it an unforgettable dessert that appeals to all ages. Whether you’re seeking a unique addition to your holiday dessert table, a special treat for a fall evening, or simply a way to indulge your sweet tooth, this homemade butterscotch pie recipe is sure to become a cherished favorite.
Embrace the tradition, enjoy the process, and delight in the incredible taste of this truly timeless pie. We encourage you to try this recipe, perhaps referencing the excellent video tutorial by Whippoorwill Holler for visual guidance, and experience the satisfaction of creating a magnificent dessert from scratch. Get ready to impress your family and friends with a pie that’s not just delicious, but also a piece of culinary history beautifully preserved.