
Ultimate Guide to Crispy Fried Ravioli: An Easy Recipe for Perfect Golden Bites
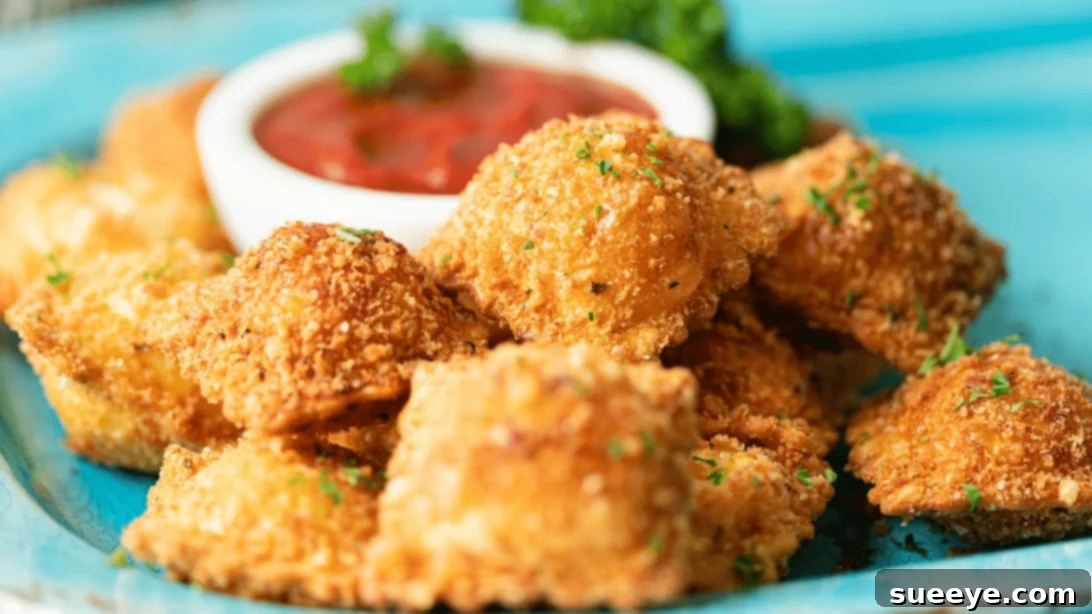
There’s something undeniably satisfying about a perfectly fried dish, and crispy fried ravioli stands out as a true crowd-pleaser. Imagine golden-brown, crunchy parcels of pasta, giving way to a warm, soft, and savory cheese filling, ready to be dipped into your favorite marinara sauce. This isn’t just a dish; it’s an experience – ideal for elevating your game nights, making party gatherings unforgettable, or simply indulging in a delicious snack while catching up on your favorite show. Forget complicated cooking; this recipe is designed for simplicity, delivering maximum flavor and crunch with minimal effort.
Frying ravioli transforms it from a traditional boiled pasta dish into an exciting appetizer or a light meal with an irresistible texture. The exterior becomes wonderfully crisp, contrasting beautifully with the tender, flavorful cheese inside. It’s a dish that always impresses and leaves guests asking for more. Plus, it’s incredibly versatile, allowing you to customize seasonings and dipping options to suit any palate.
RELATED: Easy Fried Mac & Cheese Bites Recipe
Why Fried Ravioli is a Must-Try Appetizer
If you’ve only ever enjoyed ravioli boiled and smothered in sauce, prepare for a delightful revelation. Frying ravioli brings out a whole new dimension of flavor and texture. The high heat creates a beautiful golden crust that encases the soft, cheesy filling, preventing it from drying out. This method not only adds an incredible crispiness but also imparts a richer, more complex flavor profile compared to its boiled counterpart. It’s quick to prepare, requires only a few ingredients, and the result is a gourmet-tasting appetizer that’s surprisingly easy to achieve at home.
Perfect for any occasion, from casual family dinners to elegant cocktail parties, crispy fried ravioli offers a unique twist on a beloved Italian classic. Its portability and dip-friendly nature make it an instant hit, allowing everyone to enjoy these savory bites with ease. You can adjust the seasoning to your preference, making it spicier, cheesier, or even adding a hint of herbs. The key is to serve them warm and fresh from the fryer, ensuring every bite delivers that satisfying crunch.
Essential Ingredients for Your Crispy Fried Ravioli Adventure
One of the best aspects of this recipe is its straightforward ingredient list. You don’t need a gourmet pantry to create these delicious bites. Here’s what you’ll need to gather:
- 1 pound Fresh Cheese Ravioli, uncooked: Opt for fresh ravioli over frozen if possible, as it tends to fry more evenly and maintain a better texture. Cheese ravioli is a classic choice, offering a creamy, savory filling that pairs perfectly with the crispy exterior. Ensure it’s uncooked; we’re frying it directly!
- 1 cup Panko Breadcrumbs: This is your secret weapon for ultimate crispiness. Panko breadcrumbs are lighter and flakier than traditional breadcrumbs, absorbing less oil and delivering a superior crunch.
- 1/3 cup Parmesan Cheese, grated: Freshly grated Parmesan adds a salty, nutty depth of flavor to the breading, enhancing the overall taste. It also helps achieve that beautiful golden-brown color.
- 1 tsp Italian Seasoning: A blend of classic Italian herbs like oregano, basil, thyme, and rosemary. This seasoning infuses the breading with an aromatic and authentic Italian flavor. Feel free to adjust to your taste or add a pinch of garlic powder for extra zest.
- 1 large Egg: Acts as a binder, helping the breading adhere firmly to the ravioli. It creates a sticky surface for the Panko mixture to cling to.
- 1 tbsp Water: Thins out the egg wash slightly, making it easier to coat the ravioli evenly without excess gloopiness.
- Vegetable Oil, for frying: Choose a neutral-flavored oil with a high smoke point, such as canola, sunflower, or peanut oil. You’ll need enough to submerge the ravioli completely or at least halfway.
- Marinara Sauce, for dipping: A classic pairing! The tangy, savory marinara provides a wonderful contrast to the rich, crispy fried ravioli. Feel free to use your favorite store-bought brand or homemade version.
Mastering the Art of Crispy Fried Ravioli: Step-by-Step Instructions
Follow these simple steps to create perfectly crispy fried ravioli that will delight your taste buds:
Step 1: Prepare Your Frying Station and Breading Mixture
First, set up your frying area. In a large deep skillet or a dedicated deep fryer, add enough vegetable oil to reach a depth of at least 2-3 inches. Begin heating the oil over medium-high heat until it reaches a steady temperature of 350°F (175°C). Using a kitchen thermometer is crucial here for maintaining consistent heat and achieving perfectly cooked, non-greasy results. While the oil heats, prepare your breading. In a shallow dish (a pie plate or a wide bowl works well), combine the Panko breadcrumbs, grated Parmesan cheese, and Italian seasoning. Use a fork or whisk to mix these ingredients thoroughly until they are uniformly combined. This ensures every ravioli gets an even coating of flavor. Set this mixture aside.
Step 2: Egg Wash and Breading the Ravioli
Next, prepare your egg wash. In a separate, medium-sized bowl, crack the egg and add the tablespoon of water. Whisk these two ingredients together until they are well combined and slightly frothy. Now, introduce your fresh, uncooked cheese ravioli to the egg wash. Gently toss the ravioli in the egg mixture, ensuring each piece is thoroughly coated. Once coated, transfer the ravioli, one by one or in small batches, to the breadcrumb mixture. Press each piece firmly into the breading, turning it over to ensure both sides and edges are completely covered. The goal is a thick, even layer of breadcrumbs. Place the breaded ravioli on a wire rack set over a baking sheet; this allows any excess moisture to drain and keeps the coating intact while you finish preparing the rest. Check your oil temperature again before proceeding to fry.
Step 3: Frying to Golden Perfection and Serving
Once your oil reaches the ideal temperature of 350°F (175°C), carefully lower the breaded ravioli into the hot oil in small batches. Avoid overcrowding the skillet, as this can lower the oil temperature and lead to soggy, greasy ravioli. Fry for approximately 2 minutes per batch, turning the ravioli gently with tongs or a slotted spoon halfway through to ensure they cook evenly on all sides and achieve a beautiful golden-brown color. They should look crisp and appealing. Once cooked, remove the fried ravioli from the hot oil and immediately transfer them to a fresh wire rack placed over a paper towel-lined baking sheet. This setup allows excess oil to drain off, keeping your ravioli wonderfully crispy. Allow them to cool slightly for a minute or two before serving. Serve your crispy fried ravioli immediately with a generous side of warm marinara sauce for dipping. For an extra touch of flavor and presentation, sprinkle a little fresh grated Parmesan cheese or chopped fresh parsley over them before serving. Enjoy these delightful bites while they’re still warm and at their peak crispiness!
Expert Tips for the Crispiest Fried Ravioli
Achieving restaurant-quality fried ravioli is easier than you think, especially with these insider tips:
- Maintain Oil Temperature: This is perhaps the most critical tip. Too low, and your ravioli will be greasy; too high, and they’ll burn before cooking through. Aim for a consistent 350°F (175°C) and use a reliable kitchen thermometer. Adjust heat as needed.
- Don’t Overcrowd the Fryer: Fry in small batches to prevent the oil temperature from dropping significantly. Overcrowding also makes it harder to turn the ravioli and can lead to uneven cooking.
- Drain Properly: Immediately transfer fried ravioli to a wire rack set over paper towels. This allows air circulation and ensures excess oil drips away, preserving crispiness. Don’t let them sit in a bowl of oil!
- Use Fresh Ravioli: While frozen can work, fresh ravioli typically yields a better texture and fries more consistently. If using frozen, ensure they are completely thawed and patted dry before breading.
- Press Breading Firmly: When coating the ravioli, press the breadcrumb mixture firmly onto each piece. This ensures a thick, even crust that won’t fall off during frying.
- Season Liberally: Don’t be shy with the Italian seasoning and Parmesan in your breading mix. You can also add a pinch of garlic powder, onion powder, or even a touch of smoked paprika for extra flavor.
- Serve Immediately: Fried ravioli is best enjoyed hot and fresh. While they can be reheated, the peak crispiness is right after frying.
Exciting Variations and Customizations
While cheese ravioli with marinara is a classic, don’t hesitate to get creative with your fried ravioli! The possibilities are endless:
- Different Fillings: Experiment with mushroom, spinach and ricotta, meat-filled, or even lobster ravioli for a gourmet twist. Each filling offers a unique flavor profile to complement the crispy exterior.
- Alternative Breadings: For an extra crunchy texture, mix some cornmeal into your Panko breadcrumbs. You could also try finely crushed Italian-seasoned crackers for a different flavor.
- Spicy Kick: Add a pinch of red pepper flakes to your breading mixture or directly to your marinara sauce for a pleasant heat.
- Cheese Enthusiast’s Dream: Beyond Parmesan, try incorporating finely grated Pecorino Romano or Asiago cheese into your breading for a sharper, saltier flavor.
- Herb Variations: Freshly chopped parsley, chives, or basil can be mixed into the breading for an extra aromatic touch, or simply used as a garnish.
- Dipping Sauce Diversity: While marinara is king, consider other dipping options like creamy Alfredo sauce, a spicy arrabiata, pesto, garlic aioli, or even a sweet chili sauce for an unexpected fusion.
Perfect Serving Suggestions and Pairings
Crispy fried ravioli is incredibly versatile and can fit into many dining scenarios:
- The Ultimate Appetizer: This is its most popular role. Serve a platter with several dipping sauces for guests to choose from. It’s perfect for holiday gatherings, birthdays, or just a fun night in.
- Game Day Essential: Elevate your sports viewing party with these bite-sized delights. They’re easy to eat with one hand, leaving the other free for cheering!
- Light Lunch or Dinner: Pair a generous serving of fried ravioli with a fresh, crisp green salad dressed with a light vinaigrette for a satisfying yet not-too-heavy meal.
- Kid-Friendly Snack: Kids often adore the crunchy texture and cheesy center. It’s a fun way to get them to enjoy pasta!
- Beverage Pairings: For adults, a light-bodied red wine like Pinot Noir, a crisp lager, or even a sparkling rosé would complement the rich flavors. For non-alcoholic options, sparkling lemonade or iced tea work well.
Storage and Reheating Tips
While best served fresh, sometimes you might have leftovers, or you might want to prepare them in advance. Here’s how:
- Storage: Store cooled fried ravioli in an airtight container in the refrigerator for up to 2-3 days.
- Reheating: To restore crispiness, avoid the microwave. Reheat fried ravioli in a preheated oven or air fryer at 350°F (175°C) for 5-10 minutes, or until heated through and crisp again.
- Freezing (Uncooked): If preparing in advance, you can bread the ravioli and freeze them uncooked on a baking sheet until solid. Then transfer to a freezer-safe bag. Fry directly from frozen, adding a couple of extra minutes to the cooking time, making sure to maintain oil temperature.
Conclusion: Your New Go-To Appetizer
Crispy fried ravioli is more than just a recipe; it’s a guaranteed hit that brings joy to any gathering. With its satisfying crunch, savory filling, and ease of preparation, it’s destined to become a staple in your culinary repertoire. Whether you’re hosting a grand party, enjoying a quiet evening, or looking for that perfect game-day snack, these golden bites deliver every time. So, grab your ingredients, follow our simple steps, and prepare to impress yourself and everyone around you with this utterly delicious and addictive treat. Happy frying!
* All image credit belongs to Kevin Is Cooking via YouTube. Follow and subscribe to his channel for more fantastic recipes and cooking tutorials!