
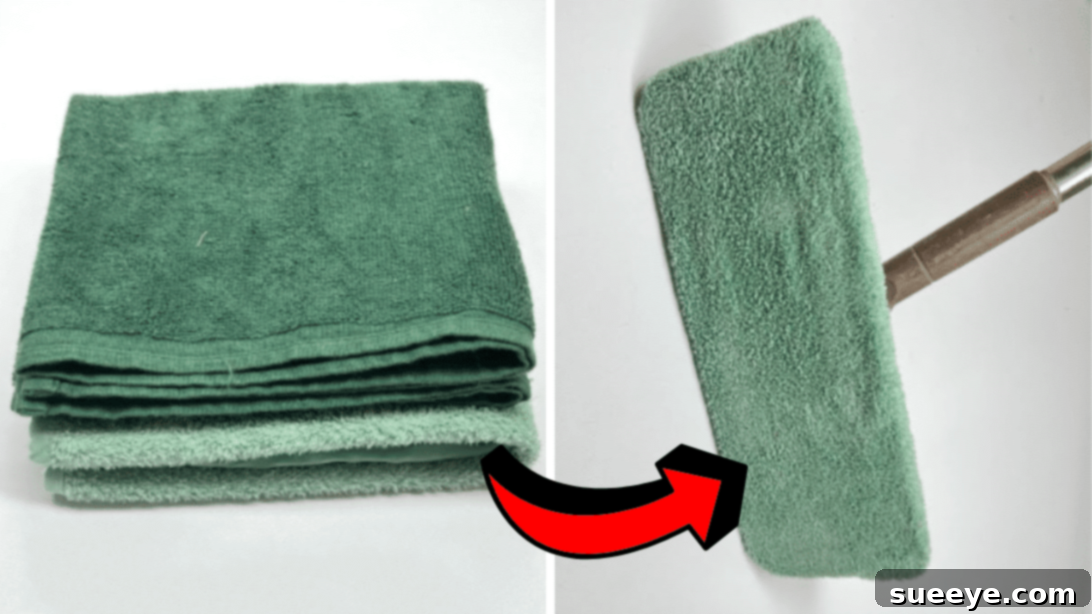
In nearly every modern household, a mop or two has become an indispensable cleaning tool. Among the variety available, flat mops have surged in popularity, offering exceptional versatility not only for floors but also for cleaning ceilings, walls, and other challenging-to-reach surfaces. A significant advantage of these mops is the ease with which their heads can be replaced, allowing for fresh, clean pads to be used regularly. However, the convenience often comes with a recurring cost: purchasing new mop refills can quickly add up, becoming a substantial expense over time. If you find yourself changing mop heads frequently, seeking a more economical and sustainable alternative is a smart move.
Imagine transforming an everyday item, often destined for the rag pile, into a highly functional and washable mop refill. This ingenious approach saves you money and reduces household waste, aligning perfectly with an eco-conscious lifestyle. We’re excited to share a fantastic solution inspired by the creative minds at DIY Trefa on YouTube: crafting your own reusable mop pads from old towels. This simple yet effective DIY project empowers you to maintain a pristine home without breaking the bank or contributing unnecessarily to landfills.
Why Choose DIY Reusable Mop Heads? The Benefits of Repurposing
Opting for homemade mop heads offers a plethora of advantages beyond simple cost savings. It’s a practical step towards a more sustainable and efficient home cleaning routine. Here’s why repurposing old towels into mop pads is a brilliant idea:
- Significant Cost Savings: Commercial mop refills can be surprisingly expensive, especially if you clean frequently. By using materials you already have, like old towels, you eliminate this recurring expense entirely.
- Environmental Friendliness: Every time you discard a store-bought mop pad, it contributes to landfill waste. Reusable pads drastically reduce this environmental impact. By giving old towels a new life, you actively participate in the “reduce, reuse, recycle” philosophy.
- Customization and Control: You have full control over the material and absorbency. Different towel types offer varying levels of scrubbing power and absorbency, allowing you to tailor your mop head to specific cleaning tasks.
- Better Cleaning Performance: Old cotton towels are often highly absorbent and effective at picking up dirt, dust, and spills. They can outperform some synthetic disposable pads, providing a thorough clean without streaks.
- Durability and Washability: Unlike disposable pads, your DIY towel mop heads are designed to be washed and reused repeatedly. This means a consistently clean and hygienic mop for every cleaning session, simply by tossing them into your laundry.
- Sense of Accomplishment: There’s a unique satisfaction that comes from creating something useful with your own hands. This simple DIY project offers a rewarding experience and a tangible benefit to your home.
Selecting the Perfect Towel for Your Mop Pad
The success of your DIY mop pad largely depends on the towel you choose. While almost any old towel can work, considering a few factors will ensure optimal cleaning performance and longevity:
- Material Matters:
- Cotton Towels: These are ideal due to their excellent absorbency and durability. Old bath towels, hand towels, or even beach towels are perfect candidates. They effectively soak up spills and trap dirt.
- Microfiber Towels: If you have old microfiber cleaning cloths or towels, these can also be repurposed. Microfiber is renowned for its ability to pick up dust and microscopic particles, making it great for polishing surfaces.
- Towel Condition: Ensure the towel is clean and free from major holes or tears. Minor wear and tear are acceptable, as you’ll be cutting and sewing it. However, a towel that’s too thin or threadbare might not offer sufficient absorbency or durability.
- Size Considerations: The size of your original towel will determine how many mop pads you can create. A large bath towel can often yield two or more pads, while smaller hand towels might be perfect for a single pad with less waste.
Essential Materials and Tools for Your Repurposed Towel Mop
Gathering your supplies before you begin will make the crafting process smooth and enjoyable. Most of these items are likely already in your home or easily accessible.
- Old Towel: Your primary material. As discussed, a clean, absorbent towel works best.
- Your Flat Mop Head: Essential for accurate measurements to ensure a perfect fit.
- Elastic Band: A crucial component for creating a snug, reusable fit around your mop head. Choose elastic that is durable and retains its stretch.
- Marking Pen, Pencil, or Chalk: For accurately tracing your pattern onto the towel. Chalk is often preferred for darker fabrics, while a fabric marker is great for lighter ones.
- Ruler or Measuring Tape: For precise measurements, ensuring your mop pad is perfectly sized.
- Scissors or Rotary Cutter and a Cutting Mat: Sharp fabric scissors will provide clean cuts. A rotary cutter with a mat offers even greater precision and speed, especially for straight lines.
- Fabric Pins: To hold fabric in place while cutting and sewing, preventing shifting.
- Needle and Thread: For hand-stitching minor details or if you don’t have a sewing machine. Choose a strong, polyester thread that matches or complements your towel color.
- Iron, for Pressing: While optional, pressing seams can make sewing easier and result in a more professional finish.
- Sewing Machine: Highly recommended for efficiency and strong, durable seams, especially when working with thick towel fabric.
Step-by-Step Guide: Crafting Your Own Reusable Mop Head
Follow these detailed instructions to transform your old towel into a functional and durable mop pad. For a visual demonstration, remember to consult DIY Trefa’s video tutorial.
Step 1: Prepare and Measure Your Towel
- Lay Flat and Smooth: Begin by spreading your chosen towel onto a clean, flat surface, ensuring it is as smooth and wrinkle-free as possible. This step is crucial for accurate measurements and cuts.
- Position the Mop Head: Place your flat mop head directly on top of the towel. Position it centrally to maximize the towel fabric for your pad.
- Measure and Mark: Using your ruler and marking tool (pen, pencil, or chalk), carefully measure around the mop head. You’ll want to add an extra margin for seam allowances and to allow the towel to wrap slightly under the mop head. A common practice is to add about 1.5 to 2 inches (4-5 cm) on all sides beyond the mop head’s dimensions. This extra fabric will form the edges that will eventually be gathered by the elastic.
- Trim Off Existing Seams: For a cleaner finish and easier sewing, trim off any existing folded or original seams of the towel. This leaves you with raw edges, which are easier to work with when creating new hems or casings.
- Trace the Corner Pattern: With the mop head still in place, or by using its outline as a guide, trace a small square or corner curve on each of the four corners of your marked pattern on the towel. The video tutorial from DIY Trefa provides an excellent visual example of this specific pattern, which helps create the pocketed corners that will hold the mop head securely. These traced lines will guide your cuts for forming the distinct shape of the mop pad.
Step 2: Cut, Stitch, and Finish Your Mop Pad
- Precise Cutting: Carefully cut along all the marked lines you traced in the previous step. Use your sharp fabric scissors or rotary cutter to achieve clean, straight edges. Accuracy here will ensure your mop pad fits snugly.
- Form the Corners: Take two corresponding raw edges of one of the cut corners. For instance, if you cut a square, bring the two side edges together. Pin them in place, aligning them perfectly. This forms a small “pocket” at each corner. Stitch these edges together firmly using your sewing machine or a strong hand stitch. Repeat this for all four corners. This step creates the structured corners that will cup the mop head, preventing it from slipping off during use.
- Sew the Elastic Casing: Now, you’ll create a casing for your elastic band around the entire perimeter of the mop pad.
- Fold the raw outer edge of the towel inward by about half an inch to an inch (1.2-2.5 cm), depending on the width of your elastic. Press the fold with an iron for a crisp edge.
- Fold it over a second time, creating a channel for the elastic. Pin this hem all the way around the mop pad, leaving a small opening (about 2-3 inches) unstitched at the back.
- Stitch this hem down, ensuring you sew close to the inner folded edge, creating a casing. Do not stitch over the opening.
- Insert the Elastic: Cut a piece of elastic that is slightly shorter than the perimeter of your mop head – this allows for tension. Attach a safety pin to one end of the elastic and thread it through the casing you just created, guiding it all the way around until it emerges from the opening.
- Secure the Elastic: Overlap the two ends of the elastic by about half an inch and securely stitch them together, forming a continuous loop. Tug on the elastic to ensure it’s firm. Once joined, gently pull the elastic inside the casing and stitch the opening closed. This gathering effect will make the mop pad hug your mop head perfectly.
- Final Fit Check: Insert your flat mop head into the newly created towel pad. The elasticized edges should snugly grip the mop head, holding the towel securely in place. Adjust any elastic tension if necessary to ensure a firm fit without being too tight to put on.
Using and Caring for Your New DIY Mop Pad
Once your repurposed towel mop head is complete, you’re ready to tackle those dirty floors! Here’s how to make the most of it and keep it in top condition:
- Attachment: Simply slip the elasticized pad over your flat mop head. The gathered edges should secure it firmly.
- Wetting Your Pad: For wet mopping, you can pre-wet the pad under the faucet, wring it out, and then attach it. Alternatively, you can use a spray bottle with your preferred cleaning solution directly on the floor or on the pad once it’s on the mop.
- Cleaning Solutions: These pads work wonderfully with almost any floor cleaner – from simple soap and water to white vinegar solutions or commercial floor cleaners.
- Washing Instructions: After each use, simply remove the towel mop head and toss it into your washing machine. Wash with your regular laundry detergent. For best results and to maintain absorbency, avoid using fabric softener, as it can reduce the towel’s ability to soak up water. Air dry or tumble dry on low heat.
- Longevity: With proper care, your DIY mop pads can last for many months, even years, providing countless cleaning cycles before needing replacement.
Creative Variations and Further Ideas
The beauty of DIY lies in its adaptability. Once you master the basic design, consider these variations to enhance your cleaning experience:
- Textured Towels: Use towels with different textures for varied cleaning needs. A slightly rougher towel might be better for scrubbing stubborn spots, while a softer one is ideal for delicate floors.
- Layering for Absorbency: For extra absorbency or thickness, you can cut two layers of towel fabric and stitch them together before following the rest of the steps.
- Scented Cleaning: Add a few drops of your favorite essential oil (like lemon, lavender, or tea tree) to your cleaning solution or directly onto the damp mop pad for a fresh scent while you clean.
- No-Sew Options: If a sewing machine isn’t available, you can still create a functional mop pad. Instead of sewing an elastic casing, you could use strong fabric glue for the hems and then thread a drawstring or thicker elastic through loops created by buttonholes or fabric slits. It might not be as durable, but it’s a good alternative.
- Experiment with Materials: While old towels are excellent, you might experiment with other absorbent fabrics like old flannel sheets, sturdy t-shirts, or even fleece blankets for different cleaning tasks.
Embracing Sustainable Cleaning and Beyond
Making your own reusable mop pads is more than just a craft; it’s a step towards a more sustainable and conscious lifestyle. By choosing to repurpose rather than constantly buying new, you contribute to reducing waste, conserving resources, and fostering a healthier planet. This project is a perfect example of how small changes in our daily routines can lead to significant positive impacts.
We encourage you to explore other DIY cleaning solutions and embrace the satisfaction of creating useful items from things you already own. Not only will you save money, but you’ll also gain a deeper appreciation for the materials around you and the power of thoughtful consumption.
*All images and the inspiring tutorial are credited to DIY Trefa via YouTube. We highly recommend visiting her channel and subscribing for more innovative and practical DIY ideas!
Frequently Asked Questions About DIY Mop Pads
Here are answers to some common questions you might have about making and using your repurposed towel mop heads:
- How often should I wash my DIY mop pads?
It’s recommended to wash your mop pad after each significant cleaning session, especially if you’ve cleaned heavily soiled areas. For light dusting, you might get away with using it a couple of times before washing. Regular washing ensures hygiene and optimal cleaning performance. - Can I use any old towel for this project?
While most old towels can work, cotton bath or hand towels are generally the best choice due to their excellent absorbency and durability. Avoid very thin or heavily worn towels as they may not last as long or be as effective. - What if I don’t have a sewing machine? Can I hand-sew it?
Absolutely! While a sewing machine makes the process quicker and creates stronger seams, you can hand-sew your mop pad. Use a sturdy needle and strong thread (like upholstery or heavy-duty polyester thread). A backstitch is recommended for durability. It will take more time, but the result will be just as functional. - Will these DIY pads scratch my floors?
No, towels are generally soft and non-abrasive, making them safe for most floor types, including hardwood, laminate, tile, and linoleum. Always ensure your towel is clean and free of any debris that could potentially scratch surfaces. - How long do these homemade mop pads typically last?
The lifespan of your DIY mop pad depends on the quality of the original towel, how frequently you use it, and how well you care for it. With good quality towels and proper washing (avoiding fabric softener), they can last for many months to a year or even longer, offering significant value and reducing waste. - Can I make different sizes for different cleaning tools?
Yes! The beauty of this DIY project is its customizability. You can adjust the measurements to fit smaller hand-held cleaning tools or even larger commercial-style flat mops. Just make sure to measure your specific cleaning tool accurately.