
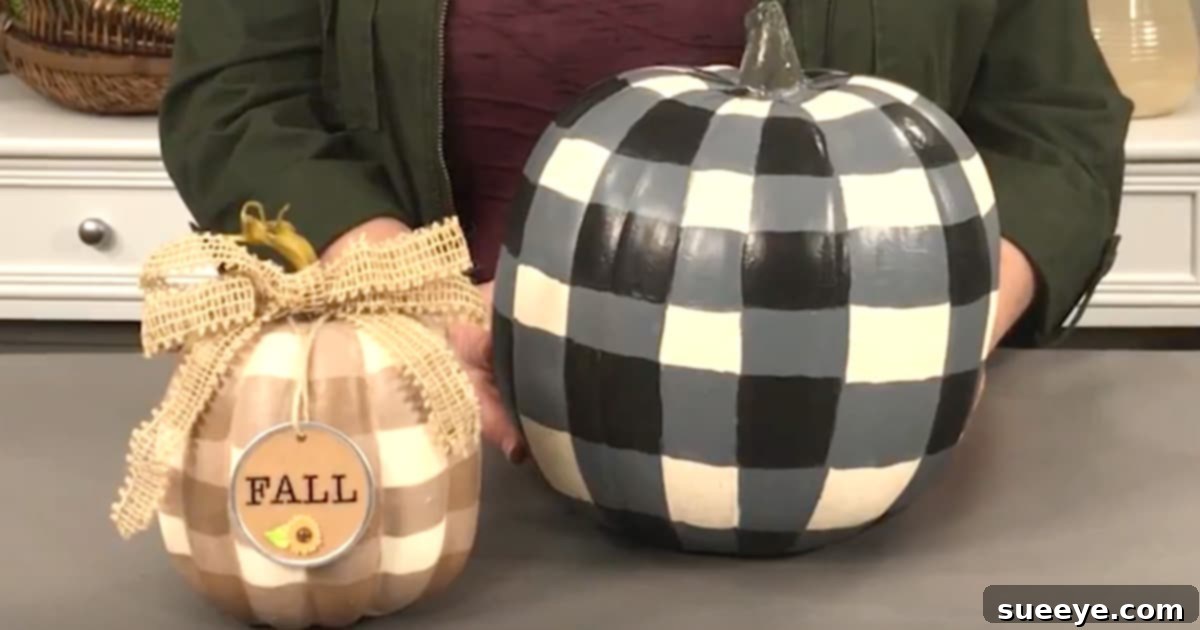
DIY Gingham Pumpkins: Add Rustic Charm to Your Fall and Halloween Decor
As the leaves begin to turn and the air grows crisp, our thoughts naturally drift to cozy autumn traditions and festive decorating. Among the most iconic symbols of fall and Halloween are pumpkins, gracing porches, mantels, and tablescapes. While natural pumpkins are beautiful in their simplicity, adding a personalized touch can transform them into truly unique seasonal accents. This year, if you’re looking for a decorating idea that combines classic appeal with a touch of rustic charm, look no further than the delightful gingham painted pumpkin. It’s a project that brings country flair right into your home, effortlessly blending with various decor styles, from farmhouse chic to traditional autumn aesthetics.
The timeless appeal of gingham makes it a perfect pattern for fall decorations. It evokes a sense of nostalgia, comfort, and homespun warmth. When applied to a pumpkin, this simple checked pattern instantly elevates its look, turning a humble gourd into a stylish statement piece. What’s even better is that this project is incredibly accessible, requiring minimal artistic skill and delivering maximum impact. Whether you’re an experienced crafter or someone who rarely picks up a paintbrush, you’ll find painting gingham pumpkins to be a surprisingly rewarding and enjoyable experience.
Why Gingham? The Enduring Appeal of a Classic Pattern
Gingham is more than just a pattern; it’s a feeling. Associated with picnics, cozy kitchens, and idyllic countrysides, gingham brings a sense of comfort and familiarity to any setting. Its clean lines and symmetrical checks provide a visually pleasing aesthetic that is both structured and inviting. For fall decor, gingham offers a wonderful contrast to the organic shapes and textures of nature. When paired with pumpkins, it creates a harmonious balance between rustic natural elements and classic design. This pattern is incredibly versatile, easily adapting to different color palettes – from traditional black and white or red and white to more subdued autumnal hues like deep olive and cream, or even playful pastels for a unique twist.
The beauty of a gingham pumpkin lies in its ability to be both understated and eye-catching. It doesn’t overpower other decor elements but instead enhances them, providing a foundational pattern that ties a seasonal display together. Imagine a cluster of gingham pumpkins in varying sizes and colors adorning your fireplace mantel, nestled among pinecones, dried leaves, and flickering candles. Or picture them as a welcoming display on your front porch, inviting guests with their wholesome charm. The timelessness of gingham ensures that your painted pumpkins will remain stylish year after year, making them a worthwhile investment of your time and creativity.
Choosing Your Canvas: Real vs. Faux Pumpkins
Before you dive into the painting process, one of the first decisions you’ll make is whether to use a real pumpkin or a faux one. Both options have distinct advantages, and your choice will likely depend on how long you wish to enjoy your decorative creations and what you intend to do with them.
Real Pumpkins: The Traditional Choice
- Pros: Authenticity, natural texture, biodegradable. They offer the genuine feel of fall.
- Cons: Perishable, susceptible to rot and pests. They typically last only a few weeks to a couple of months, even with proper care. Painting can sometimes shorten their lifespan if the paint traps moisture.
- Tips: When selecting a real pumpkin, choose one that is firm, free of blemishes, soft spots, and cuts. A smooth surface will make painting easier. Wash and thoroughly dry the pumpkin before painting to remove any dirt or residue.
Faux Pumpkins (Funkins): The Long-Lasting Solution
- Pros: Durable, reusable year after year, lightweight, and often available in a wide variety of shapes and sizes (like craft store “Funkins”). They offer excellent value for long-term decor.
- Cons: Can sometimes lack the natural weight or texture of a real pumpkin. Initial cost might be higher than a single real pumpkin, but they pay for themselves over time.
- Tips: Faux pumpkins made from foam or plastic are ideal for painting. Ensure the surface is clean and dry. Some faux pumpkins might benefit from a light sanding or a primer coat if their surface is too slick, though many acrylic paints adhere well without extra preparation.
For those who wish to enjoy their gingham pumpkins for many seasons to come, faux pumpkins are an excellent investment. You can create a collection of these beauties and bring them out every autumn, saving time and effort each year. However, if you love the idea of using fresh, natural elements, real pumpkins are still a wonderful choice for a temporary, seasonal display.
Gathering Your Supplies: Everything You Need for Gingham Pumpkin Success
One of the best aspects of this DIY project is its simplicity, which extends to the tools and materials you’ll need. Most items are readily available at craft stores, hardware stores, or even around your home. Here’s a comprehensive list:
- Pumpkin(s): Real or faux, as discussed above. Choose various sizes for an engaging display.
- Acrylic Craft Paint: You’ll need at least three colors:
- Base Color: A light, neutral shade like white, cream, or a very pale beige. This forms the background of your gingham pattern.
- Main Gingham Color: Your primary color for the checks (e.g., black, red, navy, olive green, burnt orange, brown).
- Darker Gingham Color: A slightly darker shade of your main gingham color, or a complementary darker neutral (e.g., dark gray if your main color is black, a darker red if your main is red, or a soft brown). This creates the overlapping effect that defines gingham.
- Paint Brushes: A few different sizes will be helpful:
- A wider flat brush (1-2 inches) for the base coat and broader stripes.
- A smaller flat brush (1/2-1 inch) for more precise stripes and touch-ups.
- Painter’s Tape (Low Tack): This is crucial for creating crisp, straight lines. Choose a tape that won’t pull off your base coat. Narrower tape (1/2 inch to 1 inch) is often best for gingham.
- Ruler or Measuring Tape: To ensure even spacing of your stripes.
- Pencil: For lightly marking guides.
- Paper Towels or Rags: For cleaning brushes and wiping up spills.
- Paper Plate or Paint Palette: For dispensing paint.
- Water Container: For rinsing brushes.
- Optional: Sealant Spray (Matte or Satin Finish): Highly recommended for both real and faux pumpkins to protect the paint and enhance durability. For real pumpkins, this can help extend their lifespan slightly by sealing the surface.
Step-by-Step Guide: How to Paint a Gingham Pumpkin
Now that you have your materials ready, let’s get started on transforming your plain pumpkin into a charming gingham masterpiece. Remember, patience is key, especially when waiting for paint layers to dry.
1. Prepare Your Pumpkin
- Clean the Pumpkin: If using a real pumpkin, wash it thoroughly with soap and water, then dry it completely. For faux pumpkins, a quick wipe-down with a damp cloth is usually sufficient. Ensure the surface is free of dust, dirt, or grease.
- Remove Stem (Optional for Faux): For some faux pumpkins, you might be able to remove the stem for easier painting. You can reattach it later or create your own with twine or wood.
2. Apply the Base Coat
- Paint Application: Using your wider flat brush, apply 2-3 thin, even coats of your light base color (e.g., white or cream) over the entire pumpkin. Work in sections if needed.
- Drying Time: Allow each coat to dry completely before applying the next. This prevents streaking and ensures a smooth foundation for your gingham pattern. Depending on paint thickness and humidity, this could take 15-30 minutes per coat.
3. Create the First Set of Stripes
- Measure and Mark: Once your base coat is fully dry, use a ruler and pencil to lightly mark evenly spaced vertical lines around the pumpkin. The spacing will determine the size of your gingham squares. For example, 1-inch wide stripes are a good starting point for a medium-sized pumpkin. Aim for consistency.
- Apply Painter’s Tape: Carefully apply painter’s tape along every other marked line. Ensure the tape is pressed down firmly to prevent paint bleeding underneath. The uncovered strips are where you will apply your main gingham color.
- Paint the Stripes: Using your main gingham color (e.g., black), paint thin, even coats over the exposed sections between the tape. Again, 2-3 coats may be necessary for opaque coverage.
- Drying and Removing Tape: Let the paint dry completely. This is crucial! Once dry, carefully peel off the painter’s tape to reveal your crisp, vertical stripes.
4. Create the Second Set of Stripes (Gingham Pattern)
This is where the magic happens and your gingham pattern truly emerges.
- Measure and Mark Horizontal Lines: Once the vertical stripes are thoroughly dry, measure and mark evenly spaced horizontal lines around the pumpkin, similar to how you did the vertical lines. Use the same spacing for uniform squares.
- Apply Painter’s Tape (Again!): Carefully apply painter’s tape along every other horizontal marked line.
- Paint with Darker Color: Now, using your slightly darker gingham color (e.g., dark gray or a deeper shade of your main color), paint over the exposed horizontal strips. Pay special attention to where these horizontal strips intersect with your already painted vertical strips – this overlapping effect is what creates the dark “shadow” squares of the gingham.
- Drying and Removing Tape: Allow the paint to dry completely. Once dry, very carefully remove the horizontal painter’s tape.
5. Finishing Touches and Sealing
- Touch-Ups: Inspect your pumpkin for any small bleeds or imperfections. Use a small detail brush and your base color to clean up any errant lines.
- Reattach Stem (if applicable): If you removed the stem of a faux pumpkin, reattach it now with hot glue or a strong adhesive.
- Sealant (Recommended): For added durability and protection, especially if displaying outdoors, apply a clear matte or satin sealant spray. Follow the product instructions for application and drying time. This step protects your beautiful artwork from moisture and wear.
Congratulations! You’ve successfully painted a charming gingham pumpkin. Step back and admire your handiwork!
Creative Variations and Styling Tips
The beauty of the gingham pattern is its adaptability. Don’t feel limited to a single color scheme or display idea. Here are some ways to customize and style your gingham pumpkins:
- Color Palettes: Experiment with different color combinations.
- Classic Farmhouse: White base with black or navy gingham.
- Rustic Autumn: Cream base with burnt orange, deep red, or olive green gingham.
- Subtle Elegance: Pale gray base with a slightly darker gray gingham.
- Playful: Pastel pink or blue base with a complementary brighter gingham.
- Mixed Sizes: Create a visually interesting display by painting pumpkins of varying sizes and shapes. A large gingham pumpkin can be the centerpiece, flanked by smaller ones.
- Combine Patterns: Don’t be afraid to mix your gingham pumpkins with other painted pumpkins, such as striped, polka-dotted, or even solid-colored ones.
- Porch Perfection: Arrange a welcoming vignette on your front porch or steps. Pair your gingham pumpkins with hay bales, corn stalks, mums, and lanterns for a quintessential fall display.
- Tabletop Centerpieces: For a stunning Halloween party or Thanksgiving dinner, arrange gingham pumpkins of various sizes down the center of your dining table. Add natural elements like eucalyptus leaves, small gourds, candles, or even fairy lights for extra sparkle.
- Mantel Magic: Line your fireplace mantel with gingham pumpkins, interspersing them with autumnal garlands, decorative candles, and family photos.
- Unexpected Places: Don’t limit pumpkins to traditional spots. A small gingham pumpkin can be a delightful accent on a bookshelf, a kitchen island, or even on a bathroom counter.
- Personalized Stems: Instead of leaving the stem plain, consider painting it gold, silver, or a contrasting color. You could also wrap it with twine or ribbon for an extra touch of texture.
Beyond the Basics: Advanced Gingham Techniques
Once you’ve mastered the basic gingham pattern, you might feel inspired to try more advanced techniques:
- Ombre Gingham: Instead of two distinct gingham colors, use shades that gradually lighten or darken, creating a subtle ombre effect within the checks.
- Irregular Gingham: Experiment with varying the width of your stripes for a more whimsical or abstract gingham pattern.
- Stenciled Gingham: If freehand taping feels daunting, consider using a pre-made gingham stencil. While possibly quicker, precise alignment can still be a challenge on a curved surface.
Care and Longevity for Your Gingham Pumpkins
To ensure your beautiful creations last as long as possible:
- Real Pumpkins: Keep them in a cool, dry place away from direct sunlight. The sealant will help, but they are still organic and will eventually decay. Bring them indoors during freezing temperatures.
- Faux Pumpkins: Store them carefully after the season. Wrap them individually in tissue paper or bubble wrap and place them in a sturdy box. Keep them in a cool, dry attic or closet to prevent fading or damage. With proper care, faux gingham pumpkins can become cherished parts of your autumn decor for many years to come.
Embrace the Charm of Hand-Painted Decor
Painting gingham pumpkins is more than just a craft; it’s an opportunity to infuse your home with personalized charm and seasonal spirit. The process itself is therapeutic and rewarding, allowing you to slow down and engage in a creative activity. The result is a piece of decor that not only looks beautiful but also carries the warmth of your own effort and imagination.
Whether you’re decorating for a cozy family gathering, a festive Halloween celebration, or simply enjoying the beauty of autumn, these gingham pumpkins are sure to bring smiles and compliments. So gather your supplies, pick your favorite colors, and get ready to add a touch of timeless country flair to your fall and Halloween decorating. Your home will thank you for this delightful splash of handmade warmth.