
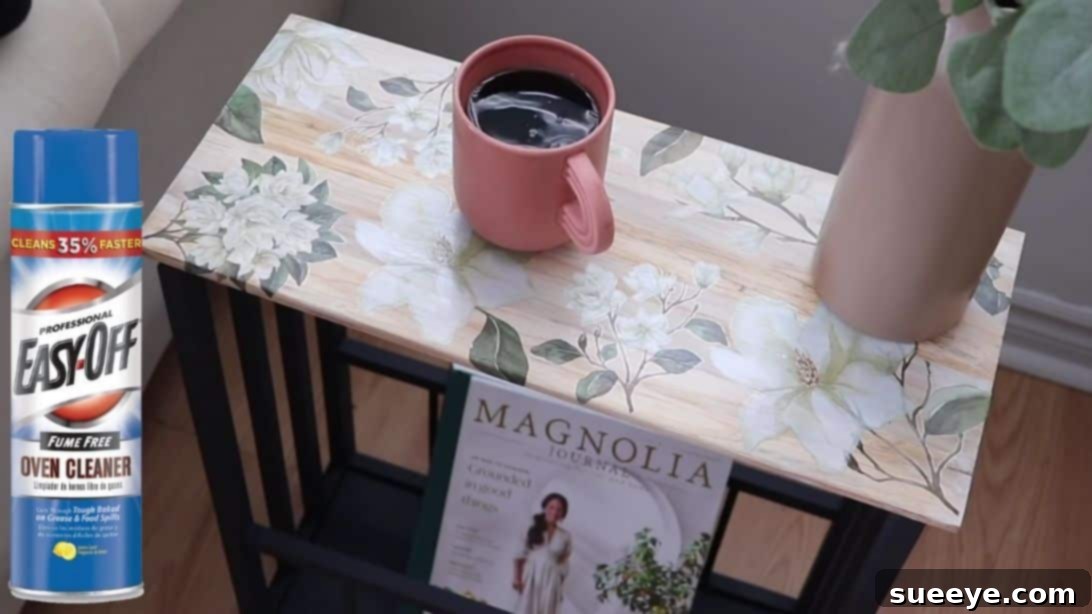
Is your once-loved table looking tired, faded, and worn, hinting that it’s seen better days? Instead of contemplating an expensive replacement that might stretch your budget, imagine giving it a breathtaking new life with a creative and cost-effective DIY makeover! Transforming your old furniture is not only incredibly satisfying but also an excellent way to personalize your living space and extend the lifespan of cherished pieces. With just a handful of materials, many of which you might already have around your house, you can achieve a sophisticated, custom-designed look that will have friends and family wondering if you splurged on a high-end, store-bought piece.
This easy-to-follow and incredibly rewarding DIY table makeover tutorial is inspired by the brilliant creative minds at Hometalk on YouTube. They’ve demonstrated how simple it is to refresh and revitalize your home decor, proving that stunning transformations don’t require professional skills or a hefty investment. Get ready to unleash your inner designer and turn that drab, neglected table into a captivating focal point in your home, all while staying well within your budget!
Materials You Will Need for Your DIY Table Makeover:
Before diving into the exciting world of furniture transformation, ensure you have all the necessary supplies gathered. Having everything on hand will make the process smoother and more enjoyable.
- An old table (the perfect canvas for your DIY project!)
- Easy Off (heavy-duty oven cleaner, excellent for stripping finishes)
- Scrubbing pad (for gently removing softened finishes)
- Wood sanding machine (orbital sander is often ideal for larger flat surfaces)
- Angle grinder with a sanding tool attachment (for stubborn spots and detailed areas, use with caution)
- Dixie Belle White Gel Stain (for a subtle, whitewashed effect)
- Dixie Belle Navy Blue Paint (to add a touch of elegant contrast)
- Foam brushes (for smooth paint and varnish application)
- Clean cloths (essential for wiping, cleaning, and buffing)
- Dixie Belle Magnolia Garden Transfer (a beautiful decorative element)
- Gloss Varnish (to seal and protect your masterpiece)
- Safety gear (gloves, eye protection, respirator for stripping/sanding)
Step-by-Step Directions for a Stunning Table Transformation:
Follow these detailed steps to give your old table an incredible new lease on life. Remember, patience and attention to detail are key to achieving a professional-looking finish.
Step 1: Preparation and Stripping the Old Finish
The foundation of any successful furniture makeover lies in thorough preparation. Begin by carefully disassembling any unnecessary parts of your table. This might include removing the tabletop from the base, detaching drawers, or taking off hardware. Disassembly makes it significantly easier to access all surfaces for cleaning, stripping, and sanding, ensuring an even and flawless finish throughout. Once you’ve decided which parts you’ll be keeping and refurbishing, move to the stripping process.
Working in a well-ventilated area, preferably outdoors or in a garage with open doors, generously spray the entire top surface of the table with Easy Off oven cleaner. This powerful chemical stripper is surprisingly effective at breaking down old paint, varnish, and other finishes. Ensure an even coat across the surface. Allow the Easy Off to sit and work its magic for approximately 20 minutes. During this time, you’ll observe the old finish beginning to bubble and loosen, indicating it’s ready for removal. Always wear protective gloves and eye protection during this step to prevent skin irritation or eye contact.
After the dwell time, use a scrubbing pad to firmly but gently scrub off the softened coat finish. You’ll see the old paint and varnish lifting away, revealing the bare wood underneath. For areas where the finish is particularly stubborn or if the Easy Off didn’t fully penetrate, a wood sanding machine will be your next best tool. Start with a medium-grit sandpaper (e.g., 100-120 grit) to remove the bulk of the remaining finish, then follow with a finer grit (e.g., 180-220 grit) for a smoother surface. For those extremely persistent patches of color or if the paint seems to have deeply penetrated the wood grain, an angle grinder fitted with a sanding tool can be incredibly effective. However, exercise extreme caution and a light touch when using an angle grinder, as it’s a powerful tool that can quickly remove too much material if not handled properly. The goal is a clean, smooth, and uniform wood surface, ready to accept new stain and paint.
Step 2: Staining, Painting, and Applying Decorative Transfers
Once your table surface is impeccably clean and smooth, it’s time to bring in the new colors and character. Begin by applying the Dixie Belle White Gel Stain to the tabletop. Gel stain is fantastic because it’s thicker than traditional stain, making it easier to control and achieve a consistent finish without blotchiness. Apply it evenly with a foam brush or clean cloth, ensuring good coverage. Immediately after application, use a separate, slightly damp cloth to wipe off the excess gel stain. This “apply and wipe” technique is crucial for leaving only a subtle hint of white hue, creating a beautiful, soft, whitewashed effect that highlights the natural wood grain rather than completely obscuring it. This gives your tabletop a fresh, airy, yet still rustic appeal, reminiscent of high-end farmhouse decor.
Next, grab your Dixie Belle Navy Blue Paint. This rich, deep color will provide a stunning contrast to the subtle white of the tabletop. Use it to color the other parts of the table – typically the legs, apron, and any structural elements. Apply the paint using a clean foam brush, ensuring smooth, even strokes. Depending on the original color and desired opacity, you might need two thin coats for optimal coverage. Allow each coat to dry completely before applying the next. The combination of the soft white top and the bold navy base will instantly elevate the table’s aesthetic, giving it a sophisticated and custom-designed look.
Now for the truly transformative and artistic step: applying the Dixie Belle Magnolia Garden Transfer. These decorative transfers are like large decals designed specifically for furniture, allowing you to add intricate and beautiful imagery with ease. Carefully unroll your transfer and cut out the pieces you wish to use. You can choose to keep the design whole or cut it into individual elements to create a more customized arrangement. Play around with the placement on your table until you achieve a design that speaks to you. Once you’re happy with the layout, firmly press the transfer onto the wood surface, ensuring good adhesion. Then, using the provided tool (or a credit card edge), rub over the transfer tightly and evenly. You’ll often see the image start to release from the backing paper. Work slowly and methodically across the entire design. Once the transfer is complete and the design has fully adhered to the wood, gently peel back the paper backing. Take your time with this step to avoid tearing the transfer or leaving parts behind. The result will be a beautifully integrated, hand-painted look that adds immense character and charm to your table.
Lastly, to protect your newly created masterpiece and ensure its longevity, seal it with a high-quality gloss varnish. Using a clean foam brush, apply the varnish evenly across all painted and stained surfaces, including over the transfers. The gloss varnish will not only provide a durable protective layer against spills, scratches, and everyday wear but also enhance the colors and give your table a beautiful, subtle sheen. Apply in thin, even coats to avoid drips or brush marks. Allow the varnish to sit and dry completely for at least 2 to 3 hours, or even longer depending on humidity and product instructions. For optimal durability, consider applying two to three thin coats, allowing adequate drying time between each. Once fully cured, your table will be ready to use and admire!
Why Choose DIY Over Buying New? The Benefits of Furniture Upcycling
In a world of mass-produced furniture, taking the DIY route for your table makeover offers a myriad of advantages that extend beyond just saving money. Choosing to upcycle your existing furniture is an environmentally conscious decision, as it reduces waste and gives old items a new purpose instead of sending them to a landfill. Furthermore, a DIY project allows for unparalleled customization. You have complete control over the color palette, finishes, and decorative elements, ensuring that the final piece perfectly complements your home’s aesthetic and reflects your unique personality. There’s also immense satisfaction and a sense of accomplishment that comes from transforming something old and neglected into a beautiful, functional piece of art with your own hands. This sense of pride makes your newly made-over table not just a piece of furniture, but a conversation starter and a testament to your creativity.
Expert Tips for a Flawless DIY Table Makeover:
- Patience is Your Best Friend: Rushing through steps, especially drying times, can compromise the final finish. Allow adequate time for each coat of paint, stain, or varnish to dry and cure.
- Work in a Well-Ventilated Area: This is crucial when using chemical strippers, paints, and varnishes to ensure your safety and minimize fumes.
- Always Test Products: If possible, test new paints, stains, or transfers on an inconspicuous area of your table or on a scrap piece of similar wood to ensure you like the result before applying it to the entire piece.
- Cleanliness is Key: Ensure your surfaces are completely free of dust and debris before applying any new coats of paint, stain, or varnish. Use a tack cloth after sanding to pick up fine particles.
- Thin Coats are Better: When painting or varnishing, it’s always better to apply multiple thin coats rather than one thick one. Thin coats dry faster, reduce drips, and create a smoother, more durable finish.
- Embrace Imperfections: Sometimes, the charm of an upcycled piece comes from its history. Don’t strive for absolute perfection; subtle imperfections can add character.
Caring for Your Refinished Table:
To keep your beautiful, newly transformed table looking its best for years to come, proper care is essential. Always use coasters under drinks and placemats under dishes to protect the surface from moisture rings and heat damage. Wipe up spills immediately with a soft, damp cloth. Avoid harsh chemical cleaners, as they can damage the varnish and paint finish. A gentle, non-abrasive furniture polish or a damp cloth is usually sufficient for regular cleaning. With a little care, your DIY table will continue to be a stunning and functional piece in your home.
Your old table doesn’t have to be a forgotten relic; it’s a blank canvas waiting for a stunning transformation! This Hometalk-inspired tutorial empowers you to breathe new life into your furniture, creating a piece that’s not only functional but also a true reflection of your personal style. Imagine the joy and pride you’ll feel every time you look at your “new” table, knowing you created it with your own hands and on a budget. So, gather your materials, clear your workspace, and get ready to embark on a rewarding DIY journey that will beautifully enhance your home decor!
*All these amazing images are thanks to Hometalk via YouTube. We highly recommend visiting their channel for more inspiring tutorials and creative home improvement ideas!