
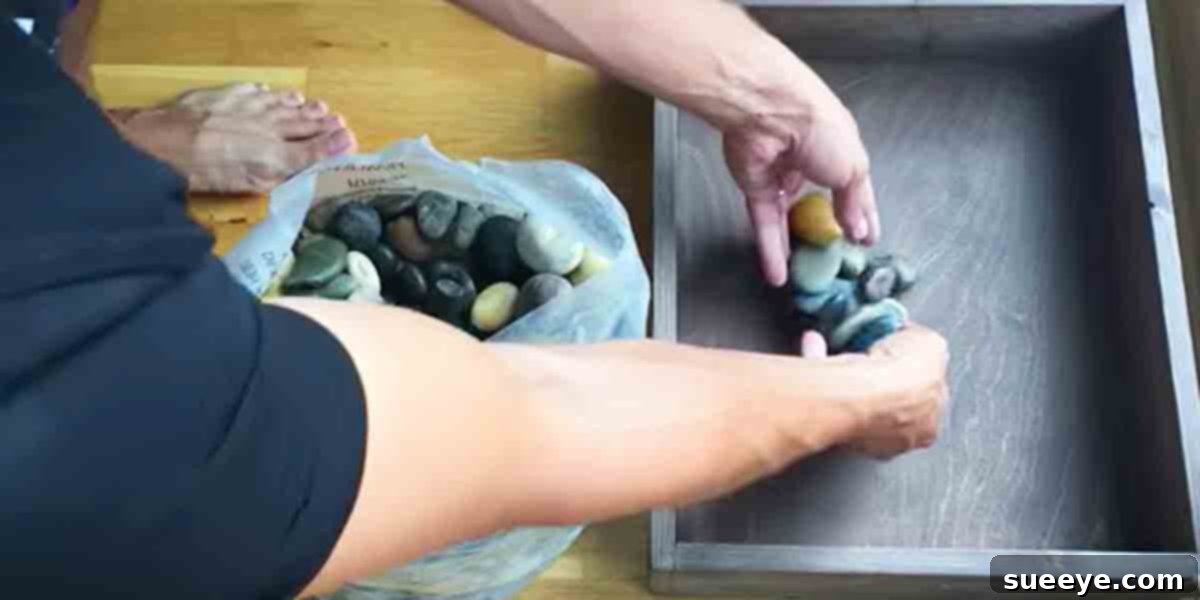
Transform Your Entryway: The Ultimate Guide to DIY Pebble Mats for a Cleaner Home
Are you tired of muddy footprints and wet shoe messes cluttering your entryway or mudroom? Imagine a simple, elegant, and highly effective solution that not only keeps your floors pristine but also adds a touch of natural beauty to your home. Look no further than the humble yet incredibly versatile DIY pebble mat. This ingenious project is not only incredibly easy to create but serves a fantastic purpose, blending seamlessly into any home aesthetic while tackling everyday grime with unparalleled efficiency.
Why a DIY Pebble Mat is Your Home’s Best Friend
In the quest for a clean and organized home, particularly in high-traffic zones like entryways and mudrooms, finding effective solutions can be a challenge. Traditional fabric mats often get soggy, harbor odors, and are a pain to clean. The natural stone pebble mat, however, offers a superior alternative with a host of benefits:
1. Superior Dirt and Moisture Management
Natural stones, especially smooth river rocks, are exceptional at trapping dirt, mud, and debris from shoes and boots. Their irregular surfaces create tiny crevices where dirt can settle, preventing it from spreading onto your pristine floors. Crucially, pebbles facilitate rapid water evaporation. When wet shoes are placed on the mat, moisture quickly drains between the stones and air circulates freely, allowing shoes to dry much faster than on a flat surface. This quick drying action is key to preventing the growth of odor-causing bacteria and fungi, keeping your entryway smelling fresh.
2. Effortless Cleaning and Maintenance
One of the most compelling advantages of a DIY pebble mat is its unparalleled ease of cleaning. Unlike fabric mats that require washing and drying, often losing their appeal over time, a pebble mat can be refreshed in mere minutes. Simply pick up the mat (if it’s in a tray or box), dump the rocks, give them a quick spray with a garden hose, and let them air dry. Once dry, simply return them to their base. This straightforward process ensures your mat remains hygienic and looks brand new with minimal effort, making it an ideal choice for busy households.
3. Unmatched Durability and Longevity
Made from natural stone, these mats are incredibly durable and built to withstand years of heavy use. Pebbles do not fray, wear out, or lose their structural integrity over time, unlike many conventional mats. They are resistant to moisture, temperature fluctuations, and physical impact, ensuring your investment in this DIY project pays off for the long haul. This inherent robustness means you won’t need to frequently replace your mat, making it a sustainable and economical choice.
4. Aesthetic Appeal and Natural Charm
Beyond its functional prowess, a pebble mat brings a unique aesthetic appeal to your home. The organic textures and earthy tones of natural stone evoke a sense of calm and connection to nature. Whether your home decor is rustic, minimalist, modern, or traditional, a pebble mat complements various styles, adding an elegant and grounded touch. It instantly elevates the look of your entryway, transforming a utilitarian space into a welcoming and thoughtfully designed area. This isn’t just a mat; it’s a piece of functional art.
5. Cost-Effectiveness and Accessibility
Creating a DIY pebble mat is remarkably budget-friendly. River rocks and pebbles are often inexpensive, sometimes even free if you have access to a natural source (ensure local regulations permit collection). The other components, such as a base container, can be repurposed from old pallets or purchased affordably. This project demonstrates that high-impact home decor doesn’t have to come with a hefty price tag, making stylish and practical solutions accessible to everyone.
Embarking on Your DIY Pebble Mat Project: What You’ll Need
The beauty of this project lies in its simplicity. You don’t need a workshop full of specialized tools or advanced crafting skills. Here’s a rundown of the essential materials and tools:
Essential Materials:
- Pebbles or River Rocks: The star of your mat! Look for smooth, rounded stones that are comfortable to step on and easy to clean. You can choose a uniform size and color for a cohesive look or mix different sizes and shades for a more natural, eclectic feel. Ensure you gather enough to cover your desired mat area completely, with a bit extra for good measure.
- A Base Container or Frame: This will hold your pebbles in place. Common choices include:
- Repurposed Pallet Box: As seen in some popular tutorials, a shallow wooden box constructed from pallet wood is sturdy, rustic, and perfectly functional.
- Shallow Wooden Tray: A ready-made wooden tray or a custom-built frame with a solid base (like plywood or a reinforced mesh) works wonderfully.
- Plastic or Metal Tray: For a more modern or industrial look, a durable, shallow tray made from plastic or metal can also serve as an excellent base.
- Flexible Mat Base (Optional): If you prefer a mat that can be rolled up or has some flexibility, you can use a sturdy, waterproof mesh mat as a base and glue the pebbles to it.
- Waterproof Adhesive (Optional but Recommended for Stability): While some prefer loose pebbles in a tray for easy dumping, securing the pebbles with a strong, waterproof adhesive (like silicone sealant or construction adhesive) can create a more stable and permanent mat, especially if you plan to move it frequently or want to prevent stones from shifting.
Basic Tools:
- Shovel or Scoop: For collecting and handling pebbles.
- Garden Hose: Indispensable for cleaning your rocks before and after assembly.
- Gloves: To protect your hands during rock handling and adhesive application.
- Measuring Tape and Saw (if building a wooden base): For precise cuts if you’re constructing your own pallet box or wooden frame.
- Caulking Gun (if using adhesive): For easy and even application of sealant.
Step-by-Step Guide: Crafting Your Own Pebble Mat
Ready to get started? Follow these simple steps to create your very own functional and beautiful pebble mat:
Step 1: Source and Prepare Your Pebbles
The first step is to gather your pebbles or river rocks. If collecting from nature, ensure they are smooth and free of sharp edges. Once you have your desired quantity, give them a thorough cleaning. Place them in a bucket or on a tarp and spray them with a garden hose until all dirt, dust, and debris are removed. Let them air dry completely in the sun. Clean rocks ensure better adhesion if you choose to glue them, and prevent tracking dirt into your home from the mat itself.
Step 2: Construct or Select Your Base
Depending on your chosen design, this step will vary. If you’re building a pallet box, follow a step-by-step tutorial (like the one mentioned from Well Done Tips) to construct a shallow, sturdy wooden frame with a solid bottom. Ensure the dimensions fit your desired entryway space. If using a ready-made tray, simply ensure it’s clean, dry, and has a robust base capable of holding the weight of the pebbles. For flexible mats, prepare your mesh base.
Step 3: Arrange Your Pebbles
This is where your creativity comes into play. Begin arranging the clean, dry pebbles within your chosen base. You can place them loosely, creating a dense layer that fills the tray to the brim, or you can opt to glue them down. If gluing, apply the adhesive to the bottom of each pebble (or directly to the base in sections) and press the pebble firmly into place. Work in small sections to ensure the adhesive doesn’t dry prematurely. Pay attention to how the pebbles fit together, aiming for a relatively flat but textured surface that will be comfortable for feet and effective at scraping dirt. You can create patterns or simply fill the space organically. Leave no gaps if you’re gluing for a solid surface.
Step 4: Allow for Curing (if using adhesive)
If you’ve opted to glue your pebbles, it’s crucial to allow ample time for the adhesive to cure completely. Refer to the adhesive manufacturer’s instructions for drying times, which can range from 24 to 72 hours. Rushing this step could lead to pebbles coming loose later on.
Step 5: Final Placement and Enjoyment
Once your mat is complete and fully cured (if applicable), place it in your entryway, mudroom, or any area where dirty shoes are a concern. Step back and admire your handiwork! You’ve just created a beautiful, functional piece that will keep your home cleaner and add a unique, natural touch. This project truly can be done in a snap!
Beyond the Entryway: Unleashing the Potential of River Rock Crafts
While the pebble mat is an excellent starting point, the world of river rock and pebble crafts extends far beyond. These natural materials are cheap, easily accessible, and can be transformed into an array of stunning decor accents with minimal effort. Imagine:
- River Rock Coasters: Protect your furniture in style. Glue smaller, flatter pebbles onto felt or cork bases for unique, absorbent coasters.
- Beautiful Pebble Wall Art: Create intricate mosaics or simple framed pieces by gluing pebbles onto a canvas or wooden board. This adds texture and organic beauty to any room.
- DIY Bathroom Mats: Bring the spa experience home by creating a larger pebble mat for your bathroom, offering a natural foot massage and quick drying after a shower.
- Garden Pathways and Edging: Incorporate pebbles into your outdoor landscaping for natural, permeable pathways or attractive garden bed edging.
- Planter Drainage and Decoration: Use pebbles at the bottom of plant pots for improved drainage, or arrange them on top of soil for a decorative, moisture-retaining layer.
- Vase Fillers and Decorative Bowls: Fill clear vases with pebbles and add artificial flowers or candles for a striking centerpiece, or simply arrange them in a decorative bowl.
The list of ideas truly is endless. With a little imagination, these humble stones can become sophisticated elements in your home and garden decor, proving that the best design often comes from nature itself.
Maintaining Your Natural Stone Mat for Lasting Beauty
Keeping your pebble mat in top condition is incredibly straightforward, ensuring it continues to perform its function and enhance your home’s aesthetics for years to come. For mats with loose pebbles in a tray:
- Regular Cleaning: Once a week, or as needed depending on usage, simply take the tray outside. Carefully tip the pebbles out onto a sturdy surface or a tarp.
- Hose Down: Use a garden hose to thoroughly spray the pebbles, washing away trapped dirt, mud, and debris. You can also clean the tray separately.
- Dry Completely: Allow both the pebbles and the tray to dry completely in the sun or a well-ventilated area before reassembling. This prevents moisture buildup and maintains freshness.
For mats where pebbles are glued to a base, you can simply hose down the entire mat in place (if outdoors) or take it to a suitable outdoor area for cleaning. Ensure good drainage and allow it to dry thoroughly.
Embrace the simplicity and effectiveness of natural stone. A DIY pebble mat is more than just a place to park your shoes; it’s a testament to sustainable living, clever home solutions, and the enduring beauty of nature’s simplest elements. Get busy making yours today!