
Transform Old Sweaters into Cozy DIY Pet Beds: An Eco-Friendly Guide
Do you have a beloved pet who deserves the ultimate comfort, but you’re tired of expensive, mass-produced pet beds? And what about those old, oversized sweaters lingering in your closet – the ones you just can’t bring yourself to part with, even though you know you’ll never wear them again? If this sounds familiar, you’re in for a treat! We’ve discovered an incredibly ingenious and easy way to give both your old garments and your furry friend a new lease on life.
It’s a common dilemma: our closets overflow with items we’ve outgrown or no longer use, yet finding sustainable and affordable solutions for everyday needs can be a challenge. Pet beds, in particular, can be surprisingly costly, often lacking the personal touch or eco-friendly credentials many of us seek. But what if we told you that the perfect, personalized pet bed could be created with something you already own, saving you money and reducing waste? Prepare to be amazed by the simple yet brilliant craft of transforming an old sweater into a soft, inviting haven for your cherished companion.

The Genius Idea: A Pet Bed from a Sweater
The concept is truly mind-blowing in its simplicity and effectiveness. We stumbled upon a brilliant tutorial that revealed how a forgotten sweater could be upcycled into a plush pet bed. The idea immediately resonated, especially for those of us who have considered buying a new dog or cat bed but also have an abundance of unused sweaters taking up precious space. This project offers a perfect confluence of practicality, sustainability, and heartwarming creativity.
Imagine the satisfaction of crafting something useful and comfortable for your pet with your own hands, all while contributing to a more sustainable lifestyle. This isn’t just a craft project; it’s a testament to the power of creative thinking and the beauty of upcycling. The ease with which this project comes together is perhaps its most appealing feature. Many DIY projects can feel daunting, but this one is genuinely accessible to everyone, regardless of their crafting experience. If it wasn’t straightforward, we’d likely all revert to store-bought options. The sheer brilliance of someone conceiving such an idea is truly inspiring.
Why Choose a DIY Upcycled Pet Bed?
Beyond the undeniable charm of a handmade item, creating a pet bed from an old sweater offers a multitude of benefits:
- Cost-Effective: Save money on expensive pet store beds by utilizing materials you already have.
- Eco-Friendly & Sustainable: Reduce textile waste by giving an old garment a new purpose. This aligns perfectly with a zero-waste lifestyle.
- Personalized Comfort: Your pet will love the familiar scent and softness of your old sweater, offering them a sense of security and comfort. You can also customize the size and firmness to their preference.
- Unique & Stylish: Create a one-of-a-kind pet bed that perfectly matches your home decor or reflects your pet’s personality.
- Easy to Make: This project requires minimal sewing skills and basic supplies, making it achievable for beginners.
- Reduces Clutter: Finally, a productive way to declutter those old sweaters you’ve been hoarding!
Meet the Inspiration: Laura from Sew Very Easy
The initial spark for this fantastic project often comes from talented creators who simplify complex ideas. In this case, Laura from “Sew Very Easy” demonstrated just how straightforward and rewarding this DIY can be. Her clear, step-by-step tutorial demystifies the process, making it approachable for anyone. Her knack for turning seemingly complex sewing tasks into simple, achievable steps is truly remarkable. Watching her technique will undoubtedly empower you to pick up those old sweaters you’ve been holding onto and transform them into something truly special.
Materials You’ll Need for Your Sweater Pet Bed
Gathering your supplies is the first step towards crafting this cozy retreat. The beauty of this project lies in its simplicity and the use of readily available items:
- One Large Old Sweater: The bigger, the better! A chunky knit, wool, or fleece sweater works wonderfully for softness and warmth. Ensure it’s clean before you begin.
- Stuffing Material: This is where you can get creative and even more eco-friendly. Options include:
- Polyfill/Polyester Fiberfill (common for pillows/toys)
- Old pillows (repurpose the filling)
- Scraps of fabric, old t-shirts, or other clean, soft clothing items
- Cedar chips (for a natural insect repellent and fresh scent, but ensure your pet isn’t sensitive)
- Scissors: Sharp fabric scissors will make cutting easier.
- Needle and Thread: A strong needle and sturdy thread that matches your sweater color (or a contrasting one for a design element). A sewing machine can also be used, but it’s not essential.
- Pins: To hold fabric in place while sewing.
- Optional: Non-slip fabric for the bottom, an embellishment for decoration, measuring tape.
Step-by-Step Guide: Crafting Your Sweater Pet Bed
Ready to transform that sweater? Follow these simple steps to create a delightful bed for your pet:
Step 1: Prepare Your Sweater
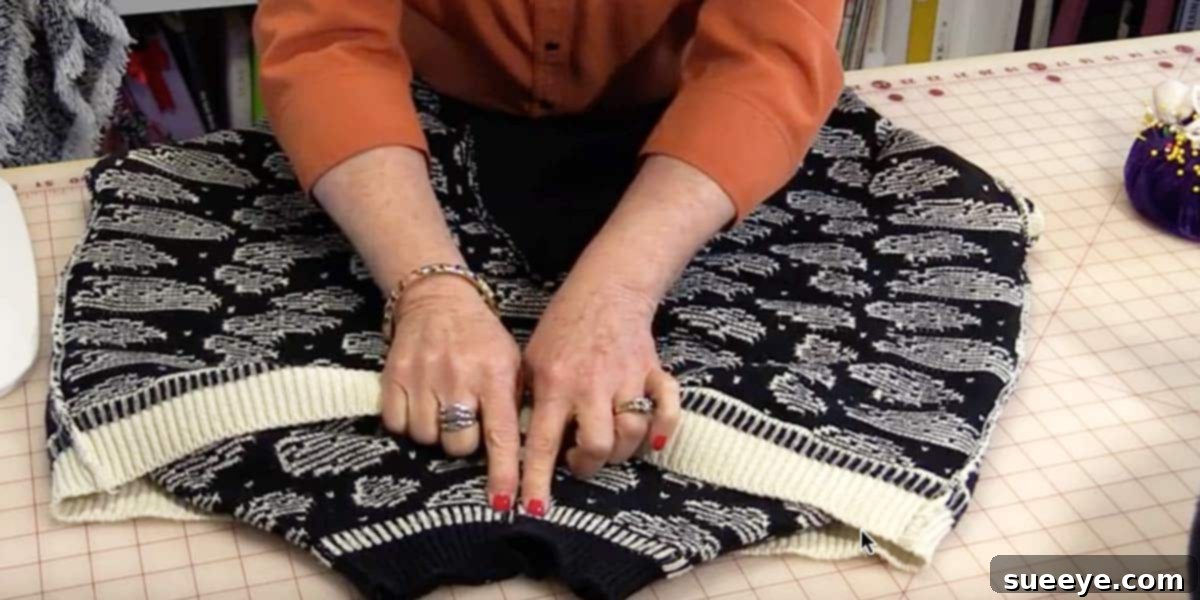
Start by washing and thoroughly drying your old sweater. This ensures it’s clean and pre-shrunk, preventing any surprises after the bed is made. Lay it flat on a clean surface.
Step 2: Create the Main Body
The basic design involves using the sweater’s body for the main sleeping area and the sleeves for the bolstered sides.
First, carefully cut a straight line across the sweater, just below the armpits. This will separate the main body of the sweater from the top portion. You’ll primarily be working with the bottom section for the bed’s base.
Step 3: Form the Side Bolsters
Take the two sleeves of the sweater. You will use these to create the comfortable, raised edges of the pet bed. If the sleeves are very wide, you might need to trim them slightly. Place one sleeve inside the other if they are thin to add more bulk. You can even stuff them slightly with a bit of extra fabric or stuffing at this stage to give them more structure.
Step 4: Attach the Bolsters to the Body
Lay the main body of the sweater (the larger rectangular or square piece you cut from the bottom) flat. Arrange the stuffed sleeves in a ‘U’ shape around three sides of this main body, leaving one short edge open. The open end of the ‘U’ will be where you complete the final seam. Pin the sleeves securely to the edges of the sweater body, forming the outer perimeter of your bed. The cuffs of the sleeves should meet at one end.
Step 5: Stitching the Perimeter
Carefully sew the sleeves to the main body of the sweater. You can do this by hand using a strong running stitch or backstitch, or with a sewing machine. Sew along both the inner and outer edges of the sleeve bolster, creating a channel. Make sure your stitches are secure, as they will hold the stuffing and withstand your pet’s weight.
Step 6: Stuffing the Bolsters
Now comes the fun part: stuffing! Begin filling the channels you created with your chosen stuffing material. Push the stuffing firmly into the sleeves, ensuring an even distribution to create plush, supportive bolsters. Don’t be shy with the stuffing; a firm bed is a comfortable and durable one. Once the bolsters are adequately stuffed, sew the remaining open end of the ‘U’ shape closed, connecting the two sleeve ends to form a complete circle or oval.
Step 7: Stuffing the Center
The center of the bed, the area within the bolster ring, also needs cushioning. Fill this space with more stuffing until it reaches your desired loft and firmness. Ensure it’s soft enough for your pet to nestle into but firm enough to provide support. Distribute the stuffing evenly to avoid lumpy spots.
Step 8: Close the Bed and Finish
Once both the bolsters and the center are stuffed, you’ll have an opening somewhere in the main body where you initially separated it from the top part of the sweater. Carefully fold under the raw edges and hand-sew this opening closed using an invisible stitch (ladder stitch) or a simple whipstitch. Reinforce any seams that look weak.
Step 9: Final Touches (Optional)
- Anti-Slip Bottom: If your pet bed tends to slide on smooth floors, you can cut a piece of non-slip rug pad or apply fabric paint dots to the bottom of the bed for added grip.
- Personalization: Add a small embroidered initial, a patch, or even a tag with your pet’s name.
And there you have it! A brand-new, super cozy, and eco-friendly pet bed made with love and an old sweater. Your pet will undoubtedly appreciate the warmth and familiarity of their new favorite spot.

Tips for Success and Durability
- Choose the Right Sweater: Thicker, more tightly woven sweaters (like wool or chunky knits) will result in a more durable and plush bed. Avoid thin, stretchy knits if you want a firmer structure.
- Stuffing Density: Don’t under-stuff! A firmly stuffed bed holds its shape better and provides more support. Over time, stuffing will compress, so starting firm is ideal.
- Strong Stitches: Use strong thread and reinforce all seams, especially where the bolsters meet the base. Pets can be rough, and sturdy seams will prolong the bed’s life.
- Pet-Safe Materials: Ensure all materials, especially stuffing, are non-toxic and safe for your pet in case they chew on the bed. Avoid small, loose embellishments that could be a choking hazard.
- Easy Cleaning: While the bed itself isn’t typically machine washable after construction, you can create a simple removable cover for the center cushion using another old t-shirt or fabric remnant for easier cleaning.
Beyond the Basic: Customization Ideas
Once you’ve mastered the basic sweater bed, the possibilities for customization are endless:
- Multiple Sweaters: Combine sweaters of complementary colors or textures for a patchwork effect.
- Removable Cover: Design a removable cover for the entire bed, making it easier to wash.
- Different Shapes: While the tutorial focuses on a circular or oval shape, with a bit more cutting and sewing, you could create square or rectangular beds.
- Add a Pillow Insert: Instead of loose stuffing, create a fabric casing for the center and fill it with polyfill, then slide it into the sweater bed. This can make washing the inner cushion easier.
- Decorative Touches: Sew on pet-themed appliques, add a fabric trim, or even embroider your pet’s name.
The Broader Impact of Upcycling for Pets
This project is more than just making a bed; it’s a testament to the power of upcycling. By repurposing old items, we actively participate in a circular economy, reducing demand for new goods and minimizing our ecological footprint. For pet owners, this translates to:
- Reduced Waste: Divert textiles from landfills, giving them a second life.
- Resource Conservation: Less new material production means less energy, water, and raw materials used.
- Inspiring Creativity: Encourages innovative thinking about how everyday items can be transformed.
- Community Building: Share your creations and inspire others to embrace DIY and sustainable practices.
So, what are you waiting for? Go rummage through your closet for one of those old sweaters you’ve been clinging to for so long. Your pet, your wallet, and the planet will thank you!
Ready to start? Jump to the step-by-step tutorial and give your furry friend the gift of comfort!
Frequently Asked Questions About DIY Sweater Pet Beds
Q: Can I use any size sweater?
A: A larger sweater will yield a larger pet bed. For a small dog or cat, a medium to large adult sweater might suffice. For bigger pets, you’ll need an extra-large or even a men’s XXL sweater to ensure adequate space and bolster height. You can also combine two smaller sweaters for one larger bed.
Q: What’s the best type of stuffing to use?
A: Polyester fiberfill (polyfill) is excellent for its loft and resilience. However, for an even more eco-friendly option, consider repurposing old pillows, shredded fabric scraps (like old t-shirts or denim), or even clean, dry plastic grocery bags for a firmer, crinklier bed. Just ensure whatever you use is clean and non-toxic.
Q: Is this pet bed washable?
A: Due to the stuffing, washing the entire bed in a machine can be challenging and might damage its shape or distribute the stuffing unevenly. Spot cleaning with a damp cloth and mild pet-safe detergent is recommended for minor messes. For deeper cleaning, you might need to hand wash and air dry, or consider creating a removable, washable outer cover.
Q: How long does this project take?
A: For beginners, it might take anywhere from 1 to 3 hours, depending on your sewing speed and familiarity with the process. Experienced crafters could finish it much faster. It’s a perfect afternoon project!
Q: Can I make this for a cat too?
A: Absolutely! Cats adore cozy, enclosed spaces, and a soft sweater bed is perfect for them. They often appreciate a slightly smaller, more ‘nest-like’ bed. A medium-sized sweater would be ideal for most cats.
Q: What if I don’t have sewing experience?
A: This project is very beginner-friendly. Basic hand-sewing stitches like a running stitch or backstitch are all you need. Focus on making strong, secure stitches rather than perfectly neat ones. There are plenty of online tutorials for basic hand-sewing techniques if you need a quick refresher.