
Maximize Your Space: 5 Genius Dollar Tree Organizing Hacks for RVs and Small Homes
Living in a compact space, whether it’s a cozy RV, a minimalist tiny home, or a small apartment, presents unique challenges when it comes to organization. Every inch counts, and clutter can quickly make a confined area feel even smaller. The good news? You don’t need to spend a fortune to create a functional and tidy environment. With a little creativity and a trip to your local Dollar Tree, you can unlock a world of affordable and ingenious storage solutions.
Inspired by the brilliant ideas shared by Grateful Glamper, these five DIY Dollar Tree hacks are absolute game-changers for anyone looking to maximize their space without breaking the bank. Each hack utilizes simple, inexpensive items found at the Dollar Tree, transforming them into highly practical organizers. Get ready to discover how these clever DIYs can bring order and efficiency to your small living area, making your everyday life much smoother. Prepare to be amazed by how useful these budget-friendly items can be!
Transforming Your Home with Dollar Tree Finds
These DIY projects are not just for RV dwellers; they are fantastic for college dorms, small apartments, kids’ rooms, or any area where space is at a premium. The beauty of these hacks lies in their simplicity, affordability, and adaptability. Let’s dive into these five innovative organizing solutions that promise to declutter your life.
1. DIY Vertical Towel Holder: Conquering Closet Chaos
Tired of towels toppling over in your linen closet or getting messy every time you grab one? This simple Dollar Tree hack provides an elegant and effective solution for keeping your towels neatly stacked and easily accessible. It’s a fantastic way to utilize vertical space that often goes overlooked.
Materials Needed:
- Three Dollar Tree napkin holders (usually found in the kitchen or dining section)
- A pack of small zip ties
- Nail file or fine-grit sandpaper (optional, for safety)
Step-by-Step Instructions:
- Begin by gathering your three napkin holders.
- Carefully stack one napkin holder on top of another, aligning them perfectly.
- Use a zip tie to securely fasten the two stacked napkin holders together. Ensure the zip tie is pulled taut for stability.
- Repeat the process, adding the third napkin holder on top of the first two, and secure it with another zip tie. For maximum stability, you might want to use two zip ties per connection point, one on each side.
- Once all three napkin holders are stacked and securely zip-tied, trim off any excess length from the zip ties. Be extremely cautious during this step, as the freshly cut ends of zip ties can be surprisingly sharp and scratchy.
- For added safety and to prevent snags, use a nail file or a piece of fine-grit sandpaper to smooth down any sharp edges left on the trimmed zip ties. This extra step ensures a polished and safe finish.
- Place your newly created vertical towel holder in a closet, cabinet, or on a shelf where you store your towels. Roll your towels and slide them into each compartment.
Benefits and Versatility:
This clever holder not only prevents your towels from collapsing into a messy pile but also makes it incredibly easy to pull one out without disturbing the rest. It frees up valuable shelf space and keeps your linen closet looking tidy. Beyond towels, this organizer can also be repurposed for storing rolled T-shirts, scarves, small blankets, or even rolls of craft fabric. Its modular design means you could even expand it further by adding more napkin holders if you have ample vertical space and a larger collection to organize.
2. DIY Under-Table Organizer: Hidden Storage for Clutter-Free Surfaces
Countertops and tabletops in small spaces often become magnets for clutter – charger cables, pens, remote controls, and other small essentials. This brilliant hack leverages the often-unused space underneath your surfaces, providing discreet yet easily accessible storage. It’s perfect for keeping your essential items handy without sacrificing precious surface area.
Materials Needed:
- Dollar Tree wire baskets (choose a size appropriate for your needs)
- Dollar Tree removable hooks (ensure they are strong enough for light items)
Step-by-Step Instructions:
- Identify an area under a table, desk, or shelf where you’d like to add hidden storage. This could be near an electrical outlet for charging accessories or under a desk for office supplies.
- Clean the surface where you intend to place the removable hooks, ensuring it’s free of dust and grease for optimal adhesion.
- Attach the removable hooks to the underside of your chosen surface, spacing them appropriately to support the wire basket. Make sure they are level.
- Hang the wire basket onto the hooks. Double-check that it feels secure before placing items inside.
Weight Capacity and Versatile Uses:
While Dollar Tree removable hooks are surprisingly sturdy, it’s important to remember their limitations. This setup is generally designed to hold up to two pounds, making it ideal for lighter items. Use it to store smartphone chargers, small power banks, earbud cases, remote controls, pens, notepads, or even small craft supplies. By moving these items off your main surfaces, you instantly create a cleaner, more organized look and feel. This hack is also fantastic for bedside tables or in kitchen cabinets to hold frequently used, lightweight items.
3. Wire Racks: Instantly Doubling Cabinet Space
Cabinetry in RVs and small kitchens often features tall, single shelves, leading to wasted vertical space. This simple yet highly effective Dollar Tree hack provides an immediate solution, practically doubling your storage capacity in an instant. It’s an essential item for anyone struggling with overcrowded cupboards.
Materials Needed:
- Dollar Tree cabinet shelves or wire racks (often found in the kitchen organization aisle)
Step-by-Step Instructions:
- Measure the height and depth of your cabinet shelves to ensure the wire rack will fit comfortably.
- Simply place the wire rack inside your cabinet, creating an additional level of storage.
Maximizing Cabinet Efficiency:
These versatile wire racks are designed to fit neatly inside cabinets, acting as an extra shelf. This allows you to stack items like plates, bowls, cups, or even canned goods more efficiently, preventing them from creating tall, precarious stacks. Instead of having one large, underutilized space, you now have two defined areas. This hack is not limited to kitchen cabinets; it can also be used in pantry shelves to organize spices, under-sink cabinets to separate cleaning supplies, or even in bathroom cupboards for toiletries. It’s an effortless way to organize and keep everything within easy reach, making your daily routines smoother and more enjoyable.
4. Bedside Storage: Your Nightstand Solution for Tiny Spaces
In many RVs and tiny homes, a traditional bedside table simply isn’t an option due to space constraints. This often results in phones, books, water bottles, and other nighttime essentials ending up on the bed, on the floor, or precariously balanced on narrow ledges. This ingenious Dollar Tree hack offers a practical and affordable alternative, ensuring your necessities are always within arm’s reach without taking up any floor space.
Materials Needed:
- One Dollar Tree removable hook
- One Dollar Tree wire basket (a slightly larger one might be suitable for this purpose)
Step-by-Step Instructions:
- Choose a suitable spot near your bed, such as a wall, the side of a cabinet, or even the bed frame itself, where you can securely attach a removable hook.
- Clean the surface thoroughly to ensure the hook adheres properly.
- Attach the removable hook according to its instructions.
- Hang the wire basket onto the hook.
Creating Your Floating Nightstand:
Once installed, this hanging basket instantly becomes your personal bedside caddy. It’s the perfect spot for your phone while it charges, a remote control, a book or e-reader, a pair of reading glasses, or even a small water bottle. This keeps these items off your bed, preventing them from getting lost or knocked over in the night, and frees up any limited floor space you might have. It’s also ideal for bunk beds, guest rooms, or even in a child’s room to hold toys or small treasures. The beauty of the removable hook means you can adjust its position or take it down easily if needed, offering ultimate flexibility in your small space.
5. Soft-Sided Storage Bin DIY: Custom Bins for Flexible Organization
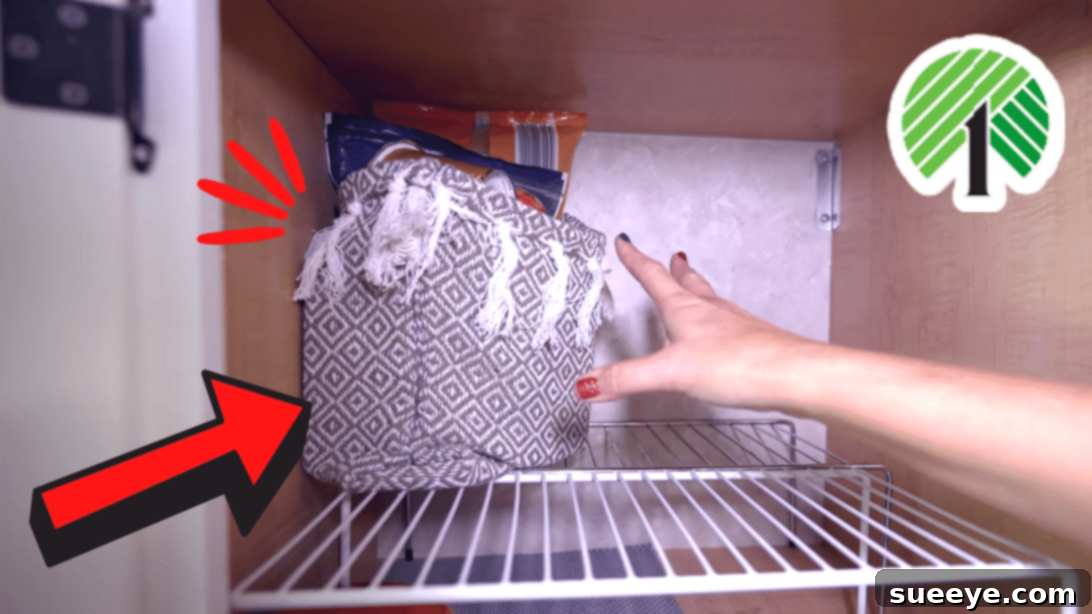
Sometimes, rigid storage containers just don’t fit or aren’t practical for certain items or spaces. For those instances, or when you need soft-sided organizers for drawers or cabinets, this Dollar Tree hack transforms inexpensive rugs into custom, flexible storage bins. These are especially useful in RVs, where items can shift during travel, as their soft nature prevents rattles and scratches.
Materials Needed:
- Dollar Tree rugs from the “soft lines” section (choose the size and pattern you prefer)
- Yarn and a needle, or fabric hot glue sticks and a hot glue gun
- Silicone fingertip covers (highly recommended for use with hot glue)
- Anti-skid shelf liner (optional, but highly recommended for RV travel)
Step-by-Step Instructions:
- Prepare the Rugs: Begin by carefully cutting off any tags or labels from the rugs. Lay the rug out flat on a protected surface.
- Fold and Secure Fringe (if applicable): If your rug has a fringe, apply a thin line of fabric hot glue along the edge of the rug just above the fringe. Carefully fold the fringe down and press it into the glue, securing it to the back of the rug. Use silicone fingertip covers to protect your fingers from the hot glue. Repeat this process on the opposite side of the rug. If using yarn, you might stitch the fringe down, though glue is faster.
- Form the First Side: Fold the rug in half with the fringed sides facing inward (if applicable). Apply a line of fabric hot glue approximately three-quarters of the way down one of the folded edges. Press firmly to secure.
- Create the Corner: Take the unglued quarter section of that same folded edge. Pinch the fabric to form a “T” shape at the corner. Apply glue around the edges of this “T” shape, sealing it to create a sturdy corner. Hold it in place until the glue dries and sets.
- Repeat for the Other Side: Follow the same gluing and shaping process for the other side of the rug, creating the second corner.
- Final Touches: Once all glue is completely dry and secure, turn the bin inside out. This will hide all the seams and raw edges, giving you a clean, finished look.
Enhanced Organization and RV-Specific Tips:
These soft-sided bins are incredibly versatile for storing a wide array of items, from toiletries and cleaning supplies to clothing, craft items, or snacks. Their flexible nature means they can conform to irregular spaces or hold oddly shaped objects more easily than rigid containers. When traveling in an RV, placing an anti-skid shelf liner beneath these bins (or any stored items) is an excellent way to prevent them from sliding around during transit, ensuring everything stays neatly in place even on bumpy roads.
Conclusion: Embrace Smart, Affordable Organization
Living in a small space doesn’t mean sacrificing organization or style. These five ingenious Dollar Tree DIY hacks, inspired by Grateful Glamper, prove that with a little creativity and minimal investment, you can transform your RV, tiny home, or small apartment into a highly functional and beautifully organized sanctuary. From tackling chaotic closets with vertical towel holders to creating hidden storage for clutter-free surfaces and custom fabric bins, each project offers a practical solution to common small-space dilemmas.
Embrace the power of budget-friendly DIY and reclaim every precious inch of your living area. These hacks are not just about tidiness; they’re about creating a more efficient, peaceful, and enjoyable environment. So, grab your Dollar Tree shopping list, unleash your inner DIY enthusiast, and start maximizing your space today!