
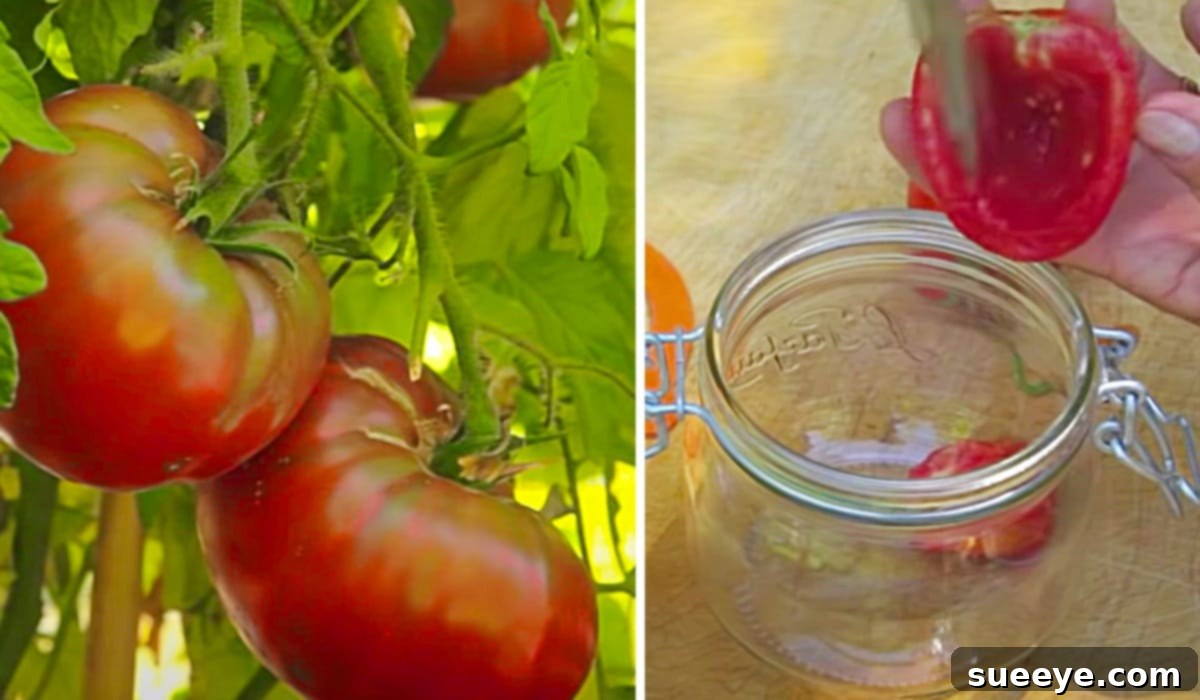
Embarking on the journey of seed saving is a profoundly rewarding step towards sustainable gardening and food self-sufficiency. Imagine cultivating vibrant plants year after year, all from seeds you’ve carefully harvested yourself. Not only does this practice significantly cut down on gardening expenses, but it also allows you to preserve precious heirloom varieties, adapt plants to your specific local climate, and foster a deeper connection with the natural world. Inspired by fantastic resources, such as video tutorials by experts like Grow Organic Peaceful Valley, it becomes clear that seed saving is a skill accessible to every gardener, regardless of experience level.
For beginners, the world of seed saving can seem daunting, but it doesn’t have to be. The key is to start with easily manageable vegetables, particularly those that are self-pollinating. These plants produce seeds that are “true-to-type,” meaning the offspring will closely resemble the parent plant, ensuring predictable results in your garden. Tomatoes, peppers, and beans stand out as excellent choices for your inaugural seed-saving adventures due to their straightforward processes and reliable outcomes. Mastering the art of saving seeds from these common garden staples will build your confidence and set the foundation for exploring more complex varieties in the future.
How To Save Seeds At Home: Your Ultimate Guide
Seed saving is much more than a hobby; it’s a vital practice that supports biodiversity and empowers gardeners. By learning how to save seeds, you’re contributing to a resilient food system and securing the genetic heritage of countless plant varieties. Let’s delve into the essential materials, methods, and tips you’ll need to successfully save seeds right from your own garden.
Why Embrace Seed Saving? The Benefits of a Sustainable Garden
The decision to save seeds from your garden offers a multitude of advantages that extend beyond mere cost savings. It’s a holistic approach to gardening that strengthens your connection to nature and promotes long-term sustainability:
- **Cost-Effectiveness:** Purchasing new seeds each season can quickly add up. Saving your own seeds eliminates this recurring expense, making gardening more affordable and accessible.
- **Preserving Heirloom Varieties:** Many commercially available seeds are hybrids, which don’t reliably produce true-to-type offspring. Saving seeds from open-pollinated or heirloom varieties helps preserve their unique flavors, characteristics, and genetic diversity, which are often lost in industrial agriculture.
- **Adapting Plants to Your Climate:** When you save seeds from plants that thrived in your specific garden conditions, you’re naturally selecting for traits that are well-suited to your local soil, climate, and pest pressures. Over time, your plants will become increasingly robust and productive in your unique environment.
- **Food Security and Self-Sufficiency:** Knowing you can reproduce your own food supply provides a profound sense of independence and security. It reduces reliance on external sources and strengthens your personal food system.
- **Genetic Selection:** You have the power to select seeds from the healthiest, most vigorous plants that produce the best yields. This intentional selection improves the quality and resilience of your crops over successive generations.
- **Education and Connection:** Seed saving is an engaging educational process that deepens your understanding of plant life cycles and ecological principles. It fosters a greater appreciation for the food you grow and consume.
Understanding Seed Types for Successful Saving
Before you begin, it’s crucial to understand the difference between various seed types, as this will determine the success and predictability of your seed-saving efforts:
- **Open-Pollinated (OP) Varieties:** These plants are pollinated by insects, wind, or other natural means. When saved correctly, seeds from open-pollinated plants (including heirlooms) will produce plants that are true-to-type, meaning they will closely resemble their parent plant. These are the best candidates for seed saving.
- **Self-Pollinating Plants:** A subset of open-pollinated varieties, these plants can pollinate themselves without needing another plant or external agent. Tomatoes, beans, peas, and many pepper varieties fall into this category, making them ideal for beginners because cross-pollination is less likely to occur.
- **Cross-Pollinating Plants:** These require pollen from another plant of the same species for fertilization. While their seeds can be saved, maintaining true-to-type characteristics requires careful isolation to prevent cross-pollination with other varieties. Examples include corn, squash, and melons. Beginners are often advised to start with self-pollinators to avoid unexpected results.
- **Hybrid (F1) Varieties:** These are created by crossing two different parent lines to produce offspring with desirable traits like increased vigor or disease resistance. However, seeds saved from F1 hybrids will not grow true to the parent plant; their offspring will often exhibit a wide range of characteristics from either grandparent, or simply revert to less desirable traits. Avoid saving seeds from F1 hybrids if you want consistent results.
Essential Materials for Your Seed Saving Toolkit:
Equipping yourself with the right tools makes the seed-saving process efficient and enjoyable. Most items are readily available around your home or at a local store:
- **Mason Jars (or other glass jars with lids):** Perfect for fermentation and short-term seed storage.
- **A Pie Plate (or ceramic plate, sheet pan, parchment paper, coffee filters):** Ideal non-stick surfaces for drying seeds. Avoid paper towels as seeds can stick.
- **Clean Water:** For rinsing and, in some cases, fermenting.
- **A Spoon or Knife:** For scooping out pulp and seeds.
- **Fine Mesh Strainer:** Essential for separating seeds from pulp and water after fermentation.
- **Labels and Permanent Marker:** Crucial for accurate record-keeping (variety, date, location).
- **Small Envelopes or Paper Bags:** Best for long-term storage of completely dry seeds.
Directions: Mastering Tomato Seed Saving Through Fermentation
Saving tomato seeds is often considered one of the easiest and most effective methods, primarily due to their self-pollinating nature and the beneficial fermentation process. This method ensures that healthy, viable seeds are separated from any disease-carrying pulp and germination inhibitors.
Step 1: Selecting the Perfect Tomatoes
Success begins with selection. Choose the healthiest, most vigorous tomatoes from your best-producing plants. Look for fruits that are fully ripe, free from disease, cracking, or insect damage, and exhibit the desired characteristics (size, flavor, color) of the variety you wish to propagate. Avoid saving seeds from the first few tomatoes of the season, as these might not represent the plant’s full potential.
Step 2: Extracting the Pulp
Carefully slice open your chosen tomatoes. For smaller varieties, simply squeeze the seeds and gel into a clean Mason jar. For larger tomatoes, use a spoon or your fingers to scoop out the seed-filled pulp and gel directly into the jar. Don’t worry if some flesh comes along – the fermentation process will take care of it.
Step 3: The Fermentation Process
Add a small amount of clean water to the jar, just enough to cover the pulp. Stir the mixture gently, then loosely place a lid on the jar (don’t seal it tightly, as gases will be produced). Let this mixture sit at room temperature for approximately 3 to 5 days. During this time, beneficial microbes will break down the gelatinous sac surrounding each seed (which contains germination inhibitors) and consume any lingering pulp. You’ll observe a frothy, sometimes moldy, layer forming on top. This is a normal and crucial part of the process, indicating that fermentation is actively occurring.
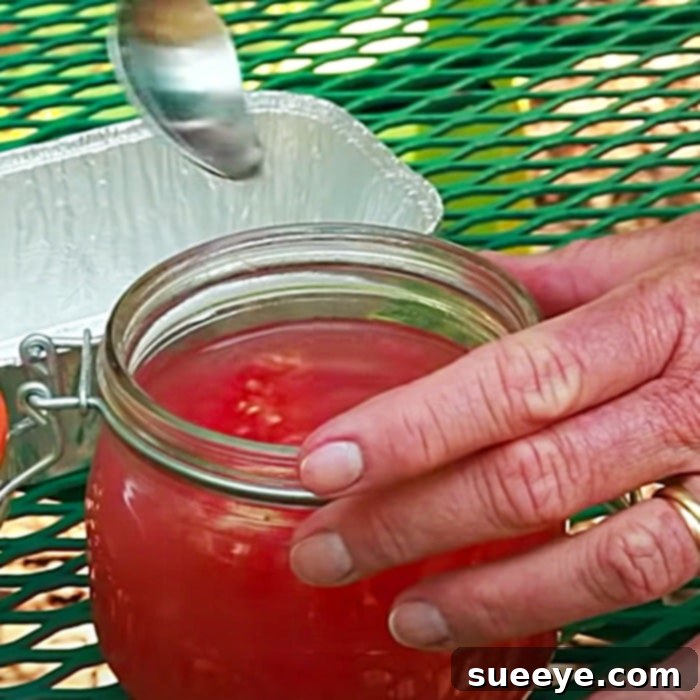
Step 4: Separating and Rinsing the Seeds
After 3-5 days, the mixture will appear frothy and potentially have a layer of mold. The viable seeds will have sunk to the bottom of the jar. Gently pour off the surface layer of mold, pulp, and any floating, non-viable seeds. Then, fill the jar with fresh water, stir, and let the good seeds settle again. Repeat this rinsing process several times until the water runs clear and all pulp residue is gone. Finally, pour the clean seeds into a fine-mesh strainer and rinse them thoroughly under running water.
Step 5: Drying the Seeds
This is a critical step for long-term viability. Spread the rinsed tomato seeds thinly in a single layer on a non-stick surface, such as a ceramic plate, a glass pie plate, a sheet of parchment paper, or a coffee filter. Avoid using paper towels, as the seeds will stick once dry. Place the plate in a warm, dry, well-ventilated area, out of direct sunlight. Allow the seeds to dry completely for several days, or even up to two weeks, depending on humidity levels. The seeds should be brittle and snap easily when bent, indicating they are fully dry.
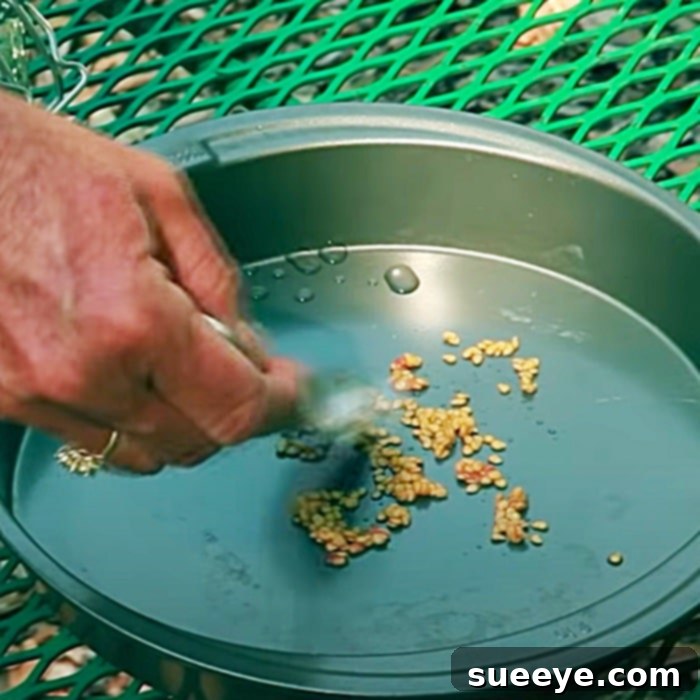
Saving Seeds from Other Easy Vegetables
Once you’ve mastered tomato seeds, expand your horizons with other simple-to-save varieties:
Pepper Seeds
Peppers are another self-pollinating vegetable, making their seeds relatively easy to save. Select fully ripe, healthy peppers from robust plants. Cut the pepper open and carefully remove the core (placenta) to which the seeds are attached. Gently separate the seeds from the core. Spread the seeds on a plate or screen in a single layer and allow them to air dry completely for about one to two weeks in a warm, dry, well-ventilated area. Ensure they are fully brittle before storage. While peppers are largely self-pollinating, slight cross-pollination can occur if different varieties are grown very close together, so be mindful of proximity if purity is paramount.
Bean and Pea Seeds
Saving bean and pea seeds is incredibly straightforward. Allow the pods to remain on the plant until they are completely mature, dry, and brittle. For most varieties, this means the pods will turn yellow or brown and rattle when shaken. Once thoroughly dried on the plant, harvest the pods. Shell the dry pods to extract the seeds. Spread the seeds out on a tray or screen for a few more days to ensure any residual moisture has evaporated. They should be hard and firm. Green beans and peas are prime examples of self-pollinating plants, making their seeds very reliable for saving.
Lettuce Seeds
Lettuce seeds are also simple to save, though they require patience as the plant “bolts” and goes to flower. Allow a healthy lettuce plant to send up a tall flower stalk. The small yellow or white flowers will eventually turn into fluffy seed heads, similar to tiny dandelions. When the fluff is fully dry and easily comes off, collect the seed heads by hand or by cutting the stalk. Rub the heads between your hands over a container to release the seeds. You might need to winnow them by gently blowing away the chaff from the heavier seeds. Ensure the seeds are completely dry before storing.
Storing Your Precious Seeds for Longevity
Proper storage is crucial for maintaining seed viability and ensuring successful germination in future seasons. Seeds are living embryos, and their longevity depends on protection from environmental stressors:
- **Cool, Dark, and Dry Conditions:** This is the golden rule for seed storage. Heat, light, and moisture are the primary enemies of seed viability.
- **Airtight Containers:** Once thoroughly dry, store your seeds in airtight containers to protect them from humidity and pests. Glass jars with tight-fitting lids, sealed plastic bags, or even small metal tins work well.
- **Desiccants:** For added protection against moisture, especially in humid climates, consider adding a small packet of silica gel or a teaspoon of powdered milk (wrapped in tissue) to your airtight container.
- **Labeling is Key:** Always label your containers clearly with the plant variety, the date the seeds were harvested, and any relevant notes (e.g., “best tasting,” “disease resistant”). This information is invaluable for future planting and tracking.
- **Storage Locations:** A cool pantry, a closet, or a refrigerator are excellent places for short to medium-term storage. For very long-term storage (several years), a freezer can be used, but ensure seeds are extremely dry before freezing to prevent cell damage.
- **Seed Longevity:** Different seeds have varying lifespans. For example, onion seeds are viable for only about a year, while tomato and cucumber seeds can last 5-10 years or more under ideal conditions. Understanding these ranges helps you prioritize which seeds to plant first.
Tips for Successful Seed Saving
To maximize your seed-saving success and enjoy bountiful harvests year after year, keep these helpful tips in mind:
- **Start Simple:** Don’t overwhelm yourself. Begin with one or two easy-to-save varieties, like tomatoes or beans, and gradually expand your repertoire.
- **Observe and Select:** Continuously observe your plants throughout the season. Choose seeds only from the healthiest, most productive, and disease-free plants that exhibit the traits you desire. This practice helps improve your garden’s genetics over time.
- **Allow Full Maturity:** For most seeds, it’s essential to let the fruit or pod mature fully on the plant, often beyond the stage at which you would typically harvest for eating. This ensures the seeds inside are fully developed and viable.
- **Ensure Complete Dryness:** This cannot be overstressed. Any residual moisture can lead to mold, rot, or premature germination, rendering your saved seeds useless. When in doubt, let them dry for a few extra days.
- **Record Keeping:** Maintain a simple garden journal. Note down the varieties you’ve saved, harvest dates, storage methods, and future planting observations. This helps you learn and refine your techniques.
- **Avoid Hybrid Seeds:** As mentioned, avoid saving seeds from “F1 Hybrid” varieties, as they will not grow true to type. Always choose open-pollinated or heirloom seeds for reliable results.
- **Continuous Learning:** Seed saving is an ongoing learning process. Join local seed exchange groups, read books, and watch tutorials (like the wonderful video by Grow Organic Peaceful Valley) to continually expand your knowledge and skills.
- **Share the Bounty:** Seed saving is often a community activity. Share your excess seeds with fellow gardeners and participate in seed swaps to discover new varieties and foster a shared love for gardening.
Saving seeds at home is an incredibly empowering and deeply satisfying aspect of gardening. It transforms you from a mere consumer of seeds into a custodian of plant heritage, contributing to a more sustainable and resilient food system. The simplicity of saving seeds from common garden favorites like tomatoes, peppers, and beans makes it an ideal starting point for anyone interested in this ancient and vital practice. By following these guidelines, you’ll not only enjoy the satisfaction of growing your own plants from your own seeds but also play a crucial role in preserving genetic diversity and fostering a vibrant, self-sufficient garden for generations to come. So, gather your jars, pick your healthiest produce, and embark on this rewarding journey – your garden, and the planet, will thank you.