
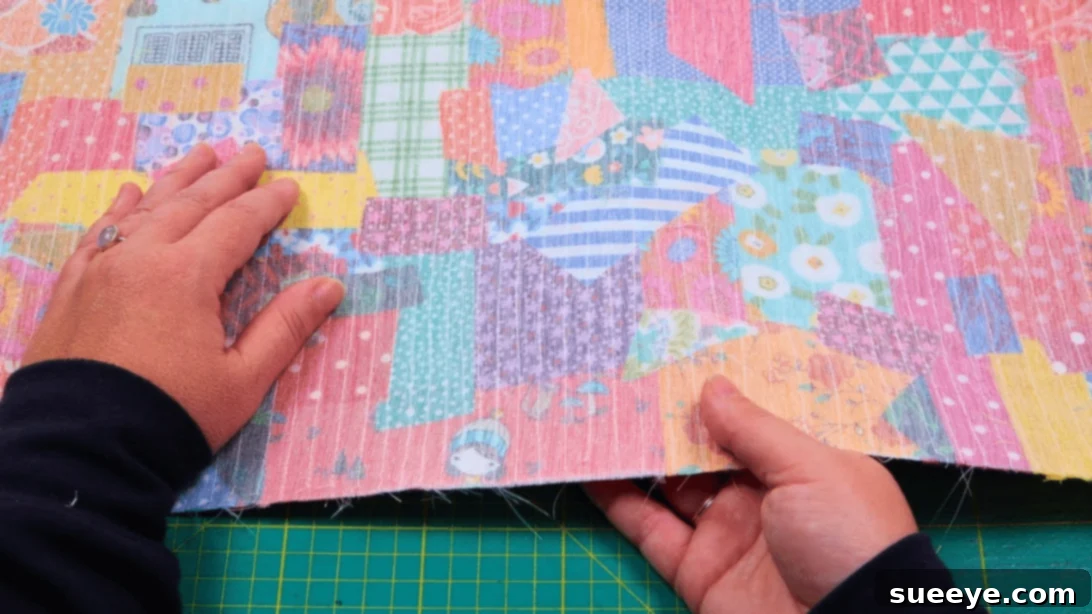
If you’re an avid quilter, chances are your creative journey has led to an ever-growing collection of fabric remnants. These cherished scraps, often too beautiful to discard, accumulate into a vibrant pile, eagerly awaiting their next transformation. While many quilters find themselves with an abundance of these smaller pieces, they might not always have a specific project in mind for them. This is precisely where the art of crumb quilting shines, offering a delightful and incredibly resourceful way to turn even the tiniest fabric bits into stunning masterpieces.
Crumb quilting is a celebration of “scrappy” aesthetics, where the project thrives on a diverse array of fabric remnants, creating a rich tapestry of colors and patterns. It’s an ideal technique for maximizing your fabric stash and embracing sustainable crafting practices.
RELATED: Easy Log Cabin Quilt Using Fabric Scraps
However, the idea of quilting with exceptionally small fabric pieces can sometimes feel daunting. Many wonder if such tiny fragments can truly come together to form a cohesive and visually appealing design. The common concern is that the finished product might appear messy or disorganized. But what if we told you that the smaller your fabric pieces are, the more spectacular the final outcome could be? This innovative approach is beautifully demonstrated in a project idea by Sew Easy by Sandy on YouTube. Her tutorial reveals how to create a breathtaking quilt (or a unique project like a drawstring bag) where micro-scraps are not just tolerated but actively encouraged and celebrated. You will undoubtedly be amazed by the intricate beauty and texture this method achieves. Ready to transform your forgotten scraps into a treasure? Let’s dive in and learn how to master this ingenious technique.
Essential Materials for Crumb Scrap Quilting
Before embarking on your crumb quilting adventure, gathering the right tools and materials will ensure a smooth and enjoyable crafting experience. Here’s a comprehensive list of what you’ll need to create your own unique piece from tiny fabric scraps:
- Assorted Fabric Scraps: This is the heart of crumb quilting! Collect a wide variety of small fabric pieces. Don’t worry about matching sizes perfectly; the beauty of crumb quilting lies in its randomness. Consider a mix of colors, patterns, and even textures to add depth and interest to your final project.
- Backing Fabric: This will form the stable base onto which your crumb fabric panel is built. Choose a sturdy cotton fabric in a coordinating or contrasting color that will provide a strong foundation.
- Lining Fabric: If you’re creating a project like a bag or a pouch, a lining fabric adds a professional finish and protects the inner seams. Select a soft, durable fabric that complements your crumb design.
- Thermal Adhesive Sheet (e.g., fusible web): A key component for crumb quilting, this sheet has adhesive on both sides and will temporarily or permanently bond your small fabric scraps together and to the backing. It simplifies the process of creating a unified fabric panel from many tiny pieces without excessive stitching.
- Transparent/Veil/Sheer Fabric (e.g., organza, tulle, lightweight interfacing): This fabric is placed over your arranged crumbs and helps to stabilize them before and during quilting. It provides a sheer layer that holds everything in place while still allowing the vibrant colors and patterns of your scraps to show through. Ensure it’s heat-friendly if you plan to press it.
- Glue Pen (fabric-specific): A precision glue pen is invaluable for temporarily adhering very tiny scraps to the adhesive sheet, especially those tricky pieces that might shift. Look for a fabric glue that dries clear and won’t gum up your needle.
- String/Cording: If your project is a drawstring bag, you’ll need a length of string or cording to create the closure. Choose a material that is durable and aesthetically pleasing with your fabric choices.
- Marking Pen, Pencil, or Chalk: Essential for transferring patterns, marking stitching lines, or indicating cutting guides on your fabric.
- Ruler (quilting ruler recommended): A clear, sturdy ruler with accurate measurements is crucial for precise cutting and marking straight lines.
- Scissors or Rotary Cutter and a Cutting Mat: A rotary cutter offers speed and accuracy, especially when paired with a self-healing cutting mat. Sharp fabric scissors are also essential for smaller cuts and trimming.
- Fabric Pins or Clips: To hold layers of fabric together securely while sewing or pressing.
- Needle and Thread: High-quality sewing machine thread that matches or complements your fabrics. Consider a strong thread for quilting.
- Iron, for Pressing: An iron is indispensable for fusing the adhesive sheet, setting seams, and achieving crisp, professional results.
- Sewing Machine: A reliable sewing machine is necessary for stitching your crumb quilt project together.
Having all these items ready before you begin will streamline your process and help you create a beautiful, durable crumb-quilted piece.
How to Quilt Using Small Scraps: A Step-by-Step Guide
This guide will walk you through the process of creating a dynamic crumb quilt panel, perfect for projects like the drawstring bag featured in Sew Easy by Sandy’s tutorial. Get ready to transform your smallest fabric pieces into something truly extraordinary!
Step 1: Preparing Your Crumb Fabric Panel Base
The first step involves creating the foundation for your crumb fabric panel. Begin by taking your larger fabric scraps and cutting them into smaller, more manageable pieces. There’s no need for perfect uniformity here; embrace the variety in shapes and sizes, as this contributes to the unique “crumb” aesthetic. Next, unroll your thermal adhesive sheet and cut it to your desired working size – for instance, a 24×10-inch rectangle, as suggested in the tutorial. Securely tape this adhesive sheet, paper side up, onto your work surface. This prevents it from shifting as you build your design. Now, start arranging your fabric scraps directly onto the paper side of the adhesive sheet. Begin with the slightly larger pieces, spreading them out to form a general layout, then meticulously fill in the gaps with your smaller, “crumb-sized” pieces. The goal is to cover the entire adhesive surface as densely as possible, leaving no paper visible. For any tiny or stubborn pieces that refuse to stay put, a dab from your fabric glue pen will hold them in place. Once satisfied with your arrangement, carefully press the entire patchwork with a warm iron (following the adhesive sheet manufacturer’s instructions) to fuse the fabric scraps to the adhesive. Allow it to cool, then gently peel off the paper backing. You should now have a cohesive fabric “crumb” panel. Take this newly formed crumb panel and press it onto your chosen backing fabric, ensuring a secure and even bond. This creates a stable, visually stunning base for your project.
Step 2: Securing the Crumb Panel with Sheer Fabric and Initial Quilting
With your crumb panel fused to the backing fabric, it’s time to add a crucial stabilizing layer. Cut your transparent, sheer fabric to the same size as your crumb patchwork. Carefully lay this sheer fabric on top of your crumb panel. This layer will encapsulate your small fabric pieces, preventing them from shifting during the quilting process and adding a subtle texture. Before pressing, it’s vital to perform a quick test: press a small scrap of your sheer fabric with your iron to ensure it doesn’t melt or distort. If it shows signs of melting, place a pressing cloth or a thin piece of cotton fabric over the sheer fabric before applying the iron. Once confident, gently press the sheer fabric onto the crumb panel. While the sheer fabric helps hold things, it’s wise to add fabric pins or clips around the edges and even across the surface to further secure all layers (crumb panel, sheer fabric, and backing) together. Now, you’re ready to quilt! You can choose any quilting pattern you desire – straight lines, a grid pattern, or even free-motion quilting – to add texture and permanently secure all the layers. This quilting not only reinforces the structure but also enhances the visual appeal of your crumb fabric. After quilting, take your prepared crumb-quilted piece and your chosen lining fabric. Place them with their right sides facing each other. If you are creating a drawstring bag as per the video, align the short sides. Stitch these short sides together with a consistent seam allowance. After stitching, open the fabric layers, lay them flat, and press the seams open. This technique helps reduce bulk and creates a neater finish for your project.
Step 3: Assembling Your Project and Finishing Touches
At this stage, your crumb-quilted fabric is ready to be transformed into a functional item, such as a stylish drawstring bag. Following the specific instructions shown in the Sew Easy by Sandy video, mark the fabric for the gaps that will serve as the casing for your drawstring. Precision is key here to ensure a symmetrical and functional opening. Stitch around the perimeter of your project, leaving these marked gaps unstitched. Reinforce the stitches at the beginning and end of each seam, especially around the gaps, to prevent unraveling. Once stitched, trim any excess fabric and clip the corners (if applicable) to help achieve crisp points. Now, carefully turn the entire piece right side out through the unstitched gaps. Use a point turner or a blunt tool to gently poke out the corners and edges, ensuring they are as sharp and defined as possible. Neatly tuck in the raw edges of the opening, pressing them flat, and then stitch this opening closed using a hidden ladder stitch or a secure topstitch for a clean finish. Next, push the lining fabric fully inside the bag, aligning all edges and corners. Ensure the lining sits smoothly without any bunching. Topstitch around the entire opening of the bag, just inside the edge, to give it a polished look and to secure the lining in place. Then, stitch a second line parallel to the first, right below where you want your string channels (holes) to be. This creates the casing for your drawstring. Finally, thread your chosen string or cording through the created channels, looping it as demonstrated in the video to create the drawstring mechanism. Knot the ends of the string securely to prevent them from fraying and to ensure they don’t pull back into the casing. With these steps complete, your beautiful and unique crumb-quilted project is finished and ready to use!
Beyond the Bag: Creative Uses for Your Crumb Quilted Fabric
While the tutorial expertly guides you through creating a charming drawstring bag, the beauty of your finished crumb quilt panel extends far beyond a single project. The unique texture and vibrant chaos of crumb quilting make it ideal for a multitude of creative endeavors. Consider using smaller crumb panels to craft one-of-a-kind coasters, placemats, or pot holders that add a personalized touch to your home decor. Larger panels can be transformed into stunning tote bags, pouches, or even incorporated as accent blocks in a bigger quilt project. Imagine a vibrant crumb quilt adding a pop of color to a throw pillow or becoming the focal point of a wall hanging. The possibilities are truly endless, limited only by your imagination. Each crumb quilt is a testament to mindful crafting, transforming forgotten scraps into cherished works of art.
Tips for Mastering Crumb Quilting
To ensure your crumb quilting journey is as successful and enjoyable as possible, here are a few tips and tricks:
- Embrace Variety: Don’t shy away from mixing different fabric types, as long as they are generally similar in weight (e.g., all cottons). The varied textures and patterns will add visual interest.
- Color Play: While randomness is key, consider sorting your scraps into general color families before you start, or try a controlled “scrappy” look by using a limited color palette. This can create a more cohesive final product.
- Size Matters (but not too much): While the goal is to use small scraps, having a mix of very tiny pieces and slightly larger ones (say, 1-3 inches) can make the initial layout process easier and create more dynamic visual appeal.
- Pressing is Your Friend: Frequent pressing throughout the process – after fusing scraps, after quilting, and after each seam – will ensure your project remains flat, crisp, and professional-looking.
- Test Your Sheer Fabric: Always test your sheer fabric with your iron on a scrap piece first. Different materials react differently to heat, and you want to avoid melting or scorching your project.
- Quilting Design: For crumb quilts, simple quilting patterns often work best as they don’t compete with the busy fabric design. Straight lines, a grid, or gentle wavy lines can provide structure without overwhelming the “crumbs.”
- Patience is a Virtue: Arranging tiny scraps can be a meditative process. Take your time, enjoy the creative flow, and don’t be afraid to rearrange pieces until you achieve a look you love.
Crumb quilting is more than just a technique; it’s an art form that champions sustainability, creativity, and the joy of transforming the seemingly insignificant into something truly magnificent. It’s an excellent way to reduce waste, personalize your projects, and add a unique, handmade touch to your creations. Whether you’re making a functional item like a bag or a decorative piece for your home, the satisfaction of turning a pile of forgotten scraps into a beautiful, cohesive work is incredibly rewarding. We encourage you to gather your fabric bits, watch Sew Easy by Sandy’s fantastic tutorial, and dive into the wonderful world of crumb quilting. You’ll be amazed at what you can create!
*All these amazing images are thanks to Sew Easy by Sandy via YouTube. Do visit her channel to see more videos like this and discover countless creative sewing projects!