
Unlock Your Inner Alchemist: Crafting Custom Lipstick from Crayons
Are you tired of endlessly searching for that elusive, perfect lipstick shade? Do you wince at the ever-increasing price tags of high-end lipsticks, only to find they don’t quite hit the mark? What if we told you that the secret to creating your dream lip color, safely and affordably, might be hiding in your childhood art supplies? Welcome to the exciting world of DIY crayon lipstick – a fun, creative, and surprisingly beneficial beauty hack that’s captivating makeup enthusiasts everywhere.
This innovative project transforms simple, non-toxic crayons into a personalized palette of lip colors, offering unparalleled customization and significant cost savings. Far from being a mere novelty, crafting your own lipstick allows you to control ingredients, experiment with textures, and unleash your creativity in a way that commercial products simply can’t match. It’s a delightful journey into cosmetic creation that promises both satisfaction and stunning results.
Why Dive into DIY Crayon Lipstick? The Benefits Unveiled
The allure of making your own lipstick extends far beyond the sheer novelty. This project offers a wealth of advantages that make it an irresistible endeavor for anyone keen on personalized beauty solutions.
1. Unmatched Customization and Endless Shades
Imagine having access to every shade under the sun, limited only by your imagination. With crayons, this becomes a reality. Instead of settling for pre-made colors, you can blend pigments to create truly unique hues that perfectly complement your skin tone, outfit, or mood. Want a subtle nude with a hint of peach? A daring emerald green? A sophisticated deep berry? The crayon box is your canvas. You can experiment with mixing primary colors to achieve secondary and tertiary shades, crafting a lip color that truly reflects your individual style. This level of personalized customization is simply not available in retail stores, making DIY crayon lipstick a game-changer for beauty enthusiasts.
2. Significant Cost Savings
Let’s talk about the bottom line. A single tube of quality lipstick from a department store can easily set you back $20-$30, if not more. A box of crayons, a jar of coconut oil, and a small container, on the other hand, cost a fraction of that price and can yield multiple lipsticks. This project is incredibly budget-friendly, allowing you to create a diverse collection of shades without breaking the bank. Over time, the savings can be substantial, freeing up your budget for other beauty essentials or perhaps even a treat for yourself.
3. Transparency and Ingredient Control
One of the most compelling reasons to go DIY is knowing exactly what you’re putting on your lips. Commercial lipsticks can contain a myriad of synthetic dyes, preservatives, and fragrances, some of which may raise concerns for sensitive individuals. By making your own, you control the ingredients. You use non-toxic Crayola crayons and natural bases like coconut oil, providing peace of mind that you’re applying a product free from harsh or questionable chemicals. This level of transparency is invaluable in today’s increasingly ingredient-conscious beauty landscape.
4. A Fun, Creative, and Empowering Experience
There’s immense satisfaction in creating something with your own hands, especially when the result is a functional and beautiful product. This DIY project is not just about making lipstick; it’s about embracing your creativity, experimenting with colors, and feeling empowered by your ability to craft personalized beauty solutions. It’s a fun, engaging activity that can be enjoyed solo or with friends, transforming a simple crafting session into a rewarding beauty adventure.
5. Quick and Easy for All Skill Levels
You don’t need to be a seasoned DIY expert or a chemist to master this project. From start to finish, the process typically takes only about 15-20 minutes, making it incredibly accessible for beginners. The steps are straightforward, requiring minimal tools and basic household items. Anyone, regardless of their crafting prowess, can successfully whip up their own bespoke lipsticks with ease.
Addressing the Elephant in the Room: Is Crayon Lipstick Safe?
Naturally, the first question many people ask when considering making lipstick from crayons is about safety. It’s a valid concern, and one that has been thoroughly investigated. The good news is, with the right choice of crayons, this project is considered safe.
The Crayola Standard: Non-Toxic Assurance
Our research, mirroring what many DIY enthusiasts have found, points directly to Crayola crayons as the brand of choice. Crayola’s official website explicitly states that “all Crayola and Silly Putty products have been evaluated by an independent toxicologist and found to contain no known toxic substances in sufficient quantities to be harmful to the human body, even if ingested or inhaled.” This statement is crucial. Crayola manufactures its products with young children in mind, anticipating that they might put crayons in their mouths. This rigorous safety standard makes them an ideal candidate for our DIY lipstick project.
Beyond Crayola: A Word of Caution
While Crayola offers a strong assurance of safety, it’s vital to exercise caution with other crayon brands. Not all manufacturers adhere to the same non-toxic standards. To ensure safety, always stick to reputable brands like Crayola, and ideally, check for specific non-toxic certifications on their packaging or websites. When in doubt, it’s always better to err on the side of caution and choose a brand known for its commitment to safety.
The Role of Your Base Ingredients
The other primary ingredient in this DIY recipe is typically coconut oil. Coconut oil is a natural, edible substance widely used in cooking and skincare. It’s known for its moisturizing properties and is generally very safe for topical application. Other natural oils or butters like shea butter, almond oil, or even olive oil can also be used, further ensuring that your homemade lipstick is composed of ingredients you trust and recognize.
Gathering Your Creative Toolkit: What You’ll Need
Before you begin your lipstick-making adventure, gather these simple and affordable supplies. You likely have most of them already!
- Crayola Crayons: Your vibrant color source! Choose your favorite shades. Remember to stick to Crayola for safety.
- Coconut Oil: Or another natural, skin-safe oil like shea butter, almond oil, or olive oil. This will be your moisturizing base. Approximately 1/2 to 1 teaspoon per crayon is a good starting point.
- Small, Clean Container(s): Empty lip balm tubes, small tins, contact lens cases, or tiny jars are perfect for storing your finished lipstick.
- Heat-Safe Bowl or Container: A glass measuring cup, a small metal bowl, or even a glass ramekin.
- Double Boiler Setup (Recommended): A saucepan with a few inches of water, and your heat-safe bowl placed on top. This provides gentle, even heat, preventing the crayons from burning. Alternatively, a microwave-safe bowl can be used for the microwave method.
- Stirring Utensil: A popsicle stick, toothpick, skewer, or an old spoon you don’t mind getting colored.
- Knife or Box Cutter: For peeling the crayon wrappers.
- Parchment Paper or Newspaper: To protect your work surface.
- Optional Add-ins:
- Essential Oils: A drop or two of food-grade peppermint, vanilla, or lavender oil for scent and flavor.
- Vitamin E Oil: A tiny drop for added nourishment and a potential increase in shelf life.
- Mica Powder: For extra shimmer or a metallic finish (ensure it’s cosmetic grade).
Your Step-by-Step Guide to Crafting Crayon Lipstick
Follow these simple instructions to create your own bespoke lip colors. The process is quick, easy, and incredibly rewarding!
-
Prepare Your Workspace and Crayons:
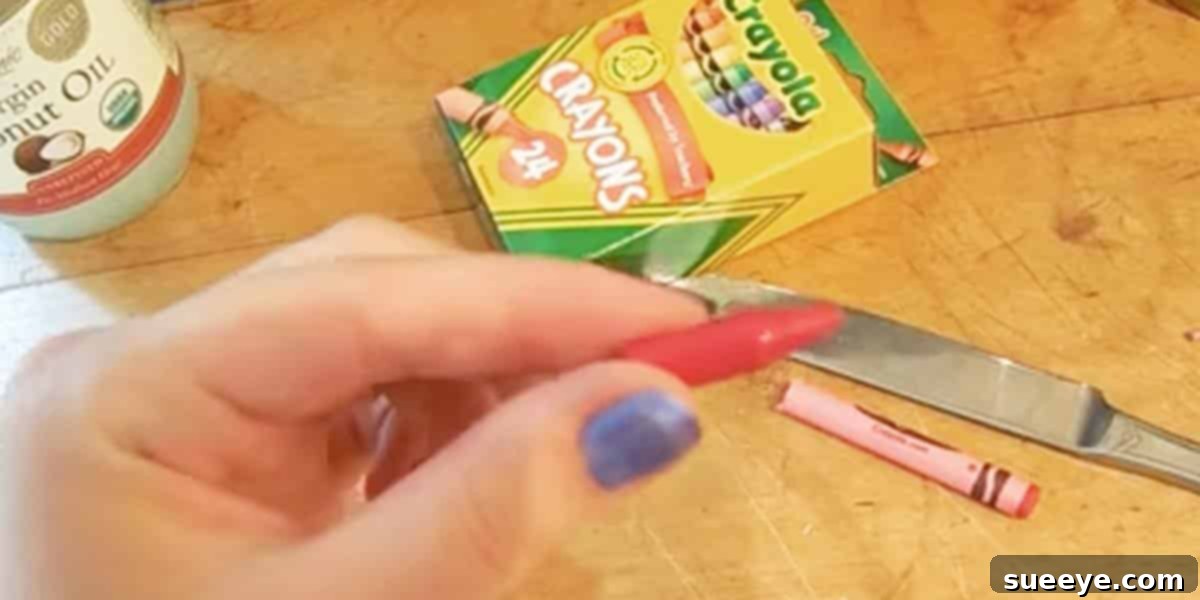
Lay down parchment paper or newspaper to protect your surface from any potential crayon drips. Select the crayon (or crayons for blending) you wish to use. Carefully peel off all paper wrappers from the crayons. You can use a knife or box cutter to make a slit along the wrapper for easier removal. Break the crayon(s) into smaller pieces (about 1/2 inch) to help them melt faster.
-
Set Up Your Melting Station:
Double Boiler Method (Recommended for Best Results): Fill a small saucepan with about 1-2 inches of water and bring it to a simmer over medium-low heat. Place your heat-safe bowl (containing the crayon pieces) on top of the saucepan, ensuring the bottom of the bowl doesn’t touch the water. This gentle heat will melt the crayons evenly without scorching them.
Microwave Method (Quicker, but Requires More Attention): Place the crayon pieces in a microwave-safe bowl. Microwave on high for 30-second intervals, stirring in between, until completely melted. Be cautious, as crayons can overheat quickly in the microwave.
-
Melt the Crayons:
Allow the crayon pieces to melt completely. Stir occasionally with your stirring utensil. This usually takes 3-5 minutes with a double boiler, or 1-2 minutes in the microwave.
-
Add the Coconut Oil:
Once the crayon is fully melted and smooth, add your chosen amount of coconut oil (or other base oil). Start with approximately 1/2 to 1 teaspoon per crayon. Stir continuously until the oil is fully incorporated and the mixture is a uniform consistency. This is where you can adjust the pigmentation: more oil for a sheerer finish, less for a more opaque, vibrant color.
-
Customize (Optional):
If you’re adding essential oils, vitamin E, or mica powder, now is the time. Add just a drop or two of essential oil for scent, a tiny amount of vitamin E for nourishment, or a pinch of mica powder for shimmer. Stir well to ensure everything is evenly distributed.
-
Pour into Containers:
Carefully and quickly pour the melted lipstick mixture into your clean, empty lipstick tubes, small jars, or contact lens cases. Work swiftly, as the mixture will begin to solidify as it cools.
-
Allow to Set:
Place your filled containers in the refrigerator for about 10-15 minutes, or leave them at room temperature for an hour or so, until the lipstick is completely solid. Avoid moving them too much while they are setting to ensure a smooth, even finish.
-
Enjoy Your New Creation!
Once fully set, your DIY crayon lipstick is ready to use! Apply it just like any regular lipstick and revel in your custom-made shade.
Tips for Perfection and Advanced Customization
Mastering DIY crayon lipstick means embracing experimentation. Here are some tips to elevate your creations:
- Color Blending Mastery: Don’t just stick to single colors. Combine bits of different crayons to create entirely new shades. For instance, a touch of white crayon can lighten a shade, while black can deepen it. Experiment with primary colors (red, yellow, blue) to mix your own custom greens, purples, and oranges. Jot down your “recipes” so you can recreate your favorite blends.
- Texture Control:
- Sheer Finish: For a more translucent, balm-like lipstick, add a bit more coconut oil to your mixture.
- Opaque & Pigmented: To achieve a rich, vibrant, and opaque color, use less coconut oil.
- Matte Finish: While crayons naturally lend a somewhat matte finish, you can enhance this by ensuring minimal oil or trying a small amount of cornstarch or arrowroot powder (very sparingly) for an ultra-matte effect.
- Glossy Finish: Add a tiny amount of extra virgin olive oil or castor oil for a slightly glossier sheen.
- Scent & Flavor Infusion: Add a drop of food-grade essential oil for a delightful aroma and subtle flavor. Peppermint oil provides a refreshing tingle, vanilla extract offers a sweet note, and a hint of citrus oil can be uplifting. Always use essential oils sparingly and ensure they are safe for lip application.
- Nourishment Boost: For extra lip care, consider adding a tiny amount of Vitamin E oil (known for its antioxidant properties) or a richer butter like shea butter or cocoa butter alongside the coconut oil. These can enhance the moisturizing benefits of your lipstick.
- Shelf Life and Storage: While your homemade lipstick is made with natural ingredients, it won’t have the preservatives of commercial products. Store your crayon lipsticks in a cool, dry place, away from direct sunlight, to prolong their life. If you notice any changes in smell or texture, it’s time to make a fresh batch. Generally, they should last for several weeks to a few months.
- Testing and Tweaking: Before pouring your entire batch, dip a small stirring stick into the melted mixture and let it cool for a few seconds. Swatch it on the back of your hand to check the color and consistency. This allows you to make adjustments (add more crayon for intensity, more oil for sheer, etc.) before committing to the final pour.
DIY Crayon Lipstick vs. Store-Bought: A Quick Comparison
Understanding the pros and cons helps you appreciate the unique value of your homemade creations.
Pros of DIY Crayon Lipstick:
- Cost-Effective: Significantly cheaper to make than high-end commercial lipsticks.
- Customizable: Unlimited color blending and texture control.
- Ingredient Transparency: You know exactly what goes into your product.
- Non-Toxic (Crayola): Safer for those conscious about chemical exposure.
- Fun & Creative: A satisfying and engaging project.
Cons of DIY Crayon Lipstick:
- Shorter Shelf Life: Lacks commercial preservatives, so it won’t last as long as store-bought options.
- Texture Variability: Can sometimes be less consistent than professionally formulated lipsticks.
- No SPF: Typically doesn’t offer sun protection unless specifically added.
- Requires Effort: Not as convenient as simply buying a tube.
Pros of Store-Bought Lipstick:
- Convenience: Ready to use, no effort required.
- Long Shelf Life: Formulated with preservatives for extended usability.
- Consistent Texture: Professionally manufactured for reliable performance.
- Wide Range of Finishes: From super matte to ultra-glossy, often with specific claims (long-wear, hydrating, etc.).
- Often Includes SPF & Treatments: Many contain sun protection or nourishing ingredients.
Cons of Store-Bought Lipstick:
- Expensive: Can be a significant investment, especially for luxury brands.
- Limited Customization: You’re restricted to available shades.
- Ingredient Concerns: May contain synthetic dyes, fragrances, and preservatives.
- Ethical Concerns: Some brands may engage in animal testing.
Final Thoughts: Unleash Your Inner Beauty Creator
The journey into making your own lipstick from crayons is more than just a beauty hack; it’s an invitation to rediscover creativity, embrace conscious consumption, and enjoy the profound satisfaction of crafting something truly unique. From the sheer joy of mixing colors to the peace of mind knowing your lipstick is made with safe, familiar ingredients, this project offers a refreshing alternative to the commercial beauty market.
So, gather your Crayola crayons, your coconut oil, and your adventurous spirit. In a matter of minutes, you can transform simple art supplies into a bespoke collection of lip colors that express your individuality perfectly. Why settle for store-bought when you can be the artist of your own beauty palette? Give this incredible DIY project a try – you might just discover your new favorite beauty obsession!
For visual learners, numerous online tutorials and video guides are available to walk you through each step, making the process even easier to follow along.